
Last winter, I found myself scrolling through photos of a beach vacation I took years ago. You know how it goes. You start reminiscing, and suddenly you are craving that warm peachy glow of a sunset over the water. I could not get those colors out of my head. The way the sky melted from soft cream into coral, then deepened into dusty rose right before the stars came out.
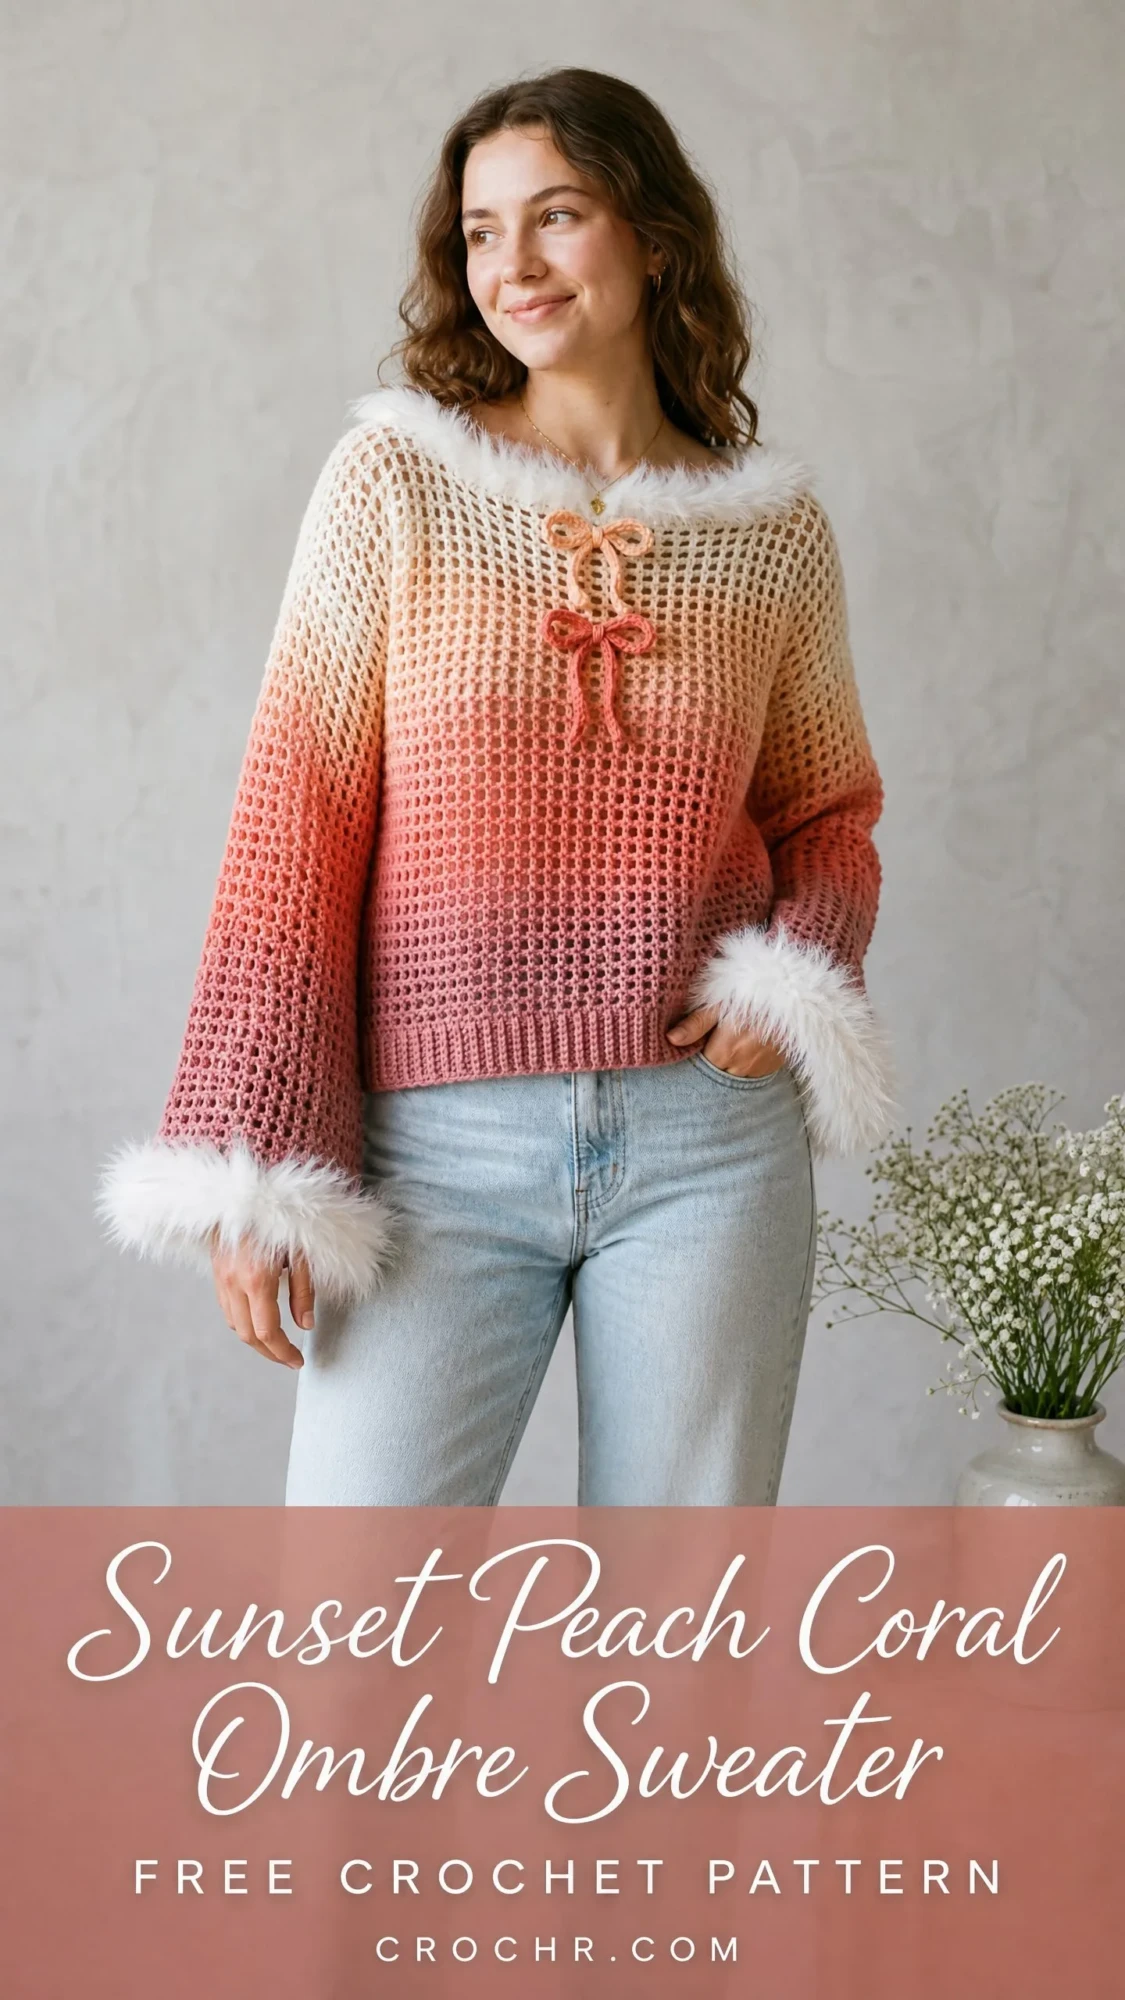
So I did what any yarn-obsessed crafter would do. I grabbed a gradient cake from my stash and started sketching. This sweater is the result of that nostalgia trip, and honestly, it turned out even better than I imagined.
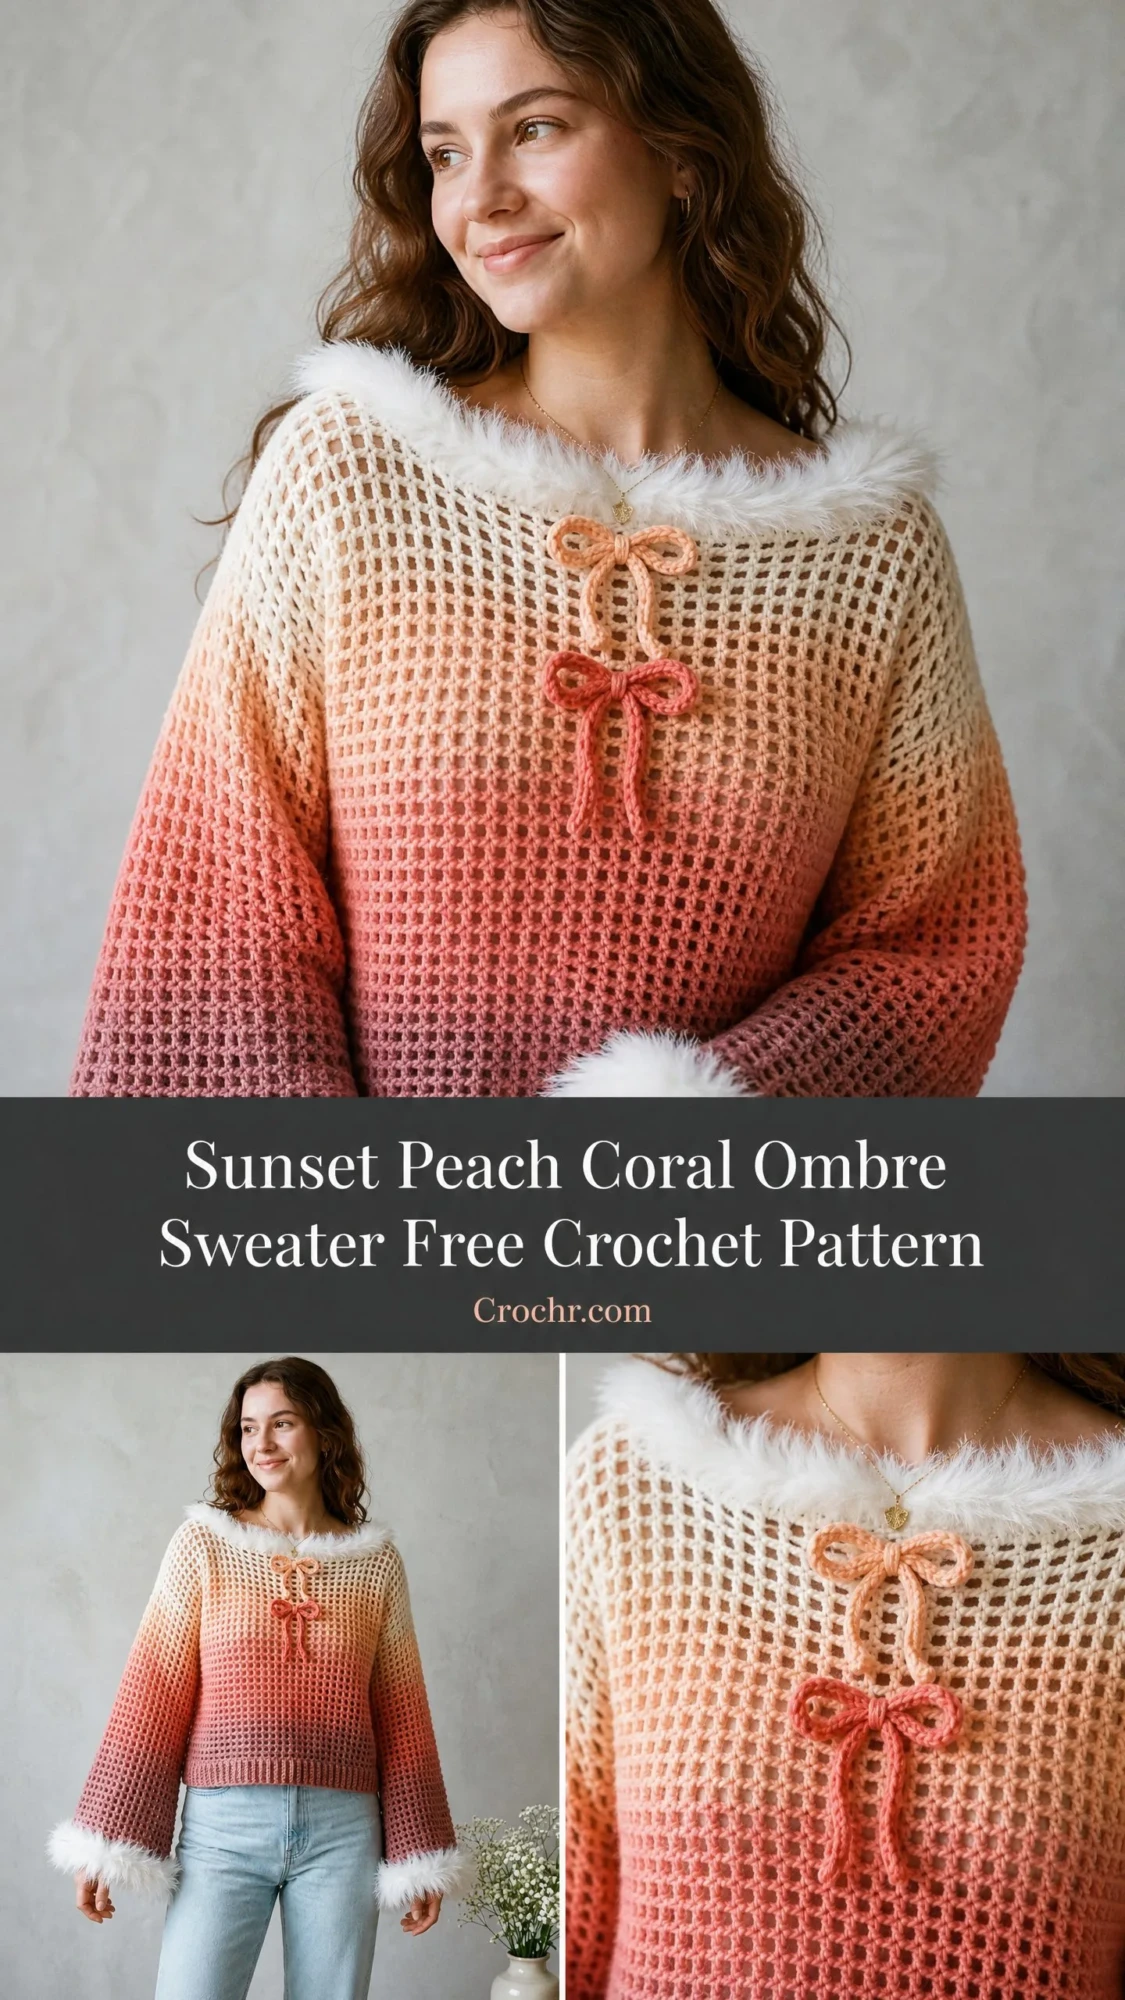
The open mesh texture gives it a relaxed, airy feel while the faux fur trim adds just enough cozy glamour for cooler days. Those little bows at the neckline? Pure whimsy. If you have been wanting to try a top-down raglan sweater with a stitch pattern that is actually interesting to work, this is your moment.
Why You Will Love This Crochet Sweater Pattern
This pullover sweater has become one of my absolute favorites to wear and to teach. The construction is seamless from the top down, which means minimal finishing work at the end. You work the yoke in one piece, separate for the body and sleeves, and just keep going. No seaming the shoulders. No picking up stitches awkwardly.
The mesh grid stitch creates that gorgeous waffle-like texture you see in the photos. It looks intricate, but it is really just a simple two-stitch repeat of single crochet (sc) and chain one (ch 1) spaces. Once you get into the rhythm, it practically works itself.
The gradient yarn does all the heavy lifting for the color transitions. You start at the neckline with creamy white, and as you crochet downward, the color naturally shifts through peachy pink, warm coral, and finally settles into dusty rose at the hem and cuffs. No color changes to manage. No ends to weave in from switching skeins every few inches.
Skill Level and Time Estimate
I would call this an intermediate level crochet pattern. You should feel comfortable working in the round, counting stitches carefully, and following a stitch pattern repeat. If you have completed three or four projects already and feel confident with basic shaping, you can absolutely tackle this.
Expect to spend somewhere between 25 to 40 hours on this sweater depending on your pace. The mesh stitch works up faster than solid fabric, which is a nice bonus. But you do need to pay attention to your counts, especially during the raglan increases.
Finished Measurements
This pattern is written for size Medium with customization tips included for adjusting up or down.
Finished chest circumference: 42 inches or 107 cm
Body length from shoulder to hem: 22 inches or 56 cm
Sleeve length from underarm to cuff: 18 inches or 46 cm
Upper sleeve circumference: 16 inches or 41 cm
Cuff circumference: 14 inches or 36 cm
Neckline circumference: 22 inches or 56 cm
Materials Needed
Yarn A (main body): Worsted weight yarn, CYCA 4, in a gradient or self-striping colorway that transitions from cream through peach, coral, and dusty rose. You will need approximately 1,000 to 1,200 yards or 915 to 1,100 meters total. Gradient cake yarns work beautifully here.
Yarn B (trim): Worsted or bulky weight faux fur or eyelash yarn in white. Approximately 80 to 100 yards or 73 to 92 meters for the neckline and cuff edgings.
Scrap yarn for bows: Small amounts of worsted weight yarn in peach and coral, about 10 to 15 yards each.
Hook for main body: US size J or 6.0 mm
Hook for ribbing: US size I or 5.5 mm
Notions: At least 8 stitch markers, yarn needle, scissors
Yarn Suggestions
Lion Brand Mandala in a sunset or peachy colorway works wonderfully. Each cake has 590 yards, so two cakes held together or their Thick and Quick version as a single strand will get you the right gauge.
Scheepjes Whirl in a peachy pink sunset colorway is another excellent choice. At 1,093 yards per cake, you can work the entire sweater from one cake with yardage to spare.
Paintbox Yarns Simply DK Gradient held double also achieves the right weight and gives you that smooth color transition.
Whatever you choose, make sure your main yarn has good stitch definition. Avoid anything too fuzzy for the body since the mesh pattern needs crisp, visible stitches to show off that grid texture.
Gauge
With Yarn A and your 6.0 mm hook in the Mesh Grid Stitch pattern:
14 stitches by 16 rows equals 4 inches or 10 cm blocked
Count each single crochet post AND each chain one space as one stitch unit horizontally. Count each row of the sc and ch 1 pairs as one row unit vertically.
Please, please swatch for this one. I know it is tempting to skip it, but gauge matters so much for garments. Work at least a 6 by 6 inch swatch, wash it, block it, and measure before you start. A difference of even one stitch per inch will throw off your finished size significantly.
Abbreviations
beg equals beginning
BLO equals back loop only
ch equals chain
ch-sp equals chain space
cont equals continue
dec equals decrease
inc equals increase
pm equals place marker
rem equals remaining
rep equals repeat
rnd equals round
RS equals right side
sc equals single crochet
sk equals skip
sl st equals slip stitch
sm equals slip marker
sp equals space
st equals stitch
sts equals stitches
t-ch equals turning chain
tog equals together
WS equals wrong side
yo equals yarn over
Special Stitches and Techniques
Mesh Grid Stitch Worked in the Round
This is the main stitch pattern for the entire sweater. Here is how it works:
Setup round: Chain 1, which does not count as a stitch. Single crochet (sc) in the joining stitch. Then work chain 1 (ch 1), skip 1 stitch, single crochet (sc) in the next stitch all the way around. Join with a slip stitch (sl st) to the first sc.
Every following round: Chain 1. Single crochet in the same stitch. Then work chain 1, skip the chain 1 space, single crochet in the next sc all the way around. Join with a slip stitch to the first sc.
The key is that your sc always lands on the sc from the row below, and your ch 1 space always sits over the sc from the row below. This staggered placement creates the even grid texture.
Raglan Increase
At each of the 4 raglan marker points, you will work sc, ch 1, sc into a single marked stitch. This replaces one stitch with three stitch units, giving you a net gain of 2 units at each marker. With 4 markers, that is 8 stitch units added per increase round.
Ribbing Stitch
For the hem and cuffs, you will work single crochet in the back loop only (BLO) of each stitch. This creates stretchy, ridged ribbing that mimics the look of knit ribbing and gives the edges nice structure.
Pattern Instructions
Neckline Foundation
With Yarn A and your J hook (6.0 mm), chain 80. Join with a slip stitch to the first chain to form a ring. Be careful not to twist your chain.
Round 1 (setup): Ch 1. Sc in the same chain as the join. Work ch 1, skip 1 ch, sc in next ch all the way around. Join with sl st to first sc. (80 units total, which breaks down to 40 sc and 40 ch 1 spaces)
Before moving on, place 4 stitch markers to divide your work into raglan sections:
Count 20 stitch units from your join and place a marker. This is your right front raglan point.
Count 10 more units and place a marker. This is your right sleeve back raglan point.
Count 20 more units and place a marker. This is your left front raglan point.
Count 10 more units and place a marker. This is your left sleeve back raglan point.
Your sections are now: 20 units for front, 10 units for left sleeve, 20 units for back, 10 units for right sleeve.
Yoke
You will alternate between increase rounds and plain rounds throughout the yoke section.
Round 2 (raglan increase round): Ch 1. Work in mesh grid pattern to your marked sc. Work sc, ch 1, sc into that marked sc, then slip your marker to the new center stitch. Repeat at all 4 markers. Complete the round in mesh. Join. (88 units)
Round 3 (plain mesh round): Ch 1. Sc in first sc. Work ch 1, skip ch 1 sp, sc in next sc all the way around. Join. (88 units)
Round 4 (increase): Repeat Round 2 formula at all 4 markers. (96 units)
Round 5 (plain): Repeat Round 3. (96 units)
Continue alternating increase rounds and plain rounds following this count:
Round 6 (inc): 104 units
Round 7 (plain): 104 units
Round 8 (inc): 112 units
Round 9 (plain): 112 units
Round 10 (inc): 120 units
Round 11 (plain): 120 units
Round 12 (inc): 128 units
Round 13 (plain): 128 units
Round 14 (inc): 136 units
Round 15 (plain): 136 units
Round 16 (inc): 144 units
Round 17 (plain): 144 units
Round 18 (inc): 152 units
Round 19 (plain): 152 units
Round 20 (inc): 160 units
Round 21 (plain): 160 units
Round 22 (inc): 168 units
Round 23 (plain): 168 units
Round 24 (inc): 176 units
Round 25 (plain): 176 units
Round 26 (inc): 184 units
Round 27 (plain): 184 units
Round 28 (inc): 192 units
Round 29 (plain): 192 units
Checkpoint: After Round 29, your yoke should measure approximately 7.5 inches or 19 cm from the neckline chain to the bottom of the yoke. Try it on or measure flat to make sure the armhole opening feels comfortable.
Body Separation
Round 30 (separation round): Ch 1. Work in mesh to the first sleeve section marker. Place those 38 sleeve stitches on a holder or scrap yarn. Chain 5 over the underarm gap, then rejoin to the back section. Work in mesh across the back (48 units). Place the second sleeve stitches (38 units) on a holder. Chain 5 over the second underarm gap. Work in mesh across the front (48 units). Join to beginning of round.
Round 31 (body adjustment): Work mesh around the full body. For the ch 5 bridges, place sc into the 1st ch, ch 1, skip 1 ch, sc into 3rd ch, ch 1, skip 1 ch, sc into 5th ch. This gives you 5 units per bridge. Join. (106 units)
Body
Work plain mesh rounds continuously from Round 32 through Round 64. No shaping is needed here. The silhouette hangs straight with natural ease.
Rounds 32 to 64: Ch 1. Sc in first sc, ch 1, skip ch 1 sp, sc in next sc around. Join. (106 units each round)
Checkpoint: After Round 64, your body below the underarm should measure approximately 13 inches or 33 cm. Total sweater length from shoulder should be about 20 inches or 51 cm.
Hem Ribbing
Round 65: Work one more plain mesh round. (106 units)
Switch to your I hook (5.5 mm).
Round 66 (ribbing setup): Ch 1. Sc in BLO of each stitch and into each ch 1 space around so you have solid single crochet all the way around. Join. (106 sc)
Rounds 67 to 70 (ribbing): Ch 1. Sc in BLO of each sc around. Join. (106 sc each round)
Fasten off Yarn A.
Sleeves
Work each sleeve separately. Transfer your 38 held sleeve stitches to your J hook. Rejoin Yarn A at the underarm center.
Round 1 (sleeve setup): Ch 1. Work mesh around sleeve stitches, picking up 5 units from the underarm chain bridge plus 1 additional stitch to reach 44 units for even mesh divisibility. Join. (44 units)
Rounds 2 to 6 (plain sleeve): Work plain mesh in the round. (44 units each round)
Now begin gentle decreasing. On decrease rounds, work sc2tog (single crochet 2 together) at each side of the underarm seam to reduce by 2 units per decrease round.
Round 7 (decrease): Ch 1. Work mesh to 1 unit before underarm point, sc2tog over next 2 sc, work mesh to 1 unit before second underarm point, sc2tog, continue in mesh. Join. (42 units)
Work 5 plain rounds between each decrease round.
Rounds 8 to 12 (plain): 42 units
Round 13 (dec): 40 units
Rounds 14 to 18 (plain): 40 units
Round 19 (dec): 38 units
Rounds 20 to 24 (plain): 38 units
Round 25 (dec): 36 units
Rounds 26 to 30 (plain): 36 units
Round 31 (dec): 34 units
Rounds 32 to 36 (plain): 34 units
Round 37 (dec): 32 units
Rounds 38 to 42 (plain): 32 units
Rounds 43 to 45 (plain): 32 units
Now create the bell sleeve flare by increasing 2 units every round for 5 rounds.
Round 46 (increase): Work mesh, adding sc, ch 1, sc at each underarm side. (34 units)
Round 47 (inc): 36 units
Round 48 (inc): 38 units
Round 49 (inc): 40 units
Round 50 (inc): 42 units
Sleeve Cuff Ribbing
Switch to your I hook.
Round 51 (ribbing setup): Ch 1. Sc into each stitch and chain space around to close mesh into a solid round. Join. (42 sc)
Rounds 52 to 55 (ribbing): Ch 1. Sc in BLO of each sc around. Join. (42 sc each round)
Fasten off Yarn A.
Repeat the full sleeve instructions for your second sleeve.
Neckline Trim
Join Yarn B at any point around the neckline edge with your J hook.
Round 1 (trim): Ch 1. Sc into each stitch and chain space around the neckline edge. Join. (80 sc)
Round 2: Ch 1. Sc into each sc around. Join. (80 sc)
Fasten off Yarn B. The faux fur fibers will fan outward and create that fluffy collar frame naturally.
Cuff Trim
Join Yarn B at any point around one cuff edge.
Round 1 (trim): Ch 1. Sc into each sc around. Join. (42 sc)
Round 2: Ch 1. Sc into each sc around. Join. (42 sc)
Fasten off Yarn B.
Repeat for the second cuff.
Crocheted Bows
Make 2 bows total: one smaller peach bow and one slightly larger coral bow.
Small Bow (peach):
With scrap peach yarn and J hook, ch 11.
Row 1: Sc in 2nd ch from hook and each ch across. (10 sc)
Rows 2 to 6: Ch 1, turn, sc in each sc. (10 sc)
Fasten off leaving a 12 inch tail. Pinch the center of your rectangle. Wrap the tail around the pinched center 8 times. Secure tightly.
Large Bow (coral):
With scrap coral yarn and J hook, ch 13.
Row 1: Sc in 2nd ch from hook and each ch across. (12 sc)
Rows 2 to 8: Ch 1, turn, sc in each sc. (12 sc)
Fasten off leaving a 12 inch tail. Pinch and wrap as above.
Using your yarn needle, sew the small peach bow to the center front neckline about 0.5 inches below the fur trim. Sew the large coral bow approximately 1.75 inches below the small bow. Both bows sit vertically stacked at center front.
Size Customization Tips
To increase chest circumference: Add 8 to the starting chain while keeping it divisible by 2. Add 2 additional raglan increase rounds at the yoke stage. Every 2 added increase rounds add approximately 1.5 inches to the chest.
To decrease chest circumference: Subtract 8 from the starting chain and remove 2 raglan increase rounds.
To adjust body length: Add or remove plain mesh rounds in the body section. Each 2 rounds adds about 0.5 inches.
To adjust sleeve length: Add or remove plain rounds between decrease rows in the sleeve section.
Finishing and Blocking
Weave in all your ends securely using a yarn needle. Hide those tails within the mesh strands where they will not show.
Wet blocking: Soak the finished sweater in cool water with a small amount of wool wash for 15 minutes. Gently press out excess water without wringing. Lay flat on blocking mats and pin to your finished measurements. Allow 24 to 48 hours to dry completely.
If your faux fur trim is already attached, spot wet the main body and block carefully around the trim. The trim yarn does not need blocking and should not be pinned.
After blocking, that mesh will open up beautifully. The stitch definition sharpens and the sweater settles into its final drape.
Care Instructions
Hand wash in cool water with gentle detergent. Do not use hot water. Roll in a clean towel to remove excess water and lay flat to dry. Do not machine wash or tumble dry. The mesh stitch and gradient yarn may stretch, distort, or felt with machine washing.
Final Thoughts on This Ombre Sweater Crochet Pattern
This sunset sweater has become one of those pieces I reach for constantly. It is cozy without being heavy, eye catching without being fussy, and the gradient yarn means the color work basically does itself. Whether you style it with jeans for a casual day out or dress it up for a special occasion, it gets compliments every single time.
Thank you so much for choosing this pattern. I genuinely hope you love making it as much as I loved designing it. If you finish one, I would absolutely love to see it. Tag me on Instagram or share in my Facebook group. Seeing your versions is the best part of sharing patterns.
If this pattern caught your eye, go ahead and pin it to your crochet boards on Pinterest so you can find it when you are ready to cast on. And please drop a comment below if you make one. I read every single comment and love hearing how your projects turn out.
You Might Also Like
- Autumn Harvest Bow Handbag Free Crochet Pattern
- Ocean Blue Seashell Motif Tote Free Crochet Pattern
- Navy Blue Open Weave Crochet Shrug Free Pattern
- Blush Ballerina Baby Crochet Dress Free Pattern
