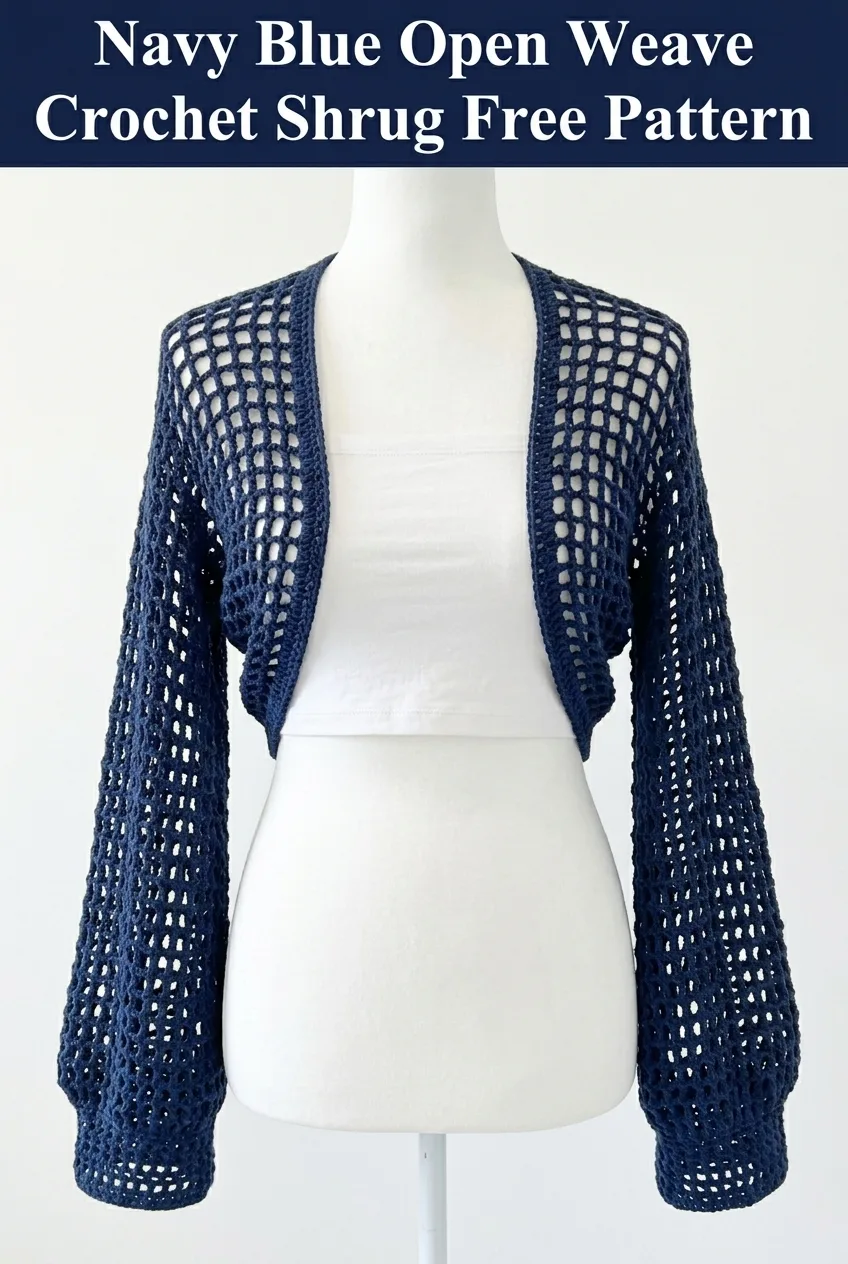
Go dig into your yarn stash right now. You know that beautiful skein of cotton blend you’ve been saving for the perfect project? This is it. This navy blue open weave shrug uses a simple mesh construction that looks far more impressive than the stitches required to make it. The whole piece starts as a rectangle, then folds and seams to create those gorgeous flowing sleeves. If you can chain and double crochet, you can absolutely make this. I won’t sugarcoat it though. You’ll need to pay attention to your stitch counts and keep your tension consistent for that beautiful grid pattern to shine.
Why You’ll Love This Crochet Shrug Pattern
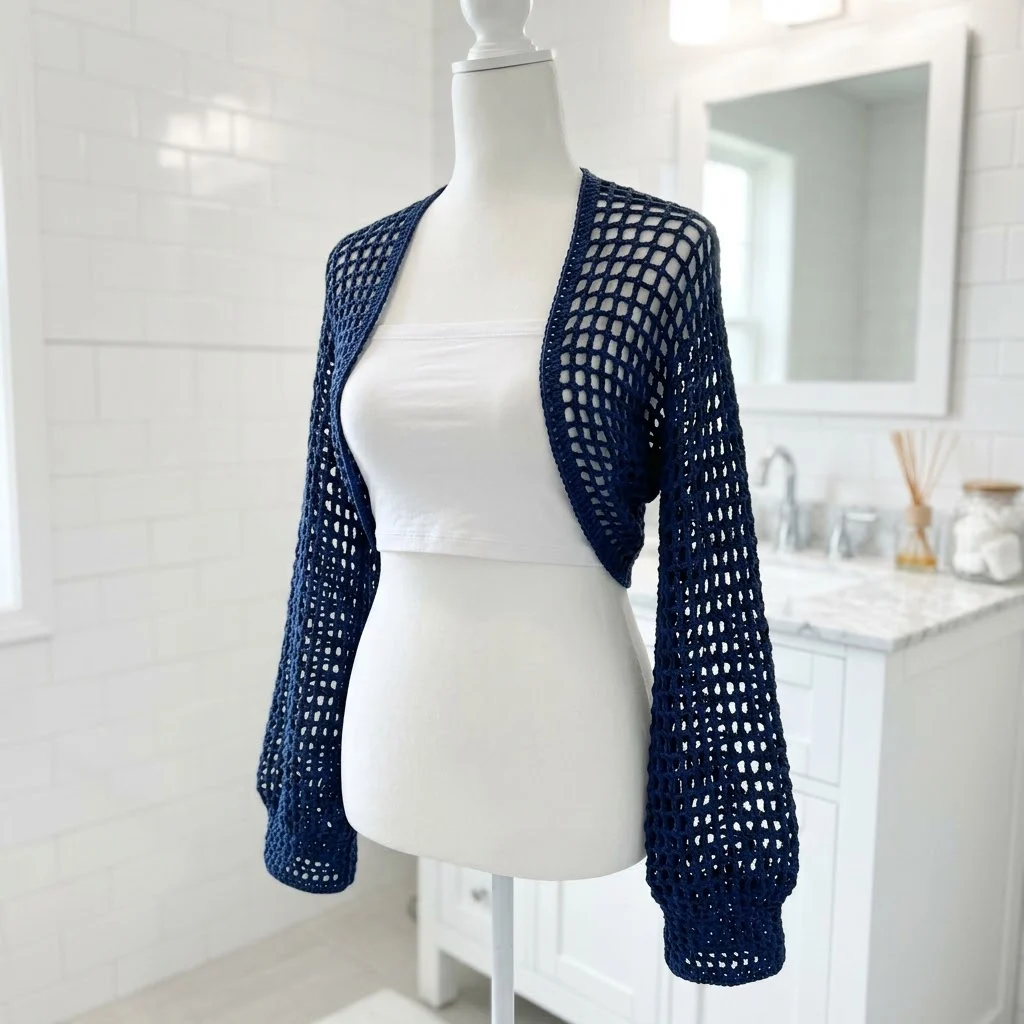
This crochet shrug pattern hits that sweet spot between stylish and practical. The open mesh construction makes it perfect for layering over tank tops and dresses without adding bulk or causing you to overheat. It’s the kind of piece you throw on when the air conditioning is just a bit too aggressive or when summer evenings turn cool.
What makes this crochet tutorial special is the construction method. You’re not dealing with complicated armhole shaping or set-in sleeves. Instead, you work one large rectangle, fold it strategically, and seam the sleeve portions. The result looks like you spent weeks on intricate garment construction when really you mastered a two-row repeat.
The open weave stitch pattern creates that gorgeous grid effect you see in the photos. Each "window" in the mesh is formed by chain spaces and double crochet posts. Once you get the rhythm down, you’ll find yourself flying through rows while binge-watching your favorite show.
Skill Level
Intermediate beginner. If you’ve completed a few scarves or blankets and feel comfortable with basic stitches, you’re ready for this. The techniques aren’t difficult, but garment construction requires attention to measurements and consistent tension.
Materials Needed
Yarn:
Recommended yarn qualities: Cotton, cotton blends, bamboo blends, or smooth acrylic. These fibers will show off the open weave pattern and provide nice drape for a garment.
Hook:
Notions:
Gauge
14 stitches and 8 rows = 4 inches in the mesh pattern after blocking.
Gauge matters for garments. Please take time to make a swatch. If your swatch is too small, go up a hook size. If it’s too large, go down a hook size. This step will save you from making a shrug that doesn’t fit.
Finished Measurements
This pattern is written for size Small/Medium with a relaxed, slightly oversized fit.
For larger sizes, add chain stitches in multiples of 4 to increase width. Add additional rows to increase length.
Abbreviations and Stitch Definitions
Let me break down every stitch you’ll use in this pattern.
Ch (Chain): The foundation stitch. Yarn over, pull through the loop on your hook. This creates the base row and the spaces in your mesh.
Sl st (Slip Stitch): Insert hook, yarn over, pull through both the stitch and the loop on your hook in one motion. Used for joining and finishing.
Dc (Double Crochet): Yarn over, insert hook into stitch, yarn over and pull up a loop (3 loops on hook), yarn over and pull through 2 loops (2 loops remain), yarn over and pull through remaining 2 loops. This is the main stitch creating the vertical posts in your mesh.
Ch-sp (Chain Space): The gap or hole created by chain stitches in the previous row. You’ll work into these spaces, not into the chains themselves.
Sk (Skip): Pass over the indicated number of stitches without working into them.
Understanding the Mesh Stitch Pattern
Before diving into the full pattern, let me explain what creates that beautiful open grid.
The mesh stitch in this shrug uses a simple formula: double crochet, chain 1, skip 1. This creates evenly spaced "windows" throughout the fabric. The double crochet posts form the vertical lines of your grid while the chain spaces form the horizontal openings.
Here’s how it works in plain English:
You make a double crochet, then chain 1 and skip the next stitch. The chain bridges the gap while the skipped stitch creates the hole. When you stack these rows, the chains and spaces align to form that gorgeous lattice effect.
Practice tip: If you’ve never worked mesh before, chain 25 and practice a few rows before starting your shrug. Getting comfortable with the rhythm will make the full project much more enjoyable.
Step by Step Crochet Pattern Instructions
Foundation Row
Ch 58 (or any multiple of 4 plus 2 for different sizing).
This chain should measure approximately 16 inches when gently stretched. Don’t pull it tight. Measure it laying naturally.
Row 1 (Right Side)
Dc in 4th ch from hook (the skipped chains count as your first dc), *ch 1, sk 1 ch, dc in next ch*, repeat from * to * across. (56 sts including chains)
What you should see: A row of double crochet posts with small gaps between them. The posts should be evenly spaced and your work should lay flat without curling.
Beginner note: That "4th chain from hook" part trips people up. Count back from your hook: 1, 2, 3, 4. Stick your hook in that 4th chain. The 3 chains you skipped count as your first double crochet.
Row 2
Ch 4 (counts as dc plus ch 1), turn, sk first dc, dc in next dc, *ch 1, sk ch-1 sp, dc in next dc*, repeat from * to * across, ending with dc in top of turning chain. (56 sts)
What you should see: Your mesh pattern starting to form. The double crochets should stack directly above each other, creating vertical lines.
Rows 3 through 72
Repeat Row 2 until your piece measures approximately 54 inches in length, or your desired cuff-to-cuff measurement.
Counting tip: Place a stitch marker every 10 rows. Trust me on this. Counting 72 rows of mesh after the fact is nobody’s idea of fun.
Tension check: Every 10 rows or so, measure your width. It should remain consistent at about 16 inches. If your work is getting wider or narrower, your tension is changing and you may need to adjust.
Final Row
After your last row, ch 1, do not turn. Work 1 round of single crochet evenly around the entire rectangle, working 3 sc in each corner to keep them flat. Sl st to first sc to join.
Fasten off and weave in this end.
Assembly Instructions
This is where the magic happens. Your rectangle transforms into a wearable shrug.
Step 1: Fold Your Rectangle
Lay your rectangle flat on a clean surface with the right side facing up.
Fold both short ends toward the center. Each folded section should be approximately 18 inches. This leaves about 18 inches in the center unfolded. This center section becomes the back of your shrug.
Step 2: Mark Your Seam Lines
Using stitch markers, mark where you’ll seam. Each sleeve seam runs from the folded edge inward for approximately 16 to 17 inches, leaving a small opening at the end for the armhole.
Visual check: When you fold it, the shape should roughly resemble a shrug laid flat, with two tube shapes for arms connected by a back panel.
Step 3: Seam the Sleeves
Thread your tapestry needle with a long length of matching yarn (about 36 inches per sleeve).
Using whip stitch or mattress stitch, seam each sleeve closed along the marked lines. Work from the cuff edge toward the body, stopping about 1 inch before the fold to create a comfortable armhole.
Whip stitch how-to: Insert needle through both layers from back to front, then move over about 1/4 inch and repeat. Keep your stitches even and not too tight.
Mattress stitch alternative: This creates an invisible seam. Insert needle under one bar on the first piece, then under the corresponding bar on the second piece. Pull gently to close the seam.
Step 4: Weave in Remaining Ends
Weave all yarn tails through several inches of stitches, changing direction once or twice to secure them. Trim close to the fabric.
Finishing and Blocking
For the best results, wet block your finished shrug.
1. Fill a basin with cool water and a drop of wool wash or gentle soap
2. Submerge your shrug and let it soak for 15 minutes
3. Gently press out water without wringing
4. Roll in a clean towel to remove excess moisture
5. Lay flat on blocking mats, gently stretching to measurements
6. Allow to dry completely before wearing
Blocking opens up the mesh pattern, evens out your stitches, and gives the finished piece a professional look.
Customization Ideas
Add cuff ribbing: Work several rows of single crochet in back loop only at each cuff for a fitted look.
Change the length: Add or subtract rows in multiples of 2 to make the sleeves longer or create a cropped version.
Try different colors: This pattern looks stunning in cream, dusty rose, sage green, or charcoal gray. Variegated yarns can also create interesting effects in the mesh.
Add a border: Work a decorative edging around the front opening, such as shell stitch or picot edging, for extra visual interest.
Common Questions
Can I use a different weight yarn?
Yes, but your gauge and finished measurements will change. Worsted weight creates a denser, warmer shrug. Fingering weight creates a more delicate, lacier version. Always swatch first.
My mesh looks uneven. What’s wrong?
Usually this is a tension issue. If some holes look bigger than others, you’re likely pulling tighter or looser on certain stitches. Conscious, consistent tension will improve with practice.
How do I make this larger?
Add chains to your foundation in multiples of 4. For a longer body, add more rows. For wider sleeves, increase your foundation chain count.
Care Instructions
I hope this navy blue open weave crochet shrug becomes a wardrobe staple for you. It’s one of those versatile pieces that works year-round and pairs with just about everything. Thank you so much for choosing this pattern. If you make one, I would absolutely love to see it. Tag me on Instagram or share a photo in our Facebook group. Your version might be the inspiration someone else needs to start their own.
If you loved working on this project, save it to your Pinterest boards so you can find it again later or share it with your crochet-loving friends. And please drop a comment below when you finish yours. I read every single one and they genuinely make my day.
