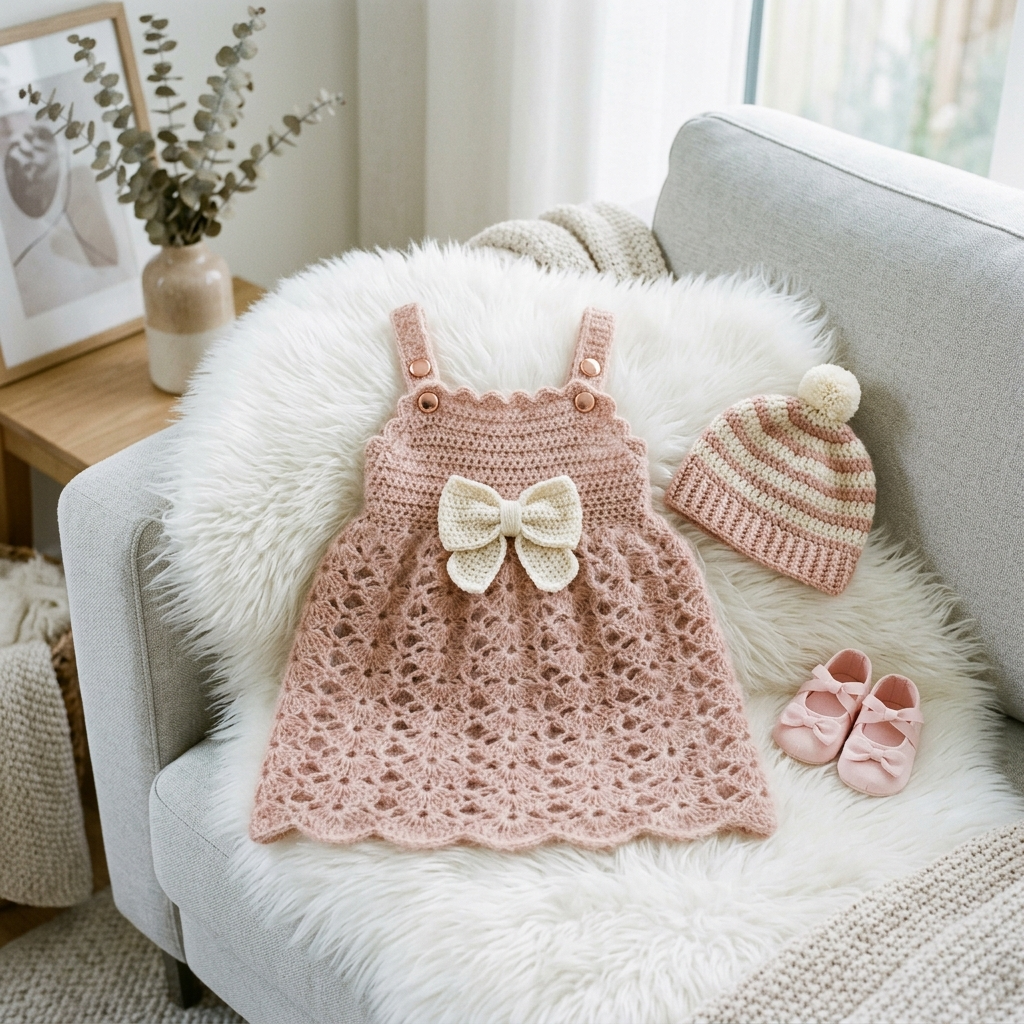
There’s something magical about creating a handmade dress for a little one. This Blush Ballerina Baby Crochet Dress combines a fitted bodice with a dreamy shell stitch skirt, finished with an oversized cream bow that steals the show. I designed this pattern with intermediate crocheters in mind, but confident beginners can absolutely tackle it with a little patience.
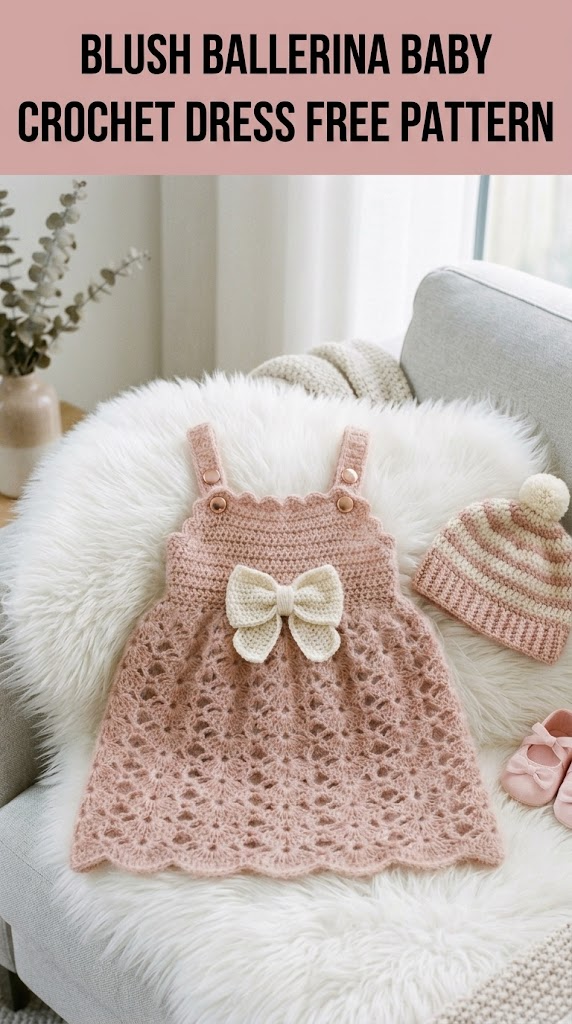
The matching striped beanie completes the set perfectly. Whether you’re making this for a baby shower gift, a special photo session, or just because tiny clothes are irresistible, this crochet pattern will guide you through every stitch.
Let me walk you through exactly how to recreate this sweet set.
What You’ll Need: Materials and Tools
Before we dive into the crochet tutorial, gather everything so you can work uninterrupted.
Yarn:
Hook:
Notions:
Gauge:
16 stitches and 12 rows = 4 inches in half double crochet
Take time to check your gauge. A dress that’s too tight won’t slip over baby’s head comfortably.
Finished Size:
This pattern is written for 6 to 12 months. The dress measures approximately 14 inches from shoulder strap to hem and 9 inches across the chest laid flat.
Abbreviations and Stitch Definitions
Let me define every stitch before we begin. Refer back here anytime you need a refresher.
Ch = Chain: Yarn over, pull through loop on hook. This creates your foundation.
Sl st = Slip stitch: Insert hook, yarn over, pull through both loops at once. Used for joining and invisible movement.
Sc = Single crochet: Insert hook, yarn over and pull up a loop (2 loops on hook), yarn over and pull through both loops. A short, tight stitch.
Hdc = Half double crochet: Yarn over, insert hook, pull up a loop (3 loops on hook), yarn over and pull through all 3 loops. Medium height stitch.
Dc = Double crochet: Yarn over, insert hook, pull up a loop, yarn over and pull through 2 loops, yarn over and pull through remaining 2 loops. A taller stitch that creates nice drape.
Shell = A group of stitches worked into the same stitch or space. In this pattern, each shell consists of 5 dc worked into one stitch.
Sk = Skip: Pass over the indicated stitch without working into it.
St(s) = Stitch(es)
Rep = Repeat
Understanding the Construction
This baby dress is worked in three main sections, then assembled. Here’s how it comes together:
1. Bodice: Worked flat in rows from the top down using half double crochet
2. Skirt: Worked in the round using a shell stitch pattern for that beautiful lacy effect
3. Straps: Worked separately and attached with decorative buttons
4. Bow: Worked flat, then gathered and attached
Don’t let the lace skirt intimidate you. Shell stitch follows a simple rhythm once you get going. I promise it clicks after about three rows.
Step by Step Crochet Pattern
Bodice
The bodice creates a simple rectangular shape that wraps around baby’s chest.
Foundation:
With MC and 4.0mm hook, ch 73.
Row 1: Hdc in 3rd ch from hook and in each ch across. (71 sts)
Row 2: Ch 2 (counts as hdc here and throughout), turn, hdc in each st across. (71 sts)
Rows 3 through 12: Repeat Row 2. (71 sts)
You should now have a rectangle measuring approximately 9 inches wide and 4 inches tall. This forms the front and back bodice panels.
Scallop Edging (Top Edge):
With CC, join yarn at corner of top edge.
*Sk 1 st, 5 dc in next st, sk 1 st, sl st in next st*
Rep from * across entire top edge.
Fasten off.
This creates those pretty little scallops you see along the neckline.
Skirt
Now for the fun part. The shell stitch skirt attaches directly to the bottom of the bodice and is worked in joined rounds.
Joining Round:
With MC, join yarn at one side edge of bodice bottom. Ch 1, sc evenly around entire bottom edge of bodice, placing approximately 71 sc across front and 71 sc across back. Join with sl st to first sc. (142 sts)
Place a stitch marker at the join. This marks the side of the dress.
Round 1 (Shell Setup):
Ch 3 (counts as dc), 2 dc in same st, *sk 2 sts, sc in next st, sk 2 sts, 5 dc in next st (shell made)*
Rep from * around, ending with 2 dc in same st as beginning ch 3, sl st to top of ch 3 to join.
You should have approximately 23 to 24 shell groups around.
Round 2:
Ch 1, sc in same st, *5 dc in next sc, sc in center dc of next shell*
Rep from * around, ending with sl st to first sc.
Rounds 3 through 16:
Repeat Round 2.
The skirt naturally flares as you work because the shells create an A line silhouette. This is exactly what we want.
Final Scallop Round:
Ch 1, sc in same st, *ch 2, 5 dc in next sc, ch 2, sc in center dc of next shell*
Rep from * around. Sl st to first sc.
Fasten off and weave in ends.
The added chain spaces on the final round create a more pronounced scalloped hem.
Shoulder Straps (Make 2)
Foundation:
With MC, ch 8.
Row 1: Sc in 2nd ch from hook and in each ch across. (7 sts)
Rows 2 through 30: Ch 1, turn, sc in each st across. (7 sts)
Each strap should measure approximately 6 inches long. Adjust length as needed for your gauge.
Edging:
Work 1 round of sc evenly around entire strap. Sl st to join and fasten off.
Leave long tails for sewing.
Button Placement
The straps attach with decorative buttons rather than being sewn directly. This allows for some size adjustment and adds that sweet vintage detail.
1. Position straps on the front bodice, approximately 1.5 inches from each side edge
2. Mark button placement on both front and back
3. Create small buttonholes by working (ch 3, sk 2 sts) into strap ends, or simply push buttons through the natural gaps in the sc fabric
4. Sew buttons securely to bodice at marked positions
Matching Striped Beanie Pattern
This coordinating hat completes the set beautifully.
Foundation:
With MC and 4.0mm hook, create a magic ring.
Round 1: Ch 2, 10 hdc in ring, sl st to join. (10 sts)
Round 2: Ch 2, 2 hdc in each st around, sl st to join. (20 sts)
Round 3: Ch 2, *hdc in next st, 2 hdc in next st* rep around, sl st to join. (30 sts)
Round 4: Ch 2, *hdc in next 2 sts, 2 hdc in next st* rep around, sl st to join. (40 sts)
Round 5: Ch 2, *hdc in next 3 sts, 2 hdc in next st* rep around, sl st to join. (50 sts)
Round 6: Ch 2, *hdc in next 4 sts, 2 hdc in next st* rep around, sl st to join. (60 sts)
Rounds 7 through 9: With MC, ch 2, hdc in each st around, sl st to join. (60 sts)
Rounds 10 through 11: Change to CC, ch 2, hdc in each st around. (60 sts)
Rounds 12 through 13: Change to MC, ch 2, hdc in each st around. (60 sts)
Continue alternating 2 rounds CC, 2 rounds MC until hat measures approximately 5 inches from crown.
Ribbed Brim:
Work 4 rounds of sc through back loop only for a ribbed effect.
Fasten off.
Pompom:
Create a 2 inch pompom with CC and attach securely to crown.
The Oversized Bow
This is the showstopper detail that makes the dress unforgettable.
Bow Loop (Make 2):
With CC and 4.0mm hook, ch 25.
Row 1: Dc in 4th ch from hook and in each ch across. (22 sts)
Rows 2 through 8: Ch 3, turn, dc in each st across. (22 sts)
Fasten off, leaving a long tail.
Bow Center:
With CC, ch 10.
Row 1: Sc in 2nd ch from hook and in each ch across. (9 sts)
Rows 2 through 12: Ch 1, turn, sc in each st across. (9 sts)
Fasten off.
Assembly:
1. Fold each bow loop piece in half lengthwise
2. Stack the two folded pieces together, slightly overlapping at center
3. Pinch the center tightly
4. Wrap the bow center piece around the pinched middle
5. Sew securely at back
6. Attach bow to front bodice, centered below the scallop edging
Finishing Touches and Care Instructions
Weaving Ends:
Take your time weaving in all yarn tails. For baby items, I weave each tail through at least 2 inches of stitches, then double back. Little fingers love to pull at loose bits.
Blocking (Optional but Recommended):
Wet block the skirt to open up the shell pattern beautifully. Lay flat on a towel, gently stretch to measurements, and let dry completely.
Washing:
If you used acrylic yarn, this dress is machine washable on gentle cycle. Lay flat to dry to maintain shape. The bow can be removed for washing if you attach it with a few loose stitches rather than permanently.
Helpful Tips for Success
If your skirt is pulling inward: Your tension might be too tight. Try going up a hook size for just the skirt section.
If the shells look uneven: Count your stitches at the end of each round. Each shell should sit directly above a single crochet from the previous round.
For a longer dress: Simply add more shell rounds before the final scallop round. Each additional round adds approximately 0.75 inches.
For preemie or newborn size: Reduce the foundation chain to 61 and work fewer increase rounds on the hat.
Why This Pattern Works
I designed this Blush Ballerina Baby Crochet Dress to balance visual interest with practical construction. The solid bodice provides structure and coverage, while the shell stitch skirt adds movement and breathability for warmer weather. The oversized bow is removable for easy laundering and can be repositioned as baby grows.
This step by step crochet tutorial gives you everything needed to create a complete baby outfit from scratch. The pattern works beautifully in countless color combinations. Consider mint and white for spring, burgundy and gold for fall, or classic pink and gray.

You Did It
Thank you so much for choosing this pattern for your next project. I genuinely hope the instructions were clear and the process enjoyable. There’s nothing quite like seeing a tiny dress come together under your own hands.
I would absolutely love to see your finished Blush Ballerina dress and beanie set. Tag me on Instagram or share in my Facebook group. Seeing your color choices and styling ideas truly makes my day.
Happy hooking, friend. You’ve got this.
