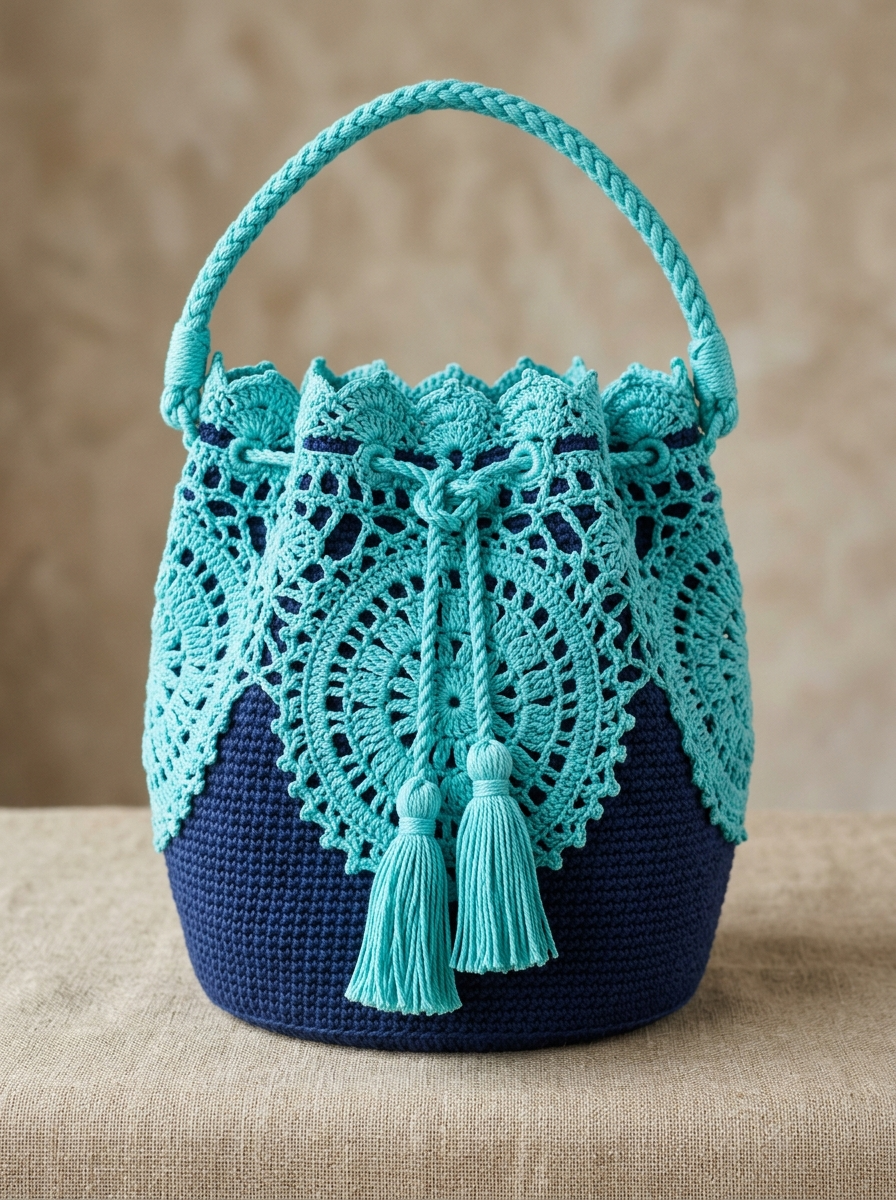
This stunning two-tone bucket bag combines the structure of tight single crochet with delicate lace overlay work. I fell completely in love making this piece. The contrast between the solid navy base and the airy aqua lace creates such a striking coastal vibe. If you can work in the round and follow a lace chart, you can absolutely make this bag.
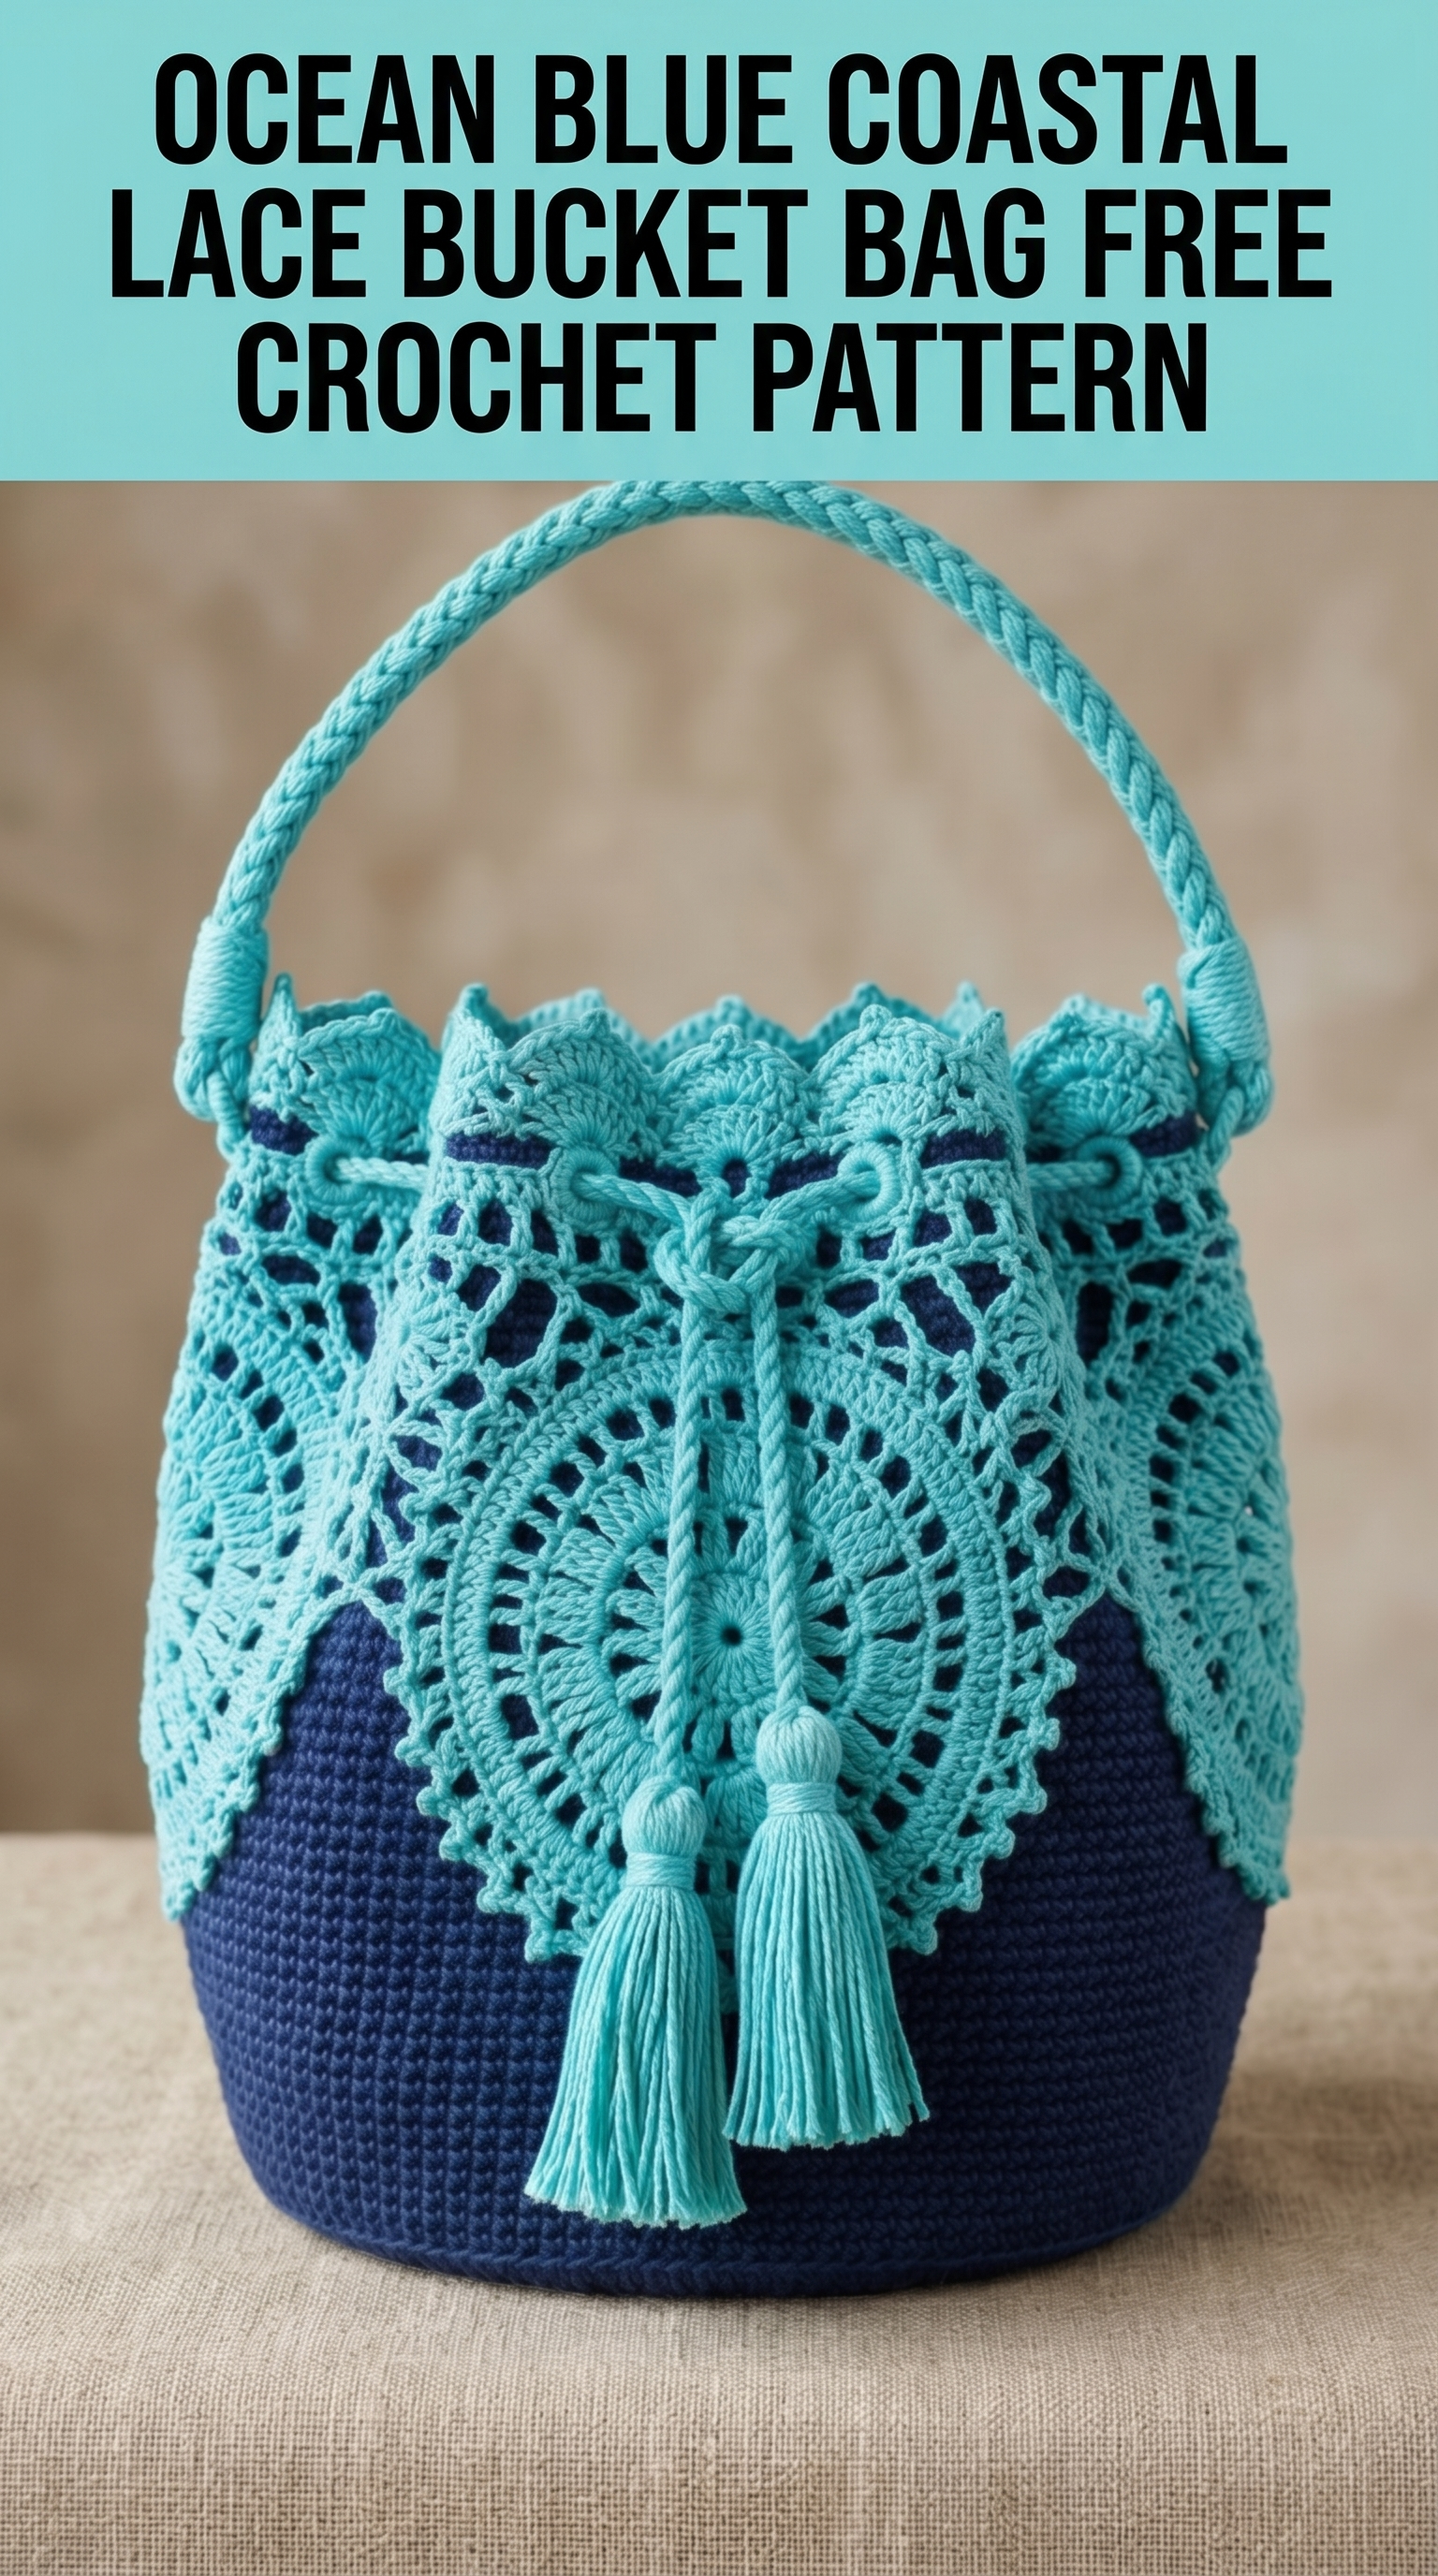
The Ocean Blue Coastal Lace Bucket Bag crochet pattern looks advanced, but I promise it breaks down into manageable sections. We will build the solid base first, then create the lace overlay separately, and finally join everything together. Take it one step at a time and you will have a gorgeous handmade bag perfect for summer outings.
Why This Crochet Bucket Bag Pattern Works
This design stands out because of the layered construction. The inner bag provides structure and holds your belongings securely. The outer lace layer adds beauty and dimension without sacrificing function. The drawstring closure keeps everything inside safe while looking absolutely elegant.
I designed this step by step crochet tutorial to guide you through each component. You will make four separate pieces before assembly. This approach keeps the work portable and less overwhelming.
Skill Level
Intermediate to Advanced
You should be comfortable with:
If you are newer to lace work, practice the shell and chain patterns on a flat swatch first. This builds your confidence before committing to the full project.
Finished Dimensions
Materials Needed
Yarn
I recommend 100% mercerized cotton for this project. The sheen enhances the lace detail beautifully. Cotton also provides the structure needed for a bag that holds its shape. Avoid acrylic for this pattern as it tends to stretch under weight.
Suggested brands: Scheepjes Catona, Drops Safran, or Lion Brand 24/7 Cotton
Hook
Always check your gauge. If your stitches look loose, go down a hook size.
Additional Supplies
Gauge
Solid section: 20 stitches and 22 rows = 4 inches (10 cm) in single crochet with 3.5mm hook
Lace section: One complete shell repeat = approximately 2 inches (5 cm) with 3.0mm hook
Please take time to check your gauge. Bags need consistent tension to hold their shape properly.
Abbreviations and Stitch Definitions
Let me explain every stitch we will use. I want you to feel confident before starting.
ch = chain: Yarn over, pull through loop on hook. This creates the foundation and spacing.
sl st = slip stitch: Insert hook, yarn over, pull through stitch AND loop on hook in one motion. Used for joining and invisible movement.
sc = single crochet: Insert hook into stitch, yarn over and pull up a loop (2 loops on hook), yarn over and pull through both loops. Creates tight, dense fabric.
dc = double crochet: Yarn over, insert hook into stitch, yarn over and pull up a loop (3 loops on hook), yarn over and pull through 2 loops, yarn over and pull through remaining 2 loops. Creates taller stitches with more drape.
tr = treble crochet: Yarn over twice, insert hook into stitch, yarn over and pull up a loop (4 loops on hook), yarn over and pull through 2 loops three times. Even taller stitch for lacy effects.
hdc = half double crochet: Yarn over, insert hook, yarn over and pull up a loop (3 loops on hook), yarn over and pull through all 3 loops at once.
inc = increase: Work 2 stitches into the same stitch. This adds width.
sk = skip: Do not work into this stitch. Jump over it to the next one.
sp = space: The gap created by chains. We work into these gaps, not into the chains themselves.
shell = A group of stitches worked into the same stitch or space. For this pattern, a basic shell is (2 dc, ch 2, 2 dc) in the same place.
picot = A decorative bump made by chaining 3, then slip stitching into the first chain.
Pattern Notes Before You Begin
Part 1: Solid Navy Base
This creates the inner structure of your bag. We start from the bottom center and work outward, then upward.
Base Circle
With Color A (Navy) and 3.5mm hook:
Round 1: Make a magic ring. Work 6 sc into ring. Pull tight. (6 sts)
Round 2: Inc in each st around. (12 sts)
Round 3: *Sc 1, inc* repeat around. (18 sts)
Round 4: *Sc 2, inc* repeat around. (24 sts)
Round 5: *Sc 3, inc* repeat around. (30 sts)
Round 6: *Sc 4, inc* repeat around. (36 sts)
Round 7: *Sc 5, inc* repeat around. (42 sts)
Round 8: *Sc 6, inc* repeat around. (48 sts)
Round 9: *Sc 7, inc* repeat around. (54 sts)
Round 10: *Sc 8, inc* repeat around. (60 sts)
Round 11: *Sc 9, inc* repeat around. (66 sts)
Round 12: *Sc 10, inc* repeat around. (72 sts)
Your base should measure approximately 6 inches across. If it cups or ruffles, adjust your hook size.
Bag Sides
Now we work straight up without increases. This creates the walls.
Round 13: Working in back loops only this round, sc in each st around. (72 sts)
This back loop round creates a sharp angle where the base meets the sides. It gives your bag that nice structured edge.
Rounds 14-45: Sc in each st around. (72 sts each round)
Continue for 32 more rounds or until sides measure approximately 5.5 inches from the base edge.
Round 46: Sl st in next st. Fasten off and weave in ends.
Set this piece aside.
Part 2: Lace Overlay
This is the beautiful aqua outer layer. We create it as a separate cone shape, then attach it over the navy base.
Lace Body
With Color B (Aqua) and 3.0mm hook:
Foundation Round: Ch 72. Being careful not to twist, sl st to first ch to form ring.
Round 1: Ch 3 (counts as dc), dc in same st, sk 2 ch, *(2 dc, ch 2, 2 dc) in next ch (shell made), sk 2 ch* repeat around, ending with 2 dc in same st as beginning, ch 1, sc in top of ch-3 to join (this positions you in the center of the last shell). (12 shells)
Round 2: Ch 3, dc in same sp, ch 3, *(2 dc, ch 2, 2 dc) in next shell sp, ch 3* repeat around, join with sl st to top of ch-3. (12 shells with ch-3 spaces between)
Round 3: Sl st to shell sp. Ch 3, dc in same sp, dc in next dc, ch 2, sk ch-3 sp, dc in next dc, *(2 dc, ch 2, 2 dc) in shell sp, dc in next dc, ch 2, sk ch-3 sp, dc in next dc* repeat around, join. (12 shell sections)
Rounds 4-12: Continue in established lace pattern, working shells into shell spaces and chain spaces between. Each round should maintain 12 repeats around.
The lace naturally forms a slight cone shape as you progress. This mirrors the bucket bag silhouette.
Scalloped Top Edge
Round 13: Sl st to shell sp. *Ch 4, (tr, ch 2, tr, ch 2, tr, ch 2, tr) in shell sp, ch 4, sl st in ch-2 sp between shells* repeat around. (12 scallops)
Round 14: In each scallop: sl st to first ch-2 sp, *(sc, hdc, dc, hdc, sc) in ch-2 sp* three times per scallop, sl st between scallops. This creates the fan-shaped top edge.
Fasten off and weave in ends.
Part 3: Center Medallion
That gorgeous circular lace piece on the front is a separate doily-style medallion.
With Color B (Aqua) and 3.0mm hook:
Round 1: Magic ring. Ch 3 (counts as dc), 11 dc in ring, sl st to top of ch-3. (12 dc)
Round 2: Ch 4 (counts as dc + ch 1), *dc in next st, ch 1* repeat around, sl st to 3rd ch of beginning ch-4. (12 dc, 12 ch-1 sps)
Round 3: Sl st to ch-1 sp. Ch 3, dc in same sp, ch 2, *2 dc in next ch-1 sp, ch 2* repeat around, sl st to join. (24 dc, 12 ch-2 sps)
Round 4: Ch 3, dc in next dc, ch 3, *dc in next 2 dc, ch 3* repeat around, join. (24 dc, 12 ch-3 sps)
Round 5: Ch 3, dc in next dc, (2 dc, ch 2, 2 dc) in ch-3 sp (shell in space), *dc in next 2 dc, shell in ch-3 sp* repeat around, join. (12 shells, 24 dc between)
Rounds 6-9: Continue expanding with shells and chain spaces. Each round adds more open lacework.
Round 10 (Outer Edge): Work picot edging: *Sc in dc, ch 3, sl st in first ch (picot made)* repeat around entire outer edge.
Fasten off. Block this piece flat to open up the lace.
Part 4: Assembly
Now we bring everything together. This is the satisfying part.
Attach Lace Overlay to Base
1. Place the navy base inside the aqua lace cone. The navy should be completely hidden by lace on the upper half.
2. Using aqua yarn and yarn needle, whipstitch the bottom edge of the lace overlay to the navy base at approximately Round 25 of the navy section. Work loosely so the lace drapes naturally.
3. Tack the lace at 4 evenly spaced points around to keep it from shifting.
Attach Center Medallion
1. Position the medallion on the front of the bag, centered.
2. Using aqua yarn, tack the medallion to the lace overlay with small hidden stitches at multiple points.
3. Be gentle. The medallion should lay flat against the bag but not be pulled tight.
Part 5: Drawstring and Closure
Twisted Cord Drawstring
Cut 6 strands of aqua yarn, each 3 yards long.
1. Tie all strands together at both ends.
2. Attach one end to a fixed point (doorknob works great).
3. Twist the strands tightly in one direction until they start to kink.
4. Fold twisted bundle in half, allowing it to twist back on itself.
5. Knot the ends together.
Your cord should be approximately 36 inches long. Make two identical cords.
Threading the Drawstring
Weave one cord through the lace openings near the top edge, starting at front center. Weave the second cord starting at back center, going the opposite direction.
Both cords should exit at the front center when pulled.
Part 6: Tassels
Make 2 matching tassels in aqua.
1. Wrap yarn around a 4-inch piece of cardboard 40 times.
2. Slide a 12-inch strand under the top loops and tie tightly.
3. Cut the bottom loops.
4. Wrap another strand around the tassel about 1 inch from top to create the head.
5. Trim ends evenly.
Attach one tassel to each drawstring end.
Part 7: Braided Handle
Cut 9 strands of aqua yarn, each 2 yards long.
Divide into 3 groups of 3 strands. Braid tightly. Knot both ends.
Attach handle ends securely to inside of bag at side points, approximately 1 inch below the scalloped edge. Reinforce attachment by stitching through the navy layer.
Finishing Touches
Weave in absolutely all ends. I know it is tedious, but loose ends inside bags get pulled and look messy quickly.
Block the completed bag lightly. Steam blocking works well for cotton.
Consider adding a fabric lining if you want extra durability and to prevent small items from poking through the lace.
Tips for Success with This Crochet Bucket Bag Pattern

You Made It
I am so proud of you for tackling this Ocean Blue Coastal Lace Bucket Bag crochet pattern. The combination of solid construction and delicate lace creates something truly special. This bag will get compliments everywhere you carry it.
Thank you for choosing to make this with me. I would absolutely love to see your finished bag. Tag me on Instagram or share in my Facebook group. Seeing your makes genuinely brightens my day.
Now go show off that gorgeous coastal creation. You earned it.
Happy crocheting, friend.
