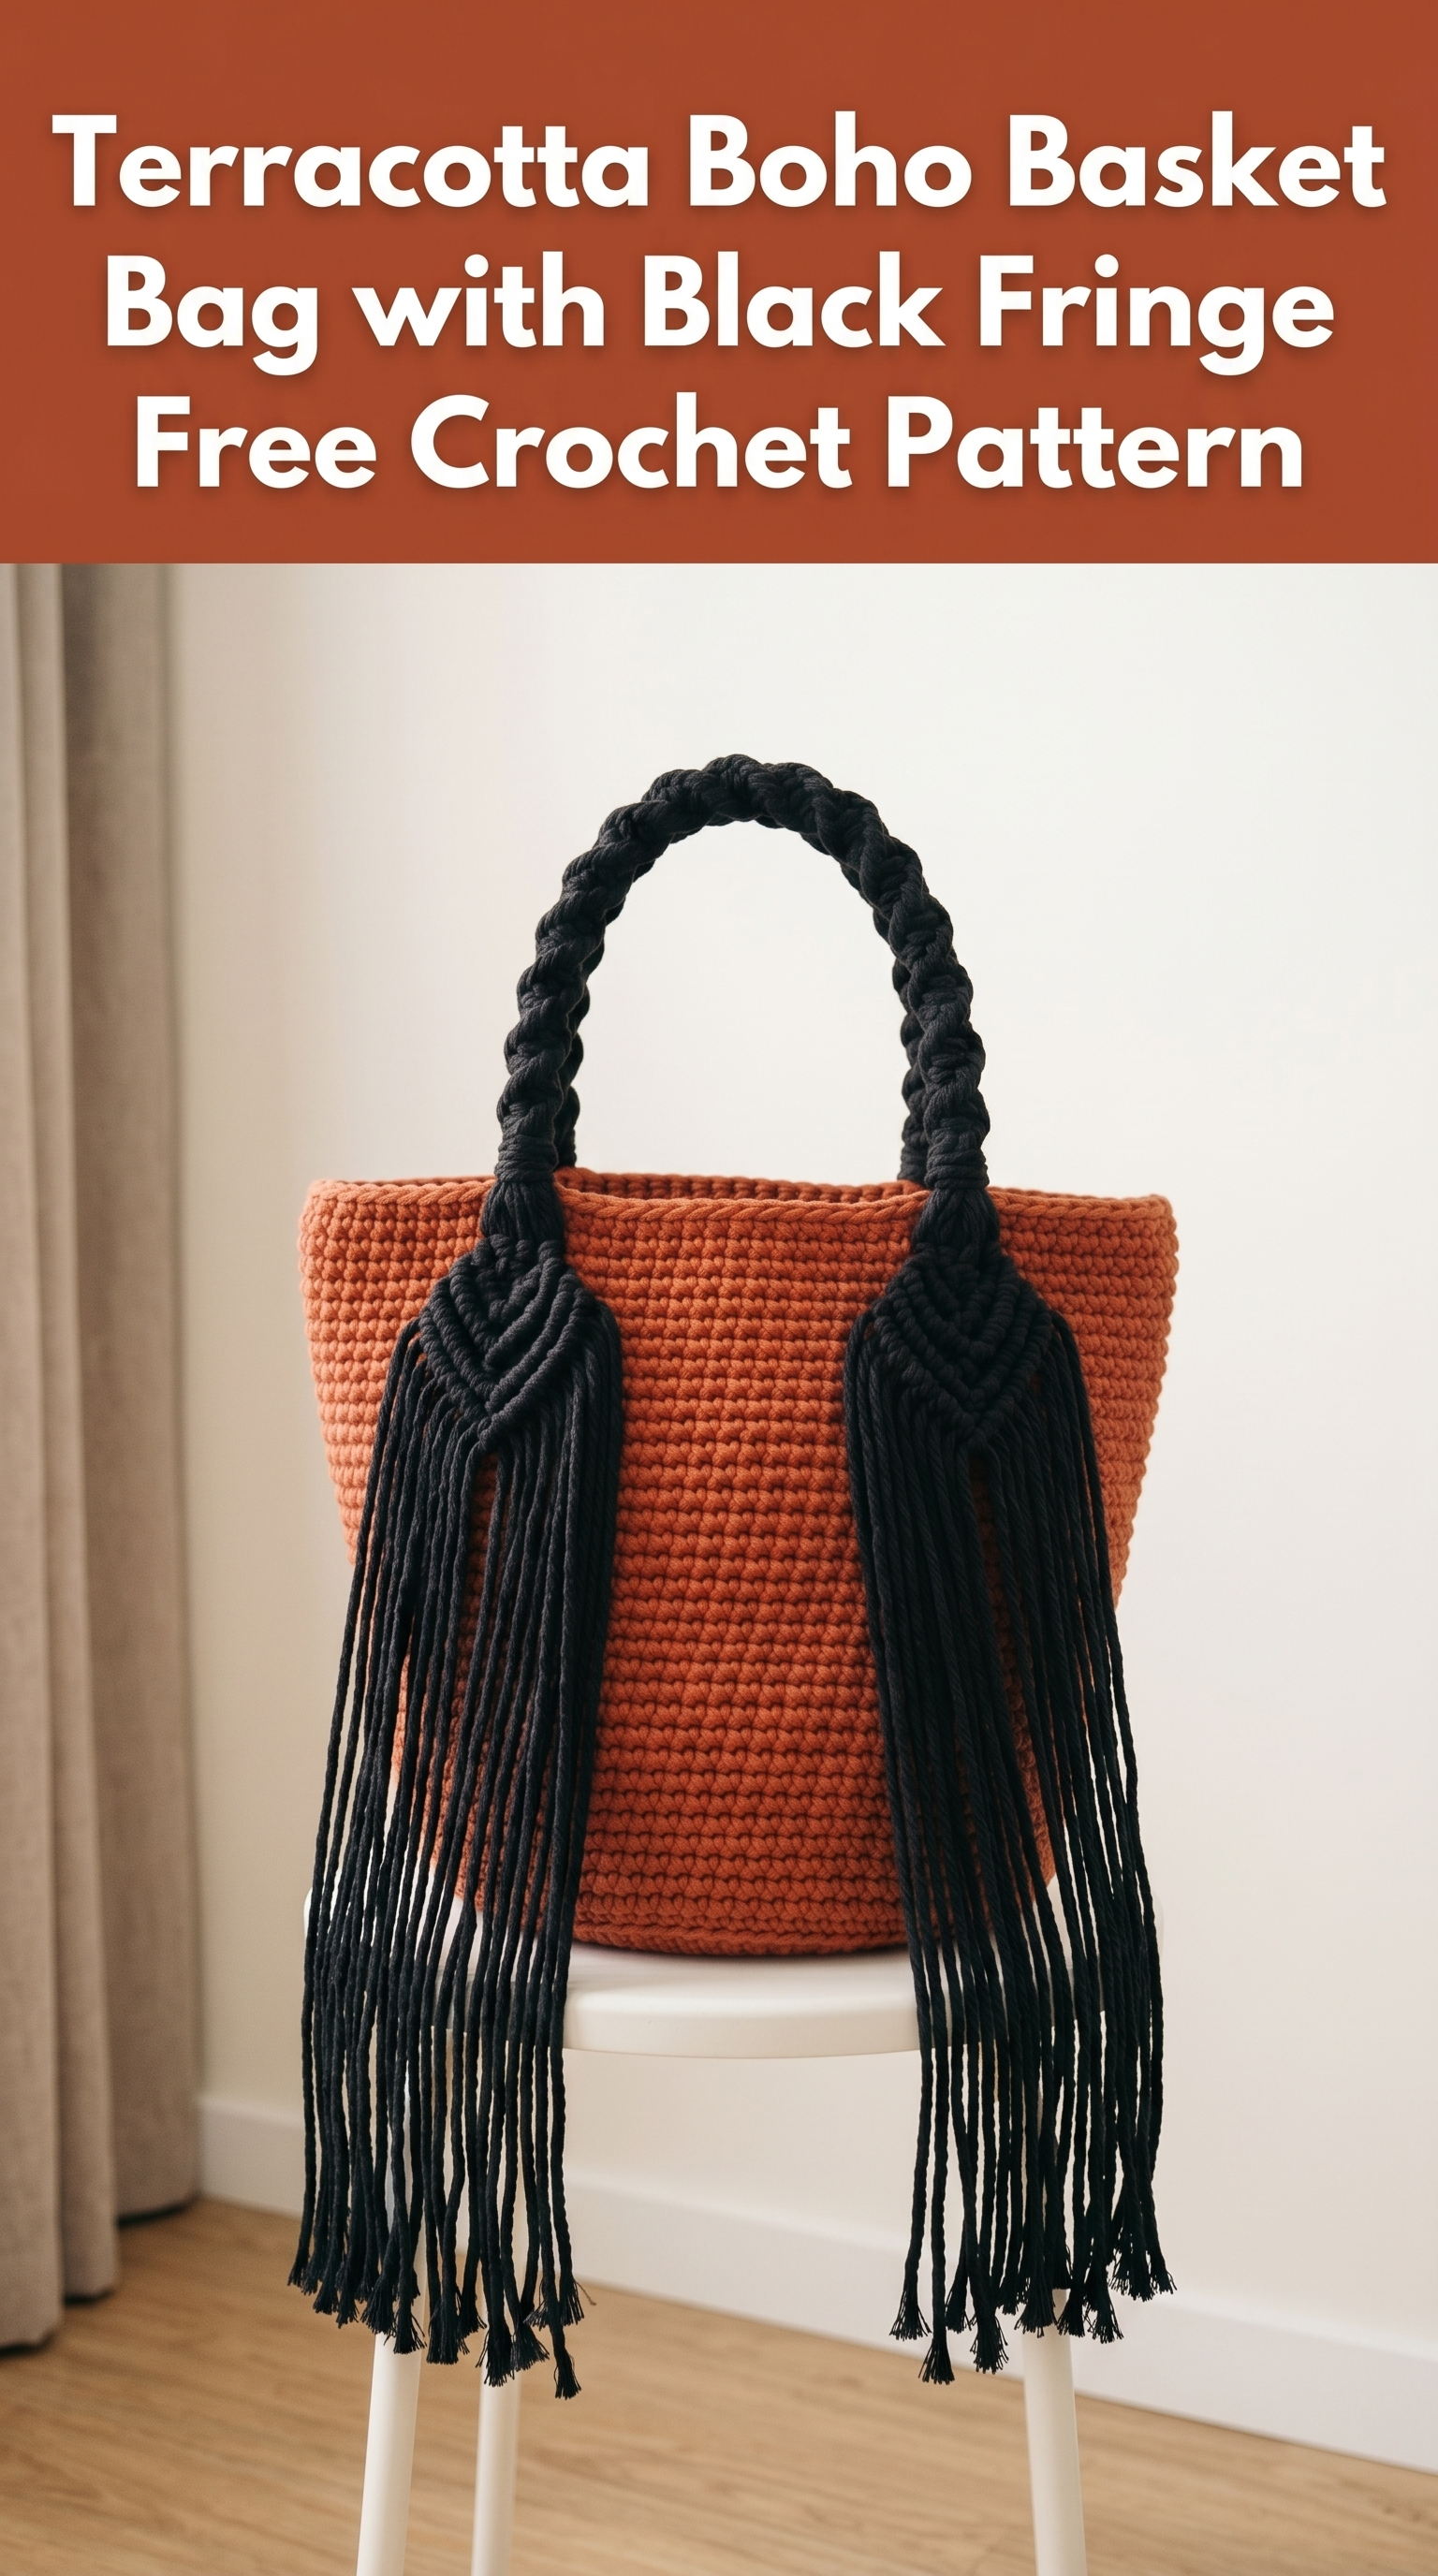
This stunning terracotta basket bag with dramatic black macramé fringe handles is about to become your new favorite accessory. I made this bag because I wanted something that felt artisan and modern at the same time. Something that would turn heads at the farmers market or a weekend brunch. And honestly? It came together more easily than it looks.
If you can crochet in the round and work a basic single crochet stitch, you can absolutely make this bag. The body is straightforward. The magic happens with those bold braided handles and cascading fringe, which use simple macramé techniques rather than complicated crochet work.
Let me walk you through every step of this crochet pattern so you can create your own boho basket bag from scratch.
Why This Crochet Basket Bag Works So Well
The construction here is clever. The bag body uses tight, dense single crochet stitches worked in continuous rounds. This creates that structured, almost woven look you see in the photos. The terracotta color gives it an earthy, warm vibe. Very much on trend right now.
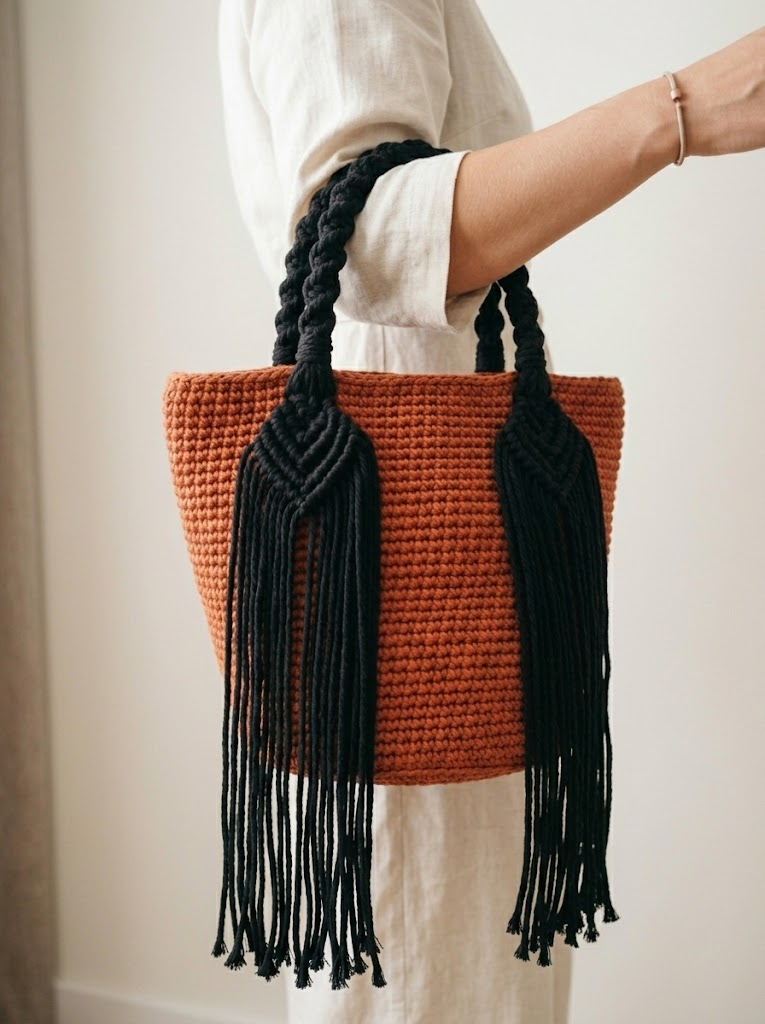
But those black handles? They steal the show. The braided rope handle transitions into a chevron macramé section with long flowing fringe. It creates incredible visual contrast against that warm rust orange body.
The finished bag stands upright on its own. It holds its shape beautifully. And it is surprisingly roomy inside for all your everyday essentials.
Skill Level
Confident beginner to intermediate. You should be comfortable with:
The macramé handles require patience more than skill. If you have never tried macramé before, do not worry. I will break it down simply.
Finished Dimensions
Materials You Will Need

Yarn
For the bag body:
For the handles and fringe:
Cotton cord works best for this project. It gives that dense, structured look and holds the basket shape. T-shirt yarn is another excellent option and creates a similar effect.
Hook
Your hook size may vary depending on your yarn choice and personal tension. The goal is a tight, sturdy fabric with minimal gaps between stitches.
Additional Tools
Gauge
Gauge matters here because you want a stiff, structured bag that holds its shape.
Target gauge: 12 to 14 single crochet stitches and 14 to 16 rows = 4 inches (10 cm) in single crochet worked in the round
If your fabric feels floppy or loose, go down a hook size. If it feels impossibly tight and hard to work, go up a hook size.
Abbreviations and Stitch Definitions
Let me define every stitch and abbreviation before we begin.
ch = chain: Wrap yarn over hook, pull through loop on hook. This creates one chain stitch.
sl st = slip stitch: Insert hook into stitch, yarn over, pull through both the stitch and the loop on your hook in one motion. Used for joining or moving across stitches without adding height.
sc = single crochet: Insert hook into stitch, yarn over and pull up a loop (two loops on hook), yarn over and pull through both loops. This is your main stitch for the entire bag body.
inc = increase: Work two single crochet stitches into the same stitch. This adds one stitch to your count.
st(s) = stitch(es)
rnd(s) = round(s)
Crochet Pattern Instructions: Bag Body
This bag is worked from the bottom up in continuous spiral rounds. You will not join at the end of each round. Use a stitch marker to track the beginning of each round. Move it up as you work.
Base of the Bag
Rnd 1: Using terracotta yarn, create a magic ring. Work 6 sc into the ring. Pull tight to close. (6 sts)
*Note: If magic rings intimidate you, chain 2 and work 6 sc into the second chain from hook instead.*
Rnd 2: Work 2 sc in each st around. (12 sts)
Rnd 3: *Sc in next st, 2 sc in next st.* Repeat from * to * around. (18 sts)
Rnd 4: *Sc in next 2 sts, 2 sc in next st.* Repeat from * to * around. (24 sts)
Rnd 5: *Sc in next 3 sts, 2 sc in next st.* Repeat from * to * around. (30 sts)
Rnd 6: *Sc in next 4 sts, 2 sc in next st.* Repeat from * to * around. (36 sts)
Rnd 7: *Sc in next 5 sts, 2 sc in next st.* Repeat from * to * around. (42 sts)
Rnd 8: *Sc in next 6 sts, 2 sc in next st.* Repeat from * to * around. (48 sts)
Rnd 9: *Sc in next 7 sts, 2 sc in next st.* Repeat from * to * around. (54 sts)
Rnd 10: *Sc in next 8 sts, 2 sc in next st.* Repeat from * to * around. (60 sts)
Your base should now measure approximately 6 to 7 inches across. Lay it flat to check. It should sit nice and round.
Sides of the Bag
Now we build the walls. This is where the magic happens. We stop increasing and work straight up.
Rnd 11: Working in the back loops only of each stitch, sc in each st around. (60 sts)
*This round creates that sharp edge at the bottom of the bag. It makes the base sit flat while the sides stand straight up. Do not skip this step.*
Rnds 12 to 45: Sc in each st around. (60 sts per round)
Continue working in both loops as normal from this round onward. Work a total of 34 rounds for the sides. This gives you approximately 8.5 to 9 inches of height.
Check your work: The bag should stand upright on its own at this point. The fabric should feel dense and sturdy.
Rnd 46: Sl st in each st around to create a finished edge. Fasten off. Weave in end securely.
How to Make the Macramé Handles with Fringe
This is where we switch techniques. The handles combine a braided section at the top with a decorative chevron knot pattern and long flowing fringe.
Preparing Your Cords
Cut 24 pieces of black macramé cord, each approximately 60 inches (150 cm) long. This gives you enough length for braiding, knotting, and generous fringe.
You will make two handles, using 12 cords per handle.
Attaching Cords to the Bag
Decide where you want your handles. They should be centered on opposite sides of the bag, with attachment points approximately 3 to 4 inches apart.
To attach each cord:
1. Fold one cord in half to find the center
2. Insert your crochet hook from front to back through a stitch about 1 inch below the top edge
3. Pull the folded loop through
4. Pull both cord ends through the loop
5. Tug gently to tighten
Attach 6 folded cords (12 cord ends) in a row for each handle attachment point. Space them evenly across about 3 inches.
Repeat on the opposite side of the bag for the second handle.
Creating the Braided Handle
Take all 12 cord ends from one side. Divide them into three groups of 4 cords each.
Braid these three groups together using a standard three-strand braid. Keep tension even and firm. Braid for approximately 10 to 12 inches, or until you reach your desired handle length.
Now here is the key step. You need to attach the other end of this braid to the second attachment point on the same side of the bag.
Thread the cord ends through the stitches near your second attachment point. Secure with tight knots on the inside of the bag. The braid now forms an arch, your handle.
Creating the Chevron Fringe Section
Below each attachment point, you will have cord ends hanging down. This is where you create the decorative chevron pattern visible in the photos.
Basic diagonal half hitch technique:
The chevron pattern uses diagonal half hitch knots arranged in a V shape. This is a fundamental macramé technique.
1. Select your leftmost cord as the guide cord
2. Hold it diagonally toward the center
3. Take the next cord and wrap it around the guide cord twice, pulling snug
4. Continue with each cord, following the diagonal line
5. Repeat from the right side, creating a mirror image
6. Where the two guide cords meet in the center, knot them together
Work 4 to 6 rows of chevron pattern, each row nested below the previous one.
Do not stress about perfection here. The fringe covers any small inconsistencies, and the handmade look is part of the charm.
Finishing the Fringe
Once your chevron section is complete, let the remaining cord ends hang as fringe. Trim them evenly to your desired length. I recommend 12 to 14 inches for that dramatic boho look.
Use a fine comb or pet brush to gently separate and fluff the cord fibers. This creates that soft, feathery fringe effect visible in the photos.
Repeat the entire handle process for the second side of the bag.
Finishing Your Boho Basket Bag
Weave in all ends on the inside of the bag body. Use a yarn needle and weave through several stitches to secure.
Check all handle attachments for security. Add extra knots on the inside if anything feels loose.
Trim any stray fibers from the bag body.
Shape your bag by gently pulling it into form. The dense single crochet fabric holds its structure well.
Tips for Success with This Crochet Tutorial
Yarn substitutions: Stick with cotton or cotton-blend cords for best results. Acrylic yarn will create a softer, floppier bag that will not hold its shape as well.
Color variations: This design looks stunning in so many combinations. Try cream body with natural fringe, navy with white, or sage green with cream. Let your creativity guide you.
Handle alternatives: If macramé feels overwhelming, you can create simple twisted cord handles or even crochet chain handles. The bag body works beautifully with any handle style.
Adding a lining: For extra durability and to protect your belongings, consider adding a fabric lining. Cut fabric slightly smaller than the bag interior, hem the edges, and hand stitch around the top opening.
Wrapping Up This Boho Basket Bag Crochet Pattern
You now have everything you need to create this gorgeous terracotta boho basket bag step by step. The combination of structured crochet and flowing macramé fringe creates something truly special. Something that looks far more complicated than it actually is.
I love how this bag bridges two crafts, crochet and macramé, into one cohesive accessory. It is the kind of project that makes you feel like a true fiber artist when you carry it out into the world.
Take your time with the handles. Do not rush the fringe. And remember that handmade means unique, not perfect.
Thank you so much for choosing this pattern for your next project. I genuinely appreciate you being here and trusting me with your crafting time.
I would absolutely love to see your finished bag. Tag me on Instagram or share your photos in our Facebook group. Seeing your creations brings me so much joy, and it helps other crafters see what is possible with a little yarn and patience.
Happy crocheting, friend. You have got this.
