
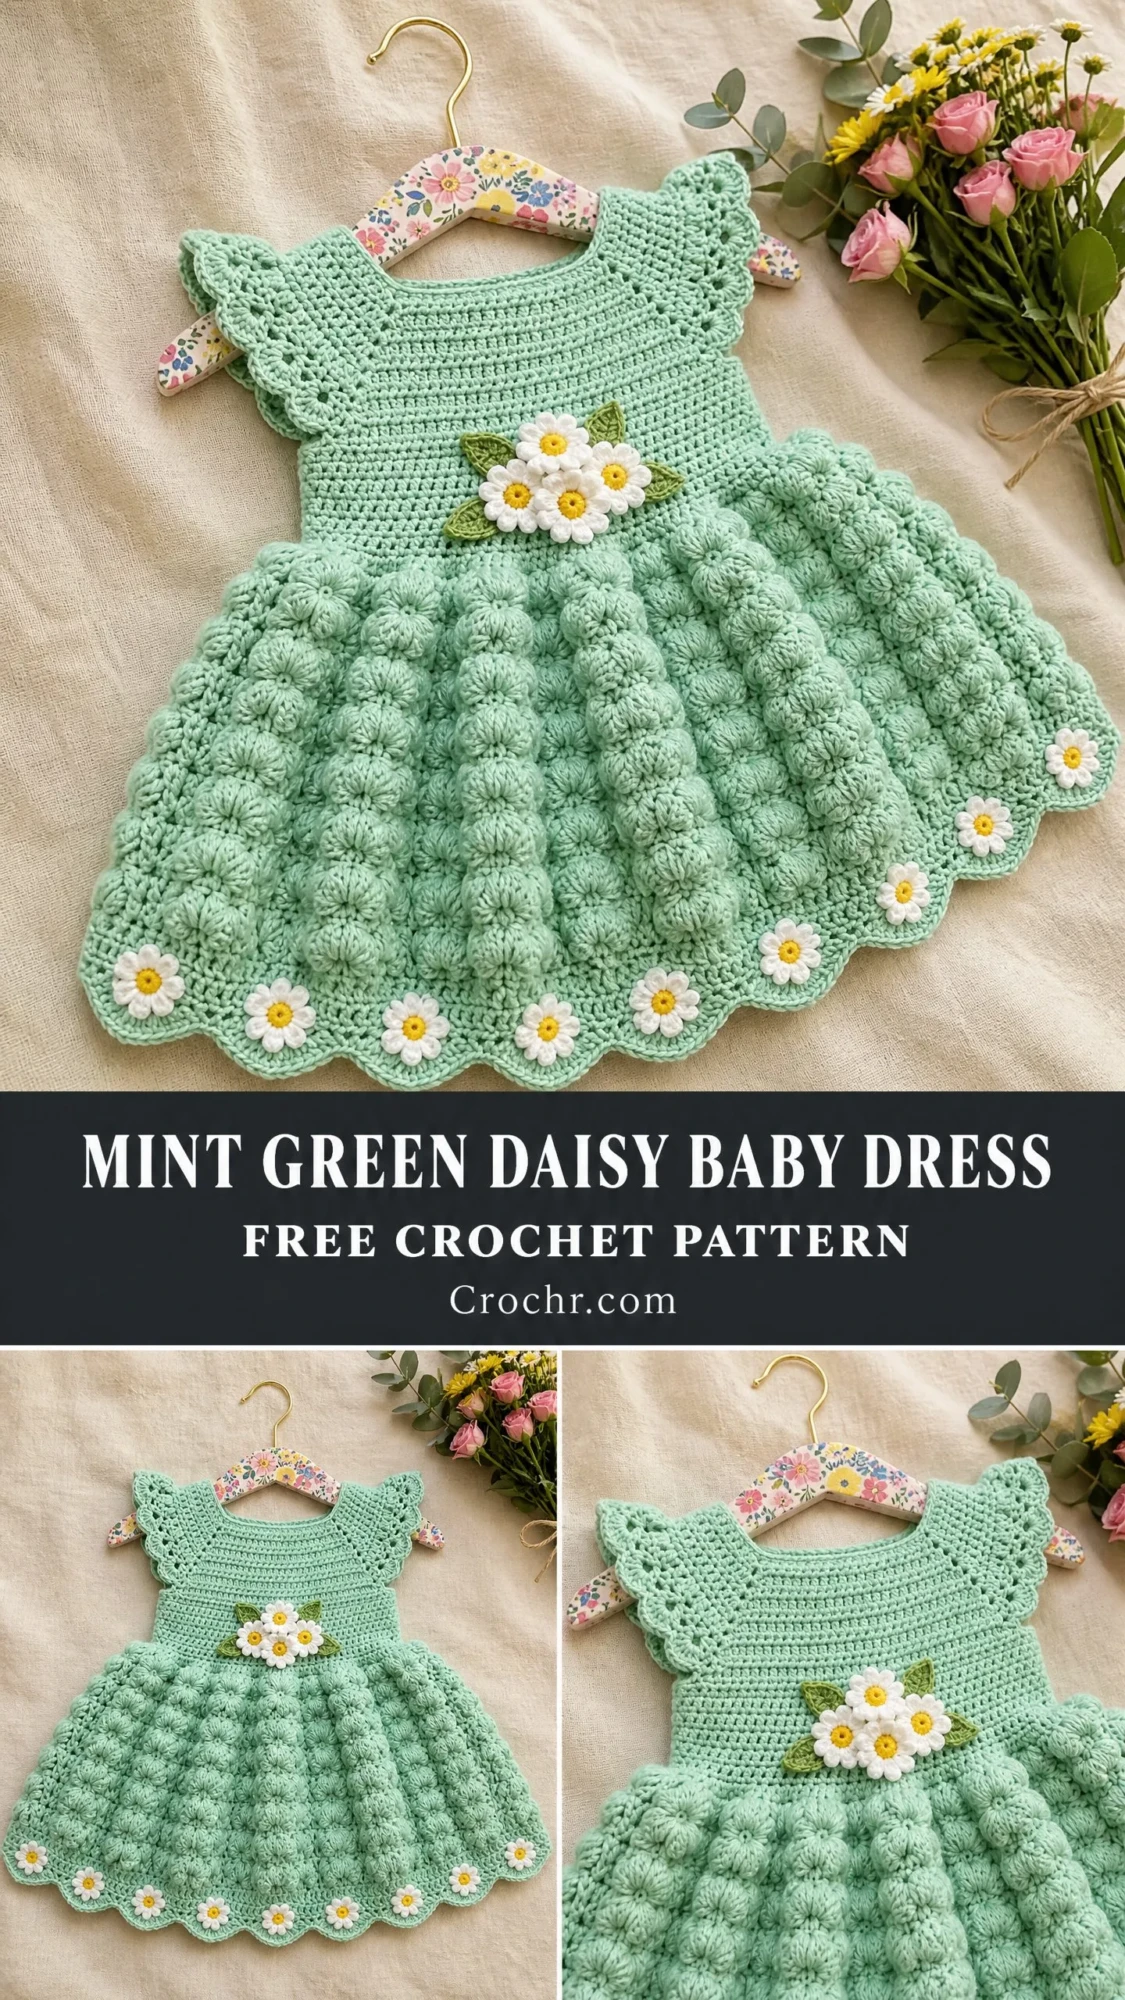
This baby dress features a fitted yoke, angel wing ruffle sleeves, a textured bubble stitch skirt, and sweet daisy appliques at the waist and hem. It uses worsted weight yarn and a 4.0 mm hook. The construction is top down in one piece with appliques added at the end.
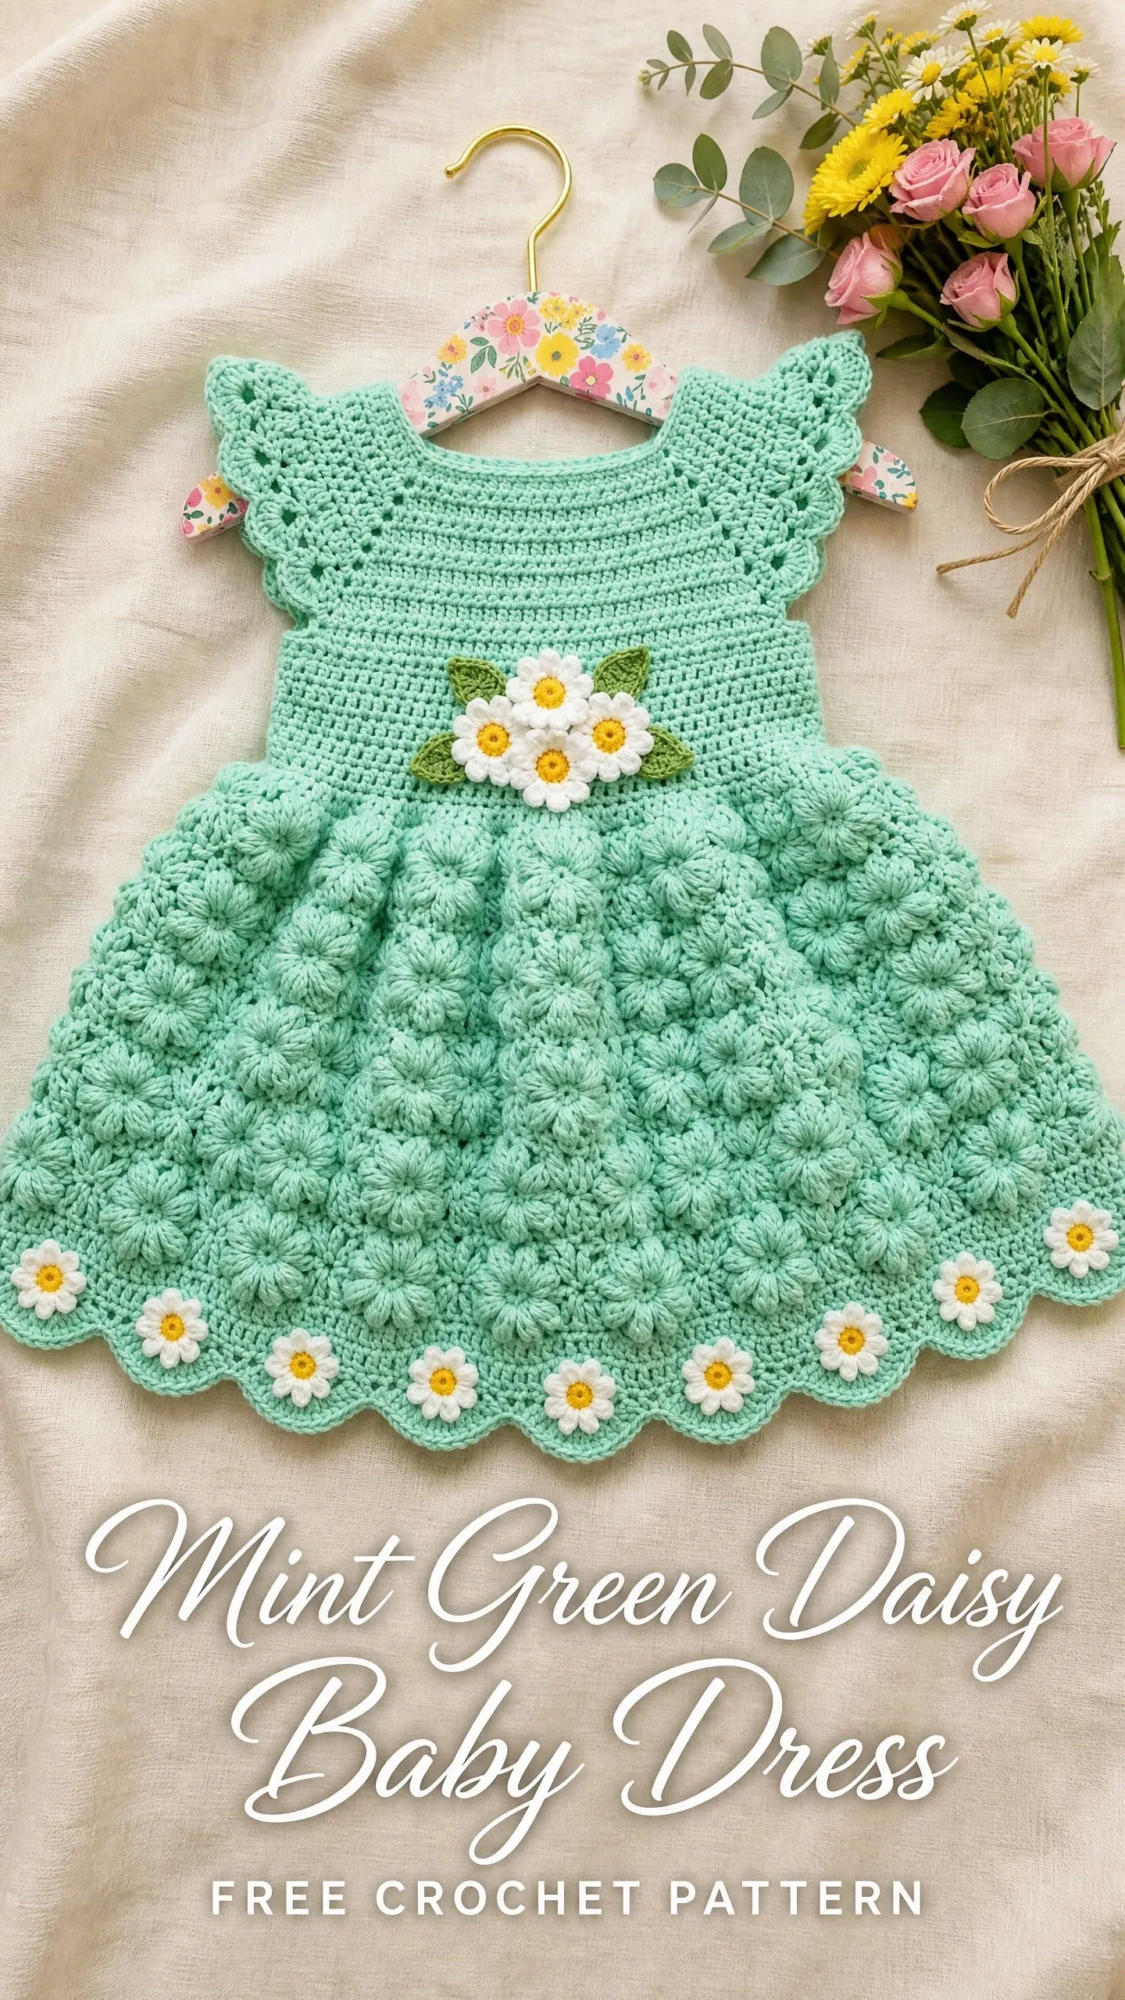
If you can work in the round and follow stitch counts, you can make this dress. The bubble puff stitch creates that gorgeous three dimensional texture in the skirt. The scalloped border and daisy flowers give it a fresh spring garden feel that photographs beautifully.
This pattern is sized for 6 to 12 months with customization tips included for sizing up or down. Let me walk you through every single step.
Why This Crochet Baby Dress Pattern Works So Well
The mint green colorway paired with white daisies and yellow centers creates a classic springtime look. The dress sits beautifully on a hanger for gifting or display. The back opening with button closure makes dressing a wiggly baby much easier.
I love that the yoke and skirt are worked as one continuous piece before the edging and appliques go on. No seaming the main body. The ruffle wing sleeves get added directly to the armhole openings, so there is no separate sleeve construction to worry about.
The bubble puff stitch in the skirt section is where this dress really shines. Those little rounded clusters create texture and fullness that makes the skirt flow beautifully. Once you get the rhythm down, it works up faster than you might expect.
Finished Measurements
Size: 6 to 12 months
Materials Needed for This Crochet Baby Dress
Yarn:
Hooks:
Notions:
Yarn Suggestions
Option 1: Lion Brand Pound of Love (100% premium acrylic, 1020 yards per 16 oz skein). Excellent stitch definition for the bubble stitch, machine washable, widely available in mint/sage tones. One skein provides more than enough yardage.
Option 2: Paintbox Yarns Simply DK used held double (100% acrylic, 137 yards per 50 g ball). Holding two strands together gives a soft worsted weight fabric. Choose their Spearmint Green shade. You will need approximately 3 balls of Color A.
Option 3: Cascade 220 Superwash (100% superwash wool, 220 yards per 100 g skein). Gives a slightly drapier hand and beautiful stitch definition. Machine washable on gentle. Two skeins of Color A in a mint or sage shade.
Avoid highly variegated or fuzzy yarns. They obscure the bubble stitch texture and the daisy applique details. For a baby garment, always choose machine washable fiber.
Gauge
With G-6 (4.0 mm) hook and Color A:
For the bubble stitch skirt section:
Gauge matters here. This is a fitted garment. Make a swatch of at least 4 by 4 inches before beginning. Adjust your hook size up or down as needed to match gauge.
Abbreviations
Special Stitches
Bubble Puff Stitch (BPS)
This stitch creates the beautiful rounded texture in the skirt. Here is how to work it:
Step 1: Yarn over and insert hook into indicated stitch or space.
Step 2: Yarn over and pull up a loop to approximately 0.5 inches (1.25 cm) in height. You now have 3 loops on hook.
Step 3: Yarn over and insert hook into the same stitch or space again.
Step 4: Yarn over and pull up a loop. You now have 5 loops on hook.
Step 5: Yarn over and insert hook into the same stitch or space one more time.
Step 6: Yarn over and pull up a loop. You now have 7 loops on hook.
Step 7: Yarn over and pull through all 7 loops on hook. One loop remains.
Step 8: Chain 1 to close and secure the bubble. This chain 1 counts as the top of the BPS and does not count as a separate stitch.
All BPS are worked on right side rounds. The closing chain 1 sits at the top of the puff and creates the rounded bubble texture.
Scallop Edging
Step 1: Skip 1 stitch, then work 5 dc into the next stitch to form a shell.
Step 2: Skip 1 stitch, then sl st into the next stitch.
Step 3: Repeat from Step 1 around.
Daisy Flower Applique
Step 1: With Color C, make a magic ring.
Step 2: Work 8 sc into the magic ring. Pull ring closed. (8 sc)
Step 3: Join Color B. Ch 8, sl st back into the base of that chain. This forms one petal.
Step 4: Repeat Step 3 seven more times, working each petal base into a different sc of the center ring. (8 petals total)
Step 5: Join with sl st to first sc. Fasten off, leaving a 12 inch tail for sewing.
Step 6: Flatten the flower so the petals radiate evenly. Use the tail to sew to garment.
Leaf Applique
Step 1: With Color D, ch 8.
Step 2: Sc in 2nd ch from hook, hdc in next ch, dc in next 2 ch, hdc in next ch, sc in next ch, 3 sc in last ch (tip of leaf).
Step 3: Working back along the opposite side of the foundation chain: sc in next ch, hdc in next ch, dc in next 2 ch, hdc in next ch, sc in last ch.
Step 4: Join with sl st to first sc. Fasten off, leaving a 10 inch tail for sewing.
Invisible Join
Step 1: Cut yarn leaving a 6 inch tail.
Step 2: Thread tail onto yarn needle.
Step 3: Insert needle from front to back under both loops of the first stitch of the round.
Step 4: Insert needle back down through the center of the last stitch of the round (into the back loop only).
Step 5: Pull snug to match stitch tension. This replaces the final sl st and creates a seamless join.
Pattern Notes Before You Begin
1. The yoke is worked in joined rounds from the neck down. The back has a gap of approximately 1 inch for the button closure. This opening is created by working the yoke in rows for the first 3 rounds and then joining into the round.
2. After the yoke is completed, stitches for the sleeves are placed on hold with stitch markers and the skirt is worked from the underarm in joined rounds.
3. The bubble stitch skirt is worked in joined rounds. Rounds alternate between BPS rounds (right side) and sc rounds (worked in blo to keep fabric RS facing).
4. The dress is designed to be worked with the right side always facing you during the skirt section.
5. Place stitch markers at the 4 raglan increase points in the yoke and move them up each round.
6. Do not turn unless specifically instructed.
7. Block the finished dress before attaching appliques for the most accurate placement.
Step by Step Instructions
Section 1: Neckband and Yoke Foundation
The neck opens at the back. Work the first 3 rows flat (back and forth), then join to work in the round.
Row 1 (RS): With Color A and G-6 hook, ch 50. Sc in 2nd ch from hook and in each ch across. Turn. (49 sc)
Row 2 (WS): Ch 1, sc in each st across. Turn. (49 sc)
Row 3 (RS): Ch 1, sc in each st across. Do not turn. (49 sc)
At the end of Row 3, the two short ends of the neckband will form the back opening. Join with sl st to the first st of Row 3 to form a ring, being careful not to twist.
Place stitch markers at the following positions to denote raglan dividers:
Section 2: Raglan Yoke Increases
Each raglan round increases 8 stitches total (2 increases at each of the 4 marked raglan points).
Raglan Increase Round (RIR): Sc in each st to 1 st before marker, inc in next st, sm, inc in marked st, sc in each st to 1 st before next marker, inc, sm, inc, continue in this manner at all 4 markers, sc to end of round, join with sl st. (total +8 sts per round)
Round 4 (RIR): Work Raglan Increase Round. (57 sc)
Round 5: Sc in each st around, join. (57 sc)
Round 6 (RIR): Work Raglan Increase Round. (65 sc)
Round 7: Sc in each st around, join. (65 sc)
Round 8 (RIR): Work Raglan Increase Round. (73 sc)
Round 9: Sc in each st around, join. (73 sc)
Round 10 (RIR): Work Raglan Increase Round. (81 sc)
Round 11: Sc in each st around, join. (81 sc)
Round 12 (RIR): Work Raglan Increase Round. (89 sc)
Round 13: Sc in each st around, join. (89 sc)
CHECKPOINT: After completing the yoke, the piece should measure approximately 3.75 to 4 inches from the neckline to the underarm, and approximately 18 inches around when the back opening is closed.
Section 3: Ruffle Wing Sleeves
Before separating the sleeves, work the ruffle edging along each sleeve opening. The sleeve stitches for each side are the 21 stitches between the raglan markers.
Right Sleeve Ruffle:
Step 1: Attach Color A with sl st to the first sleeve st on the right sleeve (the st immediately after Marker 1).
Step 2: Ch 3 (counts as first dc).
Step 3: Work 2 dc in the same st. (shell of 3 dc started)
Step 4: Sc in next st.
Step 5: Work 3 dc in next st (shell).
Step 6: Sc in next st.
Step 7: Rep Steps 5 and 6 across all 21 sleeve stitches, ending with 3 dc in last st.
Step 8: Join with sl st to top of ch 3. Fasten off.
With 21 sleeve stitches, you will work approximately 7 shells of 3 dc alternating with sc stitches. The ruffle curves naturally to create the angel wing appearance.
Left Sleeve Ruffle: Repeat all steps for the right sleeve using the 21 left sleeve stitches.
Section 4: Separating Sleeves from Body
Round 14 (Separation Round): With Color A, starting at the right back edge (after the back opening), sc across the right back stitches (14 sts), skip the 21 right sleeve sts (place on holder or mark with yarn), ch 4 (underarm bridge), sc across the 18 front sts, skip the 21 left sleeve sts (place on holder or mark), ch 4 (underarm bridge), sc across the 15 left back sts. Join with sl st to first sc. (14 + 4 + 18 + 4 + 15 = 55 sts including chain bridges)
Round 15: Sc in each st and in each ch across all, join. (55 sc)
Round 16: Sc in each st around, join. (55 sc)
Round 17: Working increases to prepare for skirt shaping: (sc in next 4 sts, inc in next st) 11 times. Join. (66 sc)
Round 18: Sc in each st around, join. (66 sc)
CHECKPOINT: At the end of Round 18, the chest/body section should measure approximately 4 inches from the underarm to the base of the yoke, and approximately 18 inches around the chest.
Section 5: Waistband
Rounds 19 to 21: Sc in each st around, join. (66 sc each round)
These 3 rounds form the waistband where the daisy appliques at the waist will be attached after blocking.
Section 6: Skirt Increases and Bubble Stitch
Round 22 (Skirt increase): (Sc in next 5 sts, inc in next st) 11 times. Join. (77 sc)
Round 23: Sc in each st around, join. (77 sc)
Round 24 (Skirt increase): (Sc in next 6 sts, inc in next st) 11 times. Join. (88 sc)
Round 25: Sc in each st around, join. (88 sc)
Round 26 (Skirt increase): (Sc in next 7 sts, inc in next st) 11 times. Join. (99 sc)
Round 27: Sc in each st around, join. (99 sc)
Round 28 (BPS Round 1): Ch 1. (BPS in next st, sc in next st) 49 times, BPS in last st. Join. (50 BPS and 49 sc over 99 sts)
Round 29 (sc round): Sc in top of each BPS and in each sc across. Join. (99 sc)
Round 30 (BPS Round 2): Same as Round 28. (99 working sts)
Round 31 (sc round): Sc across. Join. (99 sc)
Round 32 (Increase round): (Sc in next 10 sts, inc) 9 times. Join. (108 sc)
Round 33 (BPS Round 3): Ch 1. (BPS in next st, sc in next st) 54 times. Join. (54 BPS, 54 sc = 108 working sts)
Round 34 (sc round): Sc in top of each BPS and in each sc. Join. (108 sc)
Round 35 (BPS Round 4): Same as Round 33. (108 working sts)
Round 36 (sc round): Sc across. Join. (108 sc)
Round 37 (Increase round): (Sc in next 11 sts, inc) 9 times. Join. (117 sc)
Round 38 (BPS Round 5): Ch 1. (BPS in next st, sc in next st) 58 times, BPS in next st. Join. (59 BPS, 58 sc = 117 working sts)
Round 39 (sc round): Sc across. Join. (117 sc)
Round 40 (BPS Round 6): Same as Round 38. (117 working sts)
Round 41 (sc round): Sc across. Join. (117 sc)
Round 42 (adjusted): (Sc in next 12 sts, inc) 8 times, sc in next 12 sts, dec. Join. (124 sc)
CHECKPOINT: After Round 42, the skirt should measure approximately 6.5 to 7 inches from underarm to current row. The hem circumference should measure approximately 28 inches unstretched.
Section 7: Hem Edging and Scallop Border
Round 43: Sc in each st around. Join. (124 sc)
Round 44 (Scallop Border): Sl st in first st. (Skip 1 st, 5 dc in next st, skip 1 st, sl st in next st) 31 times. Join with sl st to first sl st. Fasten off. (31 shells over 124 sts)
The scallop border should produce 31 evenly spaced fan shells around the hem.
Section 8: Back Closure
Right Back Edging:
Row 1: With Color A, attach yarn at the bottom right edge of the back opening. Sc evenly up the right back edge, working approximately 1 sc per row end. Turn.
Row 2: Ch 1, sc in each st back down. Fasten off.
Left Back Button Band:
Row 1: Attach yarn at the top left back edge. Sc evenly down the left back edge. Turn.
Row 2: Ch 1, sc in first 2 sts, (ch 2, sk 2 sts, sc in next 4 sts) 2 times, ch 2, sk 2 sts, sc to end. These ch 2 spaces are the buttonholes. Turn.
Row 3: Ch 1, sc in each st and 2 sc in each ch 2 sp across. Fasten off.
Sew 2 to 3 buttons onto the right back band opposite the buttonholes.
Section 9: Daisy Appliques
Waist appliques: Make 3 daisy flowers (Color B petals, Color C center) and 2 leaves (Color D). Arrange 3 daisies in a cluster at the center front waistband, with 1 leaf on each side of the cluster.
Hem appliques: Make 7 daisy flowers (Color B petals, Color C center). Space them evenly along the hem scallop border, positioning each daisy to sit centered above a scallop shell. With 31 shells, place 1 daisy centered above every 4th to 5th shell for 7 evenly spaced daisies.
Pin all appliques in place before sewing. Use a yarn needle and the long tail on each applique to sew around the base of the center ring to attach securely to the garment. Weave in all ends on the wrong side.
Section 10: Finishing and Blocking
Step 1: Weave in all yarn ends securely on the wrong side of the dress.
Step 2: Fill a basin with cool water. Submerge the dress and gently press to saturate. Do not wring.
Step 3: Roll the dress in a clean dry towel and press to remove excess water.
Step 4: Lay flat on a foam blocking mat. Pin the dress to the schematic dimensions: chest 18 in, total length 12.5 in, hem width approximately 14 in from side to side laid flat. Pin the scallop shells open so each shell fans out neatly.
Step 5: Allow to dry completely (12 to 24 hours depending on humidity).
Step 6: Once dry, attach appliques as described in Section 9.
Step 7: Sew buttons onto the back button band.
Size Customization Tips
To size up to 12 to 18 months: Add 2 additional raglan increase rounds in the yoke (Rounds 14 and 15 before separation) for a 97 stitch total before separation, giving a chest circumference of approximately 20 inches. Add 2 additional BPS rounds to the skirt for a longer hem. The total length will be approximately 14 inches.
To size down to Newborn to 3 months: Remove 2 raglan increase rounds, giving 73 stitches before separation for a chest circumference of approximately 16 inches. Remove the Round 42 increase round. Total length will be approximately 11 inches.
To lengthen the skirt: Add additional paired rounds (one BPS round + one sc round) before the final increase and scallop border. Each pair adds approximately 0.75 inches of length.
Care Instructions
You Did It!
Thank you so much for choosing this pattern. I really hope you love making this sweet little dress as much as I loved designing it. The bubble stitch skirt and those cheerful daisies make it such a special handmade gift.
If you make one, I would absolutely love to see it! Tag me on Instagram or share a photo in my Facebook group. Seeing your finished projects is honestly the best part of my day.
Save this mint green daisy baby dress crochet pattern to your Pinterest boards so you can find it when you are ready to start. And if you have any questions along the way, drop a comment below. I am always happy to help!
You Might Also Like
- Lavender Garden Granny Square Bag Free Crochet Pattern
- Pastel Rainbow Dreamy Clutch Free Crochet Pattern
- Cozy Pumpkin Couple Amigurumi Free Crochet Pattern
- Sunshine Yellow Kitty Tote Bag Free Crochet Pattern
