
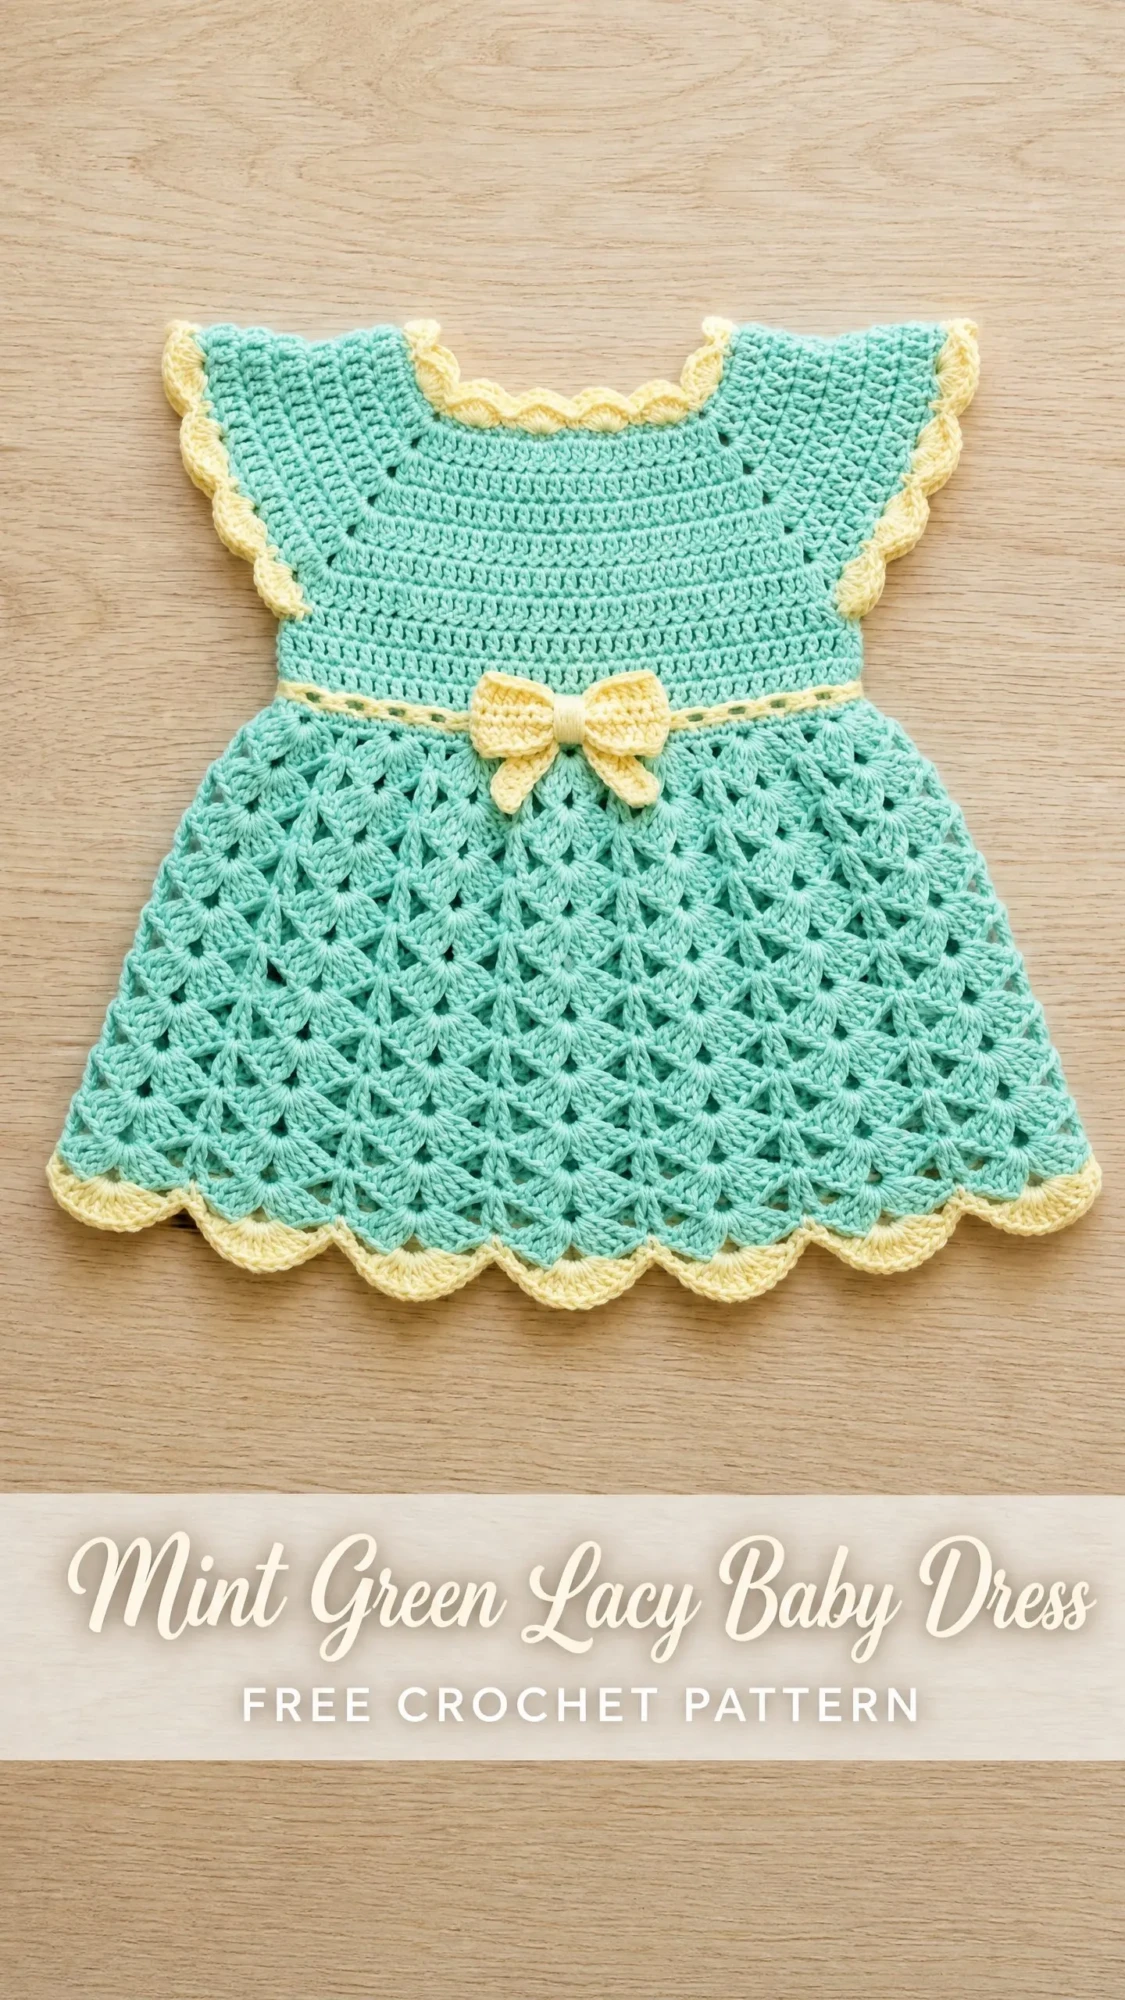
This is THE baby dress pattern you’ve been waiting for. SERIOUSLY. I’m talking about a gorgeous, lacy, absolutely adorable little dress that looks like you spent weeks on it but actually comes together in a weekend. The shell stitch skirt is a total showstopper, and that delicate yellow scallop edging? Chef’s kiss.
If you’ve got a baby shower coming up, a new niece or nephew on the way, or you just want to make something that will have everyone asking "where did you BUY that?", this is your pattern. The top-down construction means almost zero seaming, which is honestly my favorite kind of project.
Whether you’re an intermediate crocheter looking for your next challenge or a confident beginner ready to level up, this dress delivers. Let’s dive in and make something beautiful together.
Why You’ll Love This Baby Dress Crochet Pattern
This mint green lacy baby dress combines classic construction techniques with stunning visual appeal. The yoke is worked seamlessly from the neckline down using simple single crochet stitches with raglan shaping. Then the magic happens when you transition into that gorgeous open shell stitch pattern for the flared skirt.
What makes this pattern special:
The entire dress is worked top-down in joined rounds. This means you try it on as you go (well, hold it up to a onesie at least) and adjust the length easily. No piecing together separate panels. No seaming sleeves. Just smooth, continuous crocheting from collar to hem.
The contrasting pale yellow edging transforms this from a simple dress into a showpiece. Those scalloped edges on the neckline, sleeves, waist, and hem create such a polished, professional finish. And that little bow at the center waist? Absolutely precious.
Skill Level and Time Commitment
I’m calling this one intermediate level. You should be comfortable working in joined rounds, reading a stitch pattern repeat, and managing color changes. If you’ve completed a few projects and feel confident with basic stitches, you can absolutely tackle this.
Time estimate: 12 to 18 hours for an experienced crocheter working the newborn to 3 month size. Larger sizes may take up to 22 hours. I recommend breaking this into sessions. Do the yoke one evening, the skirt body another, then finish with all the pretty edgings.
Finished Sizes
This pattern includes three sizes:
Newborn to 3 months: chest circumference 14 inches (35.5 cm), total length from shoulder to hem 11 inches (28 cm)
3 to 6 months: chest circumference 16 inches (40.5 cm), total length 12.5 inches (32 cm)
6 to 12 months: chest circumference 18 inches (45.5 cm), total length 14 inches (35.5 cm)
The main instructions follow the 3 to 6 month size. Adjustments for the other sizes appear in parentheses throughout, formatted as (newborn / 3-6 months / 6-12 months).
Materials You’ll Need
Yarn A (main color): approximately 200 (175 / 200 / 240) yards of DK weight yarn in mint green
Yarn B (contrast): approximately 65 (55 / 65 / 80) yards of DK weight yarn in pale yellow
Crochet hook: US size E-4 / 3.5 mm, or whatever size you need to hit gauge
Additional supplies:
Yarn recommendations I love for this project:
1. Paintbox Yarns Simply DK (100% acrylic, 276 yards per 100g skein) in Spearmint Green and Buttercup Yellow. Excellent stitch definition, machine washable, and easy to find.
2. Lion Brand Pound of Love (100% premium acrylic, 1020 yards per 454g) in Pastel Green and Pastel Yellow. Super economical if you’re making multiple gifts.
3. Scheepjes Catona (100% mercerized cotton, 62 yards per 25g ball) in Crystaltine and Lemon. Cotton gives a lovely drape and crispness to the shell pattern. Perfect for warmer climates.
Quick tip: For baby garments, always prioritize machine washable fibers. New parents will thank you. Avoid loosely plied yarns because they can make the shell pattern look mushy.
Gauge (Don’t Skip This!)
20 single crochet (sc) = 4 inches (10 cm)
10 rows of sc = 4 inches (10 cm)
One shell repeat (5 double crochet shell plus chain-2 space plus sc) over 6 stitches = approximately 1.2 inches (3 cm) wide
Gauge matters for wearable items. Make a swatch at least 5 inches square in single crochet, wash it, block it, then measure. Adjust your hook size up or down until you match.
Abbreviations and Stitch Definitions
Let me break down every stitch you’ll use in this crochet tutorial:
ch = chain: Yarn over, pull through the loop on your hook. This creates the foundation and is used for turning and spacing.
sl st = slip stitch: Insert hook, yarn over, pull through both the stitch and the loop on your hook in one motion. Used for joining rounds.
sc = single crochet: Insert hook into stitch, yarn over and pull up a loop (2 loops on hook), yarn over and pull through both loops. A short, tight stitch.
hdc = half double crochet: Yarn over, insert hook, yarn over and pull up a loop (3 loops on hook), yarn over and pull through all 3 loops. Slightly taller than sc.
dc = double crochet: Yarn over, insert hook, yarn over and pull up a loop (3 loops), yarn over and pull through 2 loops (2 loops remain), yarn over and pull through remaining 2 loops. This is your main skirt stitch.
st(s) = stitch(es)
sp = space
ch-sp = chain space
beg = beginning
rep = repeat
rem = remaining
inc = increase (work 2 sc in same stitch)
yo = yarn over
pm = place marker
sm = slip marker
RS = right side
WS = wrong side
rnd = round
sk = skip
Special Stitches Explained
Shell Stitch
Work 5 double crochet stitches all into the same stitch or space. This creates one "shell" unit. In this pattern, each shell is separated by a single crochet and a chain-2 space, which creates the open, lacy fabric of the skirt.
Scallop Edging
This creates those beautiful wavy edges you see on the finished dress:
Step 1: With contrast yarn, join with slip stitch to any stitch.
Step 2: Chain 1, single crochet in same stitch.
Step 3: Skip 1 stitch, work 5 double crochet in next stitch (this is one scallop shell).
Step 4: Skip 1 stitch, single crochet in next stitch.
Step 5: Repeat steps 3 and 4 around.
Step 6: Join with slip stitch to first single crochet. Fasten off.
Each scallop consumes 4 stitches from the working edge.
Crocheted Bow
With Yarn B, chain 21.
Row 1: Single crochet in 2nd chain from hook and in each chain across. Turn. (20 sc)
Row 2: Chain 1, single crochet in each stitch across. Turn. (20 sc)
Row 3: Chain 1, single crochet in each stitch across. Turn. (20 sc)
Fasten off leaving a 12-inch tail. Pinch the rectangle at its center. Wrap the tail yarn around the pinch point 6 times tightly and secure with several knots to form the bow’s center knot. Use the remaining tail to sew the bow to the dress.
Waist Tie (Optional)
With Yarn B, chain 120 or desired length. Slip stitch in 2nd chain from hook and in each chain across. Fasten off. Weave through waist eyelet row.
Pattern Notes Before You Start
The dress is worked top-down in joined rounds. You’ll use a turning chain of 1 for single crochet rounds. The yoke begins at the neckline with eight raglan increase points (four pairs) shaping the shoulders.
After completing the yoke, you’ll hold the sleeve stitches on markers and continue the body in the round. The shell stitch skirt begins immediately below the underarm join.
Color changes occur at the neckline edging, sleeve edgings, waist eyelet row, and hem edging. Yarn B is joined and fastened off each time. Never carry it.
All rounds are worked with the right side facing unless noted.
Place stitch markers at 4 raglan points: right front/sleeve join, right sleeve/back join, left back/sleeve join, left sleeve/front join. Move markers up each round.
Step by Step Instructions
Section 1: Neckline and Yoke
The yoke is worked in single crochet with raglan increases every other round. Eight increase stitches are added every increase round.
With Yarn A, chain 61 (55 / 61 / 67). Taking care not to twist, slip stitch to first chain to form ring.
Round 1 (foundation): Chain 1, single crochet in each chain around, slip stitch to first single crochet to join. (60 / 54 / 60 / 66 sc)
From this point, all sizing notes are given as (newborn / 3-6 months / 6-12 months). The main written instructions follow the 3-6 month size which has 60 stitches after Round 1.
Round 2 (marker placement): Chain 1. Single crochet in first 8 stitches (left front section), place marker in next stitch, single crochet in next 2 stitches (raglan seam pair), place marker in next stitch, single crochet in next 14 stitches (sleeve), place marker in next stitch, single crochet in next 2 stitches, place marker in next stitch, single crochet in next 14 stitches (back), single crochet in next 8 stitches (right front), slip stitch to join. (60 sc)
Round 3 (increase round 1): Chain 1. Single crochet in each stitch to 1 stitch before first marker, 2 single crochet in next stitch, slip marker to working loop, 2 single crochet in next stitch, single crochet to 1 stitch before next marker, 2 single crochet in next stitch, slip marker forward, 2 single crochet in next stitch, single crochet to 1 stitch before next marker, 2 single crochet in next stitch, slip marker forward, 2 single crochet in next stitch, single crochet to 1 stitch before next marker, 2 single crochet in next stitch, slip marker forward, 2 single crochet in next stitch, single crochet to end, slip stitch to join. (68 sc)
Round 4 (plain round): Chain 1, single crochet in each stitch around, slip stitch to join. (68 sc)
Round 5 (increase round 2): Work same increase logic as Round 3. (76 sc)
Round 6 (plain round): Chain 1, single crochet in each stitch around, slip stitch to join. (76 sc)
Round 7 (increase round 3): Work increases at all 4 marker pairs. (84 sc)
Round 8 (plain round): Chain 1, single crochet in each stitch around, slip stitch to join. (84 sc)
Round 9 (increase round 4): Work increases at all 4 marker pairs. (92 sc)
Round 10 (plain round): Chain 1, single crochet in each stitch around, slip stitch to join. (92 sc)
Round 11 (increase round 5): Work increases at all 4 marker pairs. (100 sc)
Round 12 (plain round): Chain 1, single crochet in each stitch around, slip stitch to join. (100 sc)
Size notes: For newborn, stop after Round 10 (92 sc). For 3-6 months, stop after Round 12 (100 sc). For 6-12 months, work two additional increase rounds alternated with plain rounds for a total of 7 increase rounds (116 sc).
Checkpoint: The yoke should measure approximately 3.5 inches (9 cm) from the neckline edge to the bottom.
Section 2: Underarm Separation
Round 13 (separation round): Chain 1. Single crochet across 14 left front stitches, chain 4 (underarm bridge chain), skip the next 24 sleeve stitches (place these on a stitch holder or scrap yarn), single crochet across 24 back stitches, chain 4, skip next 24 right sleeve stitches (place on holder), single crochet across 14 right front stitches, slip stitch to first single crochet to join.
Round 14 (underarm join round): Chain 1. Single crochet in each single crochet and each chain stitch around. At each bridge chain midpoint, work single crochet 2 together to blend the underarm curves. Slip stitch to join. (60 sc)
For newborn: 52 sc. For 6-12 months: 72 sc. Adjust to the nearest multiple of 6 if needed.
Important: Your stitch count MUST be divisible by 6 for the shell pattern. If it’s not, work one round of even single crochet and adjust by working single crochet 2 together or increases at even intervals.
Section 3: Waist Band and Eyelet Row
Rounds 15 and 16: Chain 1, single crochet in each stitch around, slip stitch to join. (60 sc each)
Round 17 (Yarn B eyelet round): Fasten off Yarn A. Join Yarn B with slip stitch to any stitch. Chain 3 (counts as double crochet), skip 1 stitch, double crochet in next stitch, chain 1, skip 1 stitch, repeat (double crochet in next, chain 1, skip 1) around, slip stitch to top of beginning chain-3 to join. (30 dc, 30 ch-1 spaces = 60 total)
Round 18 (Yarn B mini scallop): Chain 1, single crochet in first chain-1 space, 3 double crochet in next double crochet, single crochet in next chain-1 space, repeat around, slip stitch to join. Fasten off Yarn B. (60 contact points)
Round 19: Join Yarn A with slip stitch to any single crochet between mini scallops. Chain 1, single crochet in same stitch, single crochet in each of next 2 double crochet, single crochet in next single crochet, repeat around. (60 sc)
Checkpoint: From neckline to bottom of waist band should measure approximately 5.5 inches (14 cm).
Section 4: Shell Stitch Skirt
Round 20 (transition to shell): Chain 1. Single crochet in first stitch, skip 2 stitches, 5 double crochet in next stitch, skip 2 stitches, repeat (single crochet in next stitch, skip 2 stitches, 5 double crochet in next stitch, skip 2 stitches) around, slip stitch to first single crochet. (10 sc + 10 shells)
Round 21: Chain 3 (counts as first double crochet), 2 double crochet in same stitch (half shell at beginning), single crochet in center double crochet of next shell, chain 2, single crochet in center double crochet of next shell, 5 double crochet in next single crochet (full shell), repeat (chain 2, single crochet in center double crochet of next shell, 5 double crochet in single crochet) 8 times, chain 2, single crochet in center double crochet of last shell, 2 double crochet in same stitch as chain-3 beginning, slip stitch to top of chain-3 to complete the beginning half shell. (10 shells, 10 sc, 10 ch-2 spaces)
Round 22: Chain 1, single crochet in same space, 5 double crochet in next single crochet, single crochet in next chain-2 space, repeat (5 double crochet in next single crochet, single crochet in next chain-2 space) around, slip stitch to first single crochet. (10 shells, 10 sc)
Rounds 23 through 28: Continue alternating Round 21 and Round 22 patterns.
For newborn: work Rounds 20 through 26 before increase.
For 3-6 months: work Rounds 20 through 28 before increase.
For 6-12 months: work Rounds 20 through 30 before increase.
Round 29 (increase shell round): Chain 1, single crochet in slip stitch space, skip 2 stitches, 7 double crochet in next single crochet, skip 2 stitches, repeat around, slip stitch to join. (10 sc + 10 shells of 7 dc = 80 contact points)
From Round 29 forward, the shell pattern uses 8 stitches per repeat.
Round 30: Chain 3 (counts as double crochet), 3 double crochet in same stitch, single crochet in center (4th) double crochet of next shell, chain 2, single crochet in center double crochet of next shell, 7 double crochet in next single crochet, repeat around, slip stitch to chain-3 to join.
Round 31: Chain 1, single crochet in slip stitch space, 7 double crochet in next single crochet, single crochet in next chain-2 space, repeat around, slip stitch to join. (80 contact stitches)
Rounds 32 through 36: Continue in established 7-double crochet shell pattern, alternating Rounds 30 and 31.
For 6-12 months: work through Round 39 before hem edging.
Checkpoint: The skirt from waist to bottom should measure approximately 5.5 inches (14 cm) for the 3-6 month size. Total length from neckline to bottom should be approximately 11 to 12.5 inches.
Section 5: Hem Edging
Fasten off Yarn A. Join Yarn B with slip stitch to any single crochet between shells.
Round 1 of hem (Yarn B): Chain 1, single crochet in same stitch, 5 double crochet in center double crochet of next shell, single crochet in next chain-2 space (or single crochet), repeat around, slip stitch to first single crochet. (10 scallops)
Round 2 of hem (Yarn B): Chain 1, single crochet in same single crochet, 3 half double crochet in 2nd double crochet of shell, half double crochet in center double crochet, 3 half double crochet in 4th double crochet, single crochet in single crochet, repeat around, slip stitch.
Fasten off Yarn B. Weave in ends on wrong side.
Section 6: Sleeve Edging
Place the 24 held sleeve stitches for one sleeve on your hook.
Round 1 (Yarn A, optional): Chain 1, single crochet in each stitch around, single crochet 2 into each of the 4 underarm bridge chain stitches to pick up evenly. Slip stitch to join. (28 sc)
Fasten off Yarn A. Join Yarn B.
Round 2 (Yarn B scallop): Chain 1, single crochet in first stitch, skip 1 stitch, 5 double crochet in next stitch, skip 1 stitch, single crochet in next stitch, repeat around. Slip stitch to join. (7 scallops)
Fasten off Yarn B. Repeat for second sleeve.
Section 7: Neckline Edging
Join Yarn B with slip stitch to any stitch of the original foundation chain (the neckline edge of Round 1).
Working into the underside of the foundation chain:
Round 1 (Yarn B): Chain 1, single crochet in each chain around. Slip stitch to join. (60 sc for 3-6 months)
Round 2 (Yarn B scallop): Chain 1, single crochet in first stitch, skip 1 stitch, 5 double crochet in next stitch, skip 1 stitch, single crochet in next stitch, repeat around. Slip stitch to join. (15 scallops)
Fasten off Yarn B. Weave in all ends.
Section 8: Attach the Bow
Using the bow you made earlier, position it at the center front of the waist eyelet row. Thread the tail onto a tapestry needle and sew the bow to the dress front through several stitches on the wrong side. Knot firmly and weave in all ends.
Section 9: Waist Cord
Thread your crocheted cord or ribbon through the eyelet holes of Round 17. Begin and end at the center front, tying a small bow on top of the crocheted bow. Trim ribbon ends at an angle to prevent fraying.
Optional Back Closure
If you prefer a back-opening dress, work the yoke back and forth in rows instead of rounds. At the end of each row, chain 1 and turn. After underarm separation, join the fronts to work the body in the round.
Along the back opening edge, work a button band: join Yarn B, work 3 rows of single crochet along each edge. On one edge, create button loops by chaining 3 and skipping 1 stitch at evenly spaced intervals for 3 buttons. Sew buttons to the opposite band.
This is optional. The dress can also be slipped over the baby’s head as written.
Finishing and Blocking
Weave in all remaining ends on the wrong side using your tapestry needle. Run each tail through at least 2 inches of adjacent stitches in different directions to prevent unraveling.
For acrylic yarn: Wet-block by submerging the dress in cool water. Gently squeeze out excess water without wringing. Pin to a foam mat or towel at the finished dimensions and allow to dry completely before unpinning.
For cotton yarn: Wet-block the same way. Cotton benefits from slightly longer blocking time. You may press lightly with a cool iron and damp pressing cloth while still damp.
Very important: Pin the hem scallops individually outward so each petal fans open fully. Pin the sleeve and neckline scallops the same way. This step is essential for achieving that gorgeous lacy look.
Care Instructions
Machine wash on gentle cycle in cold water if using acrylic yarn. Lay flat to dry. Do not tumble dry. Hand wash in cool water with mild soap for cotton yarn. Do not iron directly on crochet stitches. Do not bleach. Store folded rather than hung to prevent the skirt from stretching.
Size Customization Tips
To go larger: Add 2 more increase rounds to the yoke (each adds 8 single crochet), then add 4 single crochet evenly around in the separation round. Work 2 additional shell rounds in the skirt body.
To go smaller: Remove 2 yoke increase rounds. Reduce shell count in skirt by 2 rounds.
To lengthen without widening: Add plain shell rounds before the increase shell round. Each round adds approximately half an inch of length.
To shorten: Omit the increase shell rounds and work the 5-double crochet shell throughout.
Always verify that your stitch count before the shell section is a multiple of 6 (for 5-dc shells) or a multiple of 8 (for 7-dc shells).
Final Thoughts on This Baby Dress Crochet Pattern
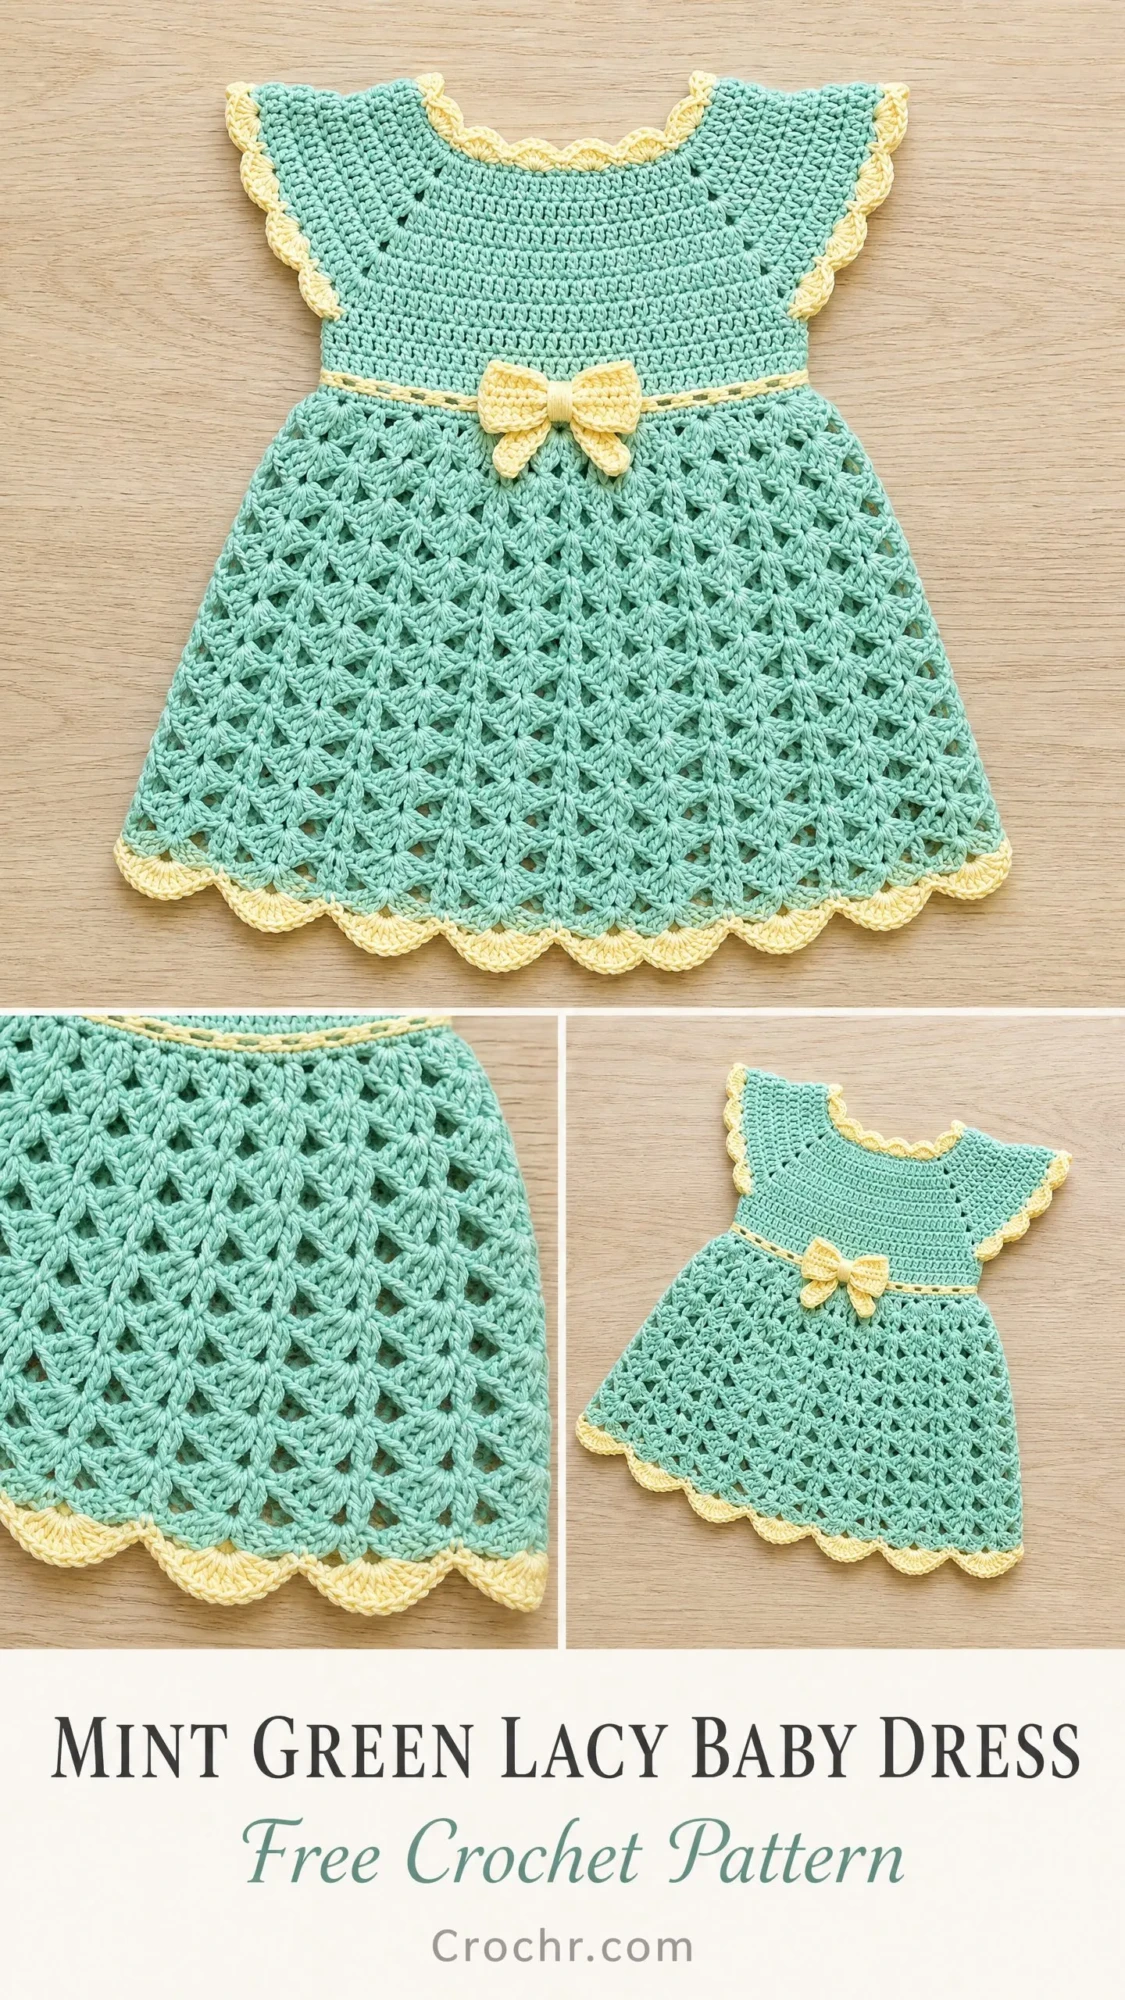
I absolutely love how this mint green lacy baby dress comes together. The combination of the structured yoke and that dreamy, flowy shell stitch skirt creates something truly special. It’s the kind of handmade gift that becomes a keepsake.
Take your time with this one. Work through each section carefully, check your stitch counts at the checkpoints, and don’t rush the blocking at the end. Those little details make all the difference.
Thank you so much for choosing this pattern. I’d love to see your finished dresses! Tag me on Instagram or share in my Facebook group. Nothing makes my day like seeing your gorgeous creations.
If you loved this pattern, save it to your Pinterest boards so you can find it when you’re ready to start. And please drop a comment below if you make one. I’d love to hear which size you chose and how it turned out!
You Might Also Like
- Dusty Rose Boho Romper Free Crochet Pattern
- Dusty Rose Bobble Purse Free Crochet Pattern
- Sunshine Yellow Duckling Granny Square Blanket Free Pattern
- Sunset Garden Floral Crochet Blouse Free Pattern
