
Last summer, my sister called me in a panic three weeks before her baby shower. She had seen this gorgeous vintage-style baby dress online and wanted one for her little girl’s homecoming outfit. "Can you make something like that?" she asked. And honestly, I had never tackled anything quite so delicate before. But I grabbed my hook, some soft mint cotton yarn, and figured it out stitch by stitch.
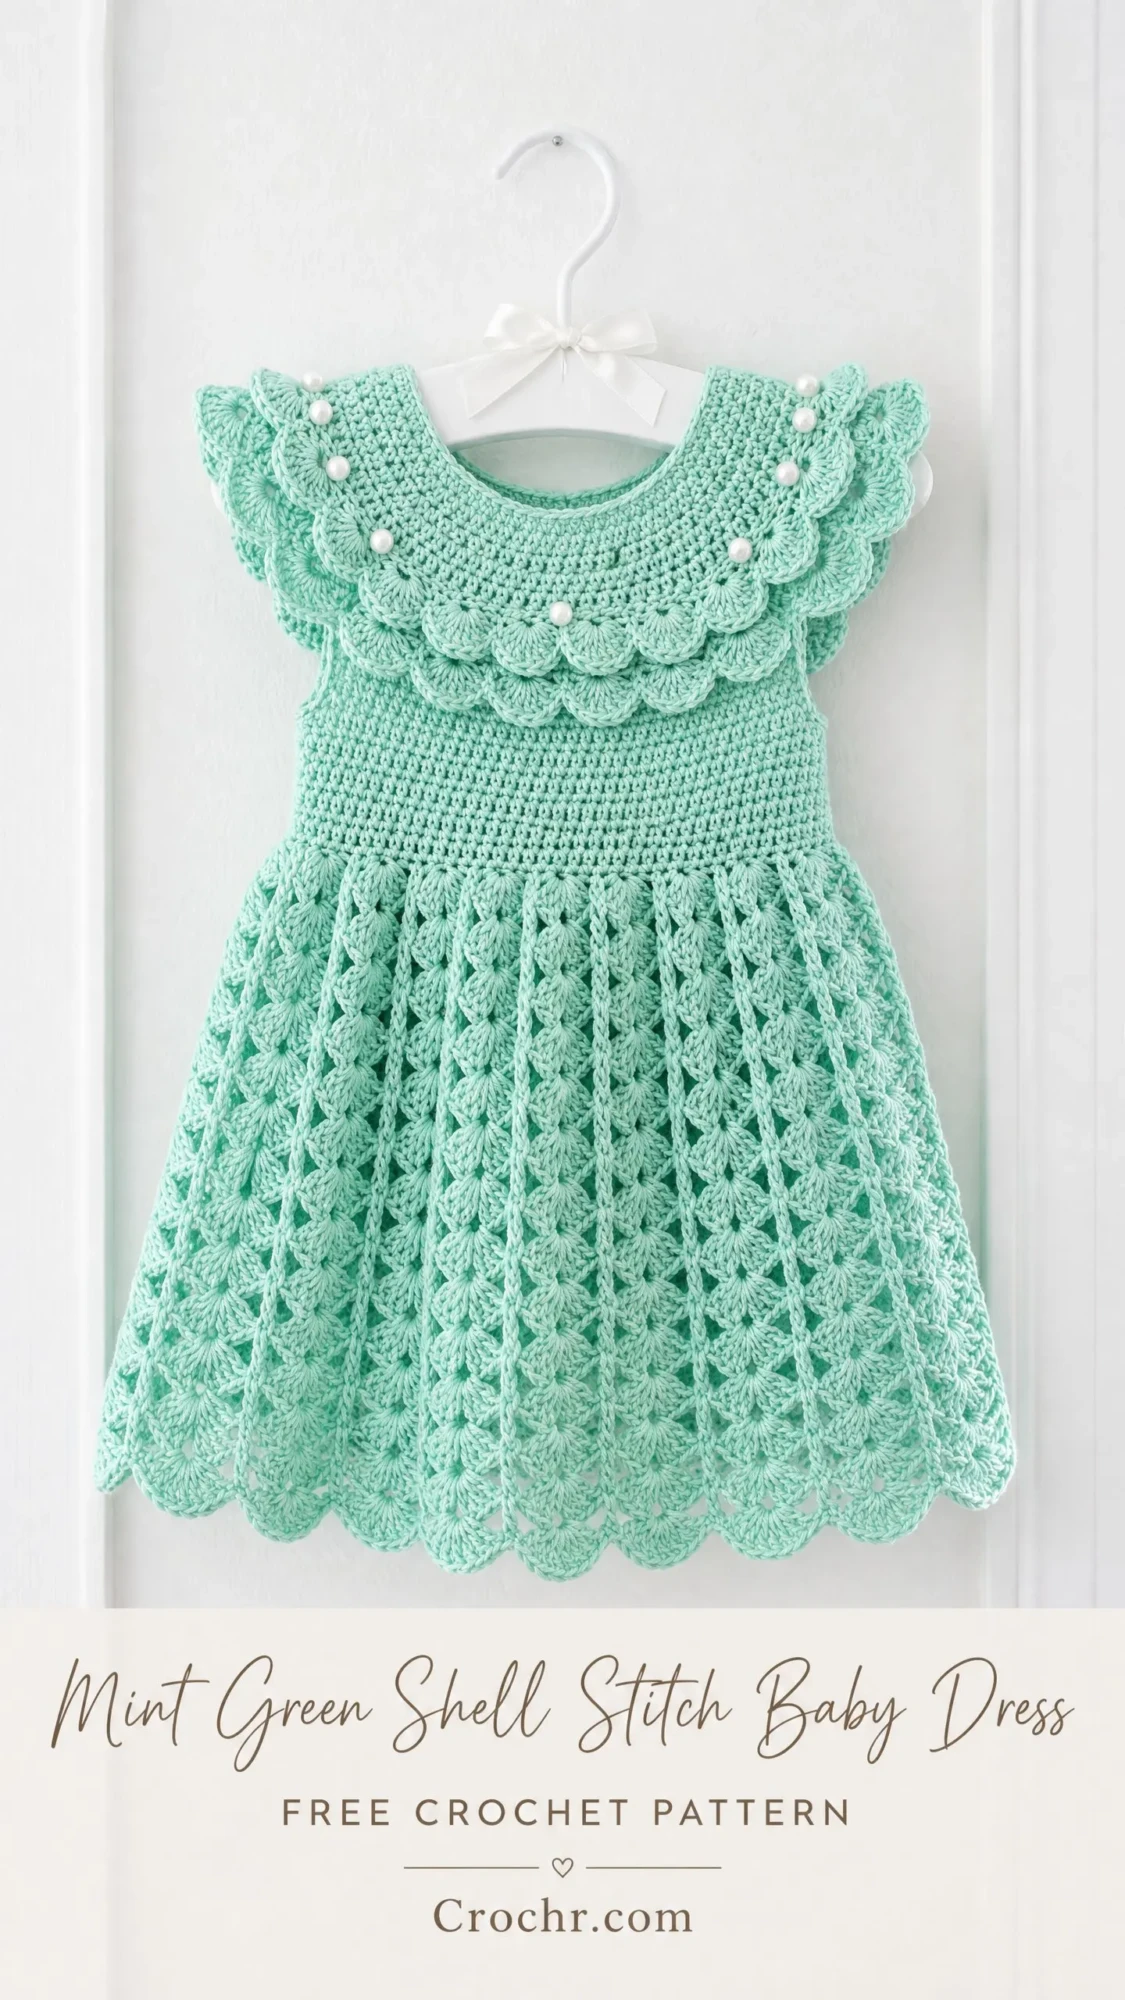
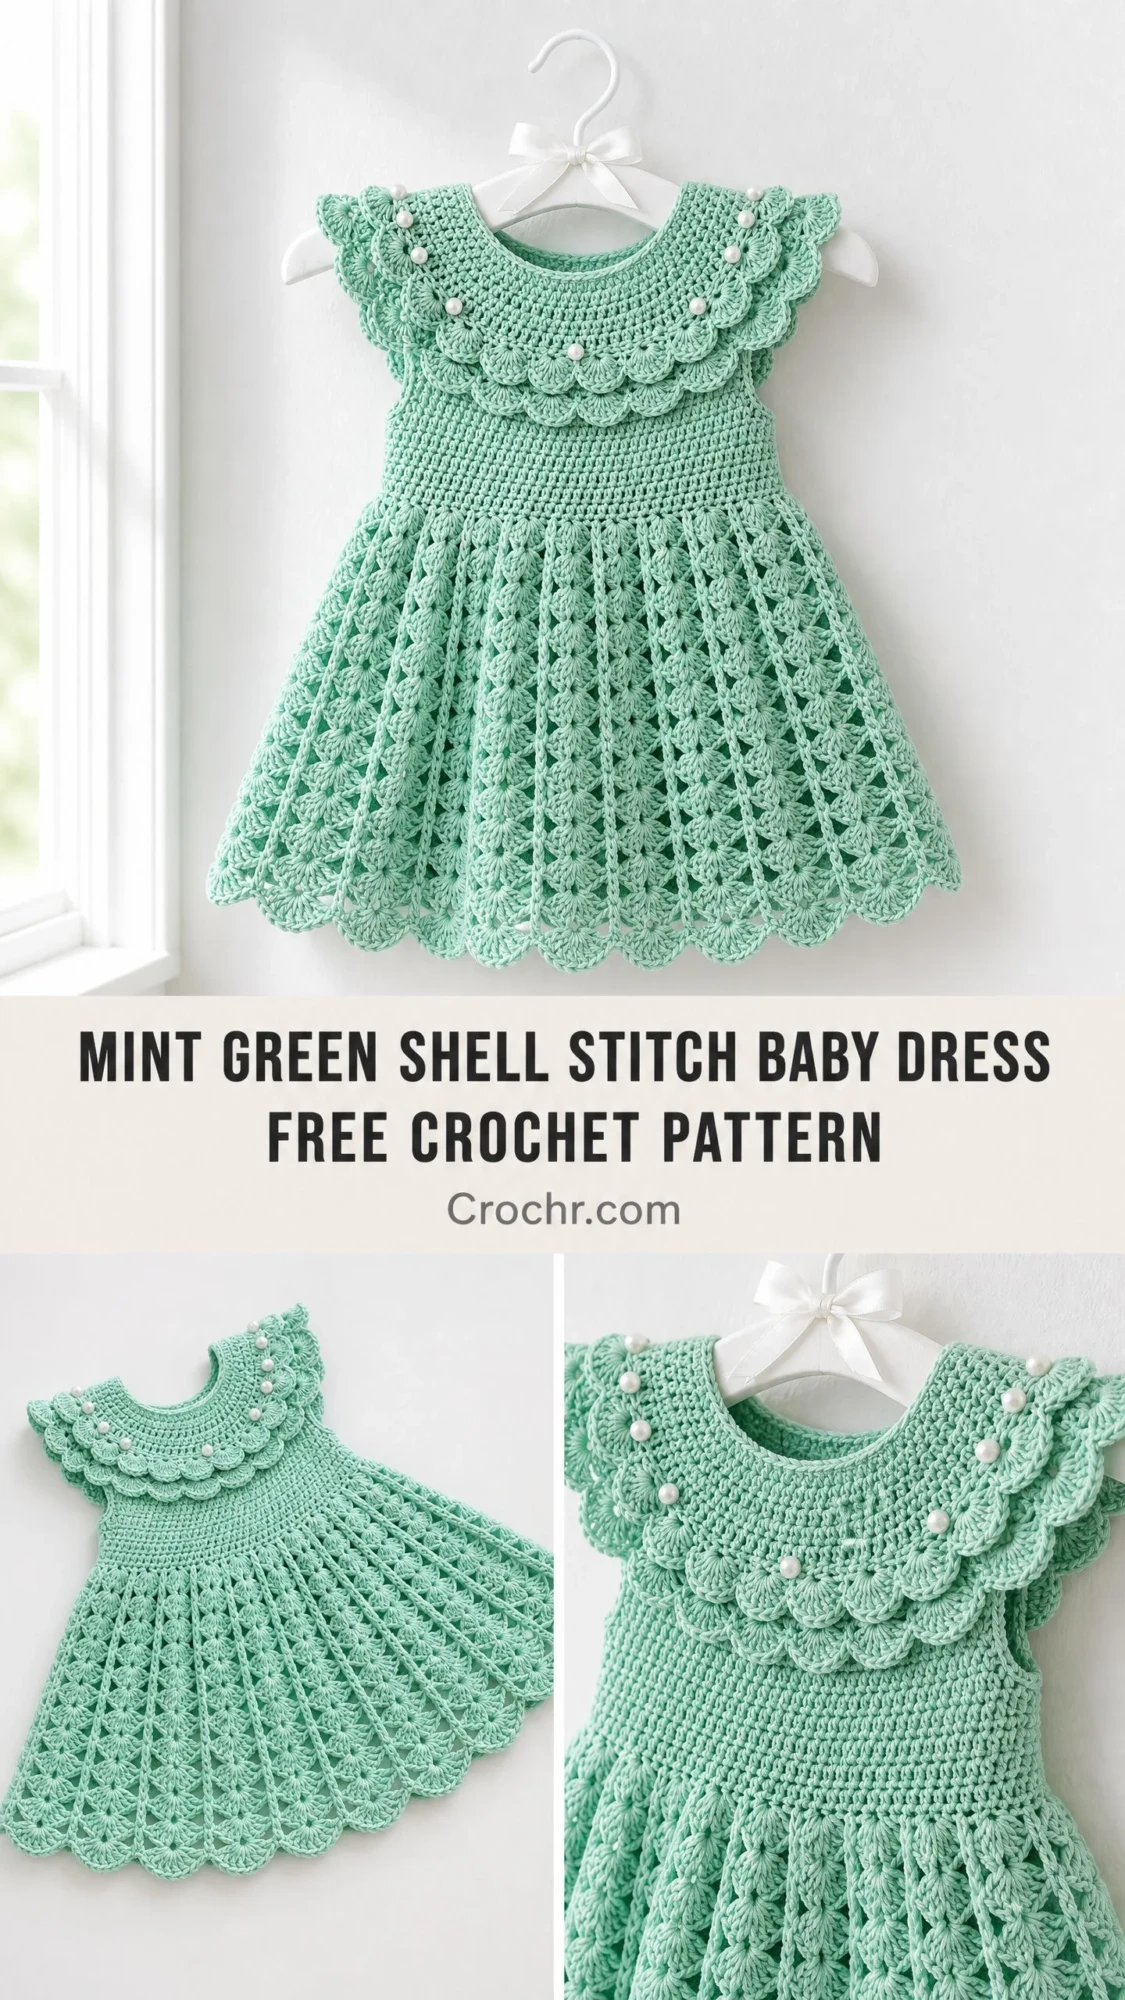
The result was this beautiful shell stitch baby dress, and I have been obsessed with it ever since. The combination of the fitted yoke, that dreamy double-layer scallop collar, and the way the skirt flares out with those repeating fan motifs just makes my crafter heart sing.
Now I am sharing exactly how to make it yourself. This pattern walks you through every single step, from that first foundation chain to sewing on those perfect little pearl beads at the end. It looks incredibly intricate hanging on that tiny hanger, but I promise the construction is more straightforward than it appears.
About This Baby Dress Crochet Pattern
This heirloom-style baby dress features a fitted yoke worked in the round from the top down. You will create a double-layered scallop collar worked separately and seamed on after blocking. The smooth fitted bodice transitions into a flared skirt constructed with repeating fan and shell motifs that widen naturally from yoke to hem.
Pearl bead embellishments get sewn along the collar after finishing, giving it that vintage baptism dress feel. The dress closes at the back with a small button or snap. The skirt hem ends with a scalloped shell edging that mirrors the collar beautifully.
Skill Level: Intermediate
You should be comfortable working in the round, executing shell and fan stitch repeats, maintaining stitch counts through increases, attaching a separately worked collar, and adding beaded embellishment. No advanced techniques are required, but attention to stitch count is essential throughout.
Time Estimate: Approximately 12 to 18 hours for an experienced intermediate crocheter. Allow additional time for blocking and bead attachment.
Finished Measurements
This crochet pattern is written for size 6 to 12 months.
Size customization tips are included at the end of the pattern for sizing up or down.
Materials Needed
Yarn: DK weight (CYCA 3), 100% cotton or cotton-blend, approximately 350 to 400 yards / 320 to 365 meters in mint green
Hook: US size E-4 / 3.5 mm crochet hook (adjust as needed to match gauge)
Notions:
Recommended Yarn Options
Paintbox Yarns Simply DK (100% cotton, 137 yards / 125 meters per 50 g ball): Approximately 3 balls in Spearmint or Duck Egg Blue. This yarn has excellent stitch definition and is gentle on baby skin.
Scheepjes Catona (100% mercerized cotton, 62 yards / 57 meters per 25 g ball): Approximately 6 small balls in shade 385 Crystalline or 397 Cyan. The sheen of this yarn elevates the heirloom look of the shell stitches.
Lion Brand 24/7 Cotton (100% mercerized cotton, 186 yards / 170 meters per 100 g ball): Approximately 2 balls in Mint. Widely available and budget-friendly while still producing excellent stitch definition.
Choose a DK weight yarn with firm twist and good stitch definition. Avoid fuzzy, brushed, or textured yarns as they will obscure the shell and fan stitch detail. Cotton or cotton-blend yarns are strongly preferred for the drape, washability, and softness required for a baby garment.
Gauge
18 single crochet (sc) = 4 inches / 10 cm
8 rows of sc = 4 inches / 10 cm
One 5-dc shell fan repeat over 6 stitches in skirt pattern = approximately 1.25 inches / 3.2 cm wide
Gauge is critical for a fitted garment. Adjust hook size up or down as needed. Always swatch before beginning.
Abbreviations Used in This Crochet Tutorial
Special Stitches for This Shell Stitch Baby Dress Pattern
Shell Stitch (shell): Work 5 dc all into the same stitch or space. This creates one shell unit. Think of it as a little fan shape blooming from a single point.
Fan Stitch (fan): Work (2 dc, ch 1, 2 dc) all into the same stitch or space. This is used in the skirt fan repeat sections.
Scallop Edge: Into the same stitch work 5 dc. Skip 2 sts. Slip stitch into next stitch. This creates one scallop unit. Repeat across for scallop trim rows.
V-Stitch (V-st): Work (dc, ch 1, dc) all into the same stitch or space.
Shell Fan Repeat (used in skirt body): Requires a multiple of 6 stitches plus 2 at foundation. Pattern: Ch 3 (counts as dc). Skip 2 sts. Work 5 dc into next st. Skip 2 sts. Sc into next st. Repeat from (skip 2, shell into next, skip 2, sc into next) to end.
Picot: Ch 3, sl st into first ch of the ch-3. Creates a small decorative loop.
Important Pattern Notes Before You Begin
The dress is constructed top-down in the round. The yoke is worked first as a flat piece with a back opening, then joined and worked in the round.
The back of the dress has a center back opening running from the neckline down approximately 3 inches / 7.5 cm. This is where your button or snap closure will go.
The collar is worked separately and sewn onto the finished neckline after blocking.
Turning chains: Ch 1 at the start of sc rows does NOT count as a stitch. Ch 3 at the start of dc rows DOES count as the first dc.
The skirt increases are built into the shell fan repeat. As you progress from yoke to hem, each round naturally adds width because the shell stitch repeat expands the stitch count at strategic increase rounds.
Pearl beads are not crocheted in. They are sewn by hand onto the collar after the garment is complete and blocked.
When working the back opening rows, work back and forth in rows (turning work) rather than joining into rounds. Place markers at center back to track the opening edges.
Step by Step Instructions
Section 1: Yoke (Worked Back and Forth in Rows First, Then Joined in the Round)
Foundation Chain: Ch 63.
Row 1 (RS): Sc in 2nd ch from hook and in each ch across. Turn. (62 sc)
Row 2: Ch 1. Sc in each st across. Turn. (62 sc)
Row 3 (increase row): Ch 1. Sc in first 3 sts. Inc in next st. (Sc in next 4 sts. Inc in next st.) repeat 11 times. Sc in rem 3 sts. Turn. (74 sc)
Row 4: Ch 1. Sc in each st across. Turn. (74 sc)
Row 5 (increase row): Ch 1. Sc in first 3 sts. Inc in next st. (Sc in next 5 sts. Inc in next st.) repeat 11 times. Sc in rem 3 sts. Turn. (86 sc)
Row 6: Ch 1. Sc in each st across. Turn. (86 sc)
Row 7 (increase row): Ch 1. Sc in first 4 sts. Inc in next st. (Sc in next 6 sts. Inc in next st.) repeat 11 times. Sc in rem 3 sts. Turn. (98 sc)
Row 8: Ch 1. Sc in each st across. Turn. (98 sc)
Row 9 (increase row): Ch 1. Sc in first 4 sts. Inc in next st. (Sc in next 7 sts. Inc in next st.) repeat 11 times. Sc in rem 3 sts. Turn. (110 sc)
Row 10: Ch 1. Sc in each st across. Turn. (110 sc)
Checkpoint: After Row 10, the yoke piece should measure approximately 3.5 inches / 9 cm from foundation chain to working row, and 13.75 inches / 35 cm wide when laid flat.
Section 2: Divide for Armholes and Join in Round
You will now separate stitches for back left panel, sleeve, front panel, sleeve, and back right panel.
Stitch division for 110 sts:
Joining Round: Ch 1. Sc across back right 13 sts. Ch 2 (underarm bridge). Skip 13 armhole sts. Sc across front 58 sts. Ch 2. Skip 13 armhole sts. Sc across back left 13 sts. Do not join yet. (84 sc plus 4 ch = 88 working sts in round)
Next Round: Ch 1. Sc in each st and each ch-2 space around (work 2 sc into each ch-2 space). Join with sl st to first sc. (88 sc)
The back center opening remains open. Place markers at each edge of the back opening and continue working in rounds, but treat the back edges as if seamed.
Section 3: Bodice (Worked in the Round)
Rounds 1 through 4: Ch 1. Sc in each st around. Join. (88 sc each round)
Round 5 (increase round): Ch 1. (Sc in next 10 sts. Inc in next st.) repeat 8 times. Join. (96 sc)
Rounds 6 through 8: Ch 1. Sc in each st around. Join. (96 sc each round)
Round 9 (increase round): Ch 1. (Sc in next 11 sts. Inc in next st.) repeat 8 times. Join. (104 sc)
Rounds 10 through 12: Ch 1. Sc in each st around. Join. (104 sc each round)
Checkpoint: After Round 12 of the bodice, the piece from shoulder to working round should measure approximately 6 inches / 15.5 cm total. The bodice circumference should be approximately 23 inches / 58.5 cm.
Section 4: Waist Transition Round
Round 13: Ch 3 (counts as dc). Dc in each st around. Join with sl st to top of ch-3. (104 dc)
This round creates a visual horizontal break line at the waist and transitions from the single crochet bodice to the shell skirt stitch.
Section 5: Skirt (Worked in the Round in Shell Fan Repeat)
The skirt requires a stitch count divisible by 6. From 104 sts, increase to 108 sts in the first skirt setup round to achieve divisibility.
Skirt Setup Round: Ch 1. Sc in first 26 sts. Inc in next st. Sc in next 26 sts. Inc in next st. Sc in next 26 sts. Inc in next st. Sc in next 24 sts. Inc in next st. Join. (108 sc)
Confirm: 108 divided by 6 = 18 shell repeat units.
Skirt Round 1 (shell fan round): Ch 3 (counts as dc). Sk 2 sts. Work 5 dc in next st. Sk 2 sts. Sc in next st. (Sk 2 sts. Work 5 dc in next st. Sk 2 sts. Sc in next st.) repeat to last 5 sts. Sk 2 sts. Work 5 dc in next st. Sk 2 sts. Sl st to top of ch-3 to join. (18 shells)
Skirt Round 2: Ch 1. Sc in first st (the sc between shells from previous round). (Ch 2. Work 5 dc into center dc of next shell. Ch 2. Sc in next sc.) repeat around. Join. (18 shells, 18 sc, 36 ch-2 spaces)
Skirt Round 3 (increase round): Ch 3. Work 2 dc in first sc. Sk ch-2 sp. Sc in center dc of shell. Sk ch-2 sp. (Work 5 dc in next sc. Sk ch-2 sp. Sc in center dc of shell. Sk ch-2 sp.) repeat around, ending with 3 dc in same sc as beg ch-3. Join. (18 shells, 18 sc)
Skirt Round 4: Repeat Skirt Round 2. (18 shells, 18 sc)
Skirt Round 5 (shell expansion increase round): Ch 1. In first sc work (sc, ch 1, sc). Work shell of 5 dc in center dc of shell. (In next sc work (sc, ch 1, sc). Shell in center dc of next shell.) repeat around. Join. (36 anchors, 18 shells: total stitches = 144 active positions)
Skirt Round 6: Ch 1. Sc in sc. Sc in ch-1 sp. Sc in sc. (Sk 2 dc. Sc in next dc. Sk 2 dc. Sc in next sc. Sc in ch-1 sp. Sc in next sc.) repeat around. Join. (144 sc)
Confirm: 144 divided by 6 = 24 repeat units.
Skirt Round 7 (shell fan round, 24 repeats): Ch 3. Sk 2 sts. 5 dc in next st. Sk 2 sts. Sc in next st. (Sk 2. 5 dc in next. Sk 2. Sc in next.) repeat around. Join. (24 shells)
Skirt Round 8: Ch 1. Sc in sc. (Ch 2. 5 dc in center dc of shell. Ch 2. Sc in next sc.) repeat around. Join. (24 shells)
Skirt Round 9: Repeat Skirt Round 8 pattern structure. Join. (24 shells)
Skirt Round 10 (increase round): Ch 1. In each sc work (sc, ch 1, sc). 5 dc in center dc of shell. Repeat around. Join. (48 anchors, 24 shells = 168 active positions)
Skirt Round 11: Ch 1. Sc in sc. Sc in ch-1 sp. Sc in sc. Sk 2. Sc in center dc. Sk 2. (Sc in sc. Sc in ch-1 sp. Sc in sc. Sk 2. Sc in center dc. Sk 2.) repeat around. Join. (168 sc)
Confirm: 168 divided by 6 = 28 repeat units.
Skirt Round 12 (shell fan round, 28 repeats): Ch 3. Sk 2. 5 dc in next. Sk 2. Sc in next. Repeat around. Join. (28 shells)
Skirt Rounds 13 through 16: Alternate between Skirt Round 8 style (ch-2 shell row) and plain shell fan round, maintaining 28 shell repeats throughout. Join each round.
Checkpoint: After Skirt Round 16, the skirt should measure approximately 6.5 to 7 inches / 16.5 to 18 cm from waist transition round.
Section 6: Skirt Hem Scallop Edging
This creates the deep scalloped lower edge visible on the finished dress.
Reset Round: Ch 1. Sc in each sc and in each center dc of each shell around to create an even base. Work 1 sc into each visible sc anchor position and 5 sc across each shell. Join. (168 sc)
Scallop Round 1: Ch 1. (5 dc in next sc. Sk 2. Sl st in next sc. Sk 2.) repeat around, working final sl st into first ch-1. Join. (28 scallop repeats)
Scallop Round 2 (outer scallop): Sl st to center dc of first scallop. Ch 1. 5 dc in same center dc. Sk 2 dc. Sl st in sl st between scallops. Sk 2 dc. (5 dc in center dc of next scallop. Sk 2. Sl st in next sl st. Sk 2.) repeat around. Join. Fasten off. (28 scallops)
The double scallop round creates the full ruffled hem edge shown in the finished piece.
Section 7: Collar (Worked Separately)
The collar consists of two tiers of scallop trim worked flat and sewn onto the neckline after blocking.
Collar Foundation: With RS facing, attach yarn at right back opening edge. Work 62 sc evenly around neckline edge, ending at left back opening edge. Do not join (this is worked flat). (62 sc)
Collar Row 1: Ch 1. Turn. Sc in each st across. (62 sc)
Collar Row 2 (first scallop tier): Ch 1. Turn. (5 dc in next sc. Sk 2 sc. Sl st in next sc. Sk 2 sc.) repeat across to last st. Sc in last st. (10 scallops, 1 edge sc each side)
Collar Row 3 (second scallop tier): Do not turn after Row 2. Hold work so Row 2 scallops face you. Sl st to center dc of first scallop. Ch 1. (5 dc in center dc of scallop. Sk 2 dc. Sl st in sl st valley. Sk 2 dc.) repeat for all 10 scallops. Fasten off. (10 outer scallops)
This creates the double-layer ruffle collar effect. The outer tier fans slightly forward and away from the inner tier.
Sew collar to neckline using whipstitch along the foundation sc row, right sides facing out. The collar will stand up and roll forward.
After blocking and drying, hand-sew 8 to 10 pearl beads evenly spaced across the inner collar tier, distributing 4 to 5 on each shoulder area. Thread needle through bead twice to secure firmly.
Section 8: Armhole Edging
With RS facing, attach yarn at underarm bridge of right armhole.
Round 1: Ch 1. Work 26 sc evenly around armhole opening. Join. (26 sc)
Round 2: Ch 1. (5 dc in next sc. Sk 2. Sl st in next sc. Sk 2.) repeat around. Join. Fasten off. (4 scallops)
Work 4 full scallop repeats = 24 sts. Work sl st into each of remaining 2 sts to close. This keeps the armhole neat without puckering.
Repeat for left armhole.
Section 9: Back Opening Edging and Button Closure
With RS facing, attach yarn at bottom of right back opening.
Row 1: Ch 1. Work 18 sc evenly up the right back opening edge. Ch 1. Turn.
Row 2: Ch 1. Sc in each st. Fasten off.
Repeat for left back opening edge.
On the left back edge, work a button loop at the top by working ch 4, sk 2 sc, sl st to next sc. Sew button to corresponding position on right back edge.
Alternatively, sew a snap fastener at top of back opening for invisible closure.
Finishing and Blocking Your Baby Dress
Weave in all ends securely using a yarn needle. Be careful that woven ends do not show through the lace-like skirt sections.
Wet blocking is strongly recommended for cotton yarns and produces the best definition in shell and fan stitches.
1. Soak finished dress in cool water with a small amount of wool wash or gentle soap for 15 to 20 minutes.
2. Gently squeeze out water without wringing.
3. Roll in a clean dry towel and press to remove excess moisture.
4. Lay flat on a blocking board or foam mat.
5. Pin the skirt hem scallops open to full spread, pulling each scallop outward and downward.
6. Pin collar scallops open.
7. Ensure the bodice is smooth and the yoke lies flat.
8. Allow to dry completely (12 to 24 hours).
After blocking is fully dry, attach pearl beads to collar as described above.
Size Customization Tips
To size up to 12 to 18 months: Begin foundation chain with 69 ch (68 working sts) and adjust all yoke increase rounds to increase by 14 sts per increase round instead of 12. Work 2 additional bodice rounds before waist transition. Add 2 extra shell repeat rounds in the skirt before the first increase round. Finished chest should measure approximately 18.5 inches / 47 cm.
To size up to 18 to 24 months: Begin foundation chain with 75 ch (74 working sts) and increase by 16 sts per increase round. Work 3 additional bodice rounds. Expect to use approximately 50 additional yards / 45 meters of yarn. Finished chest approximately 20 inches / 51 cm.
To size down to 3 to 6 months: Begin foundation chain with 57 ch (56 working sts) and increase by 10 sts per increase round. Work 1 fewer bodice round. Finished chest approximately 15.5 inches / 39.5 cm.
The shell stitch repeat requires all stitch counts remain divisible by 6 at every skirt transition round. Always check divisibility before beginning a new tier.
Care Instructions
Machine wash on gentle cycle in a mesh laundry bag with cool water and mild detergent. Lay flat to dry. Do not tumble dry as heat will shrink cotton and distort stitch pattern. Do not iron directly on textured shell stitches as this flattens the three-dimensional structure. Steam blocking to refresh shape between wearings is recommended. Check pearl bead attachments before each wearing and resew any loose beads immediately to prevent choking hazard.
You Did It!
Thank you so much for choosing this pattern for your little one or for someone special in your life. This shell stitch baby dress really does look like something from a vintage boutique, and I know yours will turn out beautifully. If you make one, I would absolutely love to see it! Tag me on Instagram or share a photo in my Facebook group.
If this pattern made you happy, go ahead and pin it to your Pinterest boards so you can find it again later. And please drop a comment below if you make this dress. I love hearing about your projects and seeing those finished photos!
You Might Also Like
- Mint Green Rose Drawstring Backpack Free Crochet Pattern
- Tropical Fish Charm Bracelet Free Crochet Pattern
- Sunset Orange Daisy Zipper Bag Free Crochet Pattern
- Forest Green Ivy Leaf Earrings Free Crochet Pattern
