I don’t know about you, but I have a serious soft spot for granny square bags. There’s something about those cheerful little motifs that makes me want to carry my crochet everywhere I go.
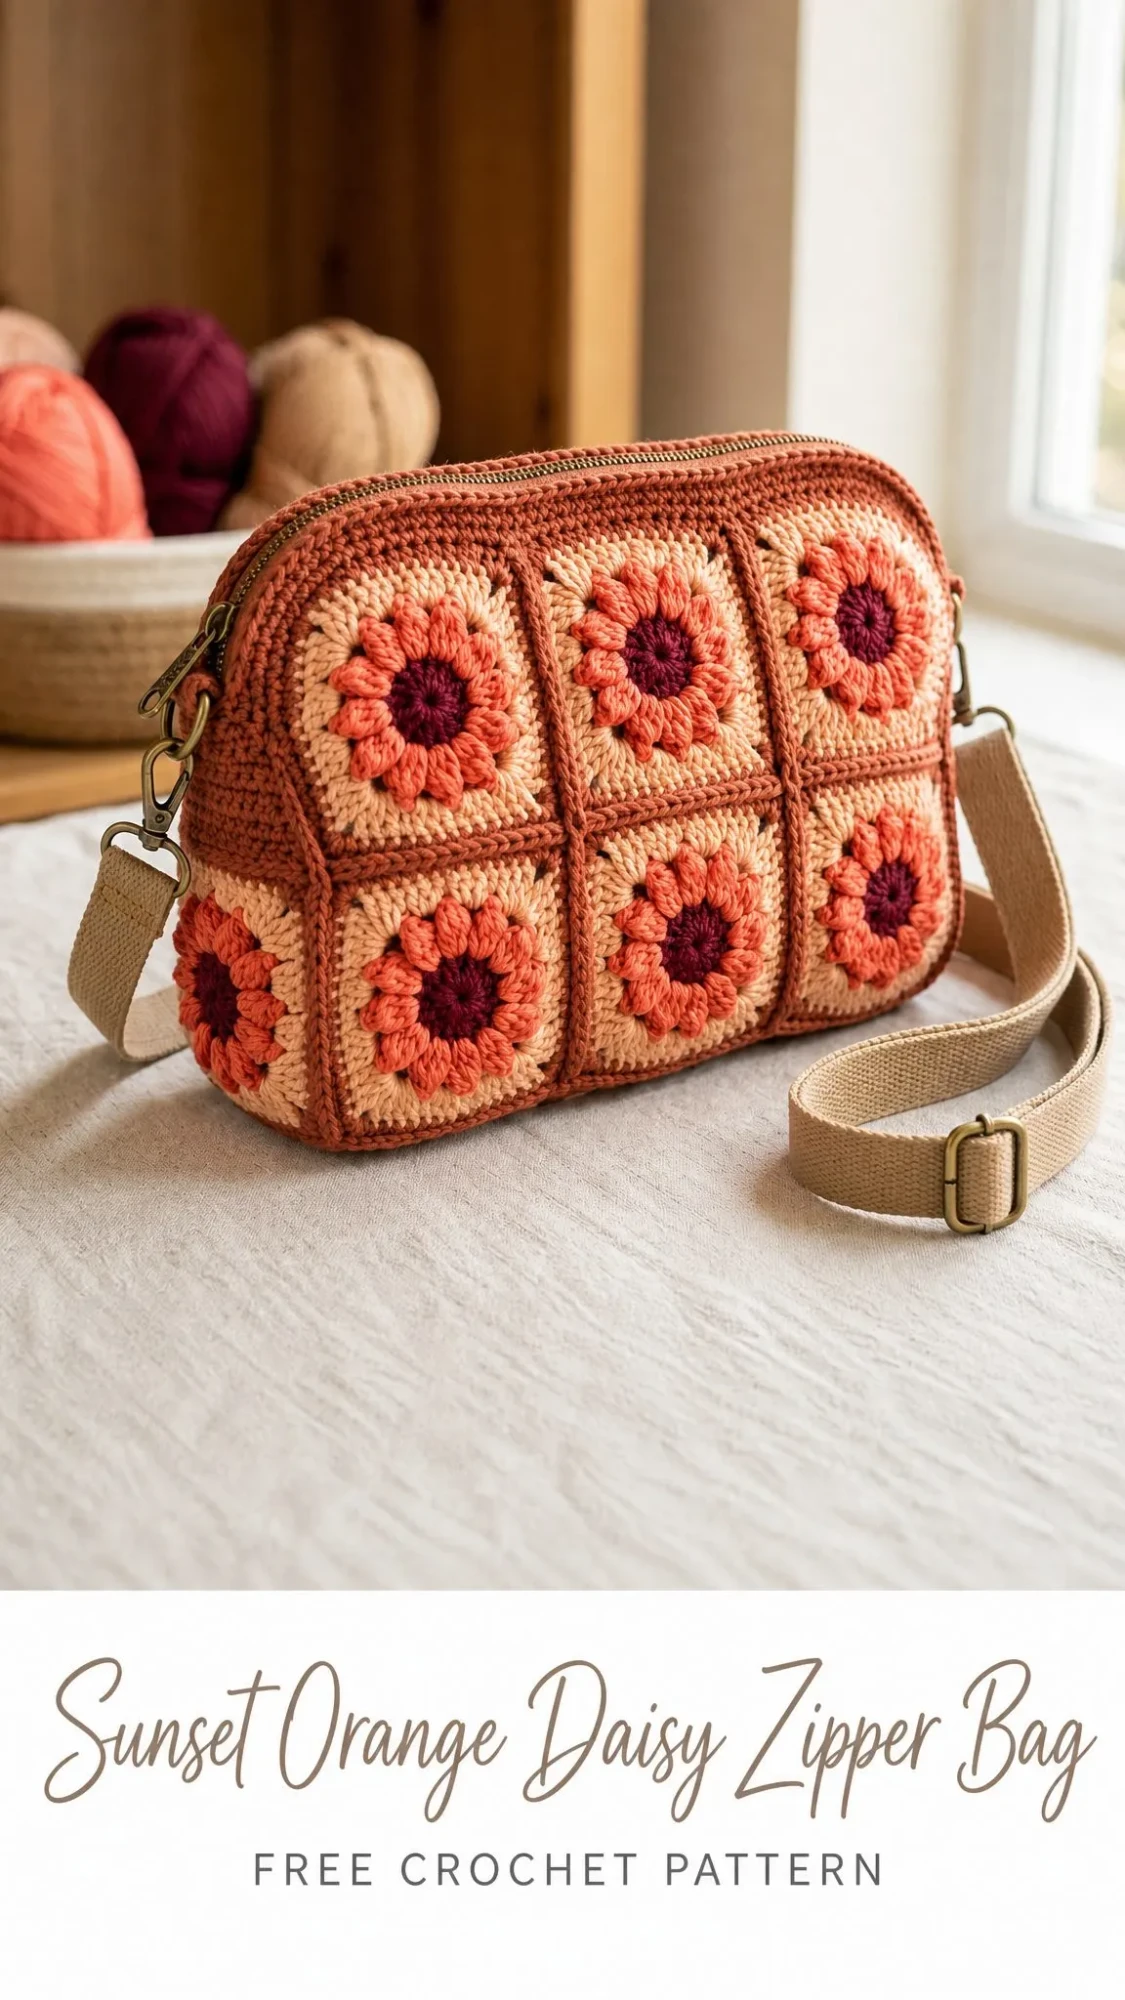
This crossbody bag hits all the right notes. It’s boxy, it’s bright, and those puff flower centers give each square so much personality. Plus, the warm sunset color palette feels perfect for year-round wear.
If you’ve been searching for a project that looks impressive but uses familiar stitches, this one is calling your name. Let me walk you through everything you need to know to make your own Sunset Daisy Crossbody Bag.
About This Crochet Bag Pattern
This adorable camera-style bag is built from twelve puff-flower granny squares joined into two panels, then connected with a solid gusset that gives the whole thing a structured, boxy shape. The finished bag measures approximately 9 × 6.5 inches, making it the perfect size for your phone, wallet, keys, and a few small essentials.
The color combination is what really makes this design pop. Deep wine centers surrounded by fluffy coral puff petals, framed in soft peach, and bordered with warm terracotta rust. It looks like a sunset in yarn form.
This pattern is rated intermediate level and takes approximately 10 to 14 hours to complete. If you’re comfortable with basic granny squares and have done some seaming before, you’ll feel right at home here.
Materials You’ll Need
Gathering your supplies before you start makes the whole process smoother. Here’s your complete shopping list.
Yarn
You’ll be working with DK weight cotton yarn for crisp stitch definition and a bag that holds its shape beautifully. Here are the approximate amounts for each color:
Some yarn brands to consider: Paintbox Yarns Cotton DK, DMC Natura Just Cotton, or Yarn and Colors Epic.
Hook and Notions
Gauge Information
Getting your gauge right ensures your bag turns out the correct size. Work a test swatch before diving into the motifs.
Gauge: 18 single crochet (sc) and 21 rows = 4 inches / 10 cm
One finished daisy motif should measure 3 inches / 7.5 cm square after blocking.
If your motif comes out larger, try dropping down to a 3.5 mm hook. If it’s smaller, move up to a 4.5 mm hook. Match the motif size and your bag will match the photos perfectly.
Abbreviations and Stitch Guide
Before we begin, let’s go over all the abbreviations you’ll encounter in this pattern. I’ll explain each one so there’s no confusion.
| Abbreviation | Full Name | What It Means |
|---|---|---|
| ch | chain | Yarn over, pull through loop on hook |
| sl st | slip stitch | Insert hook, yarn over, pull through both loops at once |
| sc | single crochet | Insert hook, yarn over, pull up loop, yarn over, pull through both loops |
| hdc | half double crochet | Yarn over, insert hook, pull up loop, yarn over, pull through all 3 loops |
| dc | double crochet | Yarn over, insert hook, pull up loop, yarn over, pull through 2 loops twice |
| st(s) | stitch(es) | Individual stitch or multiple stitches |
| sp(s) | space(s) | Gap or hole in the fabric |
| rnd | round | One complete circuit around your work |
| rep | repeat | Do the same thing again |
| yo | yarn over | Wrap yarn around hook |
| beg | beginning | Start of round or row |
| BLO | back loop only | Work into only the back loop of the stitch |
A Note for UK Crocheters
This pattern uses US crochet terminology. Here’s your quick conversion:
Convert the stitch names and follow everything else exactly as written.
Special Stitch: The Puff Stitch
This is what creates those gorgeous rounded coral petals. Here’s how to work it:
Puff Stitch: [Yarn over, insert hook in space, yarn over and pull up a loop to the height of a half double crochet] 3 times in the same space. You’ll have 7 loops on your hook. Yarn over and draw through all 7 loops, then chain 1 to close.
Don’t worry if your first few puffs look a little wonky. They get easier with practice, and blocking helps even everything out.
Pattern Notes Before You Begin
A few important things to keep in mind as you work:
The Daisy Motif Pattern
You’ll need to make 12 motifs total. Each one works up quickly once you get the rhythm down.
Round 1 – Wine (Color A)
Make a magic ring.
Chain 4 (this counts as dc + ch 1).
[Dc in ring, ch 1] 7 times.
Join with slip stitch to the 3rd chain of the beginning ch-4.
Pull the magic ring tight, then fasten off Color A.
(8 dc, 8 ch-1 spaces)
Round 2 – Coral (Color B)
Join Color B in any ch-1 space.
Chain 2, work a Puff in the same space, chain 1.
Puff in next ch-1 space, chain 1.
Repeat from * around.
Join to the top of the first puff, then fasten off Color B.
(8 puff petals, 8 ch-1 spaces)
Round 3 – Peach (Color C)
Join Color C in any ch-1 space between two petals.
Chain 1.
(2 sc, ch 2, 2 sc) in next space – this is a corner; 2 sc in next space – this is a side.
Repeat from * 3 more times.
Join to first sc.
(24 sc, 4 corner spaces)
Round 4 – Peach (Color C)
Slip stitch to the nearest corner space.
Chain 1.
(2 sc, ch 2, 2 sc) in corner space, sc in each stitch to next corner.
Repeat around.
Join, then fasten off Color C.
(40 sc, 4 corner spaces)
Round 5 – Rust (Color D)
Join Color D in any corner space.
Chain 1.
(2 sc, ch 2, 2 sc) in corner space, sc in each stitch to next corner.
Repeat around.
Join, then fasten off, leaving a long seaming tail.
(56 sc total – 14 sc per side)
Finishing Your Motifs
Weave in all ends except the rust seaming tails. Then block each motif flat to a true 3 inch / 7.5 cm square.
Consistent blocking is absolutely essential here. It’s what makes the grid line up beautifully when you join the squares together.
Joining the Panels
The bag has two identical faces. You’ll arrange 6 motifs in a grid that’s 3 wide by 2 tall, then seam them into a panel. Repeat for the second panel.
Whip Stitch Join Method
Hold two motifs with right sides together.
Using a long rust tail and your tapestry needle, whip stitch through the back loops only. Match stitch for stitch (14 sc per side, plus the corner stitches).
Seam all the vertical joins first to create three columns. Then seam the two horizontal joins across.
Keep your tension even so the seams stay flat and the rust lines create a clean grid pattern.
Tip: Snap a photo of your layout before seaming so every wine center sits in the same orientation across all six squares.
Alternative Joining Method
If you prefer a flat seam with a subtle raised ridge between flowers, you can single crochet the motifs together with Color D through back loops instead of whip stitching.
Each finished panel should measure approximately 9 × 6 inches / 23 × 15 cm.
Make 2 panels total.
Gusset and Body Construction
A single rust band wraps around the two sides and the bottom, giving the bag its structured depth. You’ll crochet it as one long strip, then sew a panel to each edge.
Gusset – Make 1 with Color D
Row 1: Chain 14. Single crochet in the 2nd chain from hook and each chain across. Turn. (13 sc)
Row 2 onward: Chain 1, single crochet in each stitch across. Turn. (13 sc)
Repeat Row 2 until the band measures approximately 21 inches / 53 cm (roughly 108 rows). This is long enough to run up one side, across the bottom, and up the other side.
The 13-stitch width creates a bag depth of approximately 3 inches / 7.5 cm.
Joining the Body
Step 1: Pin one long edge of the gusset around the front panel. Start level with the top of one side, go down the side, across the bottom, and up the other side, ending level with the top.
Step 2: With Color D, single crochet the gusset to the panel through both loops (or whip stitch if you prefer). Ease or add a row so it finishes flush at both top corners.
Step 3: Repeat to sew the gusset’s other long edge to the back panel.
Step 4: Turn right side out.
You now have one complete bag body!
Top Edge, Zipper, and Strap
Top Edge with Color D
Join yarn at a top side seam.
Chain 1 and single crochet evenly all around the opening. Keep the total even.
Join with slip stitch.
Work 1 more round of single crochet, then fasten off.
This firm lip anchors the zipper securely.
(Keep an even count, approximately 80 sc)
Strap Loops – Make 2 with Color D
Chain 7.
Single crochet in the 2nd chain and across.
Work 4 rows total.
Slip the piece through a D-ring or swivel base, fold it in half, and sew it securely to each top side seam.
(6 sc per row)
Attaching the Zipper
Hand-sew your 9 inch / 23 cm zipper to the inside of the top lip using a backstitch. Ease gently and fold the tape ends under for a clean finish.
If you’d like to hide the interior seams, line the bag with fabric before attaching the zipper.
Strap Options
Option 1 – Webbing (shown in photos): Thread approximately 48 inches / 122 cm of 1.5 inch webbing through the slider, then through a swivel hook, back through the slider. Add the second swivel hook to the free end. Clip to the loops for a fully adjustable strap.
Option 2 – Crocheted Strap: With Color D, chain 6. Single crochet in the 2nd chain and across for 5 sc. Work in single crochet rows until the strap measures approximately 46 inches / 117 cm. Sew each end to a swivel hook or attach directly to the loops. (5 sc per row)
Finishing and Care Instructions
Final Finishing Steps
Weave in every remaining tail on the inside and trim close.
Steam or wet-block the assembled body. Shape the corners square and press the gusset flat. Let it dry completely before adding the zipper.
A fabric lining sewn to the inside top edge hides seams and helps the bag maintain its boxy shape.
Give the strap a gentle tug-test and reinforce the loop seams with a few extra stitches if needed.
Caring for Your Finished Bag
Customizing the Size
The modular design of this bag makes resizing incredibly simple. Just change the motif count, not the method.
Making It Bigger
For a larger tote, arrange your motifs 4 wide × 3 tall (12 motifs per panel) for approximately 12 × 9 inches. Lengthen the gusset accordingly and use a 12 inch zipper.
Making It Smaller
For a mini pouch, use 2 × 2 motifs per panel. This creates a 6 inch coin purse. Pair it with a 6 inch zipper.
Each motif added or removed shifts a side by approximately 3 inches / 7.5 cm.
Adjusting Proportions
For a deeper bag, add stitches to the gusset width. Every 4 to 5 sc adds about 1 inch of depth.
For tighter or looser fabric, drop to a 3.5 mm hook for a firmer, smaller motif. Move up to a 4.5 mm hook for a softer, larger one. Then re-measure and recount your gusset.
For strap length, webbing adjusts easily on the slider. For a crocheted strap, add or remove rows before sewing on the hooks.
Important: Whenever you change motif count or hook size, re-check the gusset length against your new panel before sewing. Measure up the side, across the bottom, and up the other side, then crochet to match.

You Did It!
This Sunset Daisy Crossbody Bag is such a satisfying project to complete. Every time you sling it over your shoulder, you’ll feel that little burst of pride knowing you made something beautiful and functional with your own two hands.
Thank you so much for choosing to make this pattern. I genuinely appreciate you being here and trusting me to guide you through the process. If you make one, I would absolutely love to see it! Share your finished bag on Instagram or Facebook and tag me so I can admire your work.
If you loved making this bag, go ahead and save this pattern to your Pinterest boards so you can find it easily later or share it with your crafty friends. And please drop a comment below if you give it a try. I always love hearing how your projects turn out!
