Tiny crochet jewelry looks intimidating, right? All those miniature stitches, the delicate assembly, the fear that your finished piece will look like a lumpy mess. I completely understand that hesitation. But here is the truth: if you can single crochet and work in the round, you can absolutely make this bracelet. The cherries are just tiny amigurumi spheres. The flowers use basic petal construction. The leaves are simple ovals. That is it. Whether you are a confident crocheter looking for a quick project or a beginner ready to try something new, this cherry blossom charm bracelet breaks down into manageable pieces that come together beautifully.
About This Cherry Blossom Charm Bracelet Crochet Pattern
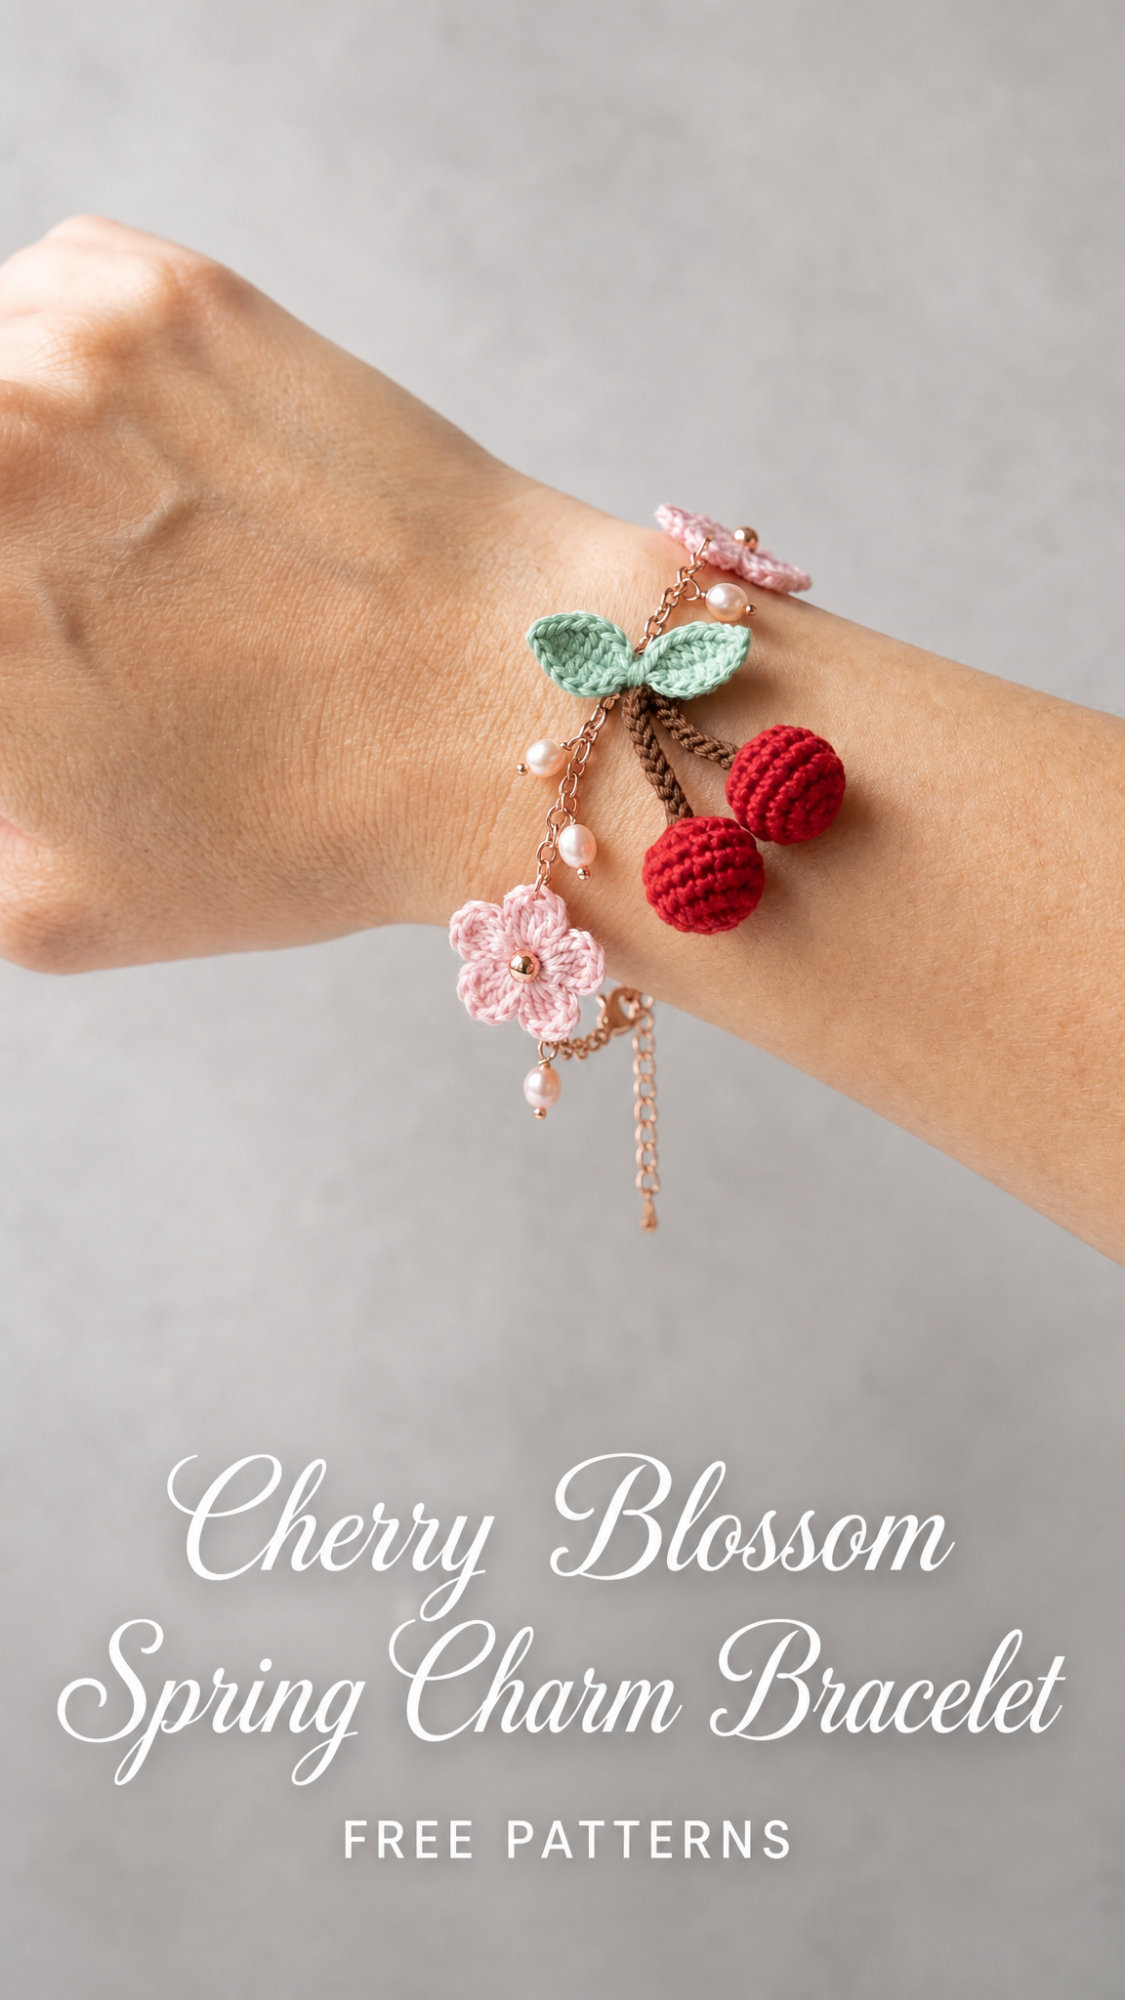
This sweet spring accessory combines crochet thread work with jewelry findings to create a wearable piece of art. The bracelet features two miniature crocheted cherries hanging from a braided stem, two mint green leaves, delicate pink cherry blossom flowers, and pearl bead accents. All of this attaches to a rose gold chain with an adjustable clasp.
The finished bracelet measures approximately 7 inches long with a 2-inch extension chain. The cherry charm drops about 1.5 inches from the main chain. Each cherry measures roughly half an inch in diameter when stuffed.
This is a wonderful project for using up small amounts of crochet thread. You need only a few yards of each color, making it perfect for those partial spools sitting in your craft room.
Skill Level
Intermediate beginner to intermediate. You should be comfortable with:
If you have never worked with crochet thread before, I recommend practicing a few swatches first. The tiny hook and fine thread feel different from regular yarn, but most crocheters adjust within a few minutes.
Materials Needed
Crochet Thread:
Hook:
Jewelry Supplies:
Tools:
Stitch Abbreviations and Definitions
Magic ring (MR): An adjustable loop that creates a tight center. Wrap thread around your finger, insert hook, pull up a loop, chain one, then work your stitches into the ring. Pull the tail to close the center hole.
Chain (ch): The foundation stitch. Yarn over, pull through the loop on your hook.
Single crochet (sc): Insert hook into stitch, yarn over and pull up a loop (two loops on hook), yarn over and pull through both loops.
Increase (inc): Work two single crochet stitches into the same stitch. This adds one stitch to your count.
Decrease (dec): Also called invisible decrease. Insert hook through front loops only of the next two stitches, yarn over and pull through both front loops, yarn over and pull through both loops on hook. This removes one stitch.
Slip stitch (sl st): Insert hook into stitch, yarn over and pull through both the stitch and the loop on your hook in one motion.
Half double crochet (hdc): Yarn over, insert hook into stitch, yarn over and pull up a loop (three loops on hook), yarn over and pull through all three loops.
Double crochet (dc): Yarn over, insert hook into stitch, yarn over and pull up a loop (three loops on hook), yarn over and pull through two loops (two loops remain), yarn over and pull through remaining two loops.
Gauge
Gauge is not critical for this project since you are creating small decorative elements. However, your cherries should measure approximately half an inch in diameter. If your cherries are significantly larger, try a smaller hook. If they are too small and loose, go up a hook size.
Pattern Instructions
Crocheted Cherries (Make 2)
Using deep red thread and your 1.5mm hook:
Round 1: Create a magic ring. Work 6 sc into the ring. Pull tail to close. Do not join. Work in continuous rounds. Place a stitch marker in the first stitch and move it up each round. (6 sts)
Round 2: Inc in each stitch around. (12 sts)
Round 3: *Sc in next st, inc in next st* repeat around. (18 sts)
Round 4: Sc in each stitch around. (18 sts)
Round 5: Sc in each stitch around. (18 sts)
Round 6: *Sc in next st, dec* repeat around. (12 sts)
Begin stuffing firmly with small bits of fiberfill. The cherries should feel solid, not squishy.
Round 7: Dec around. (6 sts)
Finish stuffing. Cut thread, leaving a 4-inch tail. Thread tail through tapestry needle, weave through front loops of remaining 6 stitches, and pull tight to close. Secure with a few small stitches and weave in the end.
Tip for beginners: Stuff your cherry before the opening gets too small. It is much easier to add fiberfill through a larger hole. Use tiny pinches of stuffing rather than one big chunk.
Cherry Stems (Make 2)
Using brown thread and your 1.5mm hook:
Chain 20. Turn.
Row 1: Sl st in second chain from hook and in each chain across. (19 sl sts)
Fasten off, leaving a 6-inch tail for attaching to the cherry.
Thread the tail onto your tapestry needle. Insert the needle through the top center of one cherry, pull through, then stitch back through a nearby spot to secure. Repeat two or three times until the stem feels firmly attached. Weave in any remaining tail inside the cherry.
Connecting Stem Section
This creates the portion where both stems join together.
Using brown thread:
Chain 15. Fasten off, leaving long tails on both ends for assembly.
You will attach one cherry stem to each end of this connecting piece during final assembly.
Leaves (Make 2)
Using mint green thread:
Chain 8. Turn.
Row 1: Sc in second chain from hook, hdc in next st, dc in next 2 sts, hdc in next st, sc in next st, 3 sc in last chain.
Now working along the opposite side of the foundation chain:
Sc in next st, hdc in next st, dc in next 2 sts, hdc in next st, sc in last st.
Sl st to first sc to join. Fasten off, leaving a tail for sewing.
Your leaf should have a pointed tip at each end and a gentle curve along the sides. If it looks flat, try blocking it with a bit of steam or starch.
Cherry Blossom Flowers (Make 2)
Using pale pink thread:
Magic ring.
Round 1: Ch 1 (does not count as a stitch), work 5 sc into the ring. Sl st to first sc to join. (5 sts)
Round 2 (creating petals): *Ch 3, dc in same stitch, ch 3, sl st in same stitch, sl st in next stitch* repeat around 5 times, working the final sl st into the base of the first petal.
Fasten off, leaving a tail for sewing. Pull the magic ring tail to tighten the center.
Optional flower center: Thread a small gold bead onto pink thread and stitch it to the center of each flower.
Assembly Instructions
Step 1: Attach Stems to Cherries
If you have not already done so, securely sew each individual stem to the top of a cherry. Make sure they are firmly attached since these will dangle and receive movement.
Step 2: Braid or Twist the Connecting Stem
Take your connecting stem piece. Fold it in half to find the center point. This center point will attach to the chain. The two ends will connect to the cherry stems.
Sew or tie each cherry stem to the ends of the connecting stem. You want the cherries to hang at slightly different lengths for a natural look.
Step 3: Attach the Leaves
Position both leaves at the top of the connecting stem, where it will attach to the chain. The leaves should point outward in opposite directions, forming a small V shape. Sew them securely using matching green thread.
Step 4: Prepare the Chain
Cut your rose gold chain to approximately 6 inches. Attach the lobster clasp to one end using a jump ring. Attach your 2-inch extension chain to the other end.
Step 5: Create Pearl Dangles
Thread each pearl bead onto an eye pin or head pin. Use your round nose pliers to create a small loop at the top. Attach these to jump rings.
Space 6 to 8 pearl dangles along the chain, attaching them at regular intervals. These add movement and sparkle to your finished bracelet.
Step 6: Attach the Cherry Charm
Find the center of your chain. Use a jump ring to attach the top of your cherry assembly (where the leaves meet the connecting stem) to the center of the chain.
Step 7: Attach the Flowers
Position one flower on each side of the cherry charm, approximately 1 inch away from center. Use small jump rings or sew them directly to the chain using pink thread.
Step 8: Final Adjustments
Try on your bracelet. Adjust any dangles that seem crooked. Make sure all jump rings are fully closed to prevent pieces from falling off.
Helpful Tips for Success
Working with crochet thread feels slippery at first. Give yourself grace during the first few rounds. Your tension will even out as you get used to the material.
Stuffing tiny amigurumi works best with a chopstick, pencil, or the back of your crochet hook. Push tiny bits of fiberfill into place rather than cramming in larger pieces.
Jewelry findings are available at most craft stores. If you cannot find rose gold, silver or gold work beautifully too. Match your pearl beads to your chain color for a cohesive look.
Blocking your flowers and leaves with light steam helps them lay flat and look more professional.
Customization Ideas
This cherry blossom spring charm bracelet crochet pattern adapts easily to your preferences:
Care Instructions
Hand wash gently if needed. Avoid submerging the metal findings for extended periods. Lay flat to dry. Store in a small jewelry box or pouch to prevent tangling.
I hope this cherry blossom charm bracelet brings a little bit of spring to your jewelry collection. It makes a thoughtful handmade gift and works up in just an evening or two. Thank you so much for choosing this pattern.
If you make this bracelet, I would absolutely love to see your version. Tag me on Instagram or share a photo in our Facebook group. Seeing your creations is genuinely the best part of designing patterns.
Save this crochet tutorial to your Pinterest boards so you can find it when you are ready to start stitching. And please drop a comment below if you make one. I read every single comment and love hearing about your projects.
