I’ve been dreaming about designing the perfect cozy slipper boot for months now. I wanted something that looked sophisticated with that gorgeous cable detail, worked up quickly in worsted weight yarn, and felt like walking on clouds around the house. The fold-over cuff with those sweet button accents? That was the detail I kept sketching over and over until I got it just right. I am SO thrilled with how these turned out, and I cannot wait for you to make your own pair!
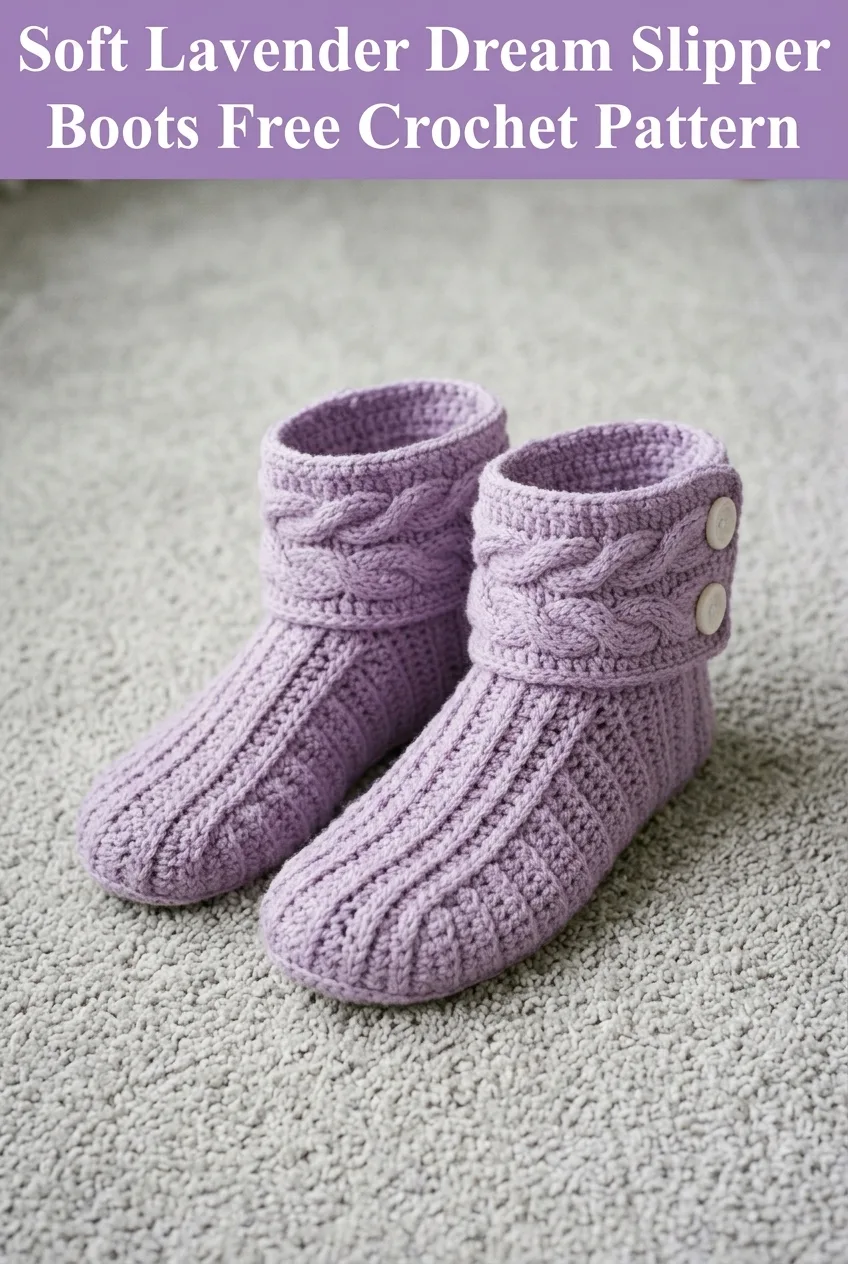
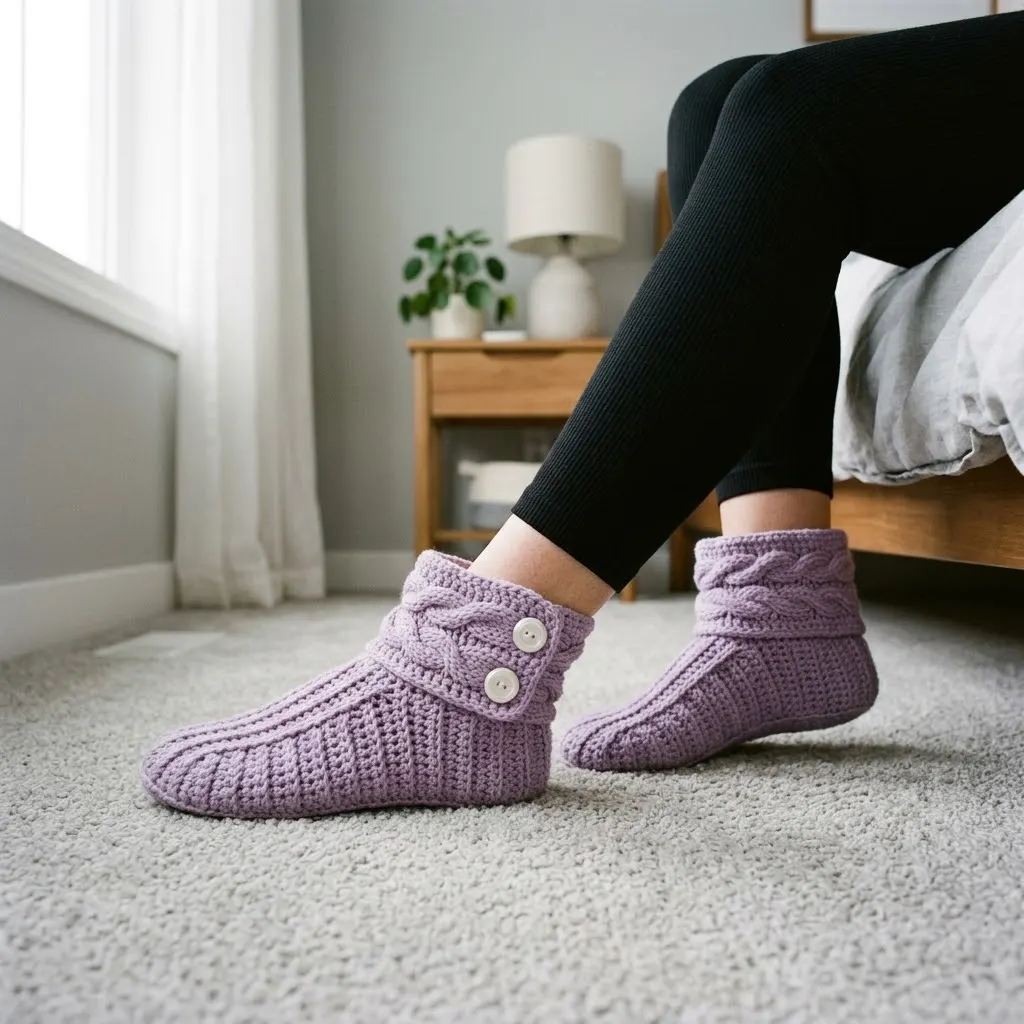
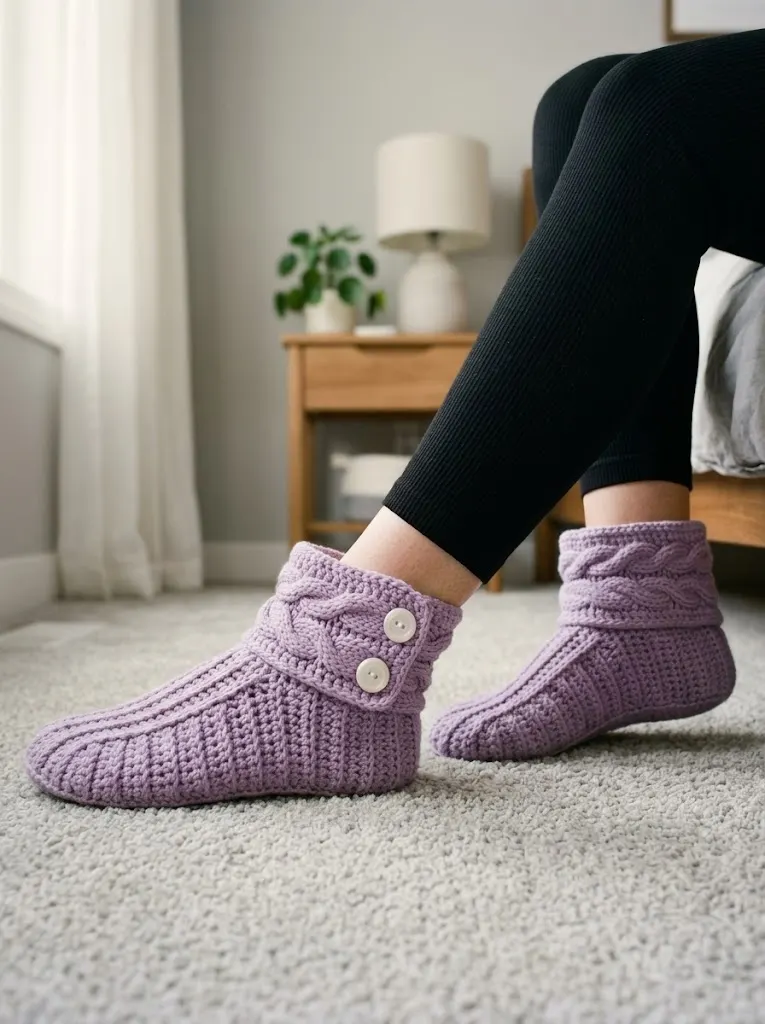
These lavender beauties combine a textured ribbed sole and foot section with an elegant braided cable cuff that folds down for a boutique-worthy finish. Whether you’re padding around on chilly mornings or gifting these to someone special, this crochet slipper boots pattern delivers warmth, style, and that handmade touch we all love.
Why You’ll Love This Slipper Boots Crochet Pattern
Let me tell you what makes these slippers special. The construction is actually quite clever. You’ll work the sole flat, then build up the foot section in joined rounds, and finally create that stunning cable cuff as a separate piece that wraps around the ankle. Don’t let the cables intimidate you. I promise they’re easier than they look, and I’ll walk you through every single step.
The ribbed texture on the foot gives these slippers excellent stretch and a snug fit. That means they stay put when you’re walking around, which is honestly my biggest pet peeve with most slipper patterns. Nobody wants to shuffle.
The fold-over cuff with the decorative buttons adds that polished, finished look that makes these perfect for gifting. They look like something you’d find in a boutique, but you made them with your own two hands.
Materials Needed
Yarn:
Hook:
Notions:
Gauge:
14 stitches and 16 rows = 4 inches in single crochet
*Always check your gauge! This pattern fits best when gauge is accurate.*
Skill Level
Intermediate
You should be comfortable with basic crochet stitches and working in the round. The cable technique uses front post stitches, which I’ll explain thoroughly. If you’ve never tried cables before, this is a wonderful first cable project because the repeat is short and manageable.
Finished Measurements
These instructions create a women’s size medium (fits US shoe sizes 7-8, approximately 9.5 inches in foot length).
I’ll include notes throughout for adjusting the size up or down.
Stitch Abbreviations and Definitions
Let me break down every stitch you’ll need for this crochet tutorial.
Ch = Chain: Yarn over, pull through the loop on your hook. This creates the foundation links.
Sl st = Slip stitch: Insert hook, yarn over, pull through both the stitch and the loop on your hook in one motion. Used for joining rounds.
Sc = Single crochet: Insert hook, yarn over and pull up a loop (2 loops on hook), yarn over and pull through both loops. A short, tight stitch.
Hdc = Half double crochet: Yarn over, insert hook, yarn over and pull up a loop (3 loops on hook), yarn over and pull through all 3 loops. Slightly taller than single crochet.
Dc = Double crochet: Yarn over, insert hook, yarn over and pull up a loop (3 loops on hook), yarn over and pull through 2 loops, yarn over and pull through remaining 2 loops. A taller stitch that creates nice drape.
FPdc = Front post double crochet: Yarn over, insert your hook from front to back around the post (the vertical part) of the stitch below, complete as a regular double crochet. This creates raised texture.
BPdc = Back post double crochet: Yarn over, insert your hook from back to front around the post of the stitch below, complete as a regular double crochet. This recesses the stitch.
Sc2tog = Single crochet 2 together: Insert hook in first stitch, pull up a loop, insert hook in next stitch, pull up a loop (3 loops on hook), yarn over and pull through all 3 loops. This decreases by one stitch.
Step by Step Crochet Pattern Instructions
Part One: The Sole
We’re starting from the bottom up. The sole is worked flat in rows.
Foundation: Ch 6.
Row 1: Sc in 2nd ch from hook and in each ch across. (5 sc)
Row 2: Ch 1, turn. 2 sc in first st, sc in each st across to last st, 2 sc in last st. (7 sc)
Row 3: Ch 1, turn. 2 sc in first st, sc in each st across to last st, 2 sc in last st. (9 sc)
Rows 4-6: Ch 1, turn. Sc in each st across. (9 sc)
Row 7: Ch 1, turn. 2 sc in first st, sc in each st across to last st, 2 sc in last st. (11 sc)
Rows 8-24: Ch 1, turn. Sc in each st across. (11 sc)
*At this point, your sole should measure approximately 6.5 inches. For a larger size, add 2-4 more rows here.*
Row 25: Ch 1, turn. Sc2tog, sc in each st across to last 2 sts, sc2tog. (9 sc)
Row 26: Ch 1, turn. Sc2tog, sc in each st across to last 2 sts, sc2tog. (7 sc)
Row 27: Ch 1, turn. Sc2tog, sc in each st across to last 2 sts, sc2tog. (5 sc)
Do not fasten off. We’re going to build directly up from the sole.
Part Two: Foot Section
Now we work around the entire perimeter of the sole to build up the sides of the slipper. This is where the magic happens!
Setup Round: Ch 1, work 1 sc in each st across the toe (5 sc), place a marker, then work sc evenly around the entire edge of the sole. Aim for approximately 52-56 sc total around. Sl st to first sc to join.
*Don’t stress about the exact count here. Just make sure your stitches are evenly spaced and the sole lies flat.*
Round 1: Ch 1, working in BLO (back loop only) for this round, sc in each st around. Sl st to join.
*Working in the back loop only creates that nice ridge at the base of the foot section. It’s a small detail that makes a big difference!*
Round 2: Ch 1, sc in each st around. Sl st to join.
Rounds 3-8: Repeat Round 2.
Toe Shaping
Now we’ll decrease at the toe to shape the slipper around your foot.
Round 9: Ch 1, sc in each st until you reach 3 sts before your toe marker, sc2tog, sc in next st (center toe), sc2tog, sc in each remaining st around. Sl st to join. (2 sts decreased)
Round 10: Ch 1, sc in each st around. Sl st to join.
Rounds 11-14: Repeat Rounds 9-10 two more times. (6 total stitches decreased at toe)
Rounds 15-16: Ch 1, sc in each st around. Sl st to join.
*Your foot section should now cup nicely around the toe area. Try it on if you can! The ribbed texture gives nice stretch.*
Ankle Section
Rounds 17-20: Ch 1, hdc in each st around. Sl st to join.
*Switching to half double crochet gives the ankle a bit more height and a slightly different texture. This also creates a natural break before the cuff.*
Fasten off and weave in your end. Set the slipper body aside.
Part Three: Cable Cuff Band
Here’s the fun part! The cable cuff is worked as a separate flat piece, then wrapped around the ankle and buttoned in place. This makes it adjustable and adds that beautiful design element.
Foundation: Ch 14.
Row 1 (Wrong Side): Dc in 4th ch from hook and in each ch across. (12 dc)
Row 2 (Right Side): Ch 2, turn. Skip first st, FPdc around next st, BPdc around next st, FPdc around each of next 2 sts, BPdc around next st, FPdc around each of next 2 sts, BPdc around next st, FPdc around each of next 2 sts, BPdc around next st, dc in top of turning ch. (12 sts)
Row 3: Ch 2, turn. Skip first st, BPdc around next st, FPdc around next st, BPdc around each of next 2 sts, FPdc around next st, BPdc around each of next 2 sts, FPdc around next st, BPdc around each of next 2 sts, FPdc around next st, dc in top of turning ch. (12 sts)
Row 4 (Cable Row): Ch 2, turn. Skip first st, FPdc around next st, BPdc around next st. *Now for the cable cross: Skip next 2 sts, FPdc around each of the following 2 sts, working in front of the sts you just made, FPdc around each of the 2 skipped sts.* BPdc around next st, repeat cable cross once more, BPdc around next st, dc in top of turning ch. (12 sts)
*The cable cross might feel awkward the first time. Go slowly! You’re essentially making stitches out of order, then doubling back. The twist creates that beautiful braided look.*
Rows 5-7: Repeat Rows 2-3, then Row 2 again.
Row 8: Repeat Row 4 (Cable Row).
Rows 9-24: Continue repeating the 4-row pattern (Rows 2, 3, 2, then 4) until your cuff measures approximately 11-12 inches long, or long enough to wrap around your ankle with a 1-inch overlap.
Final Row: Ch 1, turn. Sc in each st across. Fasten off, leaving a long tail for sewing.
Part Four: Assembly and Finishing
You’re so close to cozy feet!
Attaching the Cuff:
1. Lay your slipper body flat with the opening facing up.
2. Position the cable cuff band around the ankle opening, with the cables facing outward.
3. The cuff should overlap by about 1 inch at the outer side of the ankle.
4. Using your yarn needle and matching yarn, whip stitch the bottom edge of the cuff to the top round of the ankle section. Work around the entire circumference, securing the cuff in place.
Adding Buttons:
1. Position 2 buttons evenly spaced on the overlapping section of the cuff.
2. The buttons are decorative in this design, sewn through both layers of the overlap to hold everything secure.
3. Sew buttons firmly using matching thread or yarn.
Folding the Cuff:
Fold the top portion of the cuff down to show off those gorgeous cables. The fold should hit about mid-cuff, creating that cozy boot look you see in the photos.
Final Touches:
Weave in all remaining ends securely. I like to weave through several stitches in different directions so nothing comes loose with wear.
Pattern Notes and Tips
For Larger Sizes: Add 2-4 rows to the straight section of the sole (between the increases and decreases) and work 2-4 additional rounds on the foot section before starting toe shaping.
For Smaller Sizes: Subtract 2 rows from the sole and work 2 fewer rounds on the foot section.
Non-Slip Option: Consider adding fabric paint dots or purchasing non-slip sole material to apply to the bottom. Safety first, especially on hardwood or tile floors!
Yarn Substitutions: This pattern works beautifully in any worsted weight yarn. For extra warmth, try a wool blend. For easy care gifting, acrylic is perfect and machine washable.
Button Alternatives: No buttons? No problem! You can use decorative pins, skip them entirely, or sew on faux leather patches for a different look.
Why This Pattern Works for Gifting
These slipper boots make absolutely wonderful handmade gifts. They work up in a weekend, look incredibly professional with that cable detail, and fit a range of sizes thanks to the stretchy ribbed construction. The fold-over cuff adds sophistication without adding difficulty.
I’ve made pairs for my mom, my sister, and three friends. Everyone asks where I bought them!
You Did It!
I hope you love making these Soft Lavender Dream Slipper Boots as much as I loved designing them. There’s nothing quite like slipping your feet into something you made yourself, especially when it looks this good.
If you make these slippers, I would absolutely love to see them! Tag me on Instagram or share your photos in our Facebook group. Seeing your creations genuinely makes my day.
If you enjoyed this crochet slipper boots pattern, please save it to your Pinterest boards so you can find it easily when you’re ready to cast on. And if you make a pair, drop a comment below! I’d love to hear which color you chose and how they turned out. Happy crocheting, friend!
