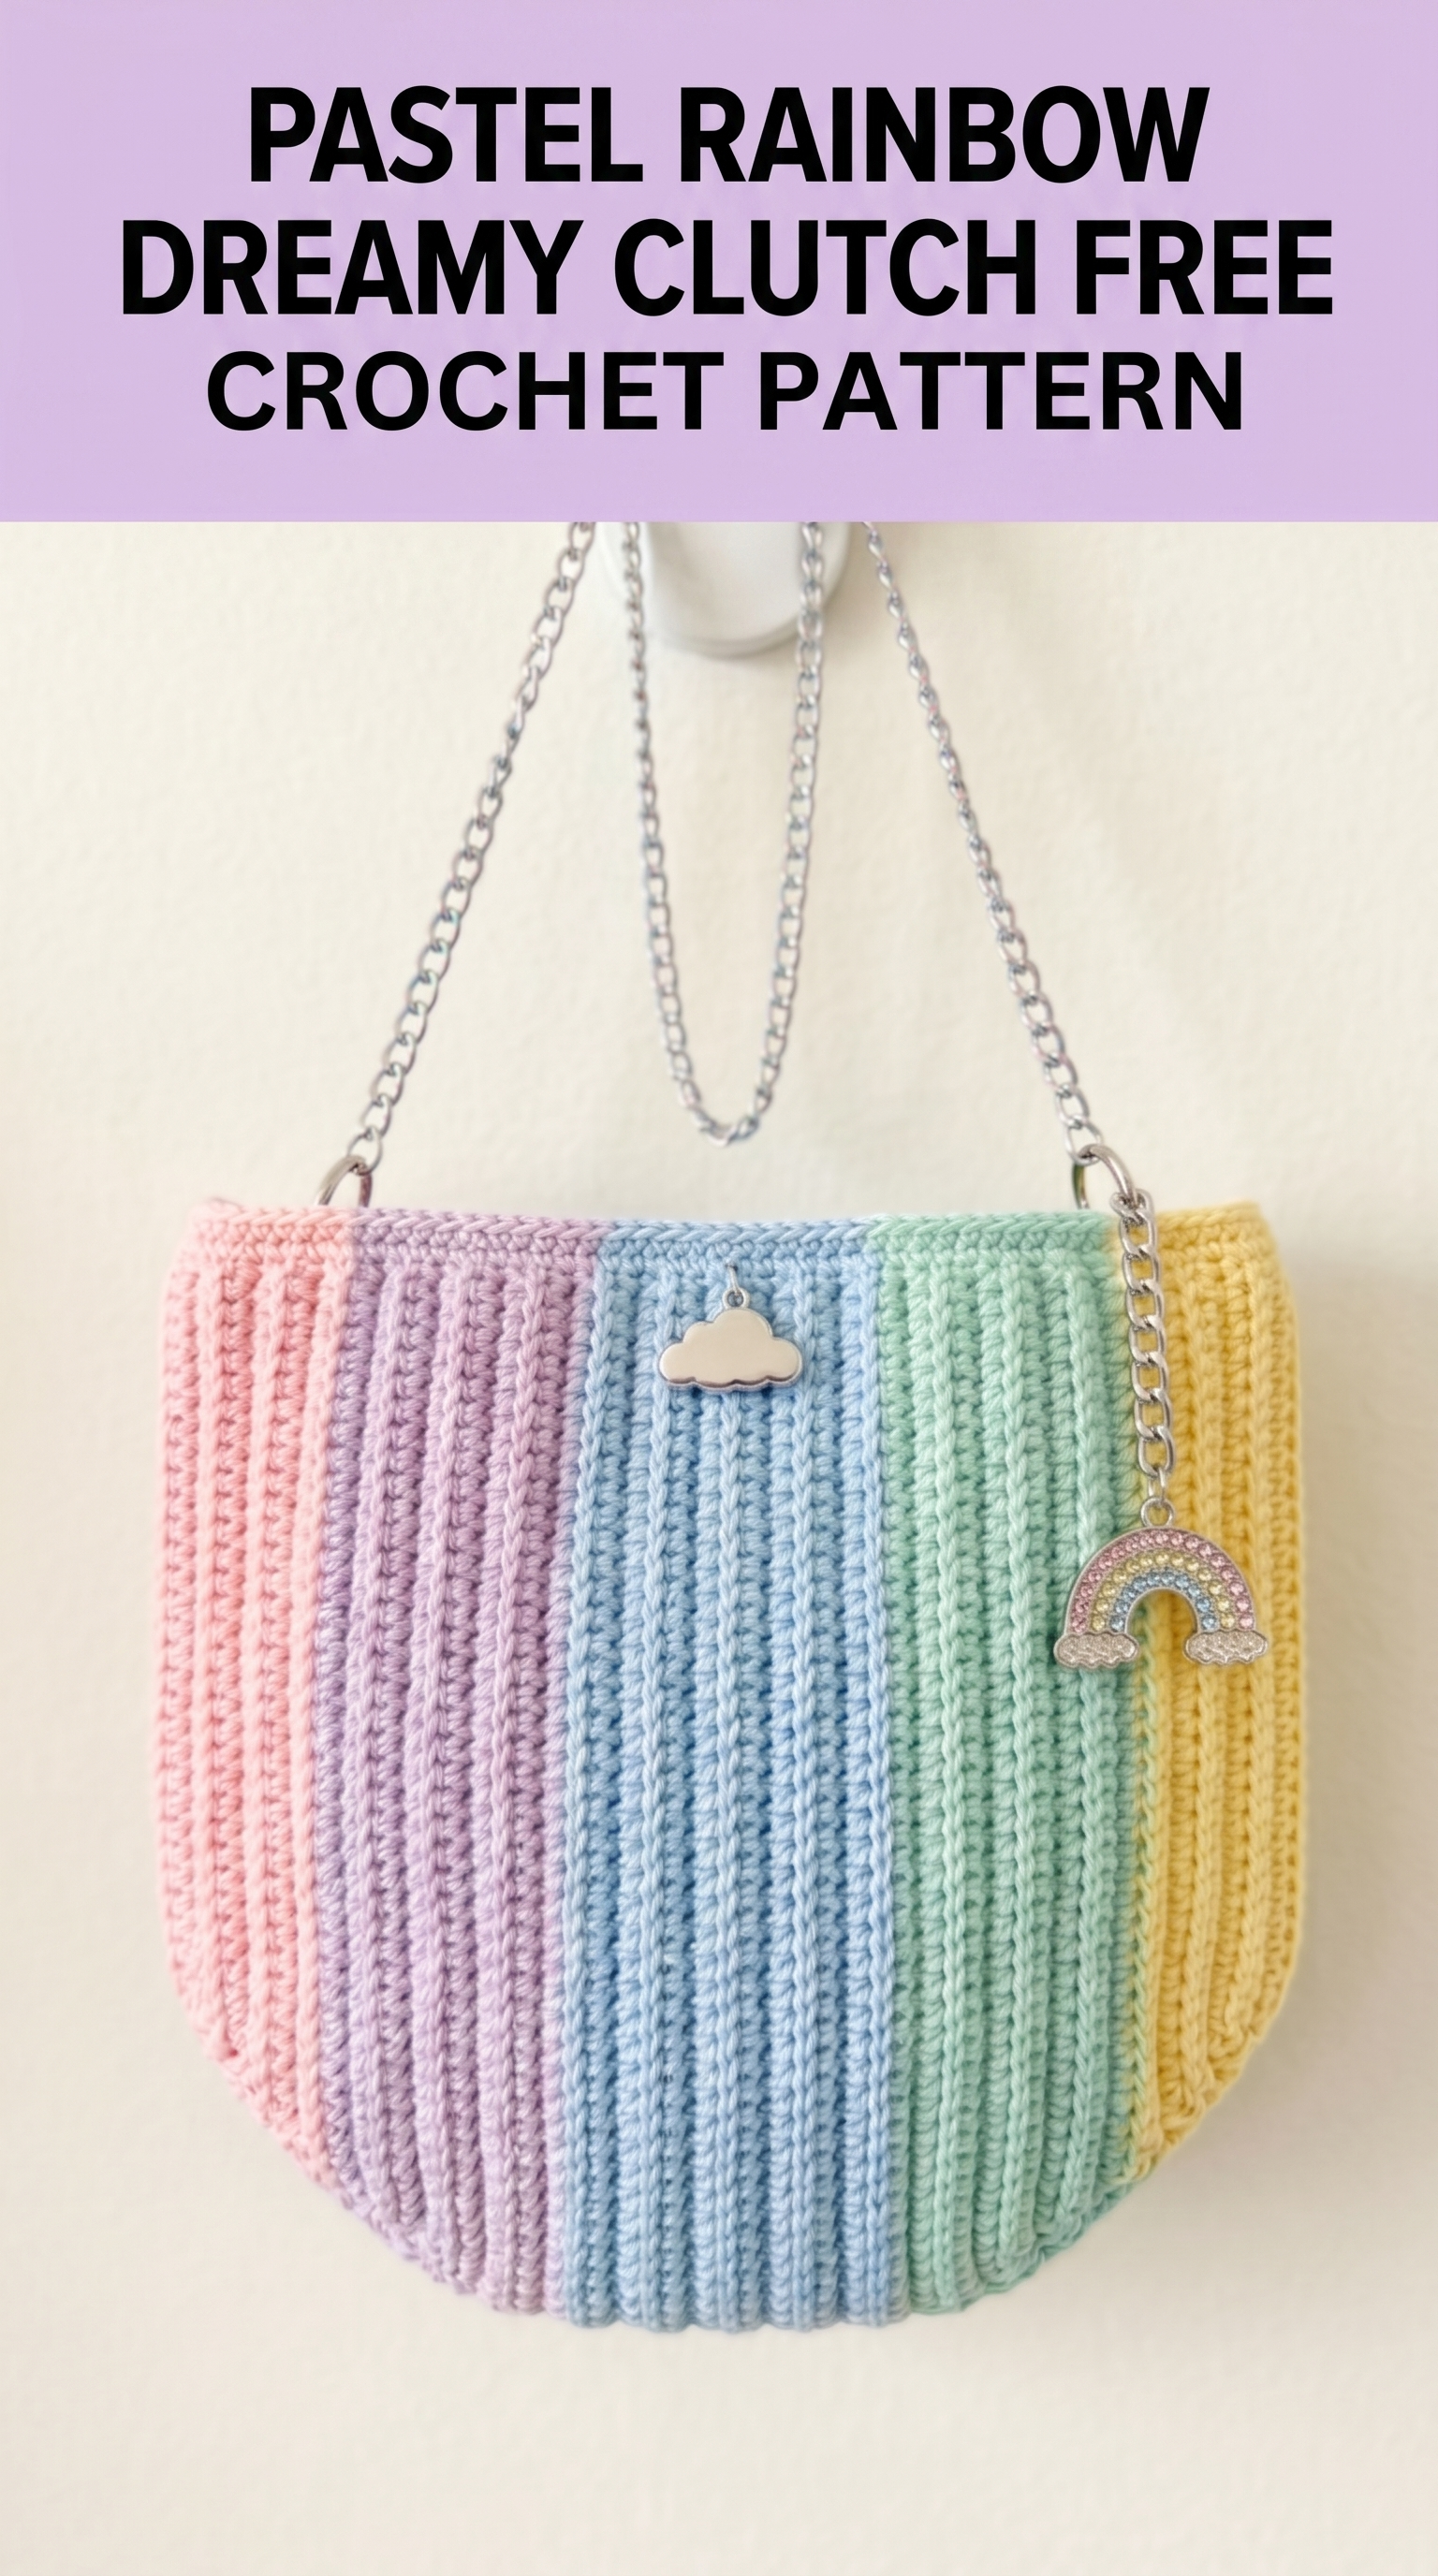
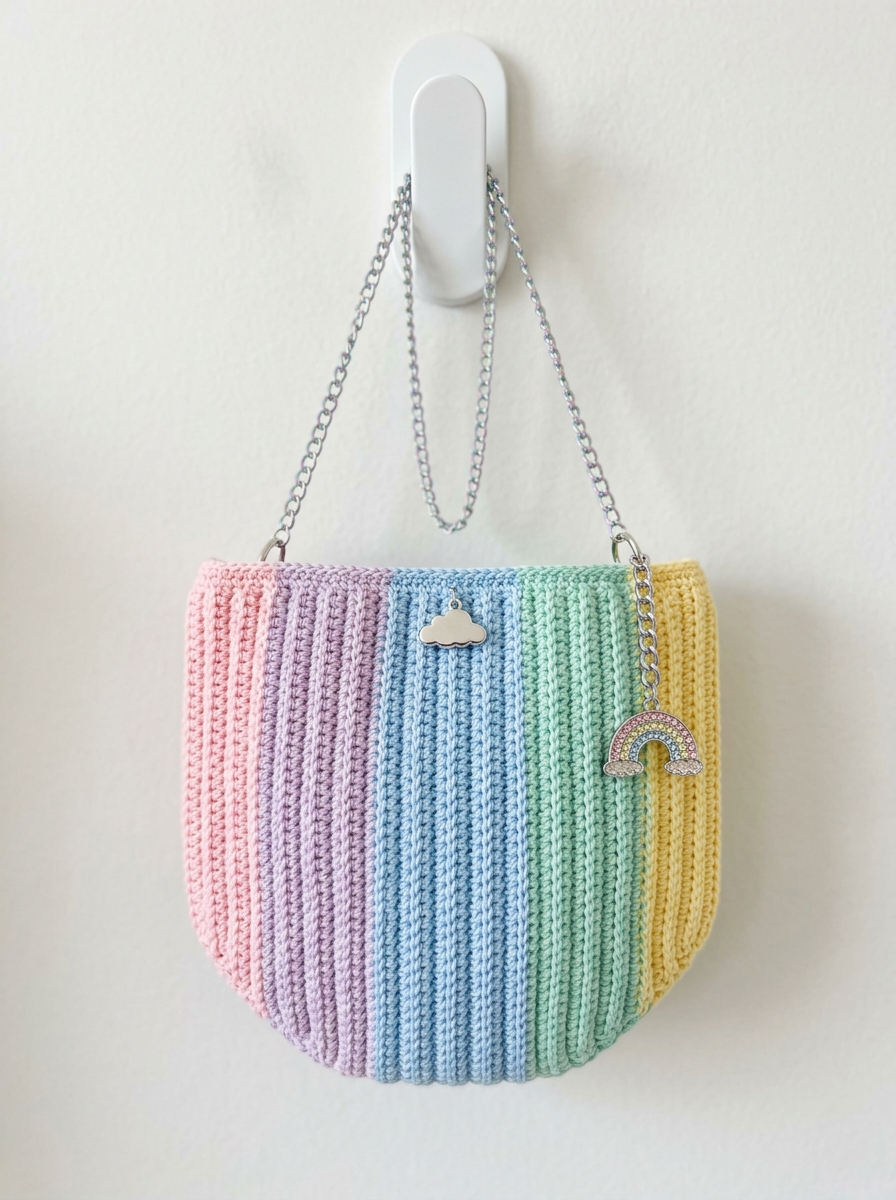
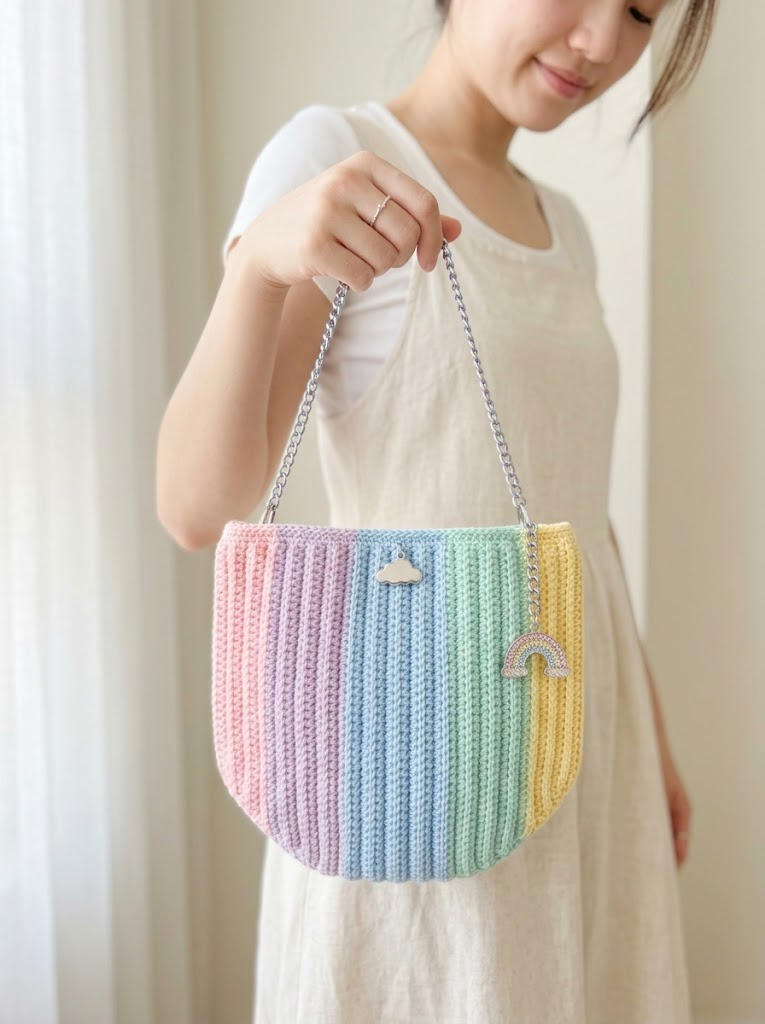
This little bag stopped me in my tracks the moment I finished it. The Pastel Rainbow Dreamy Clutch is exactly the kind of project that makes you fall in love with crochet all over again. Soft pastel stripes. A satisfying ribbed texture. That elegant silver chain strap. And honestly? It works up faster than you might think.
If you can crochet a basic rectangle and know how to change colors, you can absolutely make this clutch. I would call this a confident beginner to intermediate project. The construction is straightforward, and I will walk you through every single step.
Let me show you how to make your own.
Why This Pastel Rainbow Clutch Pattern Works So Well
The magic here is in the vertical ribbing. Those gorgeous raised lines running up and down the bag create visual interest and a slightly stretchy, cushioned fabric. This texture comes from working in the back loop only, which I will explain in detail below.
The pastel color blocking gives you that dreamy rainbow effect without overwhelming the eye. Pink flows into lavender, then soft blue, mint green, and finally a buttery yellow. The rounded bottom and structured top edge make this clutch look polished and intentional.
The silver chain strap elevates everything. It transforms a simple crocheted pouch into something you would actually carry out to brunch or a summer wedding.
Materials You Will Need
Gather these supplies before you start. Having everything ready makes the process so much smoother.
Yarn:
Hook:
Notions:
Finished Dimensions:
Stitches and Abbreviations
Let me define every stitch before we begin. If any of these feel unfamiliar, practice a small swatch first.
Ch — Chain: Yarn over, pull through the loop on your hook. This creates the foundation for most crochet projects.
Sl st — Slip stitch: Insert hook, yarn over, pull through both the stitch and the loop on your hook in one motion. Used for joining and finishing.
Sc — Single crochet: Insert hook into the stitch, yarn over and pull up a loop (two loops on hook), yarn over and pull through both loops. This is your basic building block stitch.
BLO — Back loop only: Instead of inserting your hook under both loops at the top of a stitch, you only go through the back loop. This creates that raised ribbed texture. The back loop is the one farther from you when looking at your work.
Dec — Decrease: Work two stitches together to reduce your stitch count by one. For single crochet decrease, insert hook in first stitch, pull up a loop, insert hook in next stitch, pull up a loop (three loops on hook), yarn over and pull through all three.
Gauge Check
Before diving into the pattern, work a small gauge swatch. This matters for bags because you want a tight, sturdy fabric that will not stretch out of shape.
Gauge: 18 stitches and 20 rows = 4 inches in single crochet BLO
If your swatch is larger, go down a hook size. If smaller, go up. Do not skip this step if finished size matters to you.
Step by Step Crochet Pattern for the Pastel Rainbow Clutch
This clutch is worked flat in two identical panels, then seamed together. Each panel features five color blocks worked in single crochet through the back loop only.
Panel One (Make Two)
You will create each panel by working vertical stripes. Each color section is approximately the same width.
Color A — Soft Pink
Foundation Row: Ch 29.
Row 1: Sc in second ch from hook and in each ch across. (28 sts)
Row 2: Ch 1, turn. Sc in BLO of each st across. (28 sts)
Rows 3 through 10: Repeat Row 2. (28 sts per row)
At the end of Row 10, fasten off Color A. You should have 10 rows of pink ribbing.
Color B — Lavender
Join lavender yarn with a sl st in the first stitch of the next row.
Rows 11 through 18: Ch 1, turn. Sc in BLO of each st across. (28 sts per row)
Fasten off at the end of Row 18.
Color C — Light Blue
Join light blue yarn.
Rows 19 through 26: Ch 1, turn. Sc in BLO of each st across. (28 sts per row)
Fasten off at the end of Row 26.
Color D — Mint Green
Join mint green yarn.
Rows 27 through 34: Ch 1, turn. Sc in BLO of each st across. (28 sts per row)
Fasten off at the end of Row 34.
Color E — Pale Yellow
Join pale yellow yarn.
Rows 35 through 42: Ch 1, turn. Sc in BLO of each st across. (28 sts per row)
Fasten off and weave in your end.
You now have one complete panel with 42 rows total, creating five equal color blocks of 8 rows each. The vertical ribs run parallel to the short edge.
Make a second panel identical to the first.
Shaping the Rounded Bottom
Here is where the clutch gets its signature curved shape. You will work decreases along the bottom edge of each panel before joining.
Hold one panel with the foundation chain edge (bottom) facing you.
Shaping Row 1: Join any color yarn at the corner. Sc evenly across the bottom edge, working approximately 42 sc across the row ends. (42 sts)
Shaping Row 2: Ch 1, turn. Dec, sc across to last 2 sts, dec. (40 sts)
Shaping Row 3: Ch 1, turn. Dec, sc across to last 2 sts, dec. (38 sts)
Shaping Row 4: Ch 1, turn. Dec, sc across to last 2 sts, dec. (36 sts)
Fasten off. Repeat on the second panel.
This creates a gentle curve at the bottom of each piece.
Joining the Panels
Place both panels together with wrong sides facing. The right side of the fabric (the side with more pronounced ribs) should face outward.
Using a tapestry needle and matching yarn, whip stitch or mattress stitch around the sides and curved bottom. Leave the top edge completely open.
Take your time here. Neat seaming makes a huge difference in the finished look.
Top Edge Finishing
To create a clean, sturdy top opening:
Round 1: Join yarn at one side seam. Sc evenly around the entire top opening, working through both layers at the seams for reinforcement. Sl st to first sc to join. (Approximately 56 sc total, adjust as needed)
Round 2: Ch 1, sc in each st around. Sl st to join. (56 sts)
Round 3: Repeat Round 2.
Fasten off and weave in all remaining ends.
Attaching the Hardware and Chain Strap
This step transforms your crocheted pouch into a proper clutch.
Adding D-Rings:
Cut two small pieces of matching yarn, each about 12 inches long. Fold a D-ring or lobster clasp attachment point. Insert your hook through the top corner of the clutch (through both layers for strength), about half an inch from the side seam.
Pull the folded yarn through, then pull the D-ring through the yarn loop. Secure tightly with a knot on the inside. Repeat on the opposite corner.
Attaching the Chain:
Open the end links of your silver chain and hook them through the D-rings. Close securely with pliers if needed.
The chain length is personal preference. I used approximately 45 inches for a comfortable crossbody length. You can also go shorter for a shoulder bag style.
Optional Embellishments
The sample features two adorable charms: a silver cloud and a sparkly rainbow. These attach easily to the chain links with small jump rings.
Feel free to personalize your clutch with pins, patches, tassels, or whatever makes you smile.
Tips for Crochet Beginners
A few things that might help if this is one of your first bag projects:
Tension matters. Keep your stitches firm and even. Loose stitches will create gaps and a floppy bag.
Back loop only can feel awkward at first. Slow down and make sure you are only going through that back loop. After a few rows, it becomes second nature.
Color changes are simple. On your last stitch before switching colors, complete the stitch with the new color. Pull the old color to the back and continue. Leave tails long enough to weave in securely.
Block before seaming if needed. If your panels are curling, wet block them flat before joining. Pin to a foam board, mist with water, and let dry completely.
Why This Crochet Tutorial Is Perfect for Spring and Summer
Pastel rainbow accessories are having a moment. This clutch hits all the right notes: trendy color palette, practical size, and handmade charm. It holds your phone, keys, cards, and lipstick without being bulky.
The cotton yarn keeps it lightweight and breathable. No heavy woolly bag weighing you down at outdoor events.
And let me be honest. Carrying something you made yourself feels incredible. People will ask where you got it. You get to say you made it.
Wrapping Up Your Pastel Rainbow Dreamy Clutch
You did it. Or you are about to do it. Either way, I am so glad you are here.
This Pastel Rainbow Dreamy Clutch crochet pattern is one of those projects that looks impressive but does not require advanced skills. Just patience, pretty yarn, and a willingness to try something new.
Thank you for choosing to make this with me. I genuinely appreciate you trusting my pattern and spending your creative time here.
When you finish yours, I would absolutely love to see it. Tag me on Instagram or share in my Facebook group. Seeing your makes is the best part of sharing patterns.
Now go grab those pastel skeins and get started. You are going to love how this turns out.
Happy crocheting, friend.
