This stunning crescent-shaped purse is about to become your new favorite accessory project. The Lavender Dream Crescent Purse combines textured bobble stitches with elegant silver hardware for a look that is both whimsical and sophisticated. If you have basic crochet skills and want to level up your bag-making game, this crochet pattern will walk you through every single step.
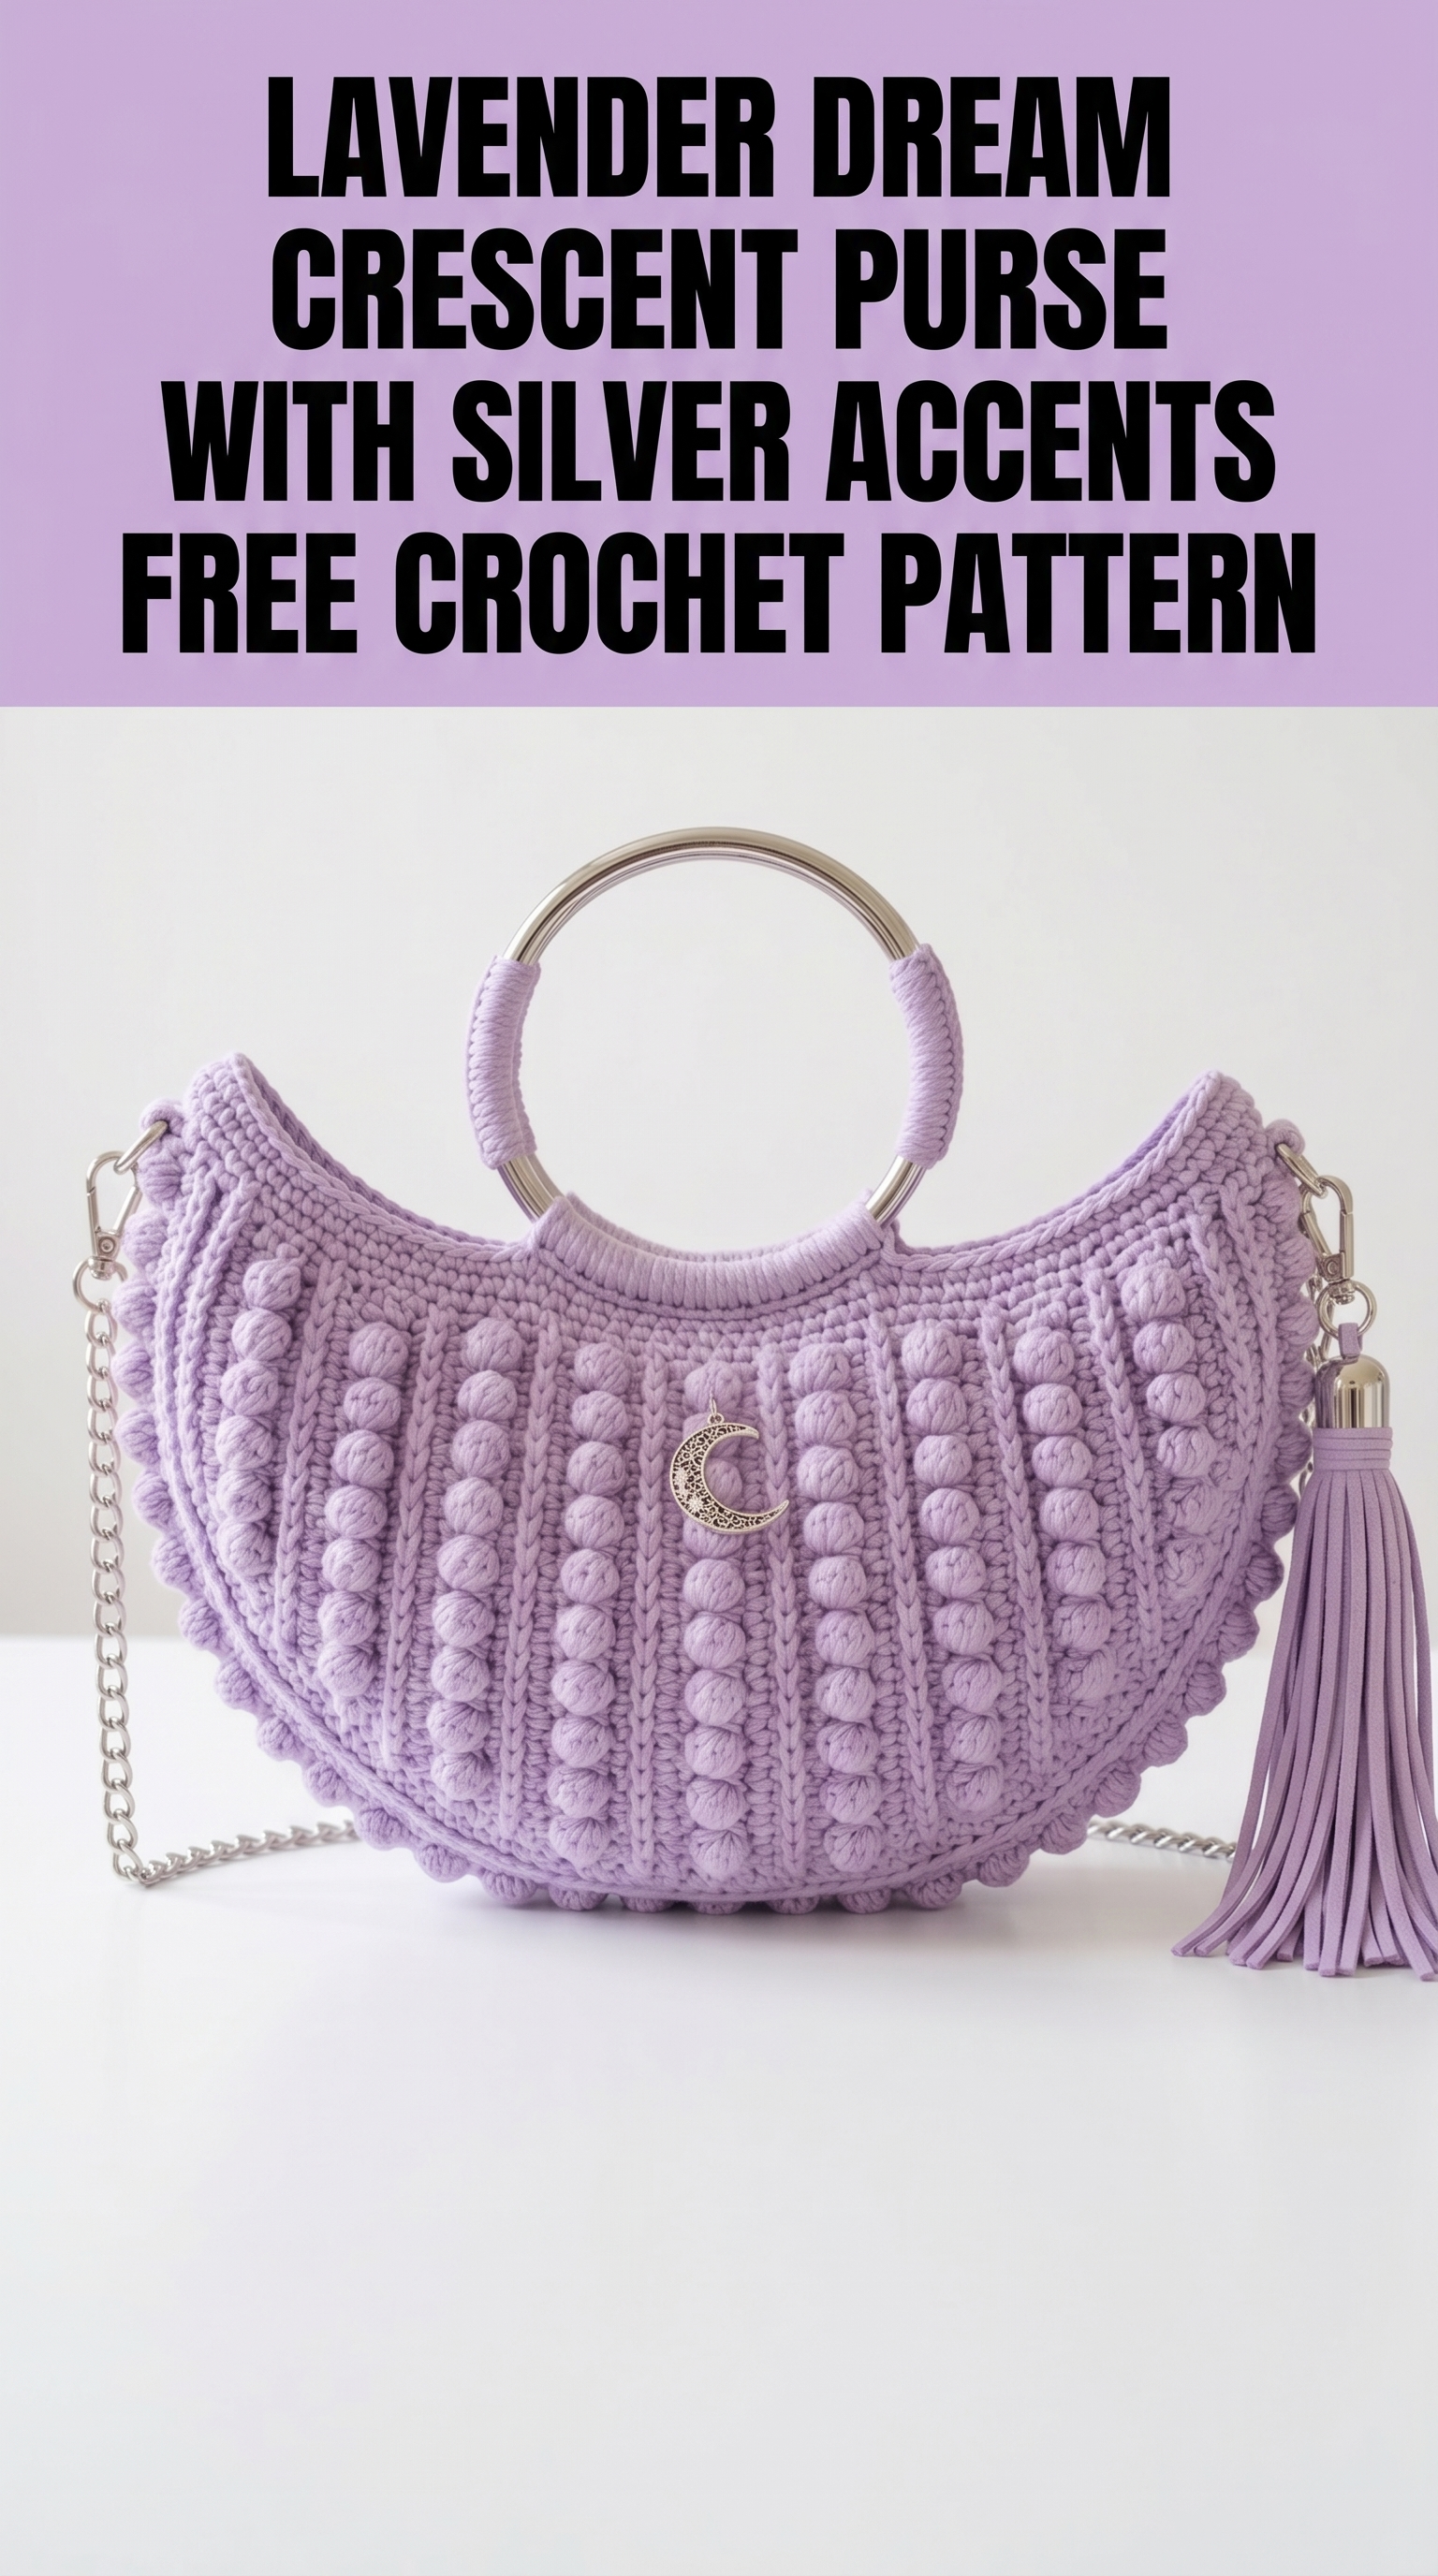
I designed this purse after falling in love with the moon-inspired shape and wanting something that felt special enough for evening events but practical enough for everyday use. The bobble stitch rows create beautiful vertical texture that catches light beautifully. And that silver ring handle? Pure elegance.
Do not worry if you have never made a bag before. This crochet tutorial breaks everything down into manageable pieces. You will work the main body flat, add the bobbles in a simple pattern, then seam and attach the hardware. Totally doable for confident beginners and satisfying for experienced crafters.
About This Crescent Purse Crochet Pattern
Skill Level: Intermediate beginner. You should be comfortable with basic stitches and ready to try bobbles.
Finished Dimensions: Approximately 11 inches wide at the widest point, 7 inches tall at center, and 2 inches deep.
Construction Method: The purse body is worked flat in rows, creating two identical panels. Panels are seamed together with a decorative bobble edging along the curved bottom. The ring handle is wrapped with yarn and attached at the top opening.
Materials You Will Need
Having everything ready before you start makes the whole process smoother. Here is your complete supply list for this lavender crescent purse:
Yarn:
Hook:
Hardware and Notions:
Optional:
Stitch Abbreviations and Definitions
Let me explain every stitch you will use in this pattern. Even if you know these, a quick refresher never hurts.
Ch = Chain. Wrap yarn over hook, pull through loop on hook. This creates foundation stitches.
Sl st = Slip stitch. Insert hook, yarn over, pull through stitch AND loop on hook in one motion. Used for joining and moving across work invisibly.
Sc = Single crochet. Insert hook into stitch, yarn over, pull up a loop (2 loops on hook), yarn over, pull through both loops. Creates a short, tight stitch.
Hdc = Half double crochet. Yarn over, insert hook into stitch, yarn over, pull up a loop (3 loops on hook), yarn over, pull through all 3 loops. Slightly taller than single crochet.
Dc = Double crochet. Yarn over, insert hook into stitch, yarn over, pull up a loop (3 loops on hook), yarn over, pull through 2 loops (2 loops remain), yarn over, pull through remaining 2 loops. A taller stitch that works up quickly.
Bob = Bobble stitch. This creates those gorgeous textured bumps. Here is how to make one:
*Working all in the same stitch:* Yarn over, insert hook, yarn over, pull up loop, yarn over, pull through 2 loops. Repeat this 4 more times in the same stitch (6 loops on hook). Yarn over, pull through all 6 loops. Push the bobble to the front (right side) of your work.
Inc = Increase. Work 2 stitches into a single stitch.
Dec = Decrease. Work 2 stitches together as one.
Gauge Information
Gauge: 16 sc and 18 rows = 4 inches in single crochet
Take time to check your gauge. For a purse, structure matters. If your gauge is too loose, your bag will be floppy and stretch out when you put things inside. Too tight, and you will use more yarn and the fabric will feel stiff.
Make a 5-inch square swatch in single crochet. Measure the center 4 inches. Adjust your hook size if needed.
Step by Step Pattern Instructions
Panel One: Front of the Purse
You will make two identical panels, then seam them together.
Foundation:
Ch 46.
Row 1 (WS): Sc in 2nd ch from hook and in each ch across. (45 sts)
Row 2 (RS): Ch 1, turn. Sc in first 3 sts, *Bob in next st, sc in next 4 sts.* Repeat from * to last 2 sts, sc in last 2 sts. (45 sts, 8 bobbles)
Row 3: Ch 1, turn. Sc in each st across. (45 sts)
Row 4: Ch 1, turn. Sc in first 3 sts, *Bob in next st, sc in next 4 sts.* Repeat from * to last 2 sts, sc in last 2 sts. (45 sts, 8 bobbles)
Rows 5-24: Repeat Rows 3 and 4 ten more times. You should have 12 bobble rows total.
Now we shape the crescent curve.
Row 25: Ch 1, turn. Sc2tog over first 2 sts, sc in each st to last 2 sts, sc2tog. (43 sts)
Row 26: Ch 1, turn. Sc in first 2 sts, *Bob in next st, sc in next 4 sts.* Repeat from * adjusting to maintain bobble columns, sc to end. (43 sts)
Row 27: Ch 1, turn. Sc2tog, sc across to last 2 sts, sc2tog. (41 sts)
Row 28: Ch 1, turn. Sc in each st across. (41 sts)
Rows 29-36: Continue decreasing at beginning and end of every other row while maintaining bobble pattern on RS rows. Decrease 1 st each side every decrease row.
Final stitch count after Row 36: 33 sts.
Rows 37-40: Continue decreasing every row.
Fasten off, leaving a long tail for seaming.
Panel Two: Back of the Purse
Repeat all instructions for Panel One exactly. Make sure your bobbles face the same direction (they should pop toward the right side of your work).
Joining the Panels
Place both panels with wrong sides together, bobbles facing outward on both sides.
Bobble Edging Join:
Starting at one top corner, attach yarn.
Round 1: Working through both layers, sc evenly around the curved bottom edge only. Do not join the straight top edge. Place approximately 3 sc per 2 rows along the curve. End with sl st to first sc.
Round 2: Ch 1. *Sc in next 3 sts, Bob in next st.* Repeat around the curved edge. Sl st to first sc.
Round 3: Sc in each st around the curve. Fasten off.
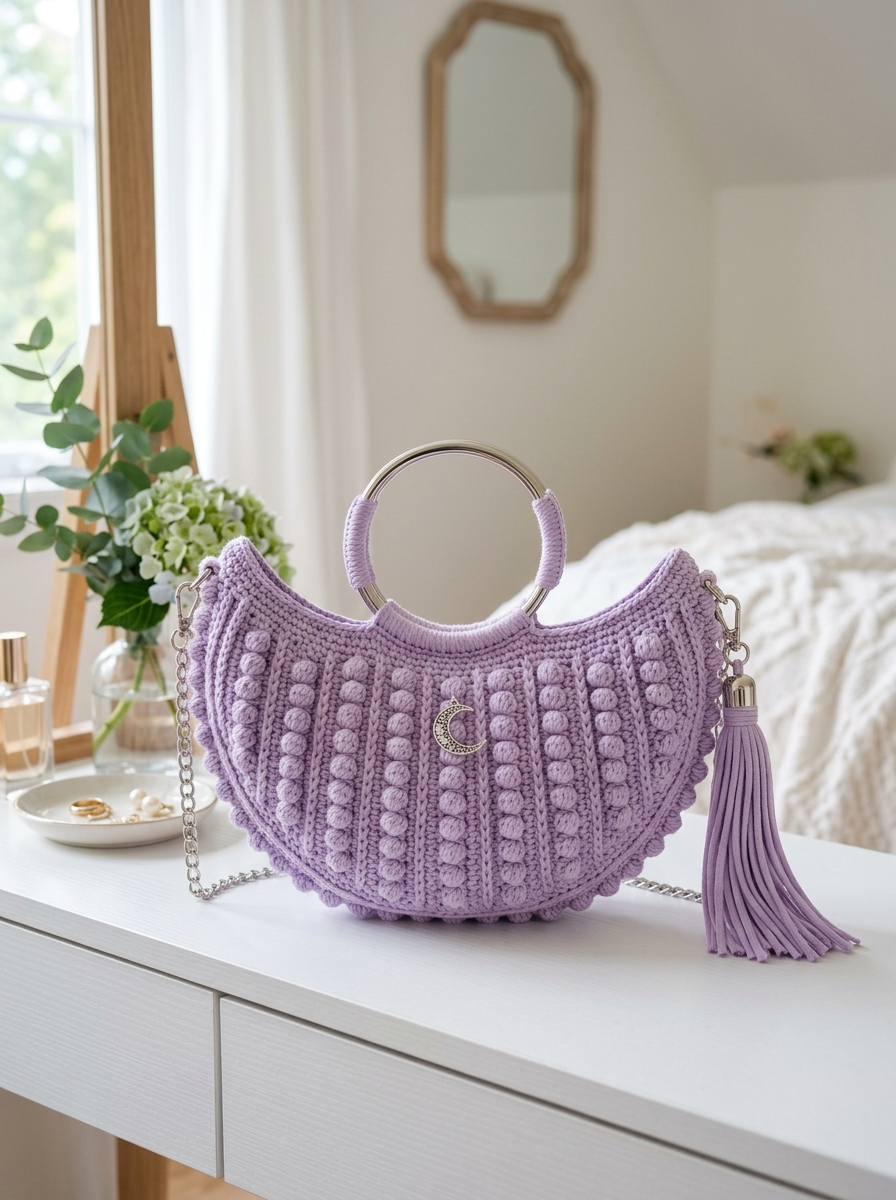
This creates that beautiful scalloped bobble edge you see along the bottom of the purse.
Top Edge Finishing
With the purse opening at top, attach yarn at one corner.
Row 1: Sc evenly across the front panel top edge. Ch 1, turn.
Row 2: Hdc in each st across. Fasten off.
Repeat for back panel top edge.
Ring Handle Attachment
This is where the magic happens. That silver ring gets wrapped in yarn for a cohesive look.
Wrapping the Ring:
Cut approximately 3 yards of yarn. Make a slip knot and place it on the ring. Wrap the yarn tightly around the ring, covering about half of it (the half that sits at the center top of the purse). Keep wraps snug and close together with no gaps showing metal.
Tie off securely. Weave in the ends.
Attaching to Purse:
Position the wrapped section of the ring at center top of purse. Using matching yarn, sew the handle to the top edge of both front and back panels. The wrapped section should sit between the two panels.
Work approximately 8-10 secure stitches through both the ring wrapping and purse fabric. Reinforce this area well since it bears the weight of the bag contents.
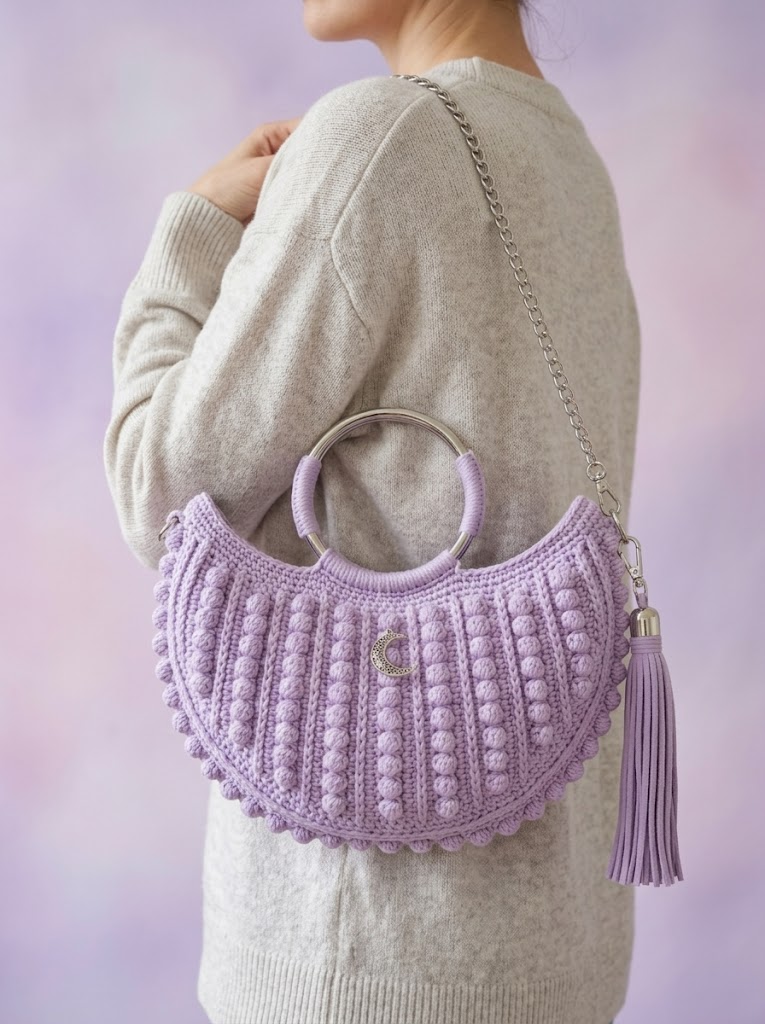
Chain Strap Attachment
Making Attachment Tabs (make 2):
Ch 8. Sl st to first ch to form a loop. Sc 12 times into the ring. Sl st to first sc. Fasten off.
Sew one tab to each side corner of the purse, at the junction where the curved seam meets the top edge.
Thread your chain strap through these tabs. Attach lobster clasps if your chain does not already have them.
Adding the Tassel
Attach your tassel to one corner of the purse using the lobster clasp or a jump ring. The tassel should hang from the same point where your chain attaches.
If making your own tassel: Cut 30 strands of yarn approximately 8 inches long. Fold in half. Wrap another strand tightly around the fold about 1 inch from the top. Secure and trim ends evenly.
Optional Moon Charm
Position your decorative moon charm at center front of the purse. Sew in place using matching thread, or attach through the fabric if your charm has a bail.
Helpful Tips for Success
Bobble consistency: Push every bobble firmly to the front of your work as you complete it. This ensures they all face the same direction and look uniform.
Tension matters: Keep your tension consistent throughout. Uneven tension shows up clearly in the bobble rows.
Blocking optional: Cotton yarn usually does not require blocking, but you can steam block gently to even out any wonky edges before seaming.
Lining recommendation: For a polished interior, cut fabric to match your panel shape plus seam allowance. Hand sew inside after all construction is complete.
Customization Ideas
This crescent purse pattern works beautifully in any color. Consider:
You can also skip the bobbles entirely and work the whole bag in single crochet for a simpler look. Or replace bobbles with popcorn stitches for even more dramatic texture.
Common Questions
How much does the finished purse hold?
This bag comfortably fits a phone, wallet, keys, lipstick, and small essentials. It is not a tote, but it is perfect for going out.
Can I make this bigger?
Yes. Add more stitches to your foundation chain in multiples of 5 to maintain the bobble pattern. Add more rows before beginning decreases.
What if my bobbles look messy?
Practice makes perfect. Make sure you are completing all 5 partial double crochets before pulling through all loops. And always push that bobble to the front.
Final Thoughts on the Lavender Dream Crescent Purse
You now have everything you need to create this gorgeous crescent purse crochet pattern from start to finish. The combination of textured bobbles, elegant hardware, and that dreamy lavender color makes this bag a true statement piece.
Take your time with the bobble rows. They look more complicated than they are, I promise. And once you get into the rhythm, the pattern becomes almost meditative.
Thank you so much for choosing this pattern for your next project. I genuinely cannot wait to see your finished purse.
When you complete yours, please share a photo with me on Instagram or Facebook. Tag your creation so I can admire your work and maybe feature it. Seeing your makes is honestly the best part of sharing patterns.
Happy crocheting, friend. You have got this.
