
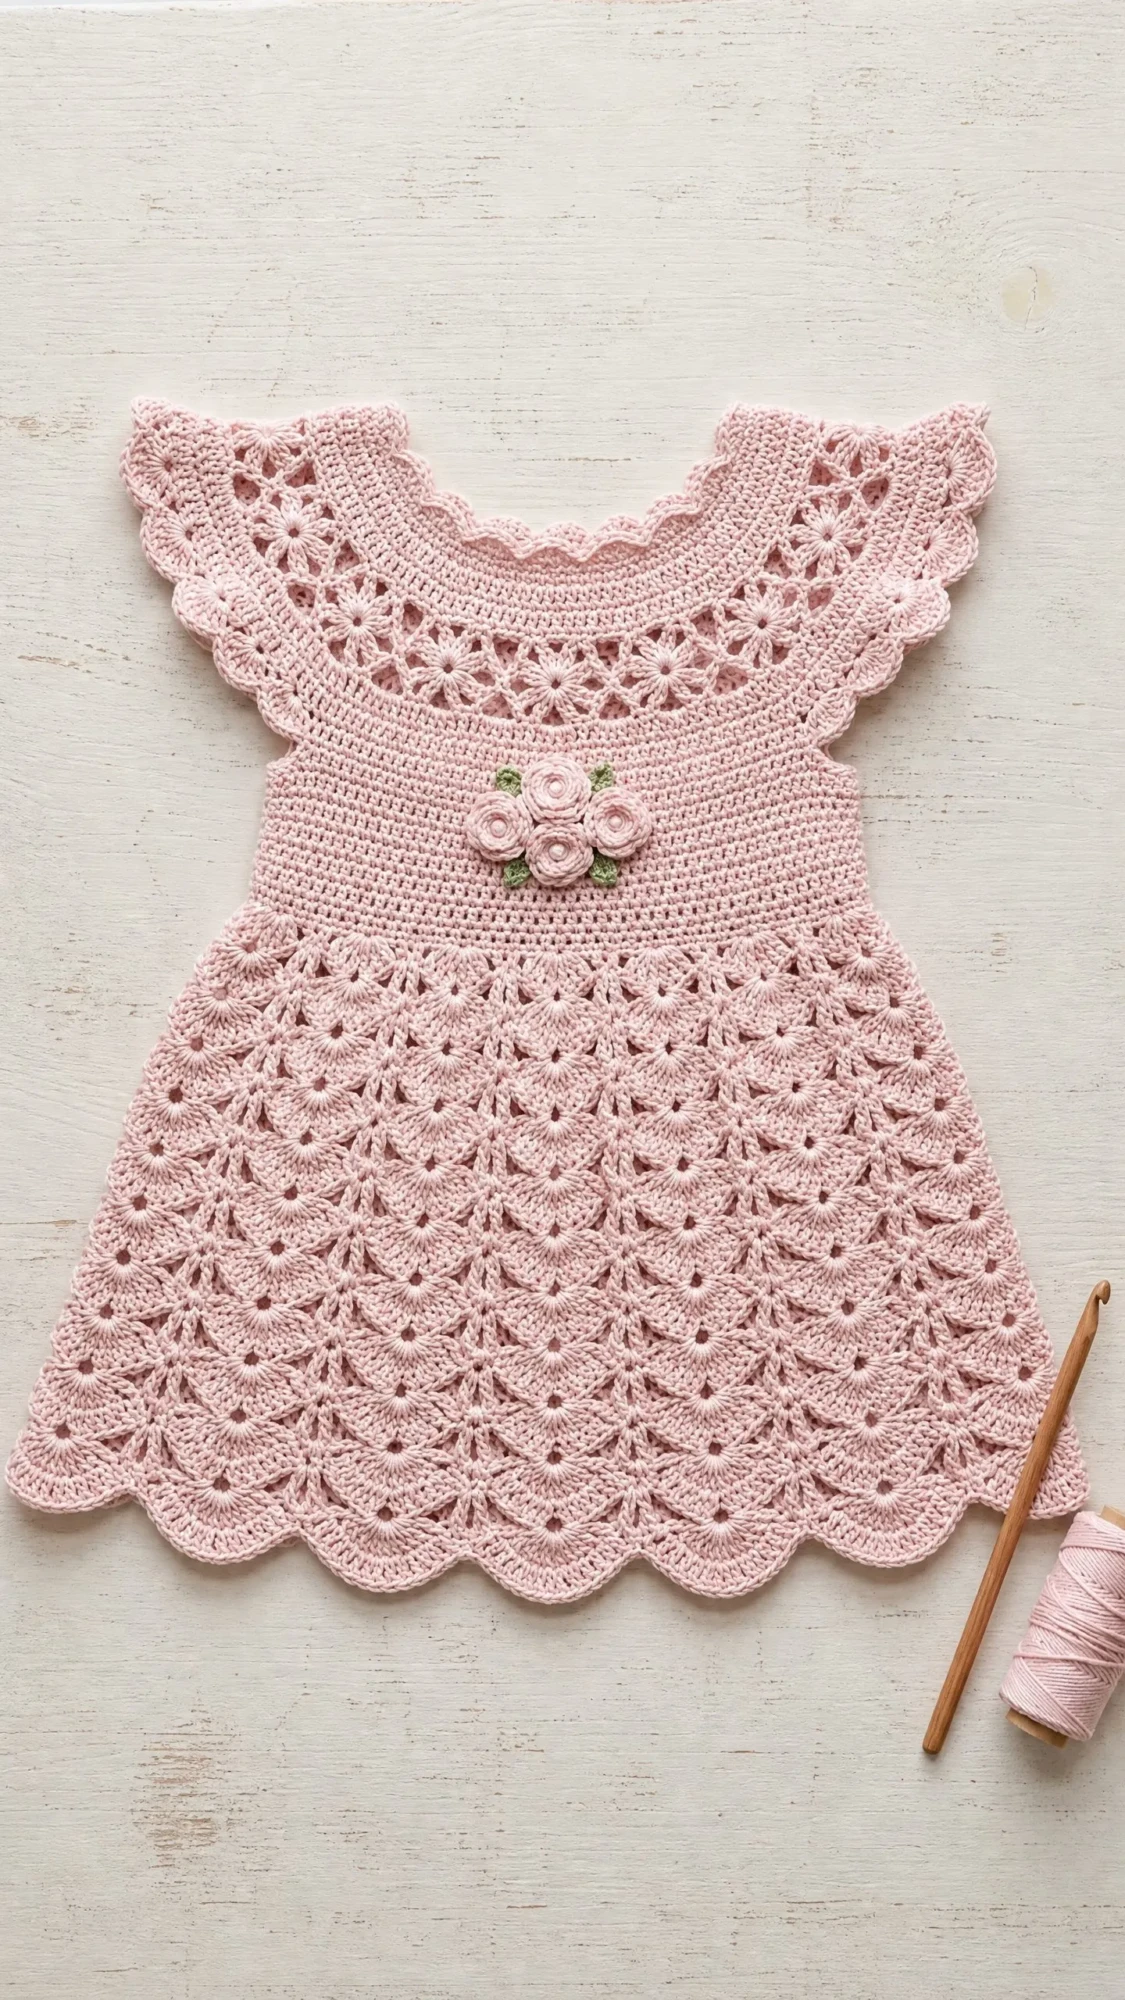
This baby dress pattern features a lace yoke, fitted bodice with flutter sleeves, and a dramatic shell stitch skirt with scalloped hem. It works up in fingering weight yarn using a 2.25mm or 2.75mm hook.
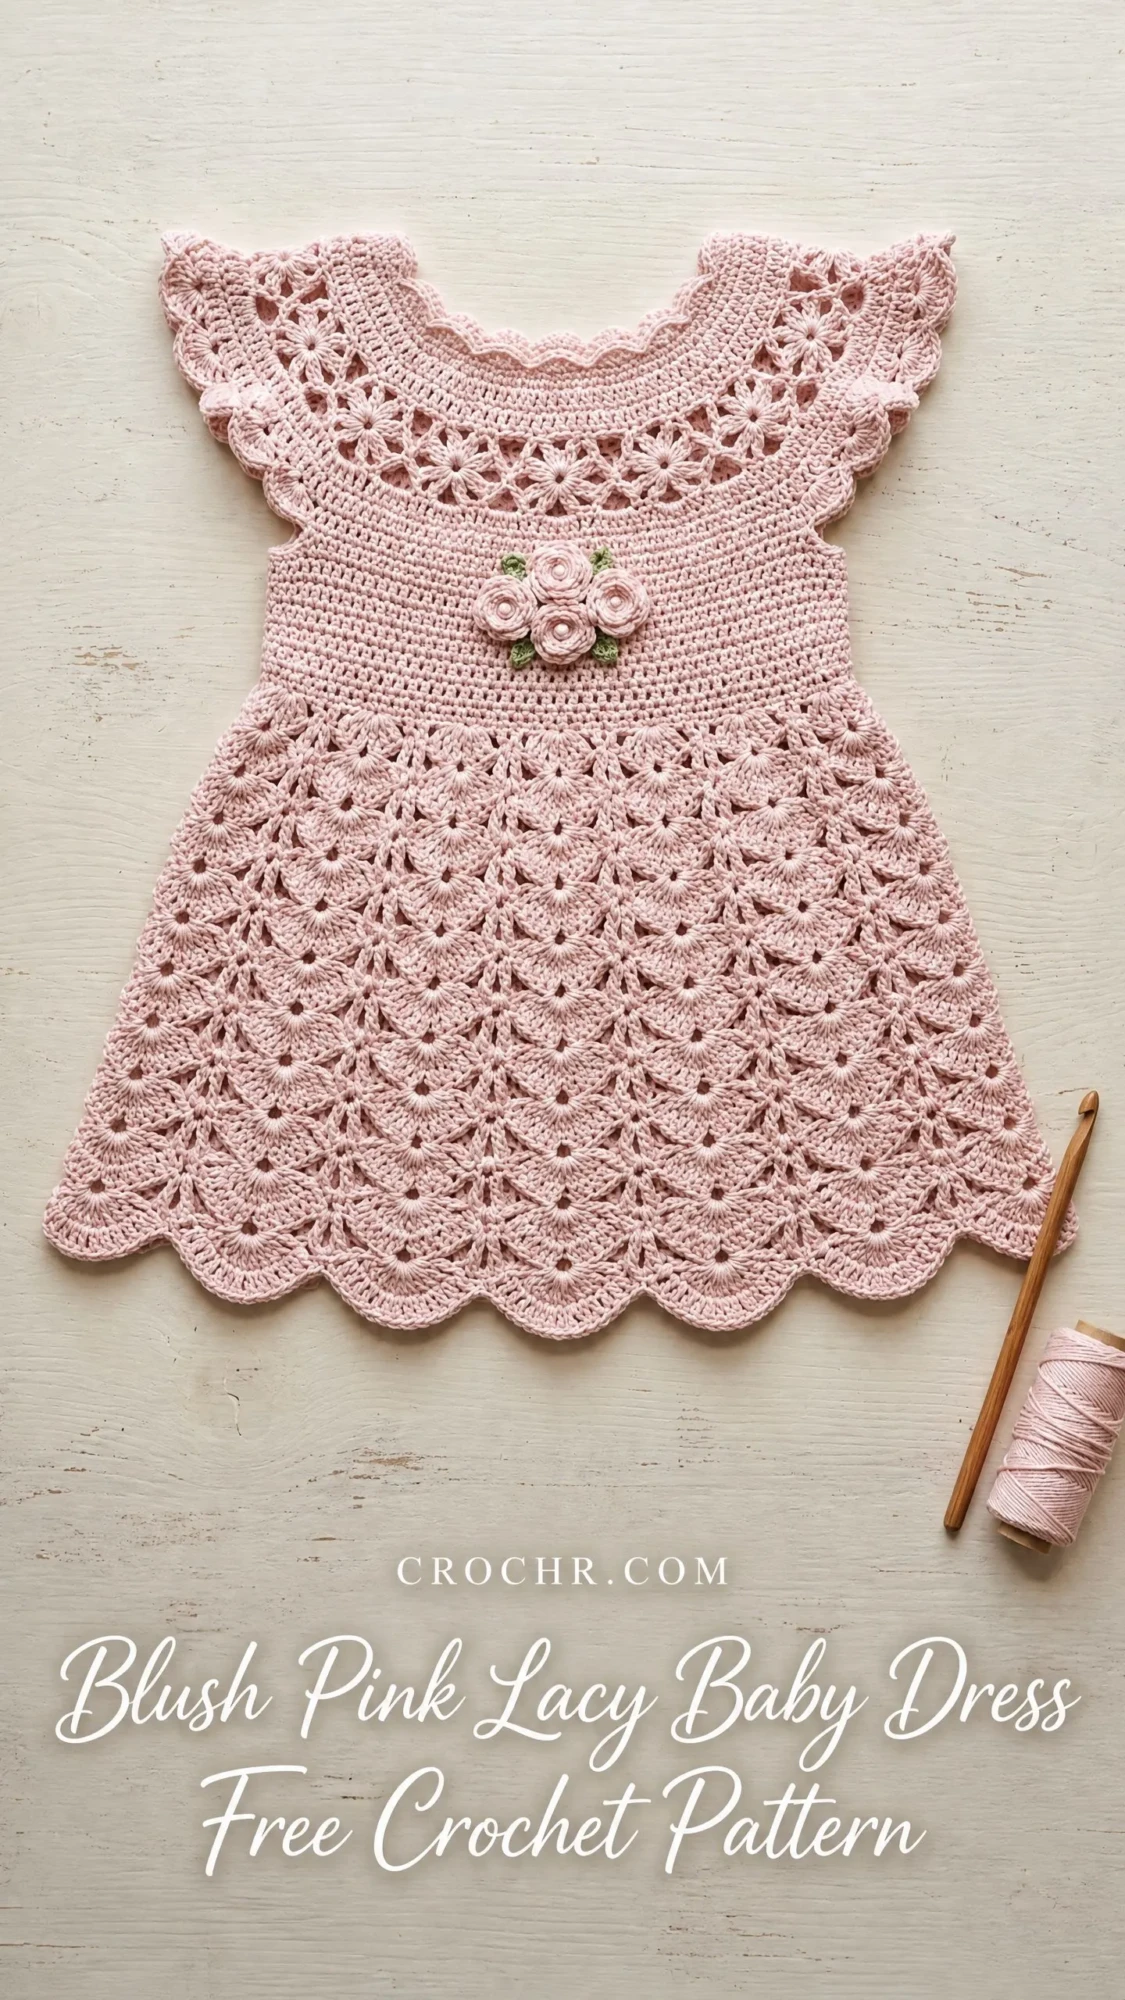
The construction is top-down in the round, starting with a circular lace yoke that divides for the bodice. Three dimensional crocheted roses and tiny leaves add an elegant finishing touch at the center front.
Size fits 6 to 12 months with an 18 inch chest and 14 inch total length. Skill level is intermediate, and you will need about 15 to 25 hours to complete it.
Why This Lacy Baby Dress Pattern Works
I designed this heirloom quality baby dress with a back opening that runs from the neck to approximately shoulder blade level. This makes it easy to dress and undress a wiggly little one. The opening secures with two small buttons or a ribbon tie threaded through the lace.
The yoke uses a daisy style motif cluster in a circular arrangement. The skirt uses a fan and shell repeat with v-stitch spacing columns. The flutter sleeves are shaped by working additional rows of fan lace along the yoke perimeter armhole edges.
If you have completed at least two or three smaller lace projects like dishcloths or baby booties and one garment in the round, you will find this achievable with patience.
Materials You Will Need
Yarn: Approximately 400 to 450 yards of fingering weight yarn (CYCA weight 1) in blush pink. A small amount of the same yarn and a tiny bit of green fingering or sport weight yarn for the roses and leaves.
Hook: US size B-1 (2.25 mm) or C-2 (2.75 mm) crochet hook. Use whichever hook achieves your gauge. The dress photographed uses a bamboo hook.
Notions:
Yarn Suggestions
Option 1: Paintbox Yarns Cotton 4 Ply in Blush Pink (100% cotton, 186 yards per 50 g skein). Cotton gives excellent stitch definition for lace and is breathable for a baby. You will need approximately 2 to 3 skeins.
Option 2: Scheepjes Catona 4 Ply in Powder Pink (100% mercerized cotton, 170 yards per 50 g ball). Mercerized cotton has a subtle sheen that enhances the lace motifs beautifully.
Option 3: Drops Safran in Light Old Pink (70% cotton, 30% polyamide, 175 yards per 50 g ball). The polyamide content adds a gentle drape and softness ideal for baby skin.
Substitution Note: Choose any fingering weight yarn with at least 170 yards per 50 g skein. Baby safe fiber content is recommended. Avoid yarns with added texture or boucle as these will obscure the lace pattern. Always swatch before beginning.
Finished Measurements
Gauge (Important!)
After blocking:
24 stitches and 28 rows = 4 inches (10 cm) in single crochet with your chosen hook.
For the shell skirt section:
One full shell repeat (consisting of 12 stitches) = 2 inches wide and one round of shells = 0.6 inches tall, after blocking.
Gauge is mandatory for this garment. Even a small variance will significantly affect the finished chest measurement and length. If your swatch is too wide, go down a hook size. If too narrow, go up a hook size.
Abbreviations (US Terms)
Special Stitches
Daisy Cluster (used in yoke lace rounds)
Insert hook into stitch, yarn over, pull up a loop. Without completing the stitch, insert hook into the next stitch, yarn over, pull up another loop. You now have 3 loops on hook. Insert hook into the next stitch, yarn over, pull up another loop (4 loops on hook). Insert hook into the next stitch, yarn over, pull up another loop (5 loops on hook). Yarn over and pull through all 5 loops on hook. Chain 1 to close and secure the cluster. This forms one daisy cluster over 4 stitches.
Fan Shell (used in skirt)
Work 7 dc all into the same stitch or space. This group of 7 dc forms one fan shell.
V-Stitch (used as spacers between fan shells)
Work 1 dc, ch 1, 1 dc all into the same stitch or space. This forms one v-stitch.
Shell Decrease (used in skirt shaping)
Skip 2 stitches, work 5 dc into the next stitch, skip 2 stitches. A smaller shell used in transitional rows.
Picot (used on collar and sleeve edge)
Work 3 sc along the edge to the picot placement point. Ch 3. Sl st into the first ch made. Continue with sc along the edge.
Crochet Rose (approximately 0.75 inch diameter)
Foundation: Ch 16.
Row 1: Starting in the 2nd ch from hook, work 1 sc in each of the next 3 ch, then in each remaining ch work: hdc, dc, 2 tr, dc, hdc. Repeat this petal unit (sc, sc, sc, hdc, dc, 2 tr, dc, hdc) across chain as many times as your foundation allows. Fasten off leaving a long tail. Roll the strip into a rose shape and use the tail to sew through the base to secure it.
Make 3 roses total.
Crochet Leaf (approximately 0.5 inch long)
Ch 8. Sl st in 2nd ch from hook. Sc in next ch. Hdc in next ch. Dc in next ch. Hdc in next ch. Sc in next ch. Sl st in last ch. Do not turn. Working back along the other side of the foundation chain: sl st in first ch, sc in next, hdc in next, dc in next, hdc in next, sc in next, sl st in next. Fasten off leaving a tail for sewing.
Make 4 leaves total.
Pattern Notes Before You Begin
The dress is worked from the neck downward. The yoke is worked in the round with a back opening. The back opening is created by working the yoke in rows for the first few rounds rather than true rounds, leaving a gap at the back center.
For the back opening: On yoke rows 1 through 8, work in rows, turning at each end and leaving the last few stitches unworked to simulate the round. A proper back opening of approximately 1.5 inches is maintained. From the bodice downward the work is joined in full rounds after the underarm stitches are chained off.
Stitch counts given in parentheses at the end of each round refer to the total number of working stitches in that round, not including turning chains or joining slip stitches.
Right side is always facing you for the skirt and most of the bodice unless otherwise stated.
Chain 3 at the beginning of rounds of double crochet counts as the first dc unless stated otherwise.
Blush Pink Baby Dress Crochet Pattern Instructions
Section 1: Neck Foundation Chain
The neck opening is formed by a foundation chain. The back opening begins here.
Foundation Chain: Ch 84.
The chain should measure approximately 10 inches unstretched. This gives a neck circumference appropriate for a 6 to 12 month baby.
Section 2: Yoke
We will work flat (in rows) for the yoke to create the back opening.
Yoke Row 1 (RS): Ch 84 (foundation chain). Sc in 2nd ch from hook. Sc in each ch across. Turn. (83 sc)
Yoke Row 2: Ch 5 (counts as dc + ch 2). Sk first 2 sc. Dc in next sc. (Ch 2, sk 2 sc, dc in next sc) repeat across. Turn. (28 dc, 27 ch-2 spaces)
Yoke Row 3 (RS): Ch 1. Sc in first dc. (4 dc in ch-2 space, sc in next dc) repeat across to last ch-2 space. 4 dc in last ch-2 space. Sc in 3rd ch of turning ch-5. Turn. (141 sts: 29 sc, 112 dc)
Yoke Row 4: Ch 1. Sc in first sc. (Ch 3, sk 4 dc, sc in next sc) repeat across. Turn. (29 sc, 28 ch-3 spaces)
Yoke Row 5 (RS): Ch 5. Dc in first ch-3 space. (Ch 2, dc in same space, ch 2, dc in next ch-3 space) rep across. End ch 2, dc in last sc. Turn. (58 dc, 57 ch-2 spaces)
Yoke Row 6: Ch 1. Sc in first dc. (4 dc in next ch-2 space, sc in next dc) rep across. Turn. (286 sts: 58 sc, 228 dc)
Yoke Row 7: Ch 1. Sc in first sc. (Ch 3, sk 4 dc, sc in sc) rep across. Turn. (58 sc, 57 ch-3 spaces)
Yoke Row 8 (RS, final yoke lace row before division): Ch 3 (counts as dc). 3 dc in first ch-3 space. (Sc in next sc, 3 dc in next ch-3 sp) rep across. Sc in last sc. Turn. (229 sts approx)
Checkpoint: After completing Yoke Row 8, the piece should measure approximately 3.5 inches in height from the foundation chain edge to the current row. The bottom of the yoke should be approximately 12 to 12.5 inches wide.
Section 3: Yoke Division and Flutter Sleeves
After the yoke rows are complete, the bottom edge becomes the armhole division row. We separate the front, back, and sleeve sections.
The total stitch count at the yoke base should be approximately 168 stitches. We normalize to 168 total stitches along the yoke base.
Division setup: The 168 stitches are divided as follows:
Total bodice circumference after joining = 48 (front) + 6 (chain) + 48 (back) + 6 (chain) = 108 stitches.
Flutter Sleeve Construction (Make 2)
The flutter sleeves are formed by working additional lace rows along the sleeve edges, then finishing with picot edging.
The yoke edge along each armhole opening forms the base of the sleeve cap. Join yarn at the underarm seam point with RS facing.
Sleeve Round 1: Ch 3. Work 2 dc in each of the 12 sleeve edge stitches along the lower yoke opening. Join to top of ch-3. (24 dc)
Sleeve Round 2: Ch 3. Dc in next dc. (Ch 1, dc in each of next 2 dc) rep around. Join. (24 dc, 11 ch-1 spaces)
Sleeve Edging: Ch 1. Sc around the entire sleeve opening edge (both the lower new rounds and the original upper yoke edge in that area), working approximately 30 to 36 sc evenly around. Add picots every 3 sc as follows: sc, sc, sc, (ch 3, sl st in first ch of ch-3) for picot. Repeat around. Join and fasten off.
The sleeve should form a small ruffle or flutter that stands out slightly.
Section 4: Bodice
After dividing for sleeves, join yarn to begin working the bodice in the round.
Join yarn at right back edge of yoke base. Chain 6 (first underarm bridge). Work across 48 front stitches in sc. Chain 6 (second underarm bridge). Work across 48 back stitches in sc. Join with sl st to first sc.
Bodice Round 1 (joining round): 48 sc across front + 6 ch (right underarm) + 48 sc across back + 6 ch (left underarm). Join. (108 sts total)
Bodice Round 2: Ch 1. Sc in each st around. Join to first sc. (108 sc)
Bodice Rounds 3 through 5: Rep Round 2. (108 sc each round)
Bodice Round 6 (increase round): Ch 1. Sc in first 12 sc. 2 sc in next sc. (Sc in next 12 sc, 2 sc in next) rep 7 times. Sc in rem sc. Join. (116 sc)
Bodice Rounds 7 through 10: Ch 1. Sc in each st around. Join. (116 sc)
Bodice Round 11 (increase round): Ch 1. (Sc 28, 2 sc in next sc) x 4. Join. (120 sc)
Bodice Rounds 12 through 14: Ch 1. Sc in each st around. Join. (120 sc)
Checkpoint: After completing the bodice, your piece should measure approximately 3 inches from the bottom of the yoke to the current working row.
Section 5: Skirt
The skirt is worked in fan shell rounds with v-stitch columns. The skirt increases naturally due to the shell pattern expanding the circumference each round.
The shell pattern works on multiples of 12 stitches. 120 is divisible by 12, giving us 10 repeats.
Skirt Setup Round (Round 15 of garment): Do not turn after last bodice round. With RS facing, ch 3 (counts as dc). Dc in next 2 sc. Ch 2. Sk 2 sc. (Dc in next 3 sc. Ch 2. Sk 2 sc) rep around. Join to top of ch-3. (72 dc, 24 ch-2 spaces)
Skirt Round 1 (Shell Round): Ch 3. 6 more dc in first ch-2 space (= 7 dc fan shell, ch-3 counts as first dc). Ch 2. Sc in space between next two dc groups. Ch 2. (7 dc in next ch-2 space, ch 2, sc between next dc groups, ch 2) rep around. Join to top of ch-3. (168 dc, 24 sc, 48 ch-2 spaces)
Skirt Round 2: Sl st into the 2nd, 3rd, 4th dc of first shell (move to center of shell). Ch 3 (counts as dc). 2 dc in same top center dc. Ch 2. Sk rest of shell. Sc in next sc. Ch 2. (3 dc in center dc of next shell, ch 2, sc in next sc, ch 2) rep around. Join. (72 dc, 24 sc)
Skirt Round 3: Sl st to center of 3-dc group. Ch 3. In the same center stitch work 6 more dc (= 7 dc fan shell). Ch 2. Sc in next sc. Ch 2. (7 dc fan shell in center dc of next group, ch 2, sc, ch 2) rep around. Join. (168 dc, 24 sc, 48 ch-2 spaces)
Skirt Rounds 4 through 6: Repeat Rounds 2 and 3, then Round 2 again.
Skirt Round 7 (Increase Round): Sl st to center of first 3-dc group. Ch 3. 6 dc in same center st (fan shell). Ch 1. V-st (dc, ch 1, dc) in next sc. Ch 1. (Fan shell in center of next 3-dc group, ch 1, v-st in next sc, ch 1) rep around. Join. (216 dc, 48 ch-1 spaces)
Skirt Round 8: Sl st to center of first fan shell. Ch 3. 2 dc in same st. Ch 2. Sc in ch-1 sp of v-st. Ch 2. (3 dc in center of next fan shell, ch 2, sc in ch-1 sp of next v-st, ch 2) rep around. Join.
Continue the shell pattern, repeating Rounds similar to Rounds 1 through 6 until skirt measures 7.5 inches from the bodice join.
Scalloped Hem Edging
On the final round, work the shell stitch pattern but do not chain between shells. This creates a continuous scalloped edge. Fasten off and weave in ends.
Finishing Your Lacy Baby Dress
Back Opening Closure
Choose one of these options:
Button Closure: Sew two small buttons (approximately 0.4 inches diameter) along one side of the back opening. Use the natural lace holes on the opposite side as buttonholes.
Ribbon Closure: Thread 12 inches of narrow ribbon through the lace at the neckline and tie in a bow.
Attaching Roses and Leaves
Position 3 roses at the center front of the bodice, just below where the yoke meets the bodice section. Arrange 4 leaves behind and around the roses. Use your yarn needle and matching yarn tails to secure each piece with small stitches on the wrong side.
Blocking
Wet block your finished dress for best results. Soak in lukewarm water for 15 minutes. Gently squeeze out excess water without wringing. Lay flat on your blocking board and pin to measurements. Allow to dry completely before removing pins.
Blocking opens up the lace motifs dramatically and gives your dress that professional, heirloom quality look.
Helpful Tips for This Crochet Pattern
Tip 1: Count your stitches at the end of every row during the yoke section. The lace pattern relies on accurate stitch counts to maintain the pretty daisy motifs.
Tip 2: Use stitch markers at each quadrant of your work when you reach the bodice rounds. This helps you spot mistakes before they become problems.
Tip 3: If your shells look uneven, blocking will fix most inconsistencies. Do not panic until after you block.
Tip 4: Make your roses and leaves while watching TV. They are mindless and meditative once you get the hang of them.
Tip 5: Take progress photos. You will want to remember making this beautiful piece, and the photos help if you need to troubleshoot later.
Size Customization Notes
To make this dress smaller (0 to 6 months), reduce the foundation chain by 12 stitches and work one fewer increase round in the bodice.
To make it larger (12 to 18 months), add 12 stitches to the foundation chain and add one extra increase round in the bodice. You may also want to add 2 to 3 additional skirt rounds for length.
Always swatch and check your gauge when adjusting sizes.
I hope you absolutely love making this lacy baby dress. It is the kind of project that looks impressive on a hanger and even more stunning on a little one. If you make one, I would love to see it! Save this pattern to your Pinterest boards so you can find it when you are ready, and please drop a comment below to let me know how yours turns out.
You Might Also Like
- Coastal Blue Wave Stitch Bodysuit Free Pattern
- Lemon Blossom Baby Dress Free Crochet Pattern
- Dusty Rose Diamond Lattice Vest Free Crochet Pattern
- Mustard Yellow Wildflower Granny Tote Free Pattern
