
When I sat down to design this little dress, I had one clear vision in my mind. I wanted something that looked like a treasured heirloom but could actually be made by someone who has completed just a couple of garments before. The flutter sleeves needed to feel delicate and feminine. The lace skirt had to have that classic pineapple motif that makes people stop and stare. And honestly? I am SO thrilled with how this turned out.
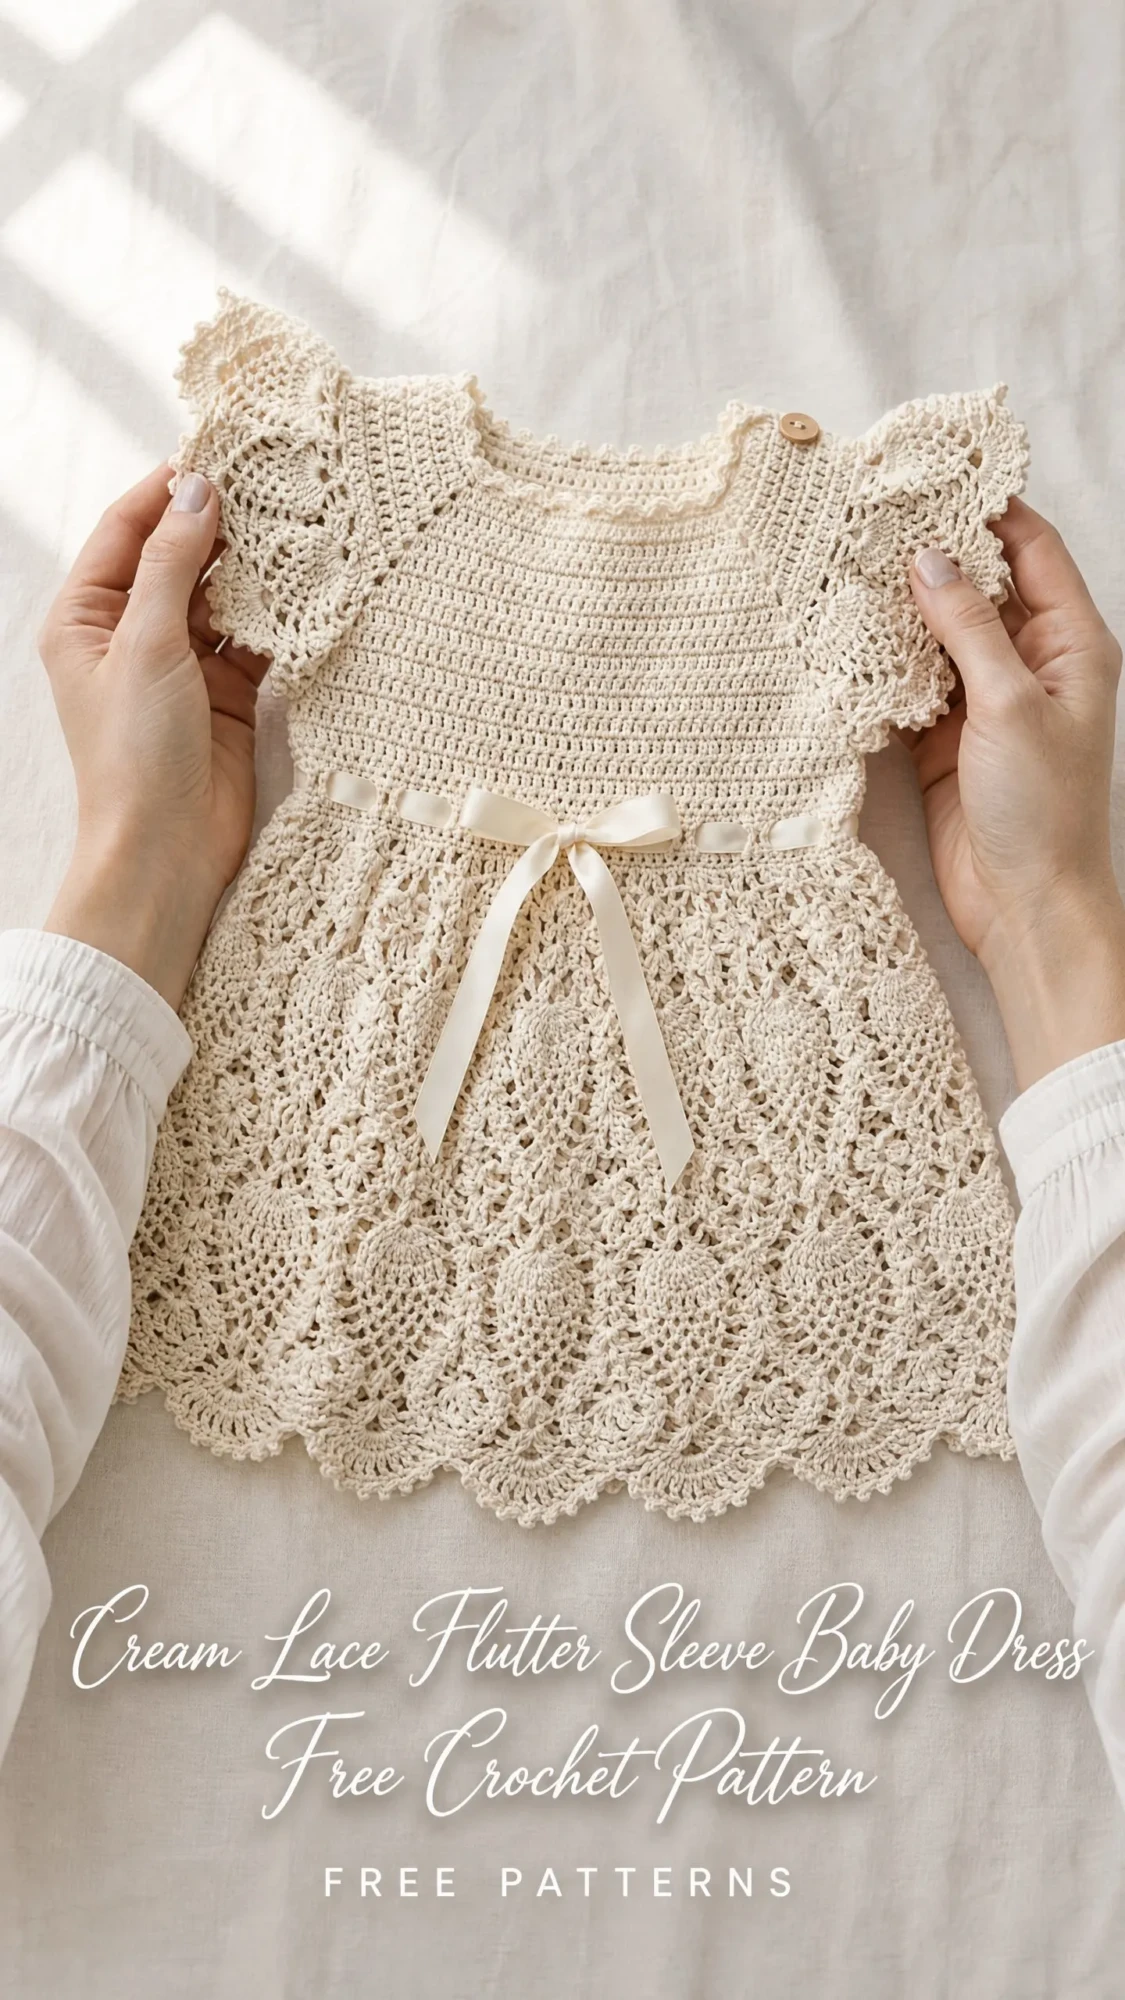
This cream lace flutter sleeve baby dress combines a structured bodice with a dreamy, flowing skirt that moves beautifully. The construction is smarter than it looks. You work from the neckline down, which means fewer seams and a more intuitive build. The pineapple lace pattern in the skirt sounds intimidating, but I promise it is just a combination of basic stitches worked in a specific sequence.
If you have been wanting to try your hand at a more detailed baby garment, this is your project. The sport weight cotton yarn creates gorgeous stitch definition, and that satin ribbon threaded through the waist gives it such a polished finish. Let me walk you through every single step.
About This Baby Dress Crochet Pattern
This crochet pattern creates a timeless baby dress featuring a fitted yoke worked from the top down, transitioning into a full lace skirt worked in joined rounds. The bodice uses half double crochet (hdc) for structure, while the skirt showcases a repeating pineapple and fan lace motif. Flutter sleeves are added separately around each armhole opening after the body is complete.
The finished dress includes a decorative picot neckline edge, an empire waist defined by a threaded satin ribbon, and a scalloped shell hem. A single button closes the back at the neckline.
Skill Level: Advanced Beginner to Intermediate
You will need comfort with basic stitches including chain, single crochet, half double crochet, double crochet, and treble crochet. The pineapple motif requires you to work treble crochet clusters and chain spaces confidently. If you have completed at least two garments and one lace project before, you will find this pattern manageable.
Time Estimate: 12 to 18 hours for an experienced crocheter working the 6 to 12 month size. Add 2 to 4 hours for blocking and finishing.
Finished Measurements
This crochet tutorial provides instructions for three sizes:
Size 0 to 3 months: Chest 14 inches (35.5 cm), Length 13 inches (33 cm)
Size 6 to 12 months (primary pattern size): Chest 17 inches (43 cm), Length 15.5 inches (39.5 cm)
Size 18 to 24 months: Chest 19 inches (48 cm), Length 17.5 inches (44.5 cm)
All instructions below are written for the 6 to 12 month size.
Materials Needed
Yarn: 400 to 500 yards (366 to 457 m) of sport weight (CYCA 2) 100% cotton or cotton blend yarn in cream or natural ecru. You will need approximately 2 balls of most sport weight cotton skeins.
Yarn Suggestions:
Choose a smooth, tightly plied cotton or cotton linen blend. Avoid hairy or textured yarns that will obscure the lace openwork.
Hook: US size B-1 / 2.25 mm steel crochet hook, or size needed to obtain gauge
Notions:
Gauge
22 hdc by 24 rows equals 4 inches (10 cm) worked flat in half double crochet, blocked.
1 pineapple and fan lace repeat (12 stitches wide) equals 2.2 inches (5.5 cm) wide and 4 inches (10 cm) tall in skirt lace pattern, blocked.
Gauge is critical. A difference of even 1 stitch per inch will significantly change the chest measurement and overall fit. Make a gauge swatch and block it before beginning.
Abbreviations and Stitch Definitions
Let me define every stitch you will encounter in this step by step crochet pattern:
ch = chain: Yarn over, pull through loop on hook
sl st = slip stitch: Insert hook, yarn over, pull through stitch and loop on hook in one motion
sc = single crochet: Insert hook, yarn over, pull up a loop (2 loops on hook), yarn over, pull through both loops
hdc = half double crochet: Yarn over, insert hook, yarn over, pull up a loop (3 loops on hook), yarn over, pull through all 3 loops
dc = double crochet: Yarn over, insert hook, yarn over, pull up a loop (3 loops on hook), yarn over, pull through 2 loops, yarn over, pull through remaining 2 loops
tr = treble crochet: Yarn over twice, insert hook, yarn over, pull up a loop (4 loops on hook), yarn over, pull through 2 loops three times
ch-sp = chain space: The gap created by a chain in the previous row or round
sk = skip: Pass over the indicated stitch without working into it
pm = place marker
RS = right side (the public facing side)
WS = wrong side
st(s) = stitch(es)
rep = repeat
rnd = round
Special Stitches
Picot: Chain 3, slip stitch into the first chain made. This creates a small decorative loop.
Shell: Work 5 double crochet into the same stitch or space. This creates a fan shaped cluster.
Pineapple Cluster (pcl): Yarn over twice (treble crochet base). Insert hook into indicated chain space, yarn over, pull up a loop (4 loops on hook), yarn over, pull through 2 loops (3 loops on hook), yarn over, pull through 2 loops (2 loops on hook). Repeat this treble crochet start 3 more times into the same space. When 5 loops remain on hook, yarn over and pull through all 5 loops. One pineapple cluster made.
Hdc2tog (half double crochet 2 together): Yarn over, insert hook into next stitch, yarn over, pull up a loop (3 loops on hook), yarn over, insert hook into following stitch, yarn over, pull up a loop (5 loops on hook), yarn over, pull through all 5 loops.
V-stitch: Work (1 dc, ch 2, 1 dc) into the same stitch or space.
Fan Stitch: Work (dc, ch 1, dc, ch 1, dc, ch 1, dc, ch 1, dc) into the same space. This is a 5 dc fan with ch 1 spaces between each dc.
Pattern Notes Before You Begin
Read through these notes before starting. They will save you confusion later.
1. The yoke is worked flat (back and forth in rows) with a button loop added at the neckline edge on the final row.
2. After the yoke is complete, stitches are joined to work the skirt in the round from the waist down.
3. The underarm stitches are chained across to maintain a clean seam free join.
4. Place stitch markers at the four raglan points during yoke increases and move them up each row.
5. For hdc rows, ch 2 and turn. The ch 2 turning chain does NOT count as a stitch in this pattern. Always work the first hdc into the first stitch at the base of the chain.
6. The ribbon is threaded through the eyelet row after blocking using a yarn needle or bodkin.
7. The sleeves (flutter wings) are worked in joined rounds attached around each armhole after the body is complete.
How to Crochet This Baby Dress Pattern
Section 1: Yoke (Worked Flat, Top Down)
The yoke begins at the neckline and is worked back and forth in rows, increasing at four raglan points on every right side row.
Starting Chain: Ch 60. This gives 58 working stitches plus 2 for the initial turning chain.
The 58 stitches are distributed as follows: 8 stitches for right back, 2 raglan stitches, 10 stitches for right sleeve, 2 raglan stitches, 16 stitches for front, 2 raglan stitches, 10 stitches for left sleeve, 2 raglan stitches, 8 stitches for left back.
Row 1 (RS): Ch 2 (does not count as st), hdc in 3rd ch from hook and in each ch across. (58 hdc)
Place markers in stitches 8, 10, 22, 24, 40, 42, 52, and 54 to identify the 4 raglan pairs.
Raglan Increase Row (RS rows): At each raglan marker pair, work 2 hdc into each of the 2 marked stitches. This adds 8 stitches per RS row. On WS rows, hdc across without increases.
Row 2 (WS): Ch 2, turn. Hdc in each stitch across. (58 hdc)
Row 3 (RS): Ch 2, turn. Hdc to 1 st before first raglan marker, 2 hdc in next st, 2 hdc in marked raglan st, pm in last increase made. Rep at each of the 4 raglan points. Hdc to end. (66 hdc)
Row 4 (WS): Ch 2, turn. Hdc across. (66 hdc)
Row 5 (RS): Raglan increase row. (74 hdc)
Row 6 (WS): Hdc across. (74 hdc)
Row 7 (RS): Raglan increase row. (82 hdc)
Row 8 (WS): Hdc across. (82 hdc)
Row 9 (RS): Raglan increase row. (90 hdc)
Row 10 (WS): Hdc across. (90 hdc)
Row 11 (RS): Raglan increase row. (98 hdc)
Row 12 (WS): Hdc across. (98 hdc)
Row 13 (RS): Raglan increase row. (106 hdc)
Row 14 (WS): Hdc across. (106 hdc)
After Row 14, stitch distribution is: Right back 22 sts, raglan 2, Right sleeve 24 sts, raglan 2, Front 30 sts, raglan 2, Left sleeve 24 sts, raglan 2, Left back 22 sts.
Checkpoint: After Row 14, the yoke should measure approximately 2.5 inches (6.5 cm) from the neckline edge.
Section 2: Separate Sleeves from Body
Row 15 (RS, separation row): Ch 2, turn. Hdc across 22 right back sts. Chain 8 for underarm bridge. Skip 28 sleeve sts (including raglan sts on each side). Hdc across 34 front sts. Chain 8 for underarm bridge. Skip 28 sleeve sts. Hdc across 22 left back sts.
Working stitch count: 22 + 8 + 34 + 8 + 22 = 94 sts total for body.
Row 16 (WS): Ch 2, turn. Hdc across all sts and chains. (94 hdc)
Checkpoint: After Row 16, the bodice base is established. The yoke and underarm now total approximately 3 inches (7.5 cm) from neckline.
Section 3: Bodice Body (Worked Flat)
Continue working back and forth in hdc on 94 sts for 8 more rows.
Rows 17 through 24: Ch 2, turn. Hdc in each stitch across. (94 hdc)
Checkpoint: After Row 24, the bodice should measure approximately 6 inches (15 cm) from neckline to waist.
Section 4: Waist Eyelet Row
The eyelet row creates a decorative channel for the ribbon.
Row 25 (RS, eyelet row): Ch 4, turn (counts as dc + ch 1). Skip 1 st. (Dc in next st, ch 1, skip 1 st) repeat across to last st. Dc in last st.
Row 26 (WS): Ch 2, turn. Hdc in first dc. (Hdc in ch 1 sp, hdc in dc) repeat across. End hdc in 3rd ch of beg ch 4. (94 hdc)
Section 5: Joining for Skirt
Row 27 (joining round): With RS facing, ch 1. Work 1 sc in each of the first 93 hdc. Fold the piece so the two back edges overlap by 1 stitch, and join with a sl st to the first sc. The skirt will now be worked in the round. (94 sc in round)
Section 6: Skirt Foundation Increase Round
Round 28 (increase round): Ch 3 (counts as dc), dc in same st, dc in next st. (2 dc in next st, dc in each of next 2 sts) repeat around. Join with sl st to top of beg ch 3. (120 dc)
This gives you 10 repeats of the 12 stitch pineapple and fan motif.
Section 7: Skirt Lace Pattern
Lace Setup Round
Round 29: Ch 5 (counts as dc + ch 2). Skip 2 sts. (Dc in next st, ch 2, skip 2 sts) repeat around. Join with sl st to 3rd ch of beg ch 5. (40 dc + 40 ch 2 sps)
Lace Section 1 (Rounds 30 to 34)
Round 30 (shell base round): Sl st into first ch 2 sp. Ch 3 (counts as dc). Work 4 more dc into same ch 2 sp (shell made). (Ch 2, sc in next ch 2 sp, ch 2, shell in next ch 2 sp) repeat around, ending ch 2, sc in last ch 2 sp, ch 2. Join to top of beg ch 3. (20 shells + 20 sc + 40 ch 2 sps)
Round 31 (pineapple foundation): Sl st to top of first shell. Ch 1. Sc in top of shell (between dc 3 and dc 4 for center). Ch 5. (Sc in center of next shell, ch 5) repeat around. Join to first sc. (20 sc + 20 ch 5 loops)
Round 32 (pineapple start): Sl st into first ch 5 sp. Ch 4. Work (tr, ch 1) 6 times into same ch 5 sp. Tr into same sp (8 tr with 7 ch 1 spaces). Ch 1. Sc into next ch 5 sp. Ch 1. Rep (8 tr fan with ch 1 sps, ch 1, sc in next sp, ch 1) around. Join to top of beg ch 4. (10 pineapple fans + 10 sc)
Round 33: Sl st to first ch 1 sp inside fan. Ch 1. Sc in same sp. (Ch 1, sc in next ch 1 sp) 6 times. Ch 3 (bridge between fans). (Sc in first ch 1 sp of next fan, (ch 1, sc in next ch 1 sp) 6 times, ch 3) repeat around. Join to first sc. (70 sc inside fans + 10 ch 3 bridges)
Round 34 (pineapple narrowing): Sl st to first ch 1 sp. Sc in sp. (Ch 1, sc in next ch 1 sp) 4 times. Ch 5. (Sc in first ch 1 sp of next fan, (ch 1, sc in next ch 1 sp) 4 times, ch 5) repeat around. Join to first sc. (50 sc + 10 ch 5 arches)
Lace Section 2 Transition
Round 35: Sl st into first ch 1 sp. Ch 3 (counts as dc). 4 dc in same sp (half shell). Dc in next sc. 4 dc in next ch 1 sp. Ch 3. Sc in ch 5 arch. Ch 3. (Shell of 5 dc in first ch 1 sp of next group, dc in next sc, shell of 5 dc in last ch 1 sp of group, ch 3, sc in ch 5 arch, ch 3) repeat around. Join to top of beg ch 3.
Round 36 (new pineapple foundation): Ch 1. Sc in first dc (linking dc between shells). Ch 6. (Sc in linking dc of next shell pair, ch 6) repeat around. Join to first sc. (10 sc + 10 ch 6 loops)
Round 37 (second pineapple fans): Work (tr, ch 1) 8 times into first ch 6 sp. Tr into same sp (9 tr with 8 ch 1 spaces). Ch 2. Sc in next ch 6 sp. Ch 2. Rep around. Join. (10 larger pineapple fans + 10 sc)
Round 38: Sc across ch 1 sps within fans, 8 sc with 7 ch 1 sps per fan, ch 4 bridge between fans. Join. (80 sc in fans + 10 ch 4 bridges)
Round 39: Sc across ch 1 sps, working 6 sc with 5 ch 1 sps per fan. Ch 5 bridge between fans. Join. (60 sc + 10 ch 5 bridges)
Round 40: Sc across ch 1 sps, working 4 sc with 3 ch 1 sps per fan. Ch 5 bridge. Join. (40 sc + 10 ch 5 bridges)
Round 41 (fan base reconnect): (5 dc shell into first ch 1 sp of group, dc in next sc, dc in next ch 1 sp, dc in next sc, 5 dc shell into last ch 1 sp, ch 3, sc in ch 5 bridge, ch 3) repeat around. Join.
Checkpoint: After Round 41, the skirt should measure approximately 6 inches (15 cm) from the waist join.
Skirt Border (Rounds 42 to 46)
Round 42 (scallop setup): Ch 1. (Sc in top of shell 1, ch 3, sc in top of shell 2 of same pair, ch 5, sc in next sc bridge, ch 5) repeat around. Join.
Round 43 (large fan round): (Shell of 5 dc in ch 3 arc, ch 2, shell of 5 dc in same arc, ch 3, sc in ch 5 arc, ch 5, sc in next ch 5 arc, ch 3) repeat around. Join.
Round 44: (Sc in each dc of first shell with ch 1 between each dc working 5 sc with 4 ch 1 sps, ch 2, sc in each dc of second shell with ch 1 between each dc, ch 4, sc in ch 5 arc, ch 4) repeat around. Join.
Round 45 (picot scallop): (Sl st to ch 1 sp within first shell, picot, sl st to next ch 1 sp, picot) 3 times across shell sts. Ch 3. (Sl st across second shell with picots in same manner.) Ch 5. Sc in ch 4 arc, picot. Ch 5. Rep around. Join.
Round 46 (final hem): Sc evenly around, working 3 sc into each ch 5 space and 1 sc into each sc, to stabilize the hem. Join. Fasten off.
Checkpoint: After Round 46, the dress should measure approximately 14 to 15.5 inches (35.5 to 39.5 cm) from shoulder to hem.
Section 8: Flutter Sleeves
Each armhole holds 28 skipped sleeve stitches plus 8 stitches along the underarm chain, totaling 36 sts per armhole.
Setup: Join yarn to the center underarm chain st of one armhole opening with RS facing. Ch 1.
Flutter Round 1: Work 1 sc in each of the 8 underarm chain sts and 1 sc in each of the 28 sleeve sts around the armhole. Join. (36 sc)
Flutter Round 2 (increase for flutter): (2 sc in next sc, sc in next sc) repeat around. (54 sc)
Flutter Round 3: (2 sc in next sc, sc in next sc, sc in next sc) repeat around. (72 sc)
Flutter Round 4 (scallop edge): (Skip 2 sc, shell of 5 dc in next sc, skip 2 sc, sc in next sc) repeat around. (12 scallops)
Flutter Round 5 (picot edge): Sl st to top of shell. (Picot in each dc of shell, ch 2 between picots, sc in next sc, ch 2) repeat around all shells. Join. Fasten off.
Repeat for second armhole.
Finishing Your Baby Dress
Back Seam: Using your yarn needle, whipstitch the back bodice edges together from the waist to about 1 inch below the neckline, leaving an opening for the button closure.
Button Loop: Join yarn at the top corner of one back neckline edge. Ch 5. Sl st to secure. This creates the button loop.
Button: Sew your button to the opposite back neckline edge, aligning with the loop.
Ribbon: Thread your satin ribbon through the eyelet row at the waist using a yarn needle or bodkin. Tie in a bow at the front or side.
Blocking: Wet block your finished dress by soaking in lukewarm water, gently squeezing out excess moisture, and pinning to measurements on a blocking mat. Allow to dry completely. This opens up the lace beautifully and gives your dress that crisp, heirloom finish.
Weave in all ends securely, taking care to hide them within the lace pattern.
Tips for Success
This beginner friendly approach to lace work builds your skills gradually. The yoke uses simple half double crochet, so you get comfortable with the construction before tackling the lace skirt.
Count your stitches at the end of every round during the lace section. One missed chain space can throw off the entire pattern repeat.
Use stitch markers liberally. Mark the beginning of each round and the center of each pineapple motif as you work.
Do not skip blocking. This step transforms your work from good to stunning. The lace motifs need blocking to fully open and show their beauty.
If you find the pineapple clusters tricky at first, practice on a small swatch before committing to the skirt. Once your hands learn the motion, it becomes rhythmic and almost meditative.
A Finished Dress Worth the Effort
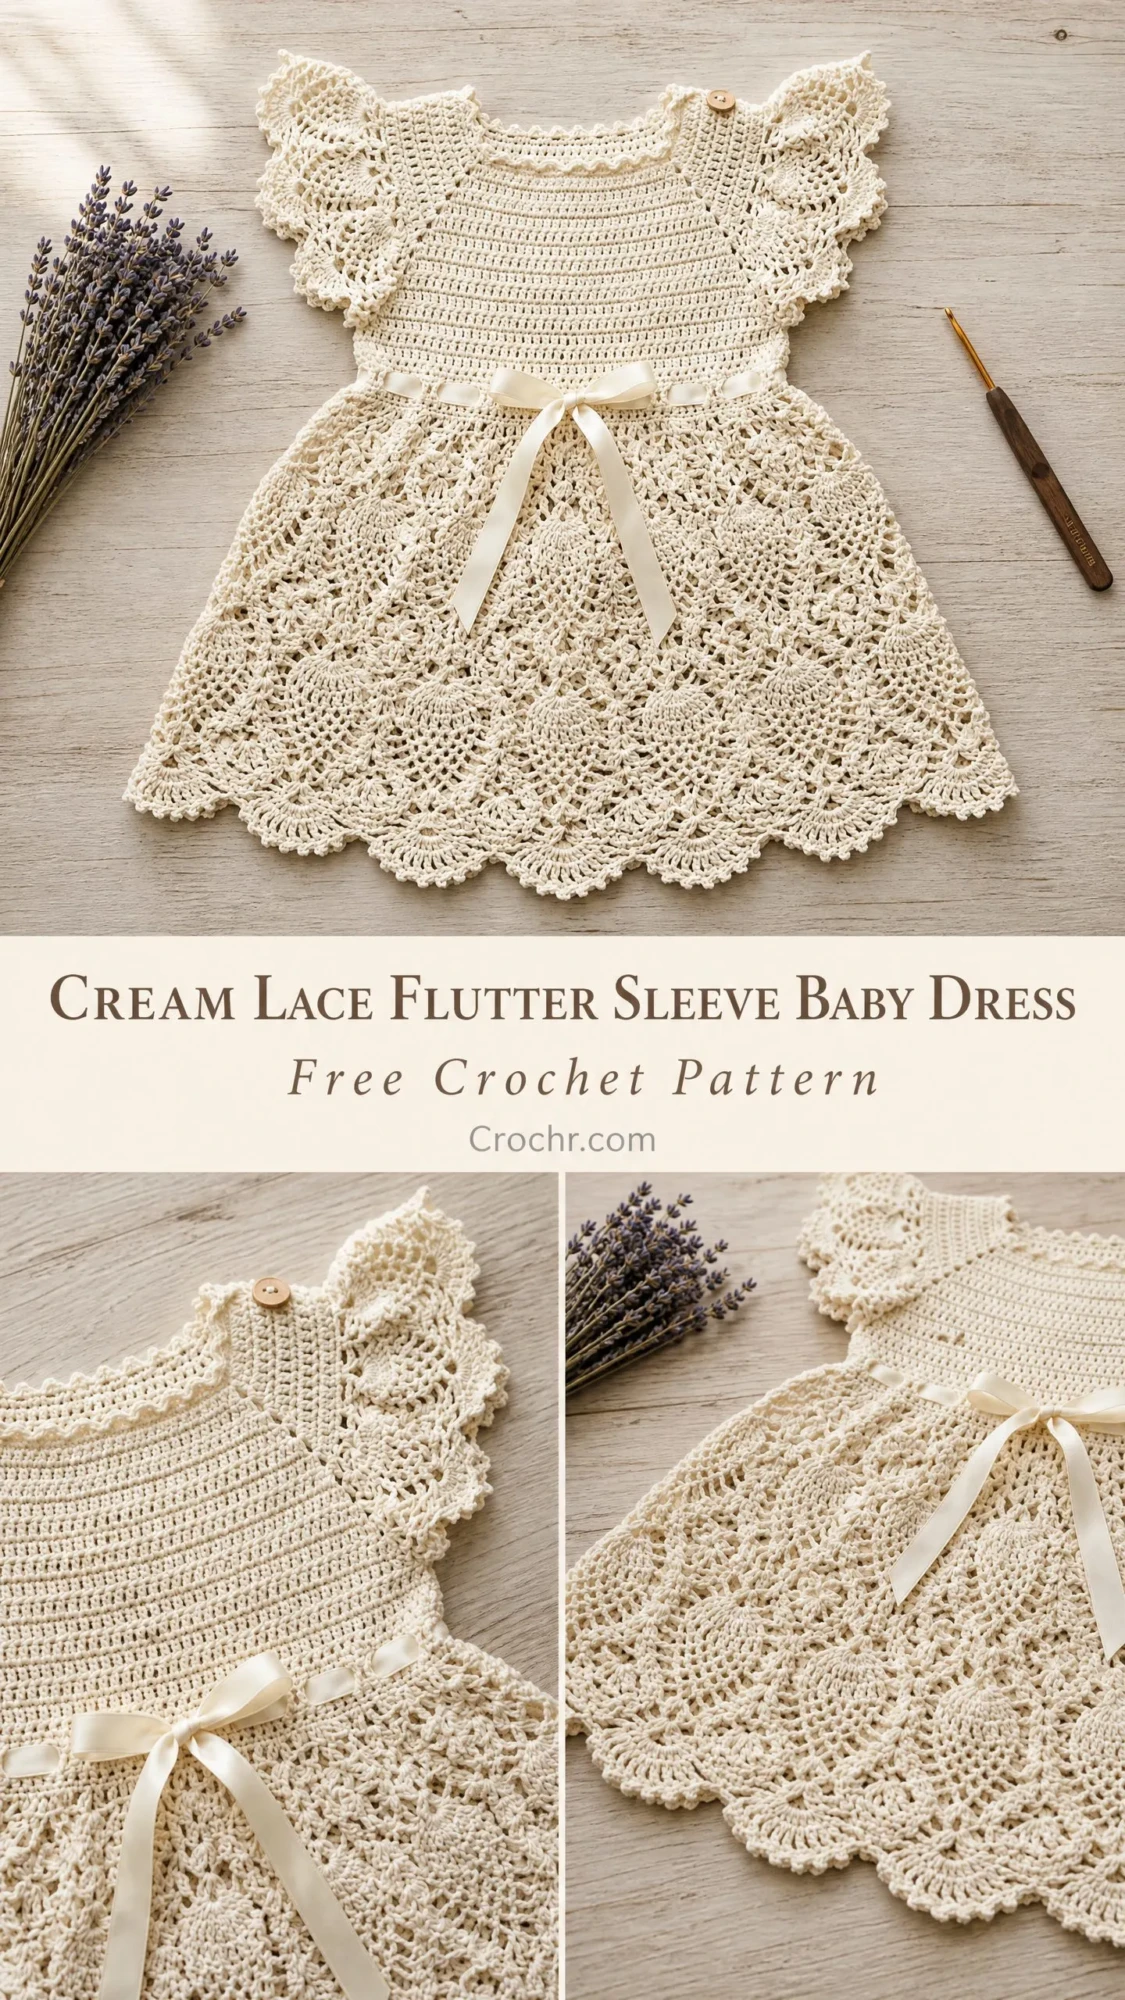
This cream lace flutter sleeve baby dress makes a stunning gift for baby showers, christenings, or special occasions. The combination of classic construction techniques and delicate lace creates something truly special. Every stitch shows when you use smooth cotton yarn, and the finished piece photographs beautifully.
Thank you so much for choosing this pattern for your next project. I genuinely hope you enjoy making it as much as I enjoyed designing it. The flutter sleeves were my favorite part to figure out, and I think they add such a sweet, feminine touch.
If you make this dress, I would absolutely love to see it! Tag me on Instagram or share a photo in my Facebook group. Seeing your finished projects truly makes my day.
Save this crochet pattern to your Pinterest boards so you can find it when you are ready to start. And please drop a comment below if you make one. I read every single comment and love hearing about your color choices and any modifications you try!
You Might Also Like
- Dusty Rose Diamond Lattice Vest Free Crochet Pattern
- Mint Seafoam Green Crochet Platform Wedge Sandals Pattern
- Ocean Blues Granny Square Bag Free Crochet Pattern
- Sage Green Mini Round Bag Free Crochet Pattern
