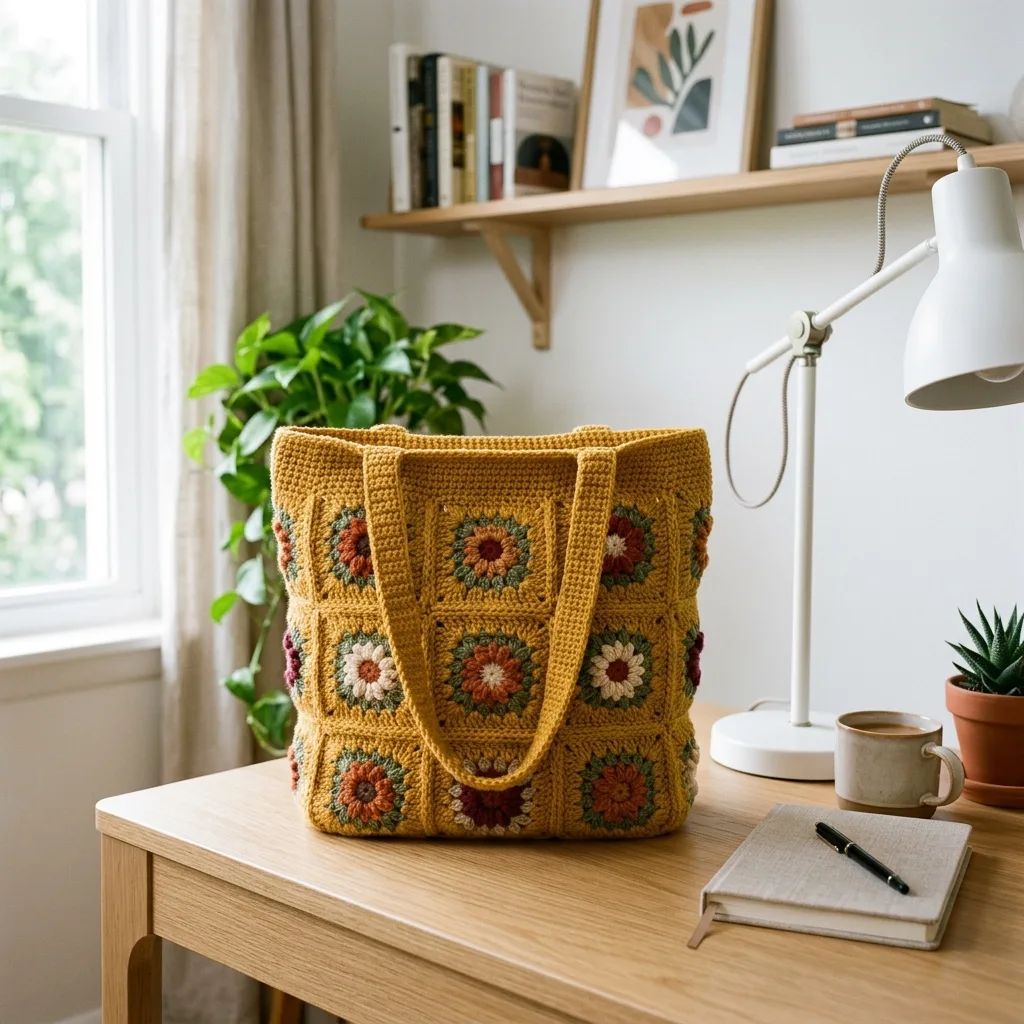
OKAY, this one is a showstopper! If you have been wanting to try a granny square bag but felt intimidated by all the seaming and construction, I promise you this Mustard Yellow Wildflower Granny Tote is one of the most satisfying projects you will ever make. We are talking about a structured, beautiful tote that looks like it took weeks but actually comes together in about 12 to 16 hours of happy crocheting. The wildflower centers give each square personality, the mustard frame ties everything together seamlessly, and the finished bag is sturdy enough for daily use. This makes an INCREDIBLE gift, and honestly, you might want to keep the first one for yourself.
Get the Ad-Free PDF Pattern
You can find the free pattern below, or you can purchase the ad-free printable PDF from my shop.
Get the Printable PDF →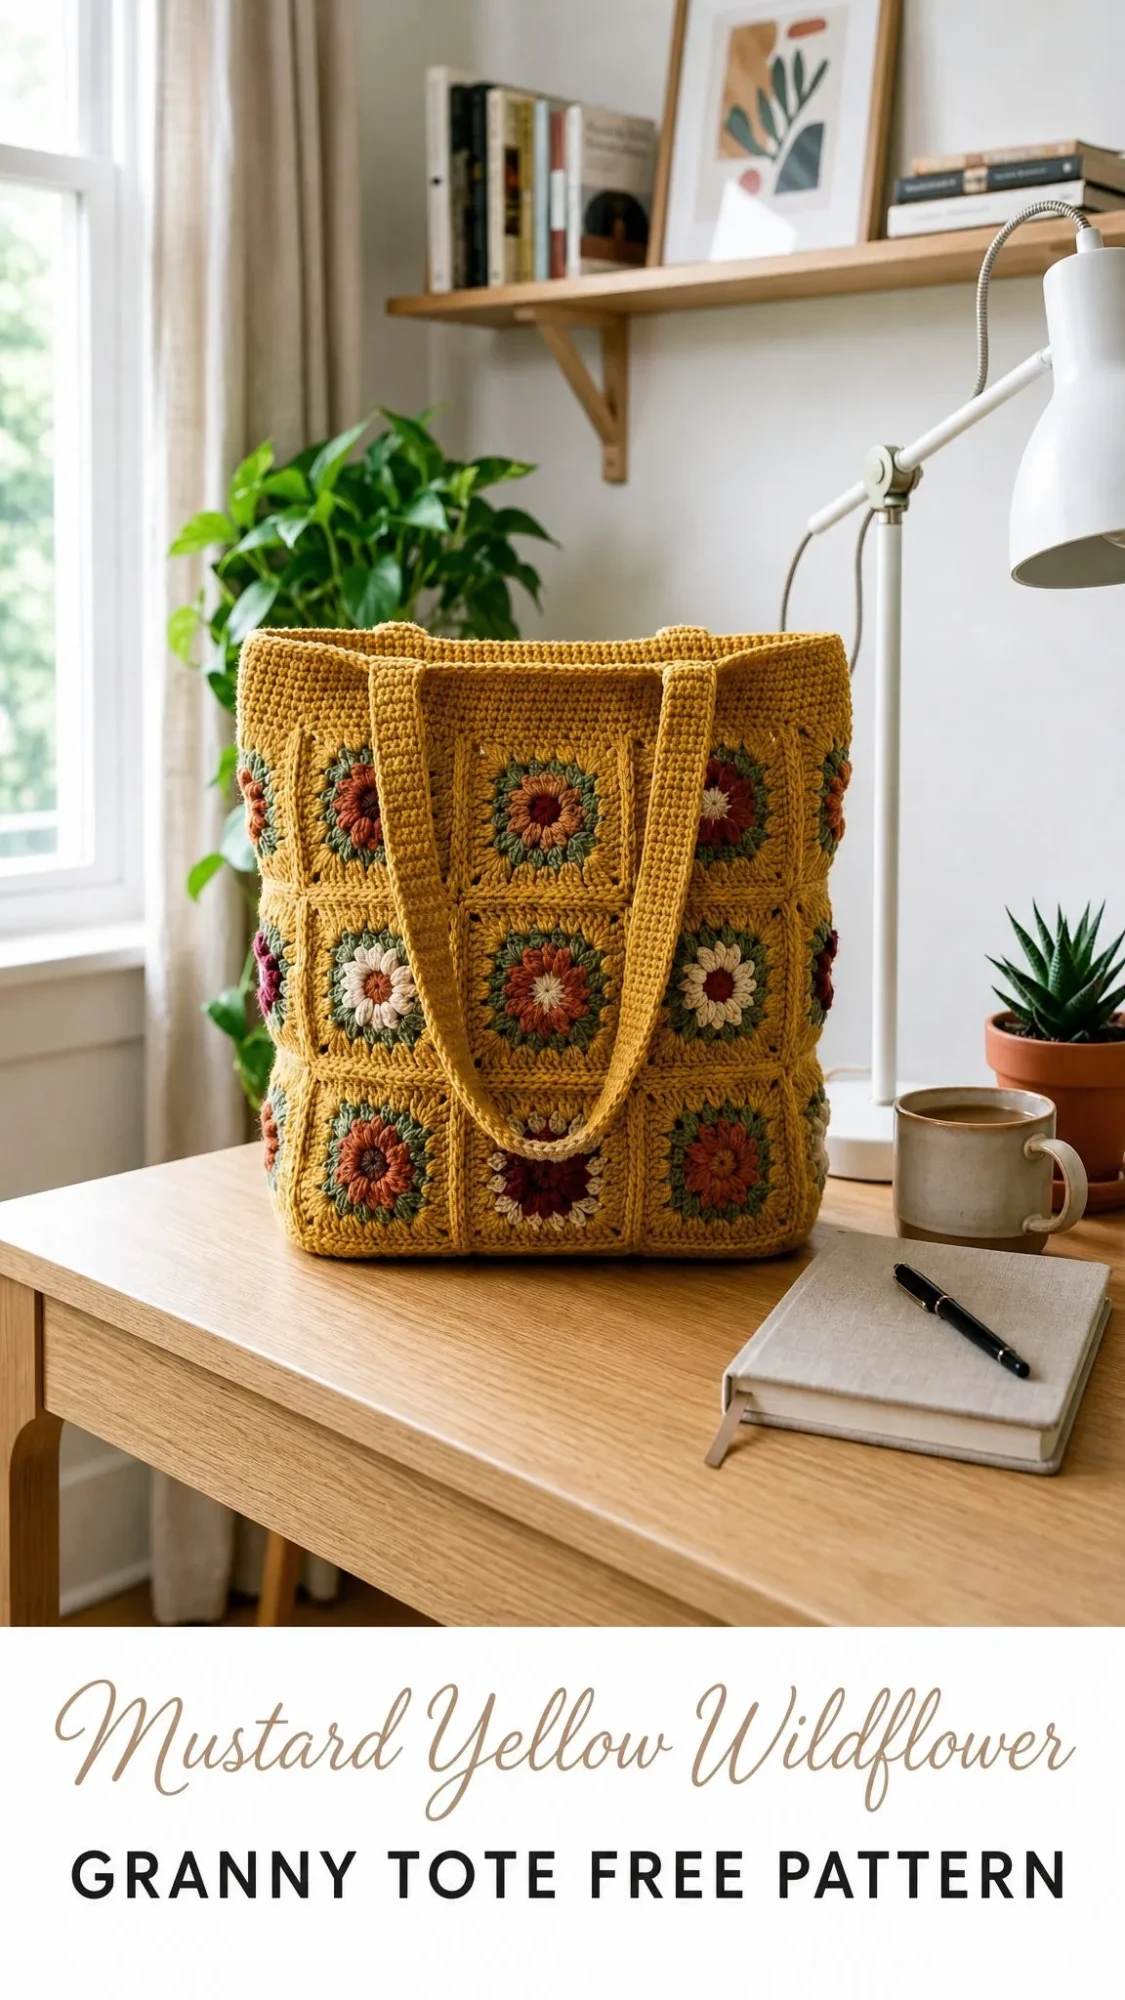
Why This Granny Tote Pattern Works So Well
What I love about this pattern is how modular it is. You are making 27 individual wildflower granny squares, which means you can crochet them anywhere. Waiting rooms, car rides, lunch breaks. Each square takes maybe 15 to 20 minutes once you get the hang of it. Then you join them into panels, add a clean single crochet (sc) edge around the top, attach two solid straps, and you have a bag that looks like it belongs in a boutique.
The construction is smart too. You are building two 3 x 3 body panels for the front and back, two 1 x 3 side gussets, and one 3 x 1 base panel. This gives the bag its structured, boxed shape. No floppy tote here. It stands up on its own and holds its shape beautifully.
Skill Level and What You Will Learn
This pattern is rated as adventurous beginner to intermediate. You will work in the round, change colors multiple times per square, seam motifs together with whip stitch, and create firm straps. If you have made a basic granny square before, you can absolutely handle this. If you have never made a granny square, this is actually a wonderful first project because you will make 27 of them and be an expert by the end.
The wildflower center uses a puff stitch, which might sound fancy but is really just pulling up loops and finishing them together. I will walk you through it in the special stitches section below.
Materials You Will Need
Yarn:
Tools:
Suggested Yarns:
Choose a yarn that creates a firm but not stiff fabric. For bags, you want structure. If your gauge swatch feels floppy, go down a hook size. Match gauge rather than relying on the label yardage.
Gauge
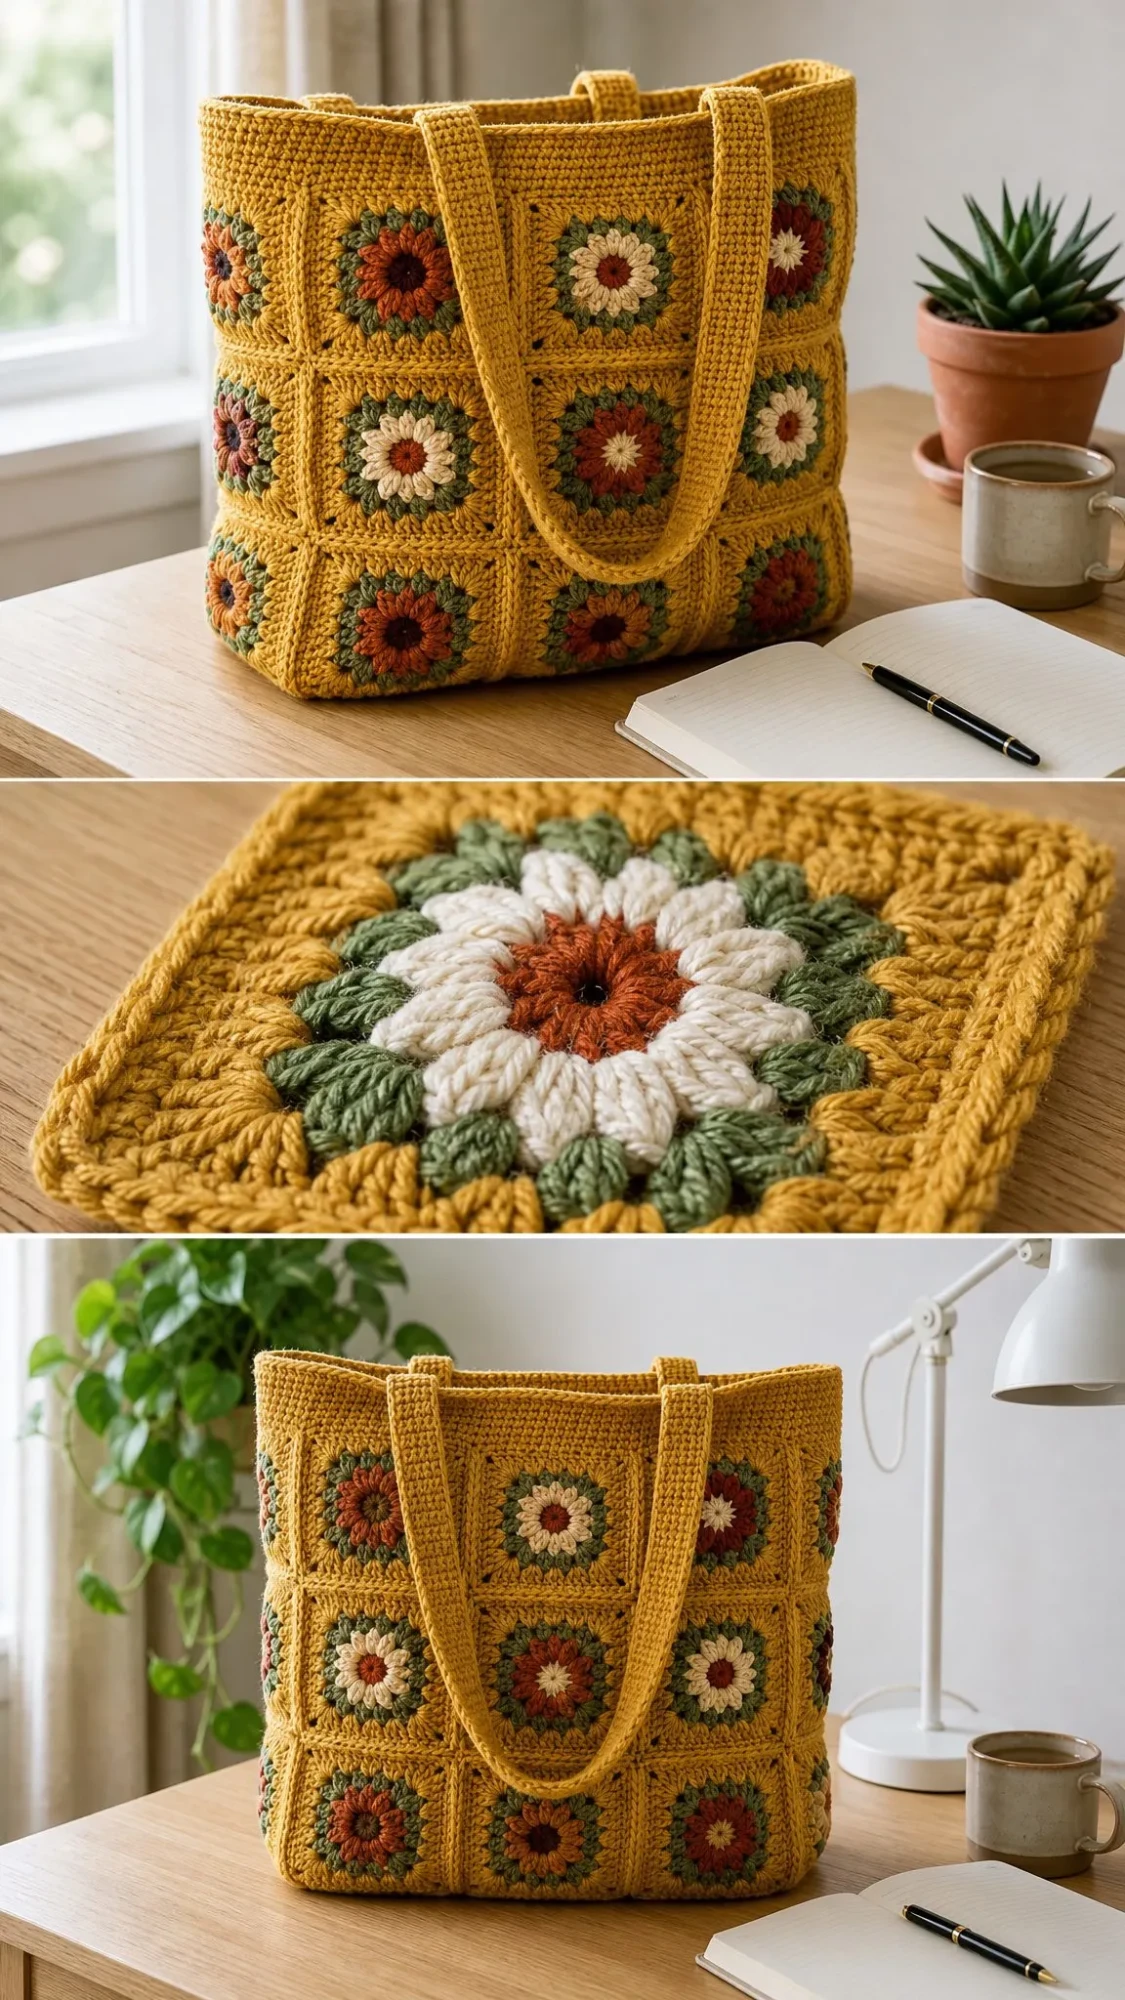
Motif gauge: One finished square after blocking measures 4 inches x 4 inches (10 x 10 cm). Each side of the square has 15 edge stitches between corner centers.
Strap gauge: 16 sc x 18 rows equals 4 inches x 4 inches (10 x 10 cm) with a 5.0 mm hook.
Please take a moment to check your gauge. This pattern is designed to help you create the tote shown, but individual results may vary depending on your yarn, tension, hook size, and finishing technique. You may need to make small adjustments to achieve the closest possible result.
Finished Size
12 inches wide x 12.5 inches tall x 4 inches deep (30.5 x 32 x 10 cm)
Abbreviations and Stitch Definitions
Note for UK crocheters: US sc equals UK dc. US dc equals UK tr.
Special Stitches
Puff Stitch: (Yarn over, insert hook in indicated stitch or space, pull up a loop) 3 times, yarn over and pull through all 7 loops on hook, chain 1 to close.
This stitch creates the fluffy petal effect in the flower center. Do not worry if your first few look a little wonky. They get easier fast.
Whip Stitch Join: Hold motifs with wrong sides together. Using your yarn needle and matching yarn, sew through the outer loops of both edges from corner center to corner center. Keep your tension even and do not pucker the seam.
Standing Single Crochet: Make a slip knot on your hook, insert hook in indicated stitch, yarn over and pull up a loop, yarn over and pull through both loops.
Pattern Notes Before You Begin
Wildflower Granny Square Pattern
Make 27 total squares. Use a mix of terracotta, burgundy, cream, and olive flower centers so the front, back, sides, and base feel balanced. I recommend making about 9 terracotta-centered, 7 burgundy-centered, 6 cream-centered, and 5 olive-centered motifs. Keep mustard as the final frame color on every motif so seams blend cleanly.
Round 1: With your flower center color, make a magic ring. Chain 1, work 8 hdc into the ring, tighten the ring, join with a slip stitch. (8 hdc)
Round 2: Chain 1, puff stitch in the same stitch, chain 1. Puff stitch in the next stitch, chain 1. Repeat from * around. Join. Fasten off. (8 puffs + 8 ch-1 spaces)
Round 3: Join olive in any ch-1 space. Chain 1, (sc, ch 3, sc) in each ch-1 space around. Join. Fasten off. (16 sc + 8 ch-3 loops)
Round 4: Join mustard in any ch-3 loop. Chain 2. (3 dc, ch 2, 3 dc) in the next loop for a corner, 3 dc in the next loop, 3 dc in the next loop. Repeat from * 3 more times. Join. (48 dc + 4 corner spaces)
Round 5: Chain 1, sc in each dc around, working 3 sc in each corner ch-2 space. Join. Fasten off. (60 sc)
Checkpoint: Each square should measure 4 inches (10 cm) across after light blocking. Each side should have 15 sc for joining, counted from corner center to corner center.
Assembly Map and Panel Instructions
Before you start seaming, lay out all your blocked squares. Rotate the flowers randomly for a handmade garden effect, but keep every mustard frame facing right side up.
Front Panel: Join 9 squares into a 3 x 3 grid. Each seam joins 15 edge stitches.
Back Panel: Join 9 squares into a second 3 x 3 grid.
Side Gussets: Join 3 squares vertically for the left side and 3 squares vertically for the right side.
Base Panel: Join 3 squares horizontally for the bottom.
Panel Checkpoint: Front and back panels should measure about 12 inches wide x 12 inches tall (30.5 x 30.5 cm). Side panels should measure about 4 inches wide x 12 inches tall (10 x 30.5 cm). The base should measure about 12 inches x 4 inches (30.5 x 10 cm).
Joining the Tote Body
Use mustard yarn and whip stitch for all seams. You can keep right sides facing out for visible handmade ridges, or wrong sides together for a flatter seam. Both look great.
Step 1: Join the left side panel to the left edge of the front panel. (45 edge stitches)
Step 2: Join the right side panel to the right edge of the front panel. (45 edge stitches)
Step 3: Join the open edge of the left side panel to the left edge of the back panel. (45 edge stitches)
Step 4: Join the open edge of the right side panel to the right edge of the back panel. (45 edge stitches)
Step 5: Pin the base panel under the tube. Line up 3 motif edges along the front, 1 motif edge at each side, and 3 motif edges along the back. Seam all the way around. (120 edge stitches total)
Body Checkpoint: With the base attached, the tote should stand as a soft box measuring about 12 inches wide x 12 inches tall x 4 inches deep before the top edging.
Top Edge
Round 1: Join mustard at a back corner. Chain 1, sc evenly around the top opening, working 15 sc across each exposed motif edge. Join. (120 sc)
Round 2: Chain 1, sc in each stitch around. Join. (120 sc)
Round 3: Chain 1, sc in each stitch around. Join. Fasten off. (120 sc)
Straps (Make 2)
Row 1: Chain 6, sc in the 2nd chain from hook and in each chain across. Turn. (5 sc)
Rows 2 to 108: Chain 1, sc in each stitch across. Turn. Fasten off after Row 108. (5 sc)
Each strap should measure about 1.25 inches wide x 24 inches long (3.2 x 61 cm).
Want a longer shoulder drop? Add 4 rows for each extra inch, or 10 rows for each extra 5.5 cm.
Attaching the Straps: Center one strap over the left and right vertical joins of each 3-square panel. Sew each end over 5 top-edge stitches and about 1.5 inches (4 cm) down the inside of the bag. Use a boxed X stitch pattern for strength. This means sewing a rectangle around the strap end, then an X through the middle.
Finishing Your Tote
Weave in all ends firmly, especially near seams and strap anchors. These areas get the most stress during use.
Steam block lightly or wet block flat. Do not stretch the straps while drying or they may become misshapen.
Optional Lining: Cut a 12 inch x 4 inch base piece and two 12 inch x 12 inch lining pieces with seam allowance. Sew into a box shape, then hand-stitch just below the top edging inside the bag. A lining adds extra structure and protects the inside from wear.
Size Customization Options
Want a wider tote? Add one motif to the front and back width, and add one motif to the base length. Add 30 sc to the top-edge count for each added front/back column.
Want a taller tote? Add one motif row to the front, back, and side panels. Strap placement stays the same.
Want a deeper tote? Make the side and base panels 2 motifs deep instead of 1. The top-edge count increases by 30 sc.
Troubleshooting Common Issues
Square cups or bowls: Your center is too tight or Round 4 is crowded. Loosen your Round 3 chains and block flat.
Square ruffles: Your center or loop rounds are too loose. Try using a smaller hook for Rounds 1 through 3.
Panels twist: Block all motifs to the same size before joining. Seam from corner center to corner center consistently.
Top edge waves: Work exactly 15 sc per motif edge. If it still waves, use a smaller hook for Rounds 2 and 3 of the top edge.
Straps stretch: Use firm, tight sc stitches. Sew with a boxed X attachment. Consider adding cotton webbing underneath the crochet strap for extra support, or lining the straps.
Care Instructions
Hand wash cold, reshape, and lay flat to dry. Do not bleach. Do not iron. If you used a machine-washable yarn, follow the yarn label instructions and protect the straps from stretching while wet by laying flat rather than hanging.
You Did It!
Thank you so much for choosing this pattern for your next project. I really hope you love making this tote as much as I loved designing it. The wildflower centers make every square feel like its own little garden, and seeing them all come together into a finished bag is incredibly satisfying.
If you make this Mustard Yellow Wildflower Granny Tote, I would absolutely love to see it! Tag me on Instagram or share a photo on Facebook. Seeing your finished projects is honestly the best part of sharing patterns.
If you loved this pattern, save it to your Pinterest boards so you can find it easily when you are ready to start. And please drop a comment below if you make one. I love hearing which color combinations you choose and how your tote turns out!
Want a Quick & Easy Printable Version?
Get a clean, beautifully formatted PDF of this pattern — easy to follow step by step, ready to print or save on any device. No scrolling, no distractions, just the pattern.
Get the Printable PDF →