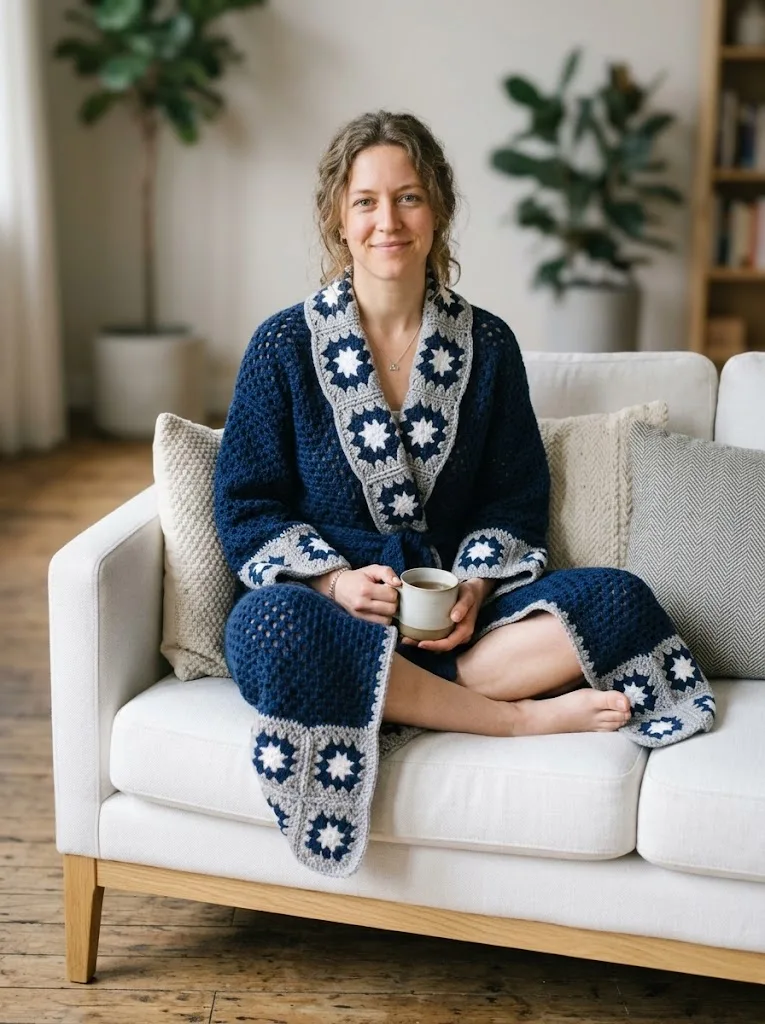
Last winter, I found myself standing in my kitchen at 6 AM, shivering in a thin cotton robe while waiting for my coffee to brew. I kept thinking about my grandmother’s old crocheted afghan and how warm it always felt wrapped around my shoulders. That morning, I decided I was going to make myself a proper robe. Not a store-bought fleece thing, but something handmade and substantial. Something that felt like being wrapped in a hug. This Navy Starlight Granny Square Robe is what came out of that chilly morning daydream, and honestly, it might be my favorite thing I have ever crocheted for myself.
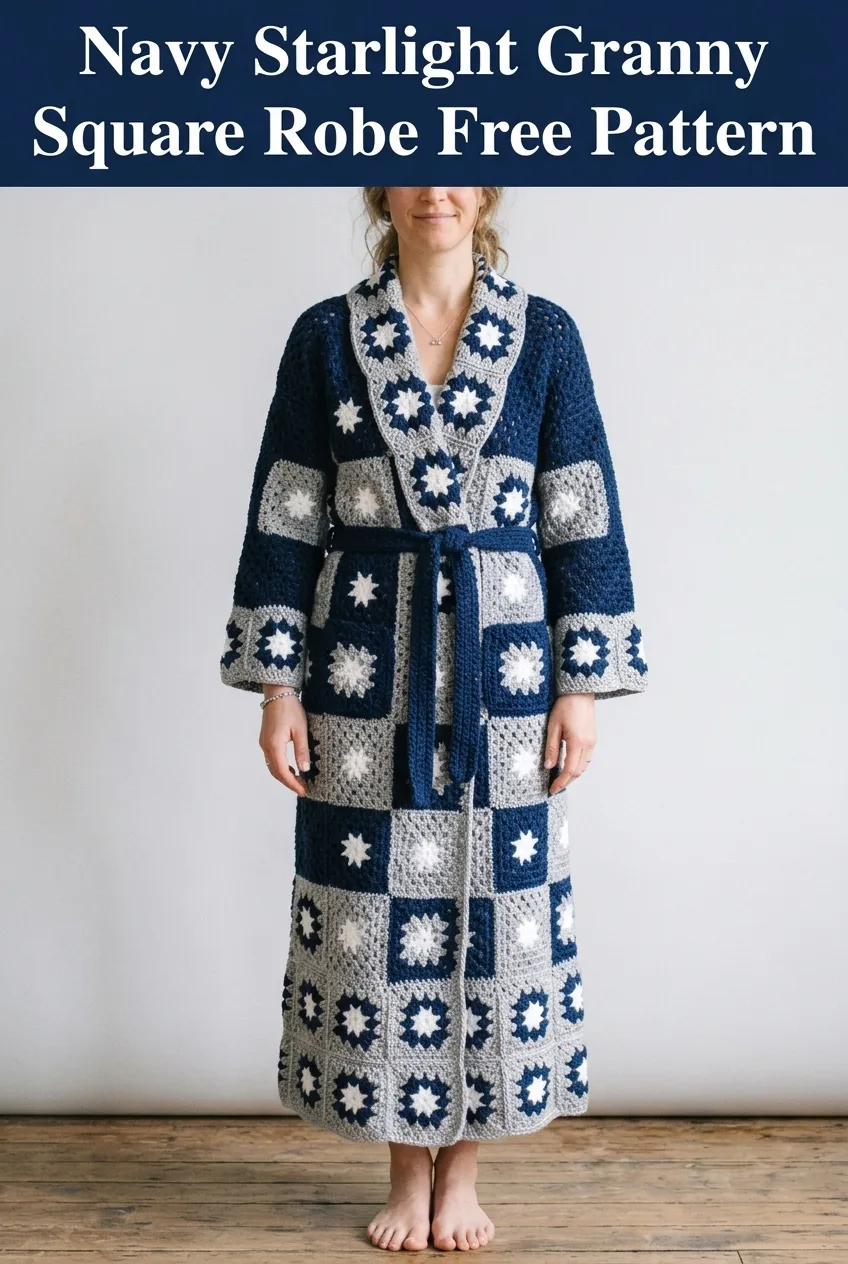
This crochet pattern combines the classic granny square with a cozy textured body to create a full-length robe that is equal parts vintage charm and modern comfort. The starlight granny squares feature a three-color design with white centers that radiate outward like little stars, framed in navy and grey. The body uses a simple textured stitch that works up beautifully and drapes well for wearing.
Why You Will Love This Crochet Robe Pattern
This robe looks impressive, but let me break it down for you. If you can make a granny square and work basic stitches in rows, you can absolutely make this. The construction is straightforward. You will make the body panels first, then create all your granny squares, join everything together, and add the finishing touches.
The skill level sits comfortably at intermediate. You need to be comfortable with changing colors, joining motifs, and seaming. But none of these techniques are difficult once you understand them. I will walk you through each step.
What makes this crochet pattern special is how the design elements work together. The textured navy body creates a beautiful backdrop that makes those starlight squares really pop. The grey borders tie everything together and give the robe a polished, intentional look.
Materials Needed for Your Starlight Robe
Yarn:
I recommend using a soft acrylic or acrylic blend for this project. You want something machine washable since this is a garment you will wear often. A yarn with good stitch definition will show off both the texture and the granny squares beautifully.
Tools:
Gauge:
14 stitches and 16 rows = 4 inches in the textured body stitch pattern
One completed granny square = 5 inches x 5 inches after blocking
Always check your gauge before starting. This matters for garment fit. If your squares are too big, go down a hook size. Too small, go up.
Abbreviations and Stitch Definitions
Let me explain every stitch you will need:
Size Information
This pattern is written for size Medium, which fits bust sizes 36 to 40 inches. The robe is designed with an open front and tie closure, so it has natural ease built in.
Finished Measurements:
For a smaller or larger size, you can adjust by adding or removing rows to the body panels and adjusting the number of granny squares along the hem.
Starlight Granny Square Pattern
You will need to make a total of 24 granny squares for this robe. They are placed along the collar, cuffs, pocket, and hem border.
Starting with Color B (white):
Round 1: Make a magic ring. Ch 3 (counts as first dc throughout), work 2 dc into the ring, ch 2, *3 dc into ring, ch 2* repeat 3 more times. Join with sl st to top of beginning ch 3. Fasten off Color B. (12 dc, 4 ch-2 spaces)
Joining Color MC (navy) in any ch-2 corner space:
Round 2: Ch 3, 2 dc in same ch-2 space, ch 1, 3 dc in same space (corner made), ch 1, *in next ch-2 space work (3 dc, ch 2, 3 dc), ch 1* repeat around. Join with sl st. Fasten off MC. (24 dc, 4 ch-2 corner spaces, 4 ch-1 spaces)
Joining Color A (grey) in any ch-2 corner space:
Round 3: Ch 3, 2 dc in same space, ch 2, 3 dc in same space (corner made), ch 1, 3 dc in next ch-1 space, ch 1, *in next corner ch-2 space work (3 dc, ch 2, 3 dc), ch 1, 3 dc in next ch-1 space, ch 1* repeat around. Join with sl st. Fasten off Color A. (36 dc, 4 ch-2 corner spaces, 8 ch-1 spaces)
Round 4: Rejoin Color A in any corner ch-2 space. Ch 3, 2 dc in same space, ch 2, 3 dc in same space, ch 1, *3 dc in next ch-1 space, ch 1* across side, work corner in next ch-2 space. Continue around. Join with sl st. Fasten off and weave in ends. (48 dc, 4 corners, 12 ch-1 spaces)
Each completed square should measure 5 inches. Block all squares before assembly.
Textured Body Stitch Pattern
The body of this robe uses a simple but beautiful textured stitch that creates a dense, cozy fabric perfect for a garment you will lounge in.
Textured Stitch Pattern (worked over any number of stitches):
Row 1: Sc in second ch from hook and in each ch across. Turn.
Row 2: Ch 1, sc in first st, *hdc in next st, sc in next st* repeat across. Turn.
Row 3: Ch 1, sc in each st across. Turn.
Repeat Rows 2 and 3 for pattern.
This creates a subtle texture that is comfortable against your skin and has enough weight to drape nicely.
Back Panel Instructions
Using MC (navy) and your 5.0mm hook:
Foundation: Ch 78.
Row 1: Sc in second ch from hook and in each ch across. Turn. (77 sts)
Rows 2 through 130: Work in Textured Stitch Pattern as established. Turn at the end of each row. (77 sts)
Your back panel should measure approximately 22 inches wide and 32 inches long. Set aside.
Front Panels (Make 2)
Using MC (navy):
Foundation: Ch 45.
Row 1: Sc in second ch from hook and in each ch across. Turn. (44 sts)
Rows 2 through 130: Work in Textured Stitch Pattern. Turn. (44 sts)
Each front panel should measure approximately 12.5 inches wide and 32 inches long.
Sleeve Panels (Make 2)
Using MC (navy):
Foundation: Ch 56.
Row 1: Sc in second ch from hook and in each ch across. Turn. (55 sts)
Rows 2 through 70: Work in Textured Stitch Pattern. Turn. (55 sts)
Each sleeve should measure approximately 16 inches wide and 18 inches long.
Tie Belt
Using MC (navy):
Foundation: Ch 201.
Row 1: Sc in second ch from hook and in each ch across. Turn. (200 sts)
Rows 2 through 8: Ch 1, sc in each st across. Turn. (200 sts)
Fasten off and weave in ends. Your belt should measure approximately 2 inches wide and 56 inches long.
Pocket (Make 1)
Using MC (navy):
Make one granny square following the Starlight Granny Square Pattern above. This single square becomes your pocket. Set aside for assembly.
Assembly Instructions
Now comes the fun part. Take your time with assembly. Good seaming makes all the difference in how your finished robe looks and feels.
Step 1: Join Shoulder Seams
Lay your back panel flat, right side up. Place front panels on top, right sides together, aligning the top corners. Using MC and your yarn needle, whip stitch or mattress stitch the shoulder seams for approximately 5 inches on each side. This leaves a neck opening of about 12 inches.
Step 2: Attach Sleeves
Find the center of each sleeve’s long edge. Match this to the shoulder seam. Pin in place. Sew sleeves to the body, attaching them to both front and back panels. The sleeve should span about 8 inches on each side of the shoulder seam.
Step 3: Side and Sleeve Seams
Fold the robe so front and back panels are right sides together. Starting at the bottom hem, sew up the side seam until you reach the sleeve. Continue sewing the sleeve seam from the underarm to the cuff. Repeat on the other side.
Step 4: Granny Square Hem Border
Join 10 granny squares in a strip for the bottom hem. Using Color A and sl st, join squares through back loops along their edges. Attach this strip to the bottom of the robe body using whip stitch, distributing evenly across the hem.
Step 5: Collar Construction
Join 8 granny squares in a long strip. This strip will wrap around the entire front opening and back of the neck. Start at the bottom right front, continue up around the neck, and down to the bottom left front. Pin first, then sew in place, easing around the corners.
Step 6: Sleeve Cuffs
Join 3 granny squares for each cuff (6 total). Attach to the bottom edge of each sleeve, distributing evenly.
Step 7: Attach Pocket
Position your single pocket square on the right front panel, approximately 6 inches below the waist and 2 inches from the front edge. Whip stitch along three sides, leaving the top open.
Step 8: Add Belt Loops
Using MC, ch 15, sl st to join into a loop. Make 2 loops. Attach one to each side seam at waist height. These will hold your tie belt.
Finishing Touches
Edging:
Using Color A, work one round of sc around the entire outer edge of the robe (excluding the granny square sections). This creates a polished, cohesive look.
Work 1 sc in each row end along the fronts, 3 sc in each corner, and 1 sc in each stitch along the hem areas without granny squares.
Blocking:
Wet block your finished robe by soaking it in cool water for 20 minutes. Gently squeeze out excess water. Lay flat on blocking mats and shape to measurements. Allow to dry completely.
Weaving in Ends:
You will have many ends to weave in. Take your time. Weave each end through at least 2 inches of stitches, then double back. Trim closely.
Tips for Success with This Crochet Tutorial
This is a big project, so pace yourself. Here are some tips I learned while making mine:
Make all your granny squares first. This gives you portable work you can do anywhere. Plus, you get the satisfaction of seeing your stack grow.
Check your gauge multiple times. Gauge can shift as you relax into the project. Measure periodically.
Use stitch markers. Mark the beginning of rows and important points like where sleeves will attach.
Take breaks. This robe took me about three weeks of consistent evening crocheting. Your hands will thank you for rest.
Consider a yarn winder. With this much yardage, center-pull balls make everything easier.
Customization Ideas
Want to make this robe your own? Here are some ideas:
Care Instructions
Machine wash your finished robe on a gentle cycle with cold water. Tumble dry on low or lay flat to dry. The acrylic yarn will soften beautifully with washing.
Store folded rather than hanging to prevent stretching at the shoulders.
I hope you love making this Navy Starlight Granny Square Robe as much as I loved designing it. There is nothing quite like wrapping yourself in something you made with your own two hands. If you make this crochet pattern, I would absolutely love to see your finished robe. Tag me on Instagram or share in my Facebook group. Seeing your creations makes my whole day.
If this pattern is calling your name, go ahead and save it to your Pinterest boards so you can find it when you are ready to cast on. And please drop a comment below if you make one. I love hearing which colors you chose and how it turned out. Happy crocheting, friend!
