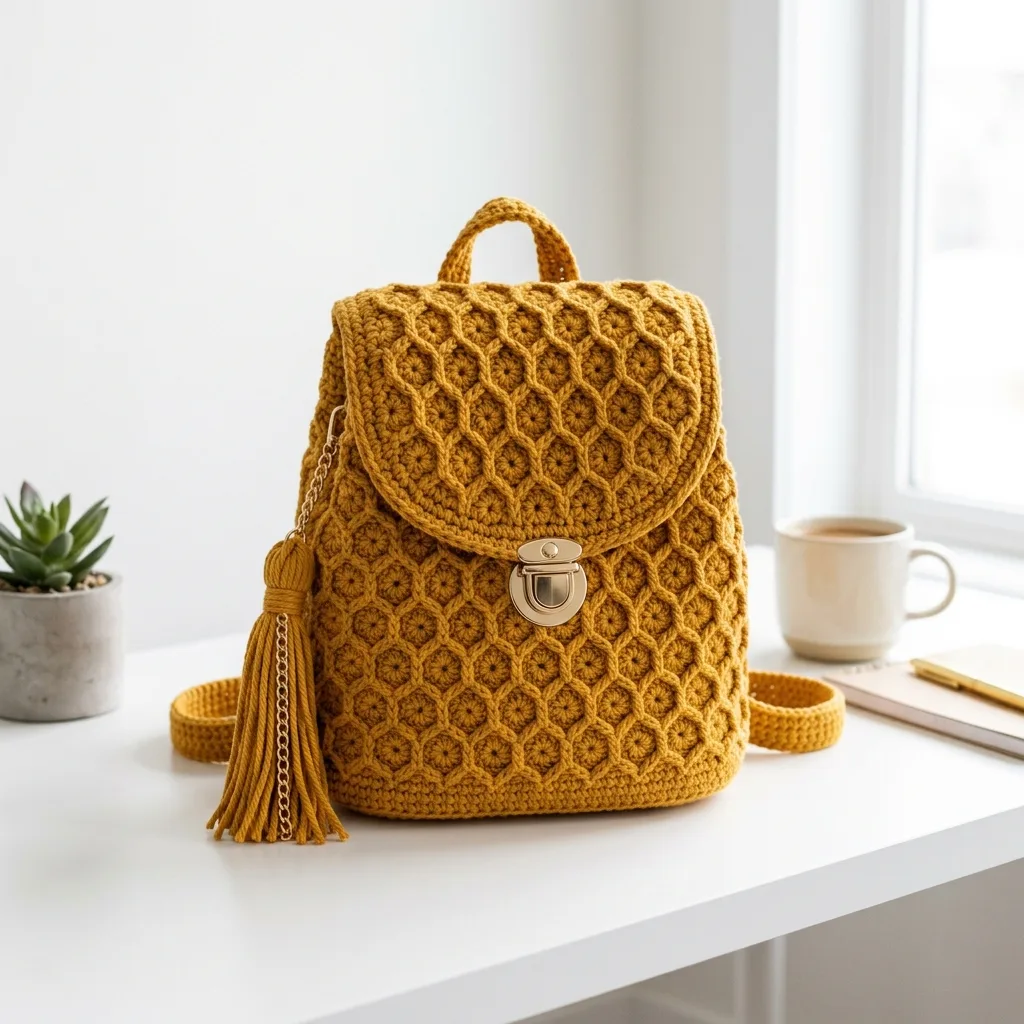
I have been dreaming about designing a structured crochet backpack for ages, and I am SO pleased with how this one turned out. My goals were ambitious: a bag that actually holds its shape, a texture that looks impressive but stays manageable, and hardware that makes it feel like something you would buy in a boutique. Every design decision, from the raised honeycomb overlay to the rounded flap to that little tassel detail, came together exactly how I pictured it. If you have been wanting to try a bag project that pushes your skills just a bit, this is the one.
Get the Ad-Free PDF Pattern
You can find the free pattern below, or you can purchase the ad-free printable PDF from my shop.
Get the Printable PDF →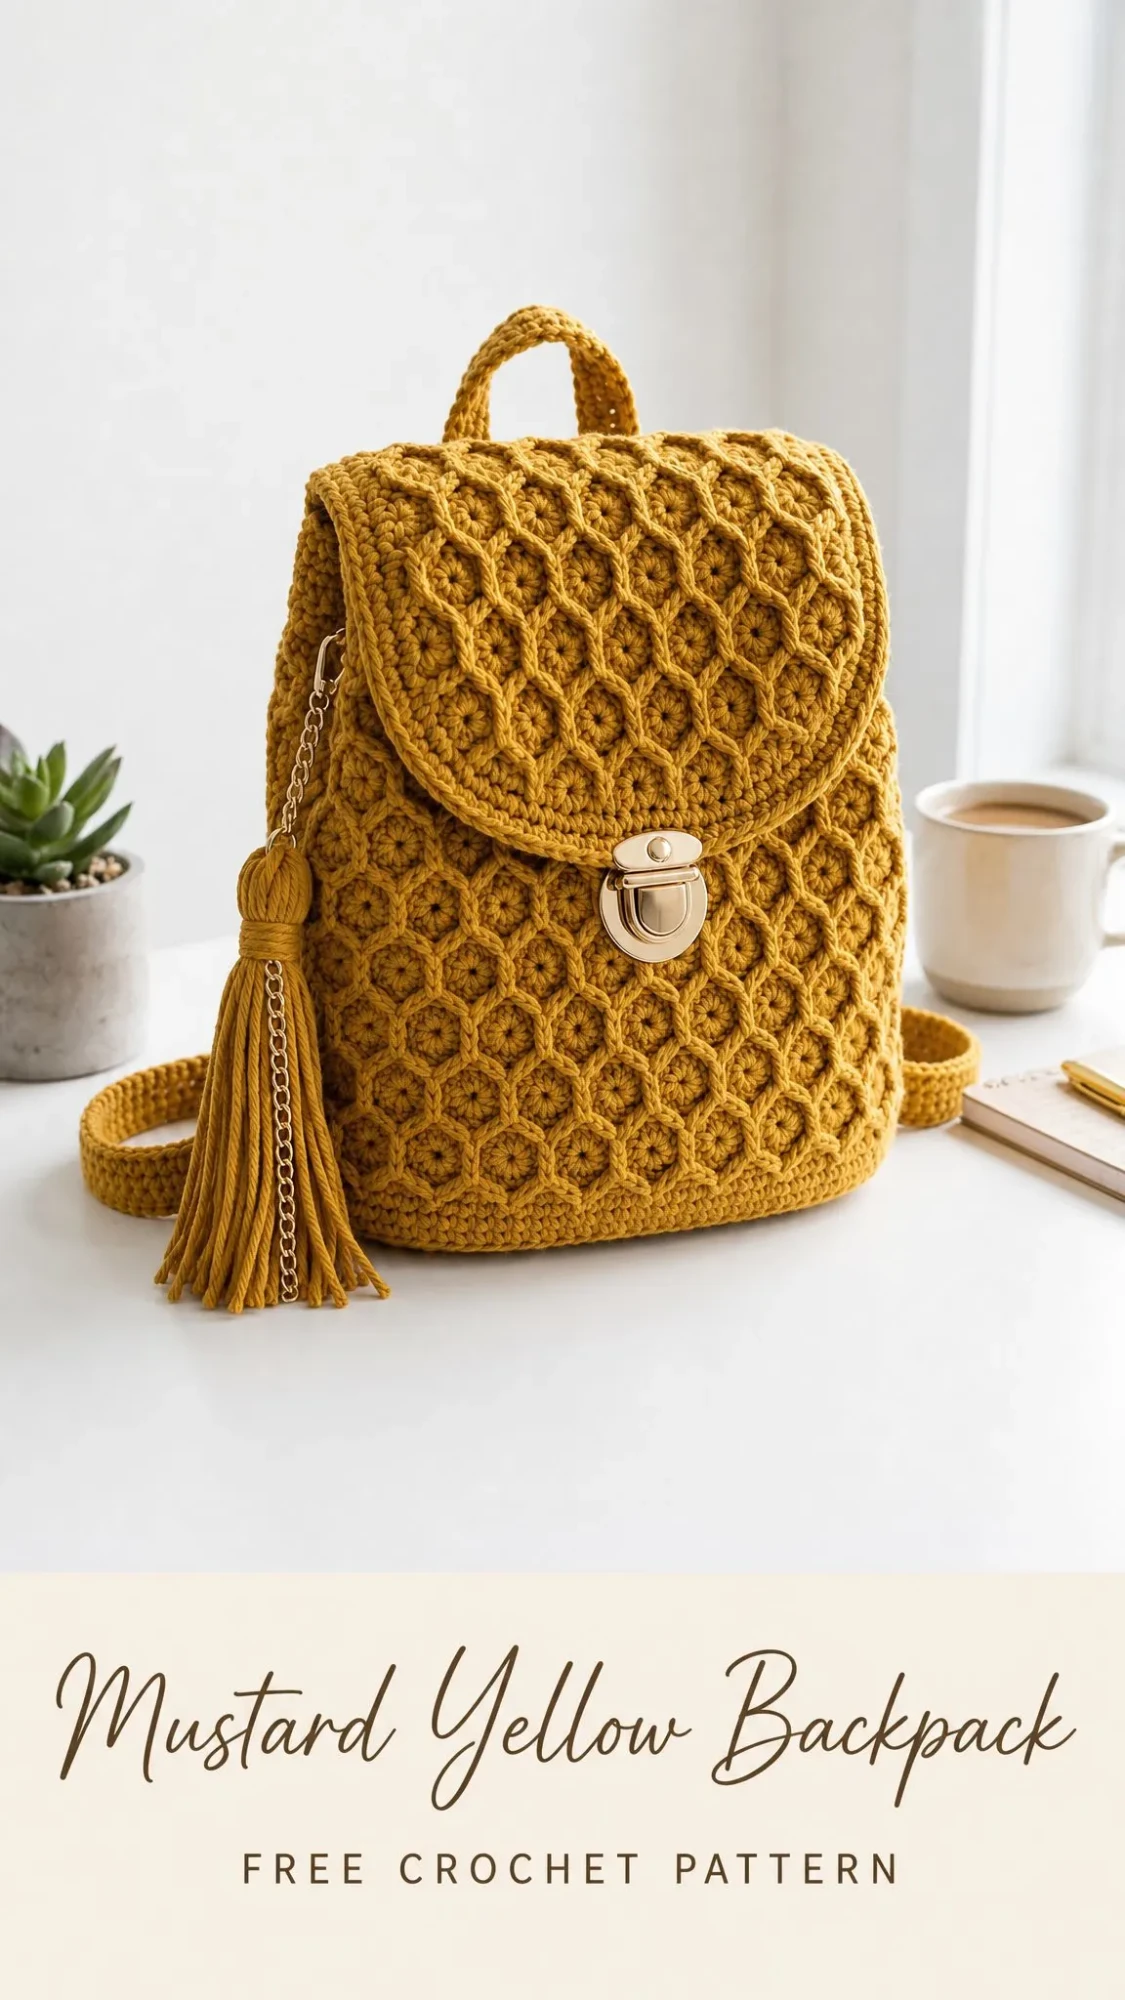
About This Mustard Honeycomb Crochet Backpack Pattern
This structured cotton backpack features a beautiful raised honeycomb texture created with surface crochet. The finished piece measures approximately 7.9 inches wide by 9.4 inches tall by 4.7 inches deep (20 x 24 x 12 cm). That is the perfect size for daily essentials, a tablet, your wallet, and a few extras.
The construction method might sound complex, but I promise it breaks down into very manageable pieces. You will work flat panels for the front and back, a long gusset strip for the sides and bottom, and then seam everything together. The honeycomb texture gets added after each panel is complete, which means you are working on a flat piece of fabric rather than trying to juggle texture and shaping at the same time.
Skill level: Intermediate. You should be comfortable with basic stitches, seaming pieces together, and following multi-step instructions. The surface crochet technique might be new to you, and that is perfectly fine. I will walk you through it.
Time estimate: 12 to 16 hours of crochet time, plus additional time for lining and hardware finishing.
Materials You Will Need
Gathering your supplies before you start makes everything smoother. Here is your complete list:
Yarn:
Recommended yarn brands:
Hook:
Notions:
Lining materials:
Hardware:
Do not skip the hardware. It transforms this from a craft project into something that genuinely looks and functions like a purchased bag.
Gauge
18 single crochet (sc) stitches x 20 rows = 4 inches / 10 cm square after light steam blocking.
Honeycomb repeat: 6 stitches x 4 rows = approximately 1.33 inches x 0.8 inches / 3.3 x 2 cm.
Gauge matters here. A backpack needs dense, sturdy fabric that will hold its shape and support the weight of your belongings. If your fabric feels loose or floppy, go down a hook size. Take the time to swatch. Your future self will thank you.
Abbreviations and Stitch Definitions
Let me define every stitch and abbreviation you will encounter in this crochet pattern.
ch = chain: Yarn over, pull through the loop on your hook. This creates the foundation for most crochet work.
sl st = slip stitch: Insert hook into the stitch, yarn over, pull through both the stitch and the loop on your hook in one motion. Used for joining and for the surface texture.
sc = single crochet: Insert hook into the stitch, yarn over and pull up a loop (2 loops on hook), yarn over and pull through both loops. This is your workhorse stitch for the entire bag.
dc = double crochet: Yarn over, insert hook into stitch, yarn over and pull up a loop, yarn over and pull through 2 loops, yarn over and pull through remaining 2 loops. (Note: UK crocheters, this is your treble.)
st/sts = stitch/stitches
rep = repeat
RS = right side: The side that faces outward when the project is finished.
WS = wrong side: The side that faces inward.
BLO = back loop only: Work into only the loop farthest from you, leaving the front loop unworked.
sc2tog = single crochet 2 together (decrease): Insert hook in next stitch, yarn over and pull up a loop. Insert hook in the following stitch, yarn over and pull up a loop. You now have 3 loops on your hook. Yarn over and pull through all 3 loops. This turns 2 stitches into 1.
Surface slip stitch: This is the special technique that creates the honeycomb texture. Hold your yarn on the wrong side of the fabric. Insert your hook from front to back at a marked point, pull up a loop to the front. Insert your hook at the next point, pull up a loop, and draw it through the loop already on your hook. Keep your loops relaxed so the fabric does not pucker.
Pattern Notes Before You Begin
A few important things to keep in mind as you work through this crochet tutorial:
Front and Back Panels
Make 2 identical panels. These form the front and back of your backpack.
Foundation: Ch 37.
Row 1: Sc in 2nd ch from hook and in each ch across. Turn. (36 sc)
Rows 2 through 48: Ch 1, sc in each st across. Turn. (36 sc)
Checkpoint: Each panel should measure approximately 7.9 inches wide by 9.4 inches tall / 20 x 24 cm after blocking.
Do not fasten off after completing the second panel if you want to continue directly into the top edging later. Set both panels aside while you add the honeycomb texture.
Raised Honeycomb Texture
This is where the magic happens. Work the honeycomb after each panel is complete, with the right side facing you.
Setting up your grid:
Place vertical stitch markers every 6 stitches across the panel. With 36 stitches total, you will have 6 repeats across.
Place horizontal markers every 4 rows up the panel. With 48 rows total, you will have 12 repeats vertically.
Creating the overlay lines:
Use surface slip stitches to draw diagonal paths. Start from the lower left corner of each 6 x 4 cell, travel up to the top center of that cell, then down to the lower right corner.
For the next row of cells, offset your starting point by 3 stitches. This creates the linked hexagon pattern that gives the honeycomb its characteristic look.
Continue outlining all 6 columns and 12 rows until your entire panel is covered.
Texture tip: Keep your overlay loops relaxed. If the fabric starts to cup or pull inward, your surface stitches are too tight. Redo that line with looser loops. The panel should lie flat when you finish.
Repeat for both the front and back panels.
Side and Bottom Gusset
The gusset is a long strip that wraps around the sides and bottom of the bag, connecting the front and back panels.
Foundation: Ch 23.
Row 1: Sc in 2nd ch from hook and in each ch across. Turn. (22 sc)
Rows 2 through 132: Ch 1, sc in each st across. Turn. (22 sc)
Checkpoint: Your strip should measure approximately 4.7 inches wide by 26 inches long / 12 x 66 cm. It will ease around both sides and the bottom of your panels.
Attaching the Gusset
With right sides together, pin Row 1 of the gusset at the top left corner of the front panel.
Match 48 gusset rows to the first side edge, 36 rows to the bottom edge, and 48 rows to the second side edge.
Seam with slip stitch or mattress stitch. I recommend mattress stitch for an invisible join, but slip stitch works well if you prefer a faster method.
Contact count: 48 side rows + 36 bottom stitches + 48 side rows = 132 joining points.
Repeat the entire process to attach the back panel to the other side of the gusset.
Top Opening Rim
Join yarn at a back corner of the opening.
Round 1: Ch 1, sc around the top opening: 36 stitches across front, 22 stitches across side, 36 stitches across back, 22 stitches across side. Join with sl st. (116 sc)
Rounds 2 and 3: Ch 1, sc in each st around, join. (116 sc)
Fasten off and weave in ends.
Rounded Front Flap
The flap is worked from the top edge downward so the shaped edge curves neatly over the front of the bag.
Foundation: Ch 37.
Row 1: Sc in 2nd ch from hook and in each ch across. Turn. (36 sc)
Rows 2 through 6: Ch 1, sc in each st across. Turn. (36 sc)
Row 7: Ch 1, sc2tog, sc across to last 2 sts, sc2tog. Turn. (34 sc)
Row 8: Ch 1, sc in each st across. Turn. (34 sc)
Rows 9 through 24: Repeat Rows 7 and 8 eight more times, reducing 2 stitches on every odd row. Your final Row 24 has 18 sc.
Edging: Ch 1, sc evenly around the entire flap, working 2 sc in each lower curved corner to keep the edge smooth. Join and fasten off.
Checkpoint: Your flap should be approximately 7.9 inches / 20 cm wide at the top and 4.7 to 5 inches / 12 to 13 cm deep at the center.
Flap texture: Add the honeycomb overlay to the flap using the same 6 stitch by 4 row grid. Keep the first 6 rows full-width, then allow the honeycomb to taper naturally as the flap narrows. Center the design so the motif row meets cleanly above where your clasp will go.
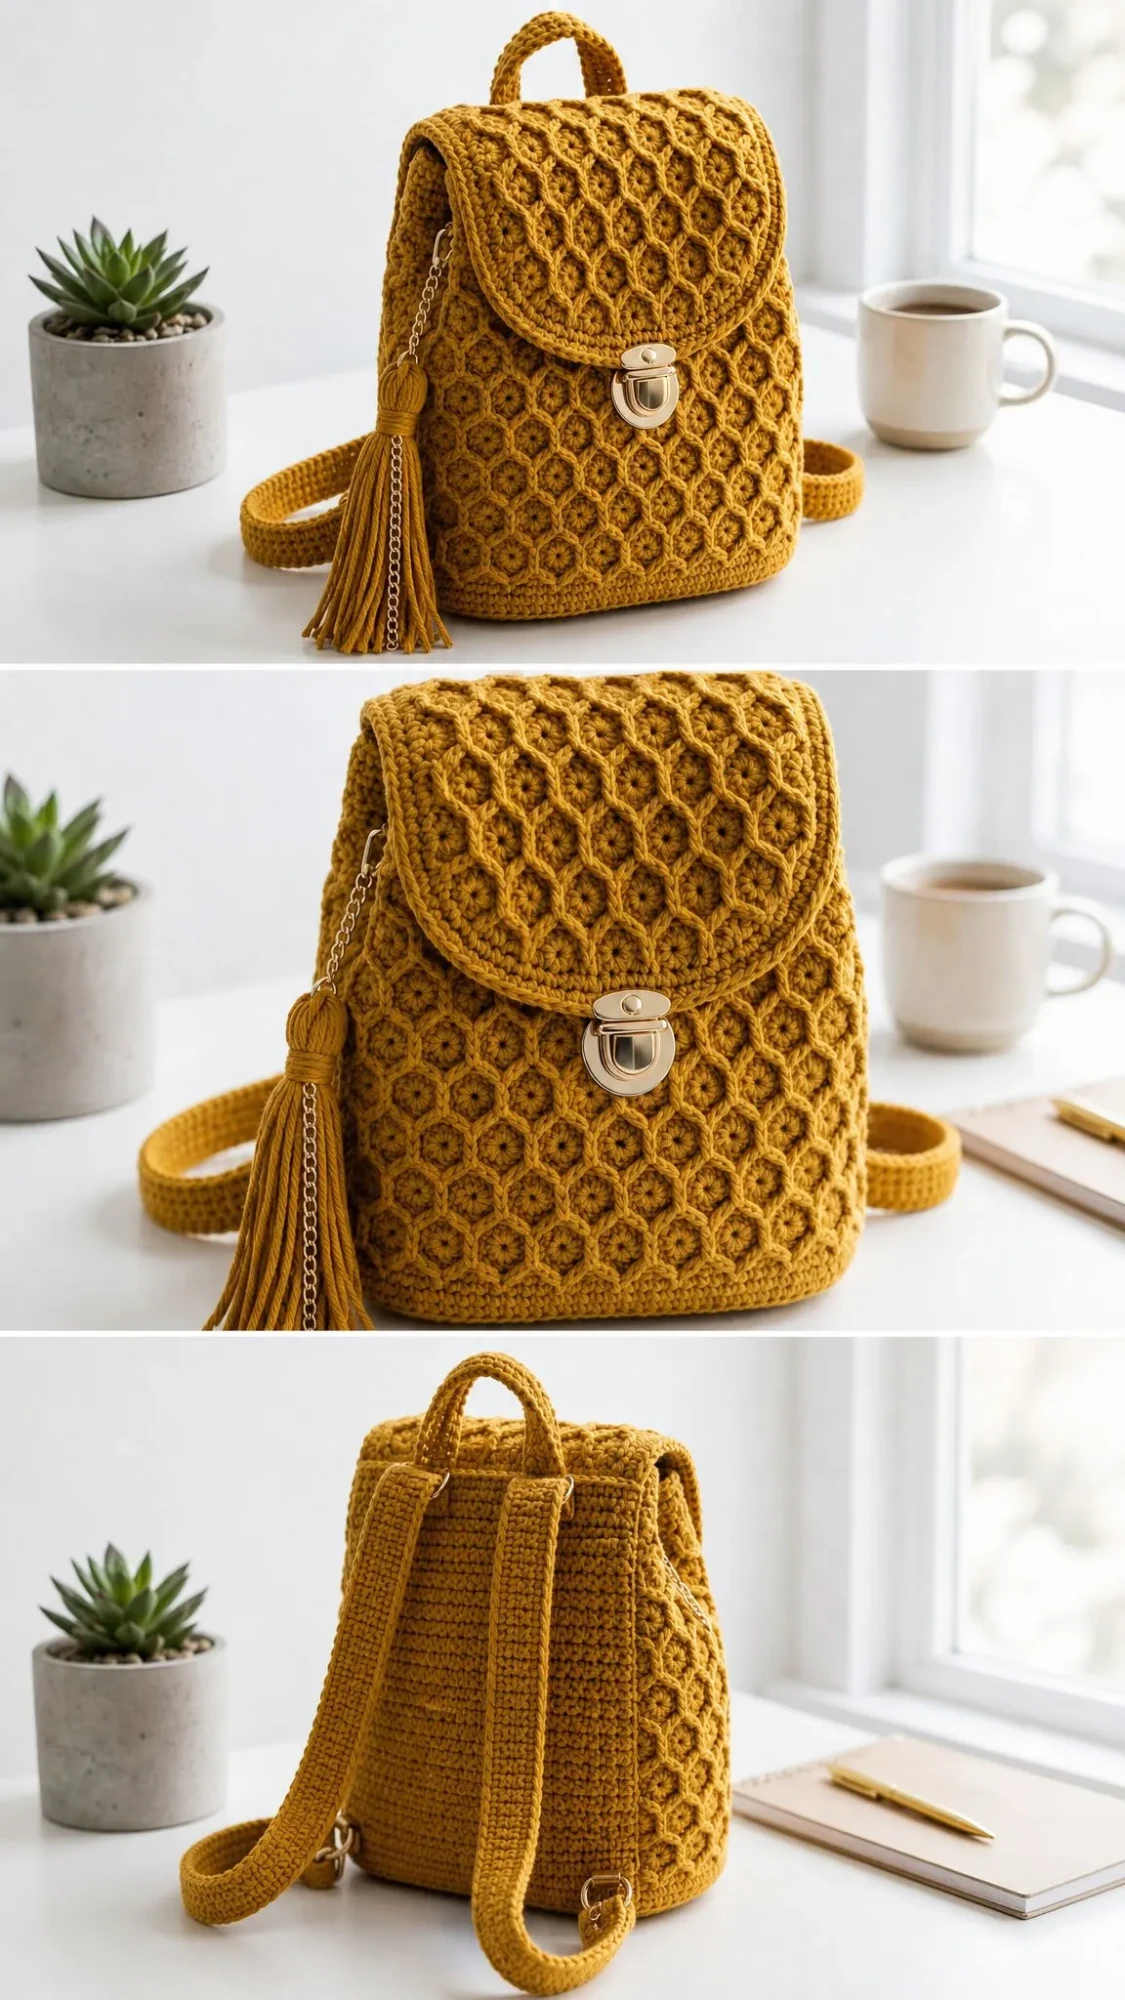
Shoulder Straps
Make 2 identical straps.
Foundation: Ch 6.
Row 1: Sc in 2nd ch from hook and in each ch across. Turn. (5 sc)
Rows 2 through 130: Ch 1, sc in each st across. Turn. (5 sc)
Edging: Sc evenly around the entire strap, working 2 sc in each corner. Fasten off.
Checkpoint: Each strap measures approximately 25.5 to 26 inches / 65 to 66 cm before hardware adjustment.
If you prefer longer or shorter straps, adjust the row count before fastening off. Try the bag on and see what length feels comfortable for you.
Top Handle
Foundation: Ch 6.
Work 34 rows of 5 sc, exactly as you did for the straps.
Fold the short ends under by approximately 0.5 inch / 1.25 cm and sew securely to the back top edge of the bag, centered between the strap attachment points.
Tassel
Wrap yarn around a 5 inch / 13 cm piece of cardboard 35 times.
Tie the top firmly with a separate piece of yarn.
Cut the lower loops.
Wrap a separate piece of yarn around the tassel about 0.75 inch / 2 cm below the top to create the head.
Trim the ends evenly.
Attach your tassel to the gold chain, then clip or sew the chain to one side seam under the flap.
Assembly and Hardware
Step 1, Shape: Lightly steam block all your pieces: panels, gusset, flap, straps, and handle. Be careful not to flatten the raised overlay texture. Hold your iron a few inches above the fabric and let the steam do the work.
Step 2, Flap: Sew the top edge of the flap to the upper back edge of the bag, centered over the opening.
Step 3, Clasp: Install the turn-lock plate at the lower center of the flap. Install the receiving plate on the front panel, positioning it so the flap closes without pulling or straining the fabric.
Step 4, Strap hardware: Sew two D-rings or rectangular rings to the upper back of the bag, approximately 1.5 inches / 4 cm in from each side. Attach strap ends to the lower side seams. Thread the straps through sliders or buckles for adjustability.
Step 5, Handle: Sew handle ends to the back top edge, inside the strap anchors. Reinforce this attachment by sewing through several layers. The handle takes a lot of stress when you grab the bag.
Lining Your Backpack
Cut your lining fabric to match your front, back, and gusset pieces, adding 0.5 inch / 1.25 cm seam allowance on all sides.
Sew the lining shell together.
Add an optional inner slip pocket if desired. This is a great spot for your phone or keys.
Press the upper edge under.
Place the lining inside the bag and hand-stitch it to the inner rim. Keep your stitches hidden under the top edging.
The lining serves two purposes: it protects your belongings from snagging on the crochet fabric, and it adds structure to help the bag hold its shape.
Final Checkpoints
Before you call this project complete, verify these details:
Customizing the Size
Want a bigger or smaller bag? Here is how to adjust:
To change the width: Add or subtract stitches in multiples of 6 so your honeycomb repeat stays complete. Every 6 stitches changes the width by approximately 1.33 inches / 3.3 cm.
To change the height: Add or subtract rows in multiples of 4.
Important: Adjust your gusset joining length to match. The formula is side rows + bottom stitches + side rows.
Troubleshooting Common Issues
Panel too narrow or wide: Change your hook size and re-swatch before continuing.
Honeycomb pulls inward: Your surface slip stitches are too tight. Redo the overlay with more relaxed loops.
Flap curls: Add one extra edging round, or block gently over a towel.
Bag lacks structure: Add firmer lining, fusible interfacing, or plastic canvas between the crochet and lining layers.
Clasp pulls fabric: Add a small backing patch behind each hardware plate to distribute the stress.
Care Instructions
Spot clean your backpack with cool water and mild soap. Reshape while damp and dry flat. Avoid machine drying, which can distort the shape and damage the hardware.
If your bag is lined, test the lining fabric for colorfastness before washing the entire piece.
You Did It!
Thank you so much for making this mustard honeycomb backpack with me. This step by step crochet pattern has a lot of pieces, and finishing a project like this is genuinely something to be proud of. I would absolutely love to see your finished bag, whether you stuck with the mustard yellow or chose your own color adventure. Pop over to Instagram or Facebook and share a photo. Seeing your makes truly brightens my day.
If you loved this project, save it to your Pinterest boards so you can find it again later or share it with your crochet friends. And please drop a comment below if you make this bag. I want to hear how it turned out for you!
Want a Quick & Easy Printable Version?
Get a clean, beautifully formatted PDF of this pattern — easy to follow step by step, ready to print or save on any device. No scrolling, no distractions, just the pattern.
Get the Printable PDF →