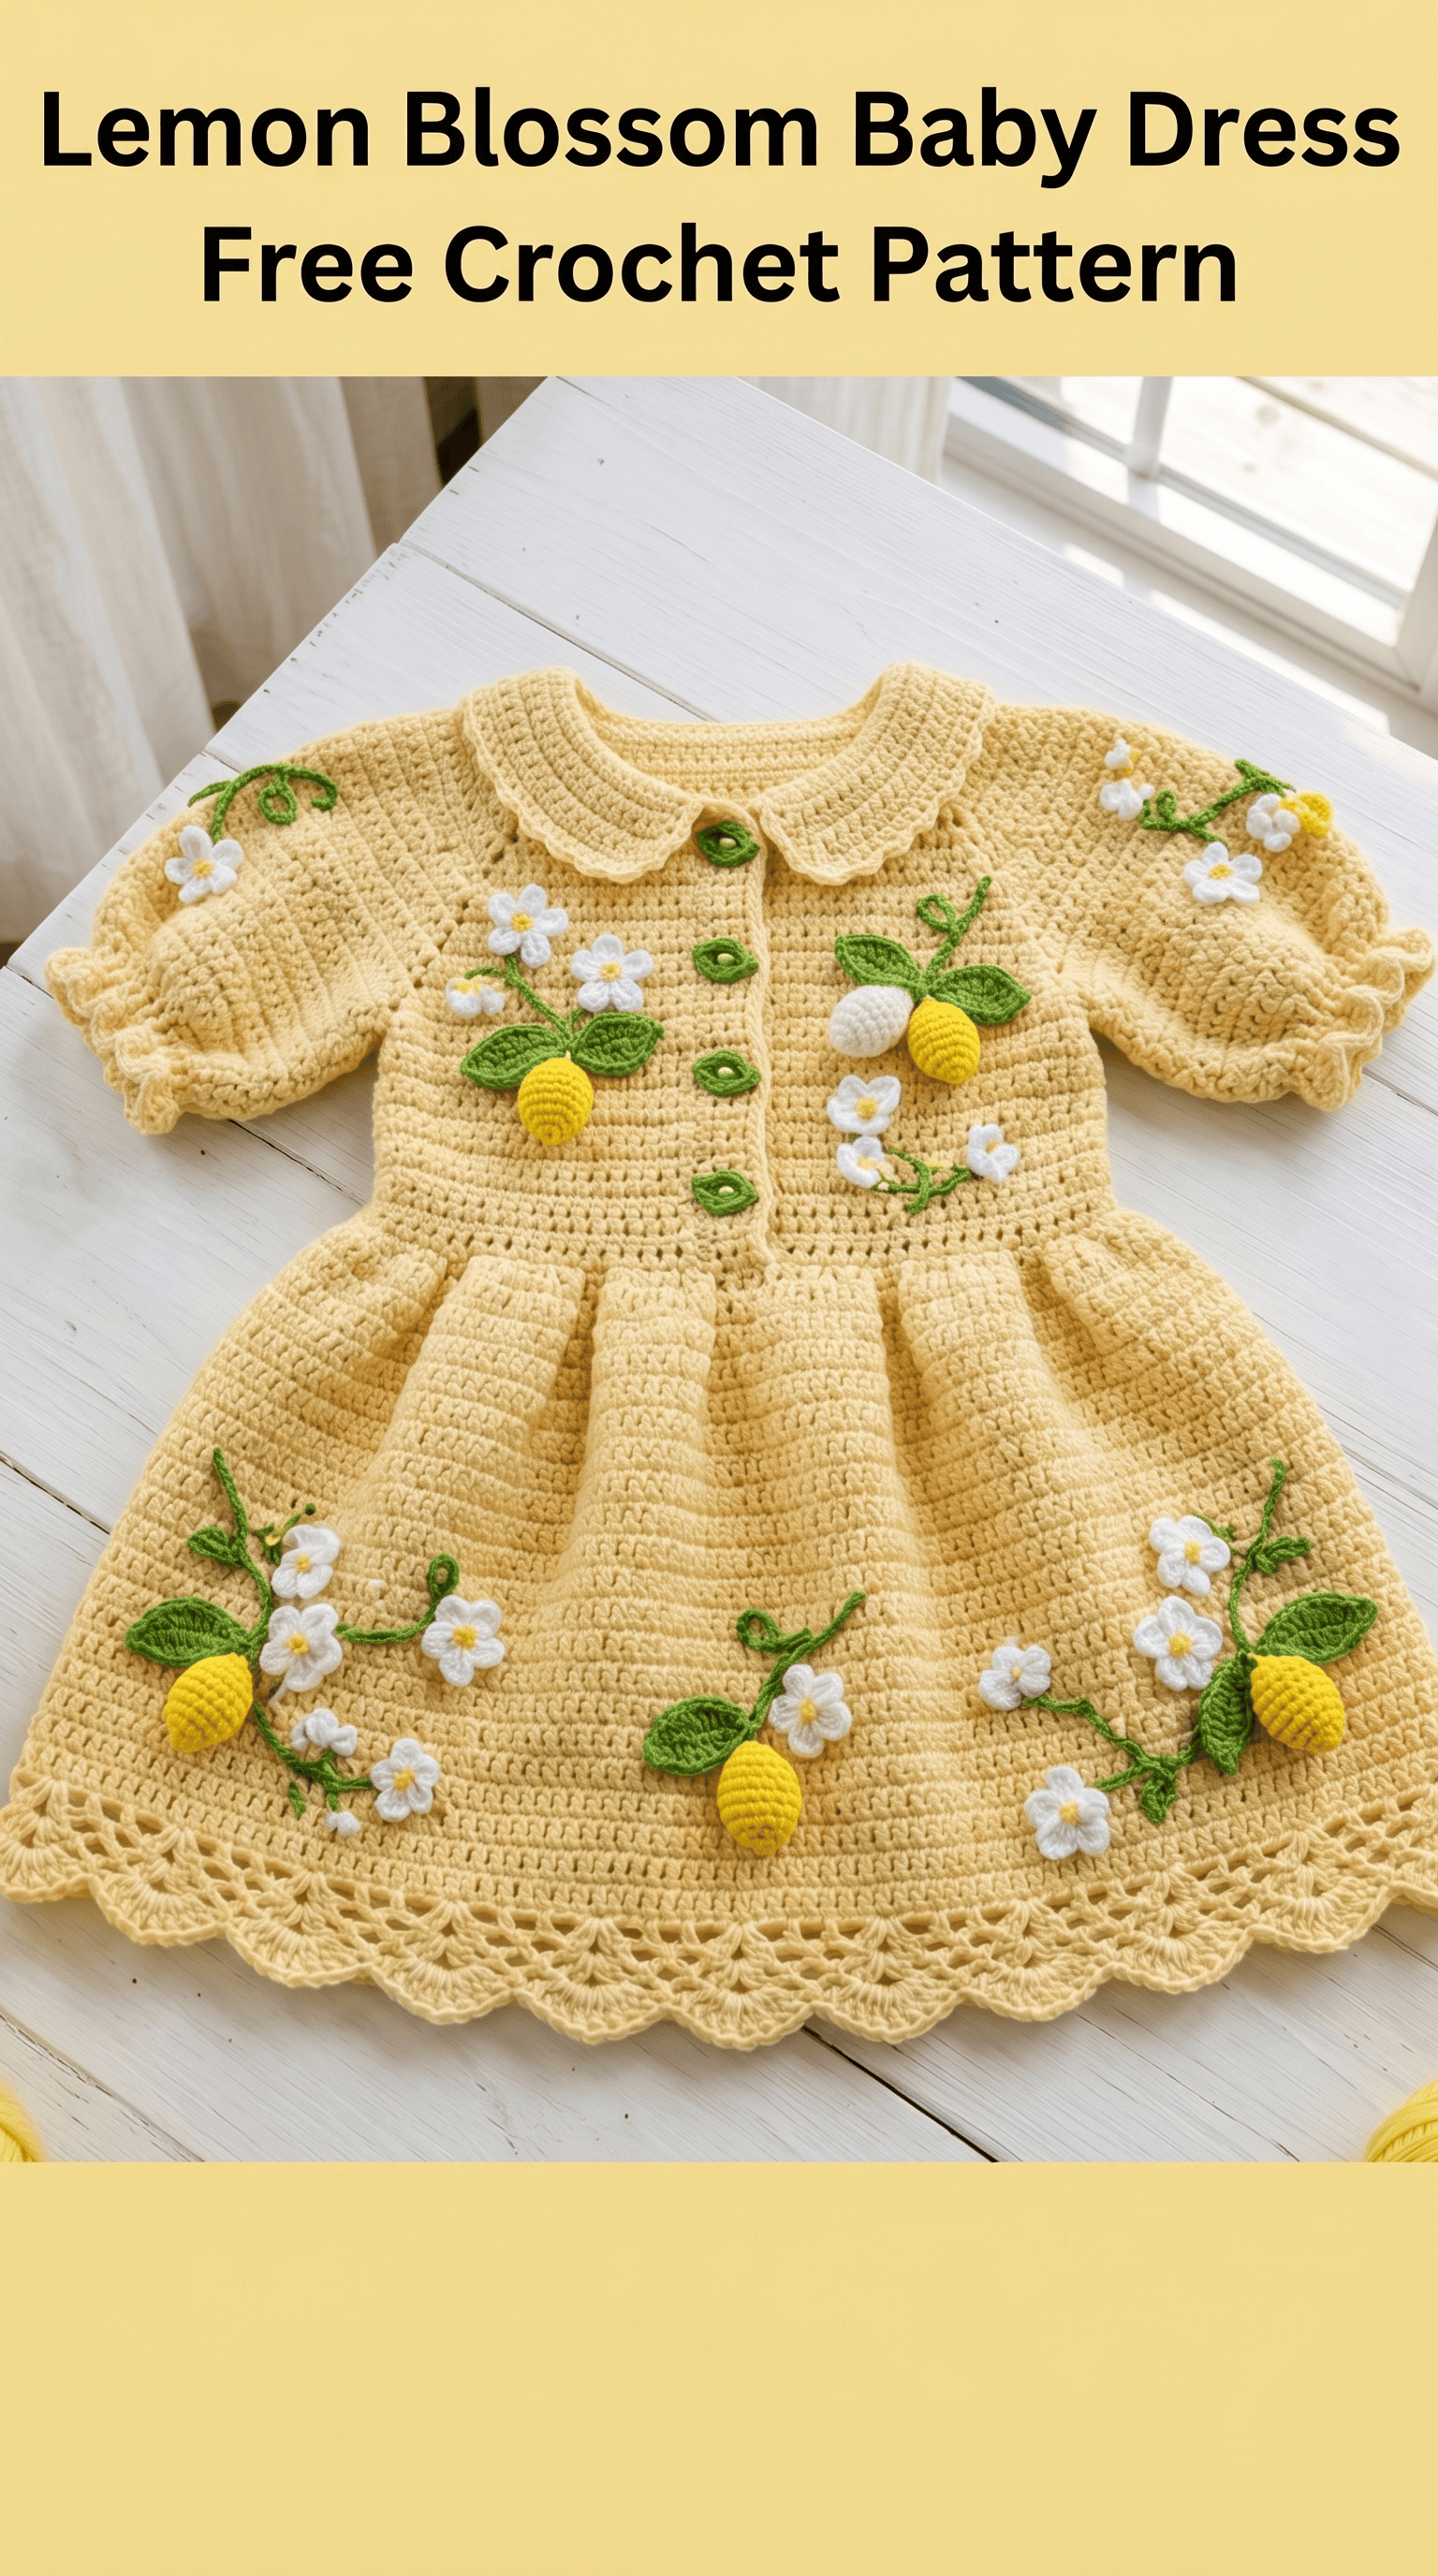
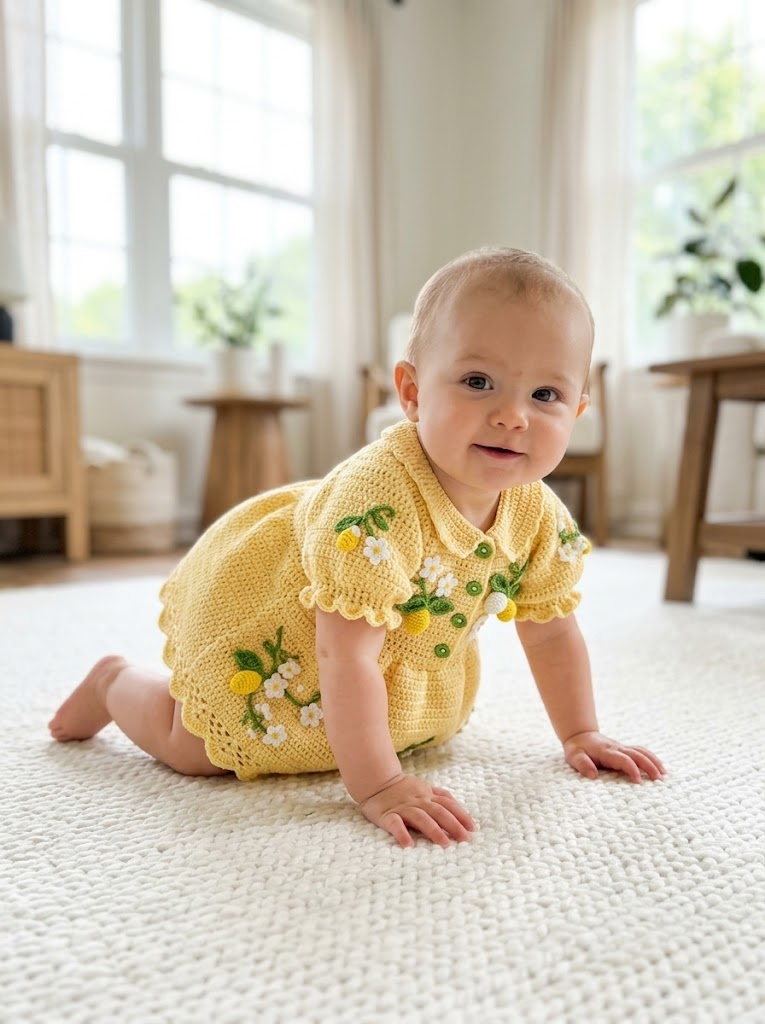
There is something magical about a handmade baby dress. This Lemon Blossom Baby Dress crochet pattern combines a classic silhouette with the sweetest lemon and flower appliqués you will ever stitch. The pale butter yellow body, Peter Pan collar, puff sleeves, and that gorgeous scalloped hem make this dress a showstopper for spring photos, first birthdays, or just everyday twirling.
I designed this pattern to look impressive while staying approachable. If you can work basic stitches and follow a simple rhythm, you can absolutely make this dress. The appliqués are worked separately and sewn on at the end, so you can customize placement however you like.
Let me walk you through everything you need to recreate this little lemon grove beauty.
Why You Will Love This Crochet Pattern
This dress hits all the right notes. The fitted bodice creates a polished look. The gathered skirt gives that classic twirl factor toddlers love. And those dimensional lemons, blossoms, and leaves transform a simple dress into wearable art.
The construction is smarter than it looks. You will work the bodice flat with a button placket, then join and work the skirt in the round. The collar and sleeves attach afterward. Breaking the project into smaller pieces keeps everything manageable.
This crochet tutorial gives you a complete roadmap. Every section has its own instructions. You will never wonder what comes next.
Skill Level
Intermediate beginner to intermediate. You should feel comfortable with basic stitches and working in rows and rounds. The appliqués involve some shaping but nothing complicated.
If you have made a baby blanket or simple garment before, you are ready.
Finished Measurements
This pattern is written for size 6 to 12 months.
Sizing can be adjusted by changing hook size or adding rows to the bodice and skirt.
Materials Needed
Yarn:
I recommend a cotton or cotton blend yarn for structure and washability. Acrylic works but may not hold the crisp collar shape as well.
Hook:
Notions:
Gauge
18 stitches and 20 rows = 4 inches in single crochet with 4.0 mm hook.
Gauge matters for garment fit. Take a few minutes to make a swatch. If your swatch is too big, go down a hook size. Too small, go up.
Abbreviations and Stitch Definitions
Let me define every abbreviation before we start. Refer back here anytime.
Step by Step Crochet Pattern Instructions
Back Bodice
The bodice is worked flat in rows using single crochet (sc) throughout.
Foundation: With main color and 4.0 mm hook, ch 43.
Row 1 (RS): Sc in 2nd ch from hook and in each ch across. Turn. (42 sts)
Rows 2 through 24: Ch 1, sc in each st across. Turn. (42 sts)
You now have a rectangle approximately 9 inches wide and 5 inches tall. This forms the back bodice.
Armhole Shaping:
Row 25: Ch 1, sl st in first 4 sts, ch 1, sc in next 34 sts, leave remaining 4 sts unworked. Turn. (34 sts)
Rows 26 through 30: Ch 1, sc in each st across. Turn. (34 sts)
First Shoulder:
Row 31: Ch 1, sc in first 10 sts. Turn. Leave remaining sts unworked. (10 sts)
Rows 32 through 34: Ch 1, sc in each st across. Turn. (10 sts)
Fasten off.
Second Shoulder:
Skip center 14 sts for neck opening. Join yarn to next st.
Row 31: Ch 1, sc in same st and in next 9 sts. Turn. (10 sts)
Rows 32 through 34: Ch 1, sc in each st across. Turn. (10 sts)
Fasten off.
Left Front Bodice (as worn)
Foundation: Ch 24.
Row 1 (RS): Sc in 2nd ch from hook and in each ch across. Turn. (23 sts)
Rows 2 through 24: Ch 1, sc in each st across. Turn. (23 sts)
Armhole Shaping (worked on outer edge):
Row 25: Ch 1, sl st in first 4 sts, ch 1, sc in remaining 19 sts. Turn. (19 sts)
Rows 26 through 30: Ch 1, sc in each st across. Turn. (19 sts)
Neck Shaping:
Row 31: Ch 1, sc in first 10 sts. Turn. Leave remaining 9 sts unworked. (10 sts)
Rows 32 through 34: Ch 1, sc in each st across. Turn. (10 sts)
Fasten off.
Right Front Bodice (as worn)
Work same as Left Front Bodice through Row 24.
Armhole Shaping (worked on outer edge):
Row 25: Ch 1, sc in first 19 sts, leave remaining 4 sts unworked. Turn. (19 sts)
Rows 26 through 30: Ch 1, sc in each st across. Turn. (19 sts)
Neck Shaping:
Row 31: Ch 1, sk first 9 sts, join to 10th st, sc in same st and remaining 9 sts. Turn. (10 sts)
Rows 32 through 34: Ch 1, sc in each st across. Turn. (10 sts)
Fasten off.
Button Band (Left Front)
With RS facing, join main color to bottom corner of left front center edge.
Row 1: Work 30 sc evenly along center front edge. Turn. (30 sts)
Rows 2 through 4: Ch 1, sc in each st across. Turn. (30 sts)
Fasten off.
Buttonhole Band (Right Front)
With RS facing, join main color to top corner of right front center edge.
Row 1: Work 30 sc evenly along center front edge. Turn. (30 sts)
Row 2: Ch 1, sc in each st across. Turn. (30 sts)
Row 3 (buttonhole row): Ch 1, sc in first 2 sts, *ch 1, sk 1 st, sc in next 5 sts*, repeat from * to * 3 more times, ch 1, sk 1 st, sc in last 2 sts. Turn. (5 buttonholes made)
Row 4: Ch 1, sc in each st and ch sp across. Turn. (30 sts)
Fasten off.
Bodice Assembly
1. Place front and back pieces with RS together.
2. Sew shoulder seams using whip stitch or mattress stitch.
3. Do not sew side seams yet.
Peter Pan Collar
The collar is worked in two pieces, then joined.
First Half:
Foundation: Ch 28.
Row 1: Sc in 2nd ch from hook and in each ch across. Turn. (27 sts)
Row 2: Ch 1, 2 sc in first st (inc made), sc in each st to last st, 2 sc in last st. Turn. (29 sts)
Rows 3 through 6: Repeat Row 2. (37 sts after Row 6)
Row 7: Ch 1, sc in each st across. Turn. (37 sts)
Border: Ch 1, work sc evenly around entire piece, working 3 sc in each corner. Sl st to first sc.
Fasten off.
Second Half: Work identical to first half.
Attaching Collar:
Position collar pieces at front neckline with rounded edges toward the front. The straight edges meet at center back. Pin in place, then whip stitch along neck edge.
Sleeves (make 2)
The sleeves are worked in the round from the shoulder down.
With RS facing, join main color at underarm.
Round 1: Ch 1, work 36 sc evenly around armhole opening. Sl st to first sc to join. (36 sts)
Rounds 2 through 12: Ch 1, sc in each st around. Sl st to join. (36 sts)
Puff Gathering Round:
Round 13: Ch 1, *sc in next st, sc2tog*, repeat around. Sl st to join. (24 sts)
Ruffle Cuff:
Round 14: Ch 3 (counts as dc), dc in same st, 2 dc in each st around. Sl st to top of ch 3. (48 sts)
Round 15: Ch 1, sc in first st, *sk 1 st, 5 dc in next st (shell made), sk 1 st, sc in next st*, repeat from * to * around. Sl st to first sc.
Fasten off.
Repeat for second sleeve.
Skirt
After bodice is assembled and side seams remain open:
1. Sew side seams from bottom edge to approximately 1 inch below armhole.
2. Join main color at center back bottom edge of bodice with RS facing.
Round 1 (gathering round): Ch 1, work 2 sc in each row end around entire bottom edge of bodice. Sl st to join. (approximately 84 sts)
Round 2: Ch 1, sc in each st around. Sl st to join. (84 sts)
Rounds 3 through 40: Ch 1, sc in each st around. Sl st to join. (84 sts)
This creates approximately 8 inches of skirt length. Adjust row count for longer or shorter dress.
Scallop Border:
Round 41: Ch 1, sc in first st, *sk 2 sts, 6 dc in next st, sk 2 sts, sc in next st*, repeat from * to * around. Sl st to first sc.
Round 42: Sl st to center of first shell, ch 1, sc in same st, *ch 3, sc in center dc of next shell*, repeat around. Sl st to first sc.
Fasten off. Weave in ends.
Appliqué Patterns
These dimensional details bring the dress to life. Work them separately, then sew in place.
Lemon (make 4 to 6)
With bright yellow yarn and smaller hook:
Round 1: Make a magic ring, ch 1, 6 sc in ring. Pull tight. (6 sts)
Round 2: 2 sc in each st around. (12 sts)
Round 3: *Sc in next st, 2 sc in next st*, repeat around. (18 sts)
Rounds 4 through 6: Sc in each st around. (18 sts)
Round 7: *Sc in next st, sc2tog*, repeat around. (12 sts)
Stuff lightly with yarn scraps or fiberfill.
Round 8: Sc2tog around. (6 sts)
Fasten off, leaving long tail. Sew opening closed. Shape into oval by pinching ends.
Lemon Blossom (make 8 to 10)
With white yarn and smaller hook:
Magic ring, ch 2, dc in ring, ch 2, sl st in ring (first petal made), *ch 2, dc in ring, ch 2, sl st in ring*, repeat 4 more times. (5 petals)
Pull ring closed. Fasten off.
Center: With light yellow, make a French knot in center of flower, or sew a small bead.
Leaf (make 10 to 14)
With green yarn and smaller hook:
Ch 8. Sl st in 2nd ch from hook, sc in next ch, hdc in next ch, dc in next 2 ch, hdc in next ch, 3 sc in last ch.
Working along opposite side of foundation chain:
Hdc in next ch, dc in next 2 ch, hdc in next ch, sc in next ch, sl st in last ch.
Fasten off, leaving tail for sewing.
Stem/Vine (make as needed)
Ch 15 to 25 depending on desired length. Sl st in 2nd ch from hook and in each ch across.
Fasten off. Curl and shape as desired when attaching.
Finishing and Assembly
Arranging Appliqués:
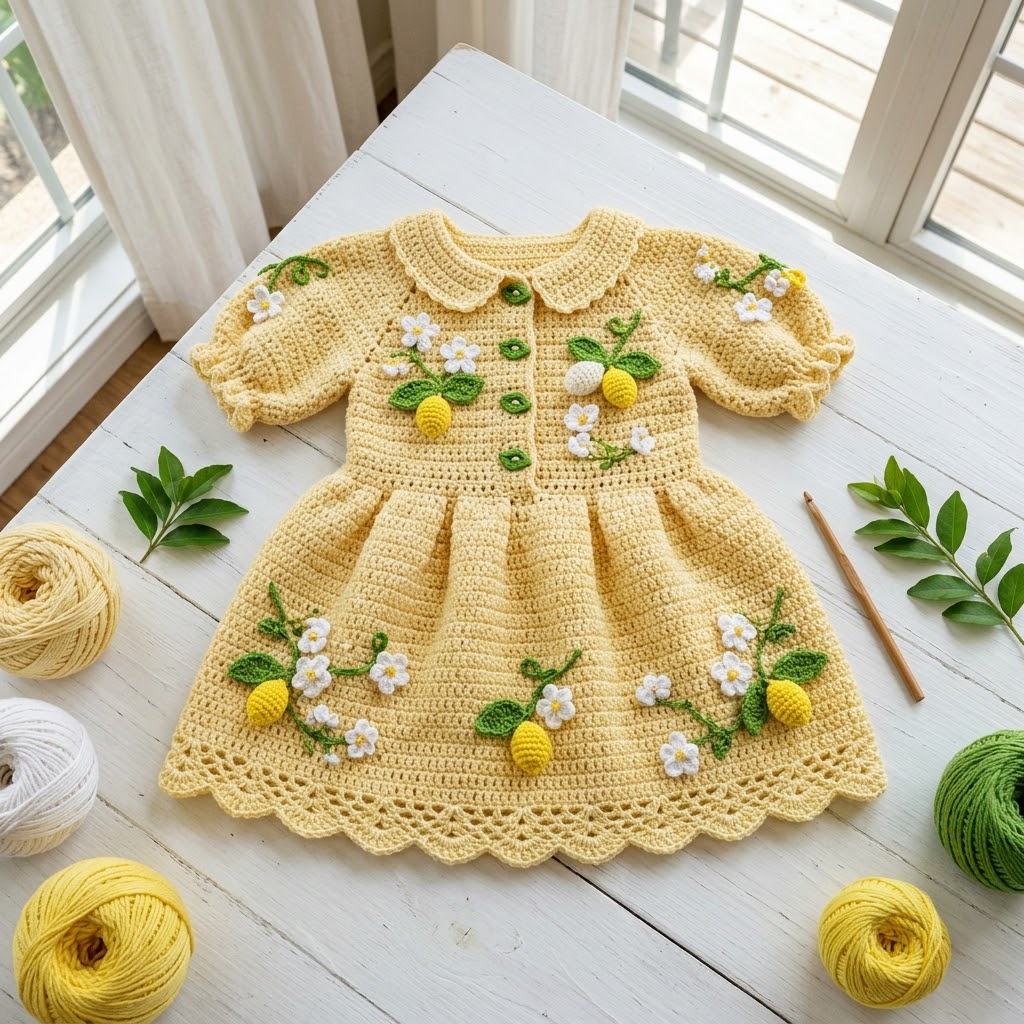
Lay dress flat. Position lemons, blossoms, and leaves in clusters as shown. I placed clusters at each shoulder, along the bodice front, and in a garland arrangement along the skirt hem.
Pin everything in place before sewing. Step back and adjust until balanced.
Use matching yarn and small whip stitches to secure each piece. Tack leaves under lemons and blossoms so edges are hidden.
Buttons:
Sew 5 buttons to left front band, aligned with buttonholes. I used green buttons to echo the leaf color, but white or yellow work beautifully too.
Blocking:
Wet block or steam block the finished dress for a polished look. Lay flat to dry. This evens out stitches and helps the collar lie flat.
Pro Tips for Success
Tension consistency matters most on the bodice. If your stitches vary, the button bands will not align properly.
Sew appliqués securely. Little fingers will pull at those lemons. Reinforce with extra stitches around the edges.
Adjust sleeve length easily by adding or removing rounds before the gathering row.
Make extra appliqués. You will want options when arranging. Leftover lemons make adorable hair clips or headband decorations.
Care Instructions
Machine wash gentle cycle, cold water. Tumble dry low or lay flat to dry. Cotton yarns may shrink slightly on first wash, so prewashing your yarn is wise if sizing is critical.
Store folded with tissue paper to prevent creasing on the collar.
You Did It
This Lemon Blossom Baby Dress crochet pattern is a labor of love, and the result is absolutely worth every stitch. The combination of classic construction and whimsical details creates a keepsake dress that will be photographed, cherished, and possibly passed down.
Thank you for trusting me to guide you through this project. I hope your stitches flowed smoothly and your appliqué placement brought you joy.
I would love to see your finished dress. Tag me on Instagram or share in my Facebook group. Seeing your creations is the best part of pattern writing.
Happy crocheting, friend. Now go watch a little one twirl.
