
I’ve been on the hunt for the perfect summer tote pattern for months now, and this one stopped me in my tracks. The way those warm sunset colors blend into the classic granny stitch texture is exactly what I’ve been looking for. This is my new favourite bag pattern, and I’m so excited to share it with you today.
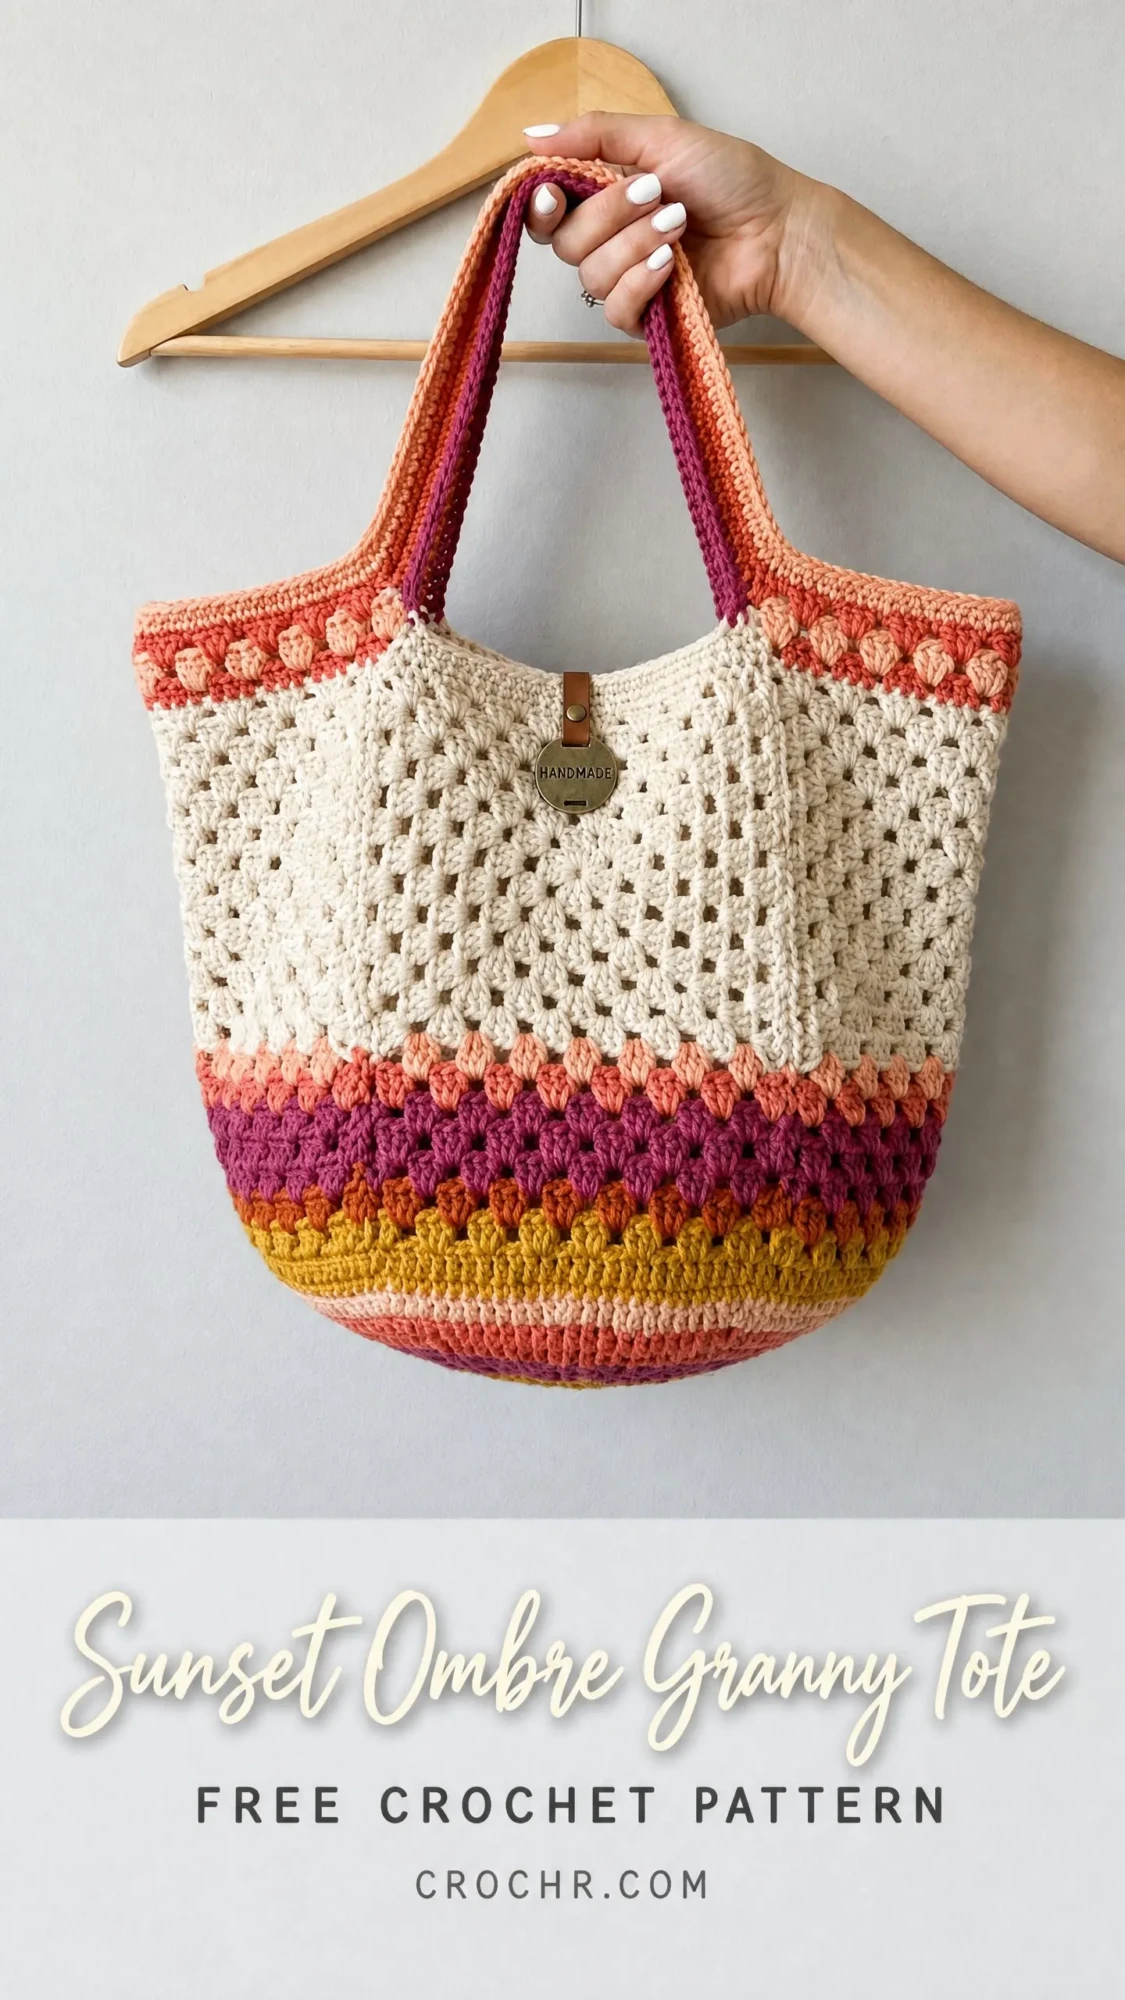
What makes this tote special is how it combines two of my absolute favourite things in crochet. You get the timeless, airy look of granny stitch clusters for the main body. Then those cheerful bobble stripes frame everything in gorgeous peach, coral, magenta, orange, and golden yellow. The result is a bag that looks way more complicated than it actually is.
Whether you’re headed to the farmer’s market, beach, or library, this roomy tote has you covered. Let’s dive into everything you need to make your own.
About This Crochet Tote Bag Pattern
The Sunset Ombre Granny Tote is a roomy, structured bag worked in the round from the bottom up. You’ll start with a flat oval base, work your way through colorful bobble stripe bands, create the open lace texture of the cream granny stitch body, and finish with another stripe band at the top. The straps are crocheted separately and sewn on at the end.
Finished Size: Approximately 14 inches wide at the widest point by 13 inches tall (body only, not including straps), with a depth of approximately 6 inches. In metric, that’s about 35.5 cm wide by 33 cm tall by 15 cm deep. The straps add approximately 12 inches (30.5 cm) of usable drop from the top of the bag.
Skill Level: Intermediate. You’ll use basic stitches like chain (ch), slip stitch (sl st), single crochet (sc), double crochet (dc), and bobble stitches. The pattern requires comfort with joining rounds, managing multiple colors, working a continuous granny square texture in the round, and seaming straps. If you’ve made a granny square blanket before, you can absolutely handle this.
Time Estimate: 12 to 18 hours for an experienced crocheter working at a steady pace. Allow additional time for weaving in ends, which will be numerous due to color changes. Don’t let that scare you. Just put on a good podcast and enjoy the process.
Materials Needed
Yarn: Worsted weight (category 4), approximately 1000 yards total distributed across 7 colors as follows:
Hook: US size J/10 (6.0 mm)
Notions:
Yarn Suggestions
Option 1: Lion Brand Pound of Love (Worsted, 100% acrylic). Excellent stitch definition for showing granny texture, machine washable, widely available in cream. Pair with Lion Brand Heartland or Vanna’s Choice for the accent colors.
Option 2: Paintbox Yarns Simply DK used held double (treated as worsted). This gives a soft drape with beautiful stitch clarity. Available in all necessary colors individually.
Option 3: Cascade 220 Superwash (Worsted, 100% superwash wool). Superior stitch memory, blocks beautifully, and gives the bag a structured body. Available in a wide spectrum including all sunset tones needed.
Substitution note: Any smooth, plied worsted weight yarn that achieves the stated gauge will work. Avoid hairy or textured yarns like mohair or boucle as they will obscure the granny stitch detail. Cotton yarns work well for a stiffer, more structured bag with less stretch.
Gauge
Getting gauge right matters for this project since you want your bag to be the correct size.
In Granny Stitch pattern:
One granny stitch repeat (3 dc cluster + ch 1) = approximately 1 inch wide (2.5 cm)
4 rounds of granny stitch = approximately 2.5 inches tall (6.4 cm)
In single crochet for base and stripe bands:
14 sc by 16 rows = 4 inches by 4 inches (10 cm by 10 cm)
Adjust hook size as needed to match gauge.
Abbreviations and Stitch Definitions
Before we begin, let’s go over all the stitches you’ll need. I’ll define each one so you know exactly what to do.
Special Stitches
Bobble Stitch (bobble):
This creates a cute textured bump that pops out from the fabric. Here’s how to make one:
Yarn over, insert hook in indicated stitch or space, yarn over and pull up a loop, yarn over and draw through 2 loops (2 loops remain on hook). Yarn over, insert hook in same stitch or space, yarn over and pull up a loop, yarn over and draw through 2 loops (3 loops remain on hook). Yarn over, insert hook in same stitch or space, yarn over and pull up a loop, yarn over and draw through 2 loops (4 loops remain on hook). Yarn over and draw through all 4 loops on hook. One bobble made.
Granny Stitch Cluster (gs-cl):
Work 3 dc in the indicated ch-1 sp or ch-2 sp. One granny stitch cluster made. Simple as that.
Granny Stitch Pattern (worked in the round):
Each round: [sl st to next ch-1 sp, ch 3, 2 dc in same sp (beg cluster made), ch 1, 3 dc in next ch-1 sp, ch 1] around, sl st to top of beg ch-3. The ch-1 spaces between clusters form the grid of the granny pattern.
Pattern Notes
The bag is worked in the round throughout. Do not turn at the end of rounds unless specifically instructed (strap sections turn each row).
Join rounds with a slip stitch to the first stitch or the top of the beginning chain as indicated in each section.
Color changes happen at the end of the last yarn over of the final stitch of the round. Drop old color, pick up new color to complete the stitch and begin the next round.
Carry unused colors loosely up the inside of the bag when changing colors every 1 to 2 rounds to minimize ends. When colors are not used for 3 or more rounds, cut and rejoin.
The granny stitch body is worked in Color A only. The bobble stripe bands above and below the granny section use Colors B, C, D, E, F, and G.
Numbers in parentheses at the end of each round reflect the total working stitches in that round.
Oval Base Instructions (Color A)
The base is an elongated oval approximately 14 inches by 6 inches (35.5 cm by 15 cm) to create the correct finished depth.
Foundation: Ch 19.
Round 1: Starting in the second ch from hook, sc in each of next 17 ch, work 3 sc in the last ch (this is the first short end). Working back along the opposite side of the foundation chain, sc in each of next 17 ch, work 3 sc in the last ch (second short end). Sl st to first sc to join. (40 sc)
Round 2: Ch 1, sc in same st, sc in next 17 sc, 2 sc in each of next 3 sc (corner increase), sc in next 17 sc, 2 sc in each of next 3 sc (corner increase), sl st to first sc to join. (46 sc)
Round 3: Ch 1, sc in same st, sc in next 17 sc, [2 sc in next sc, sc in next sc] 3 times (corner), sc in next 17 sc, [2 sc in next sc, sc in next sc] 3 times (corner), sl st to first sc to join. (52 sc)
Round 4: Ch 1, sc in same st, sc in next 17 sc, [2 sc in next sc, sc in next 2 sc] 3 times (corner), sc in next 17 sc, [2 sc in next sc, sc in next 2 sc] 3 times (corner), sl st to first sc to join. (58 sc)
Round 5: Ch 1, sc in same st, sc in next 17 sc, [2 sc in next sc, sc in next 3 sc] 3 times (corner), sc in next 17 sc, [2 sc in next sc, sc in next 3 sc] 3 times (corner), sl st to first sc to join. (64 sc)
Round 6: Ch 1, sc in same st, sc in next 17 sc, [2 sc in next sc, sc in next 4 sc] 3 times (corner), sc in next 17 sc, [2 sc in next sc, sc in next 4 sc] 3 times (corner), sl st to first sc to join. (70 sc)
Do not fasten off. Place a stitch marker in the first stitch of this round to mark the beginning of the round throughout.
Checkpoint: Your piece should measure approximately 14 inches long by 6 inches wide lying flat.
Bottom Stripe Band Instructions
This section creates the colorful bobble stripes visible at the bottom of the bag, progressing from golden yellow at the very bottom through orange, coral, magenta, and peach going upward.
Round 7 (Color F, Golden Yellow):
Ch 1, sc in same st and in each sc around. Sl st to first sc to join. (70 sc)
Round 8 (Color F, Golden Yellow, bobble round):
Ch 1, sc in first sc, [bobble in next sc, sc in next sc] around. Sl st to first sc to join. (70 sts, 35 sc and 35 bobbles)
Round 9 (Color E, Burnt Orange):
Ch 1, sc in same st and in each st across, working sc into the top of each bobble and into each sc. Sl st to first sc to join. (70 sc)
Round 10 (Color E, Burnt Orange, bobble round):
Ch 1, sc in first sc, [bobble in next sc, sc in next sc] around, ending with bobble in last sc. Sl st to first sc to join. (70 sts)
Round 11 (Color D, Magenta):
Ch 1, sc in same st and in each st across. Sl st to first sc to join. (70 sc)
Round 12 (Color D, Magenta, bobble round):
Ch 1, sc in first sc, [bobble in next sc, sc in next sc] around. Sl st to first sc to join. (70 sts)
Round 13 (Color C, Peach):
Ch 1, sc in same st and in each st around. Sl st to first sc to join. (70 sc)
Round 14 (Color C, Peach, bobble round):
Ch 1, sc in first sc, [bobble in next sc, sc in next sc] around. Sl st to first sc to join. (70 sts)
Round 15 (Color B, Coral, transition round):
Ch 1, sc in same st and in each st around. Sl st to first sc to join. (70 sc)
Checkpoint: The bottom stripe band should measure approximately 2.5 to 3 inches tall from the base. Five colors of bobble stripes should be visible.
Transition to Granny Stitch Body
Round 16, Setup Round (Color A, Natural Cream):
Join Color A with sl st to any sc. Ch 3 (counts as first dc here and throughout granny section), 2 dc in same st (first beg cluster made), ch 1, skip 1 sc, [3 dc in next sc, ch 1, skip 1 sc] around. Sl st to top of beg ch-3 to join. (35 gs-cl; 35 ch-1 sps)
Granny Stitch Body Instructions (Color A, Natural Cream)
All rounds are worked on the RS. Sl st to move to next ch-1 sp at the beginning of each round.
Rounds 17 through 26:
Sl st to first ch-1 sp, ch 3, 2 dc in same sp, ch 1, [3 dc in next ch-1 sp, ch 1] around. Sl st to top of beg ch-3 to join. (35 gs-cl; 35 ch-1 sps)
Repeat this round 10 times total (Rounds 17 through 26).
Checkpoint: The granny stitch body should measure approximately 7 to 7.5 inches tall. You should have 11 rounds of granny stitch clusters (Rounds 16 through 26 inclusive).
Transition to Top Stripe Band
Round 27, Closing sc Round (Color B, Coral):
Join Color B. Ch 1, sc in the top of each dc only, skipping ch-1 sps. Work sc in each of the 3 dc of each cluster. 35 clusters times 3 sc equals 105 sc. Sl st to first sc to join. (105 sc)
Top Stripe Band Instructions
Round 28 (Color C, Peach, bobble round):
Ch 1, sc in first sc, [bobble in next sc, sc in next sc] 52 times, bobble in last sc. Sl st to first sc to join. (105 sts, 53 sc and 52 bobbles)
Round 29 (Color B, Coral):
Ch 1, sc in same st and in each st around. Sl st to first sc to join. (105 sc)
Round 30 (Color B, Coral, bobble round):
Ch 1, sc in first sc, [bobble in next sc, sc in next sc] 52 times, bobble in last sc. Sl st to first sc. (105 sts)
Round 31 (Color C, Peach):
Ch 1, sc in same st and in each st around. Sl st to first sc to join. (105 sc)
Round 32 (Color G, Terracotta, bobble round):
Ch 1, sc in first sc, [bobble in next sc, sc in next sc] 52 times, bobble in last sc. Sl st to first sc. (105 sts)
Round 33 (Color B, Coral, finishing sc round):
Ch 1, sc in same st and in each st around. Sl st to first sc to join. (105 sc)
Fasten off and weave in ends.
Checkpoint: The top stripe band should measure approximately 2 to 2.5 inches tall. Three distinct bobble stripe colors should be visible in the top band. The total bag height before straps should be approximately 12.5 to 13 inches.
Strap Instructions (Make 2)
Each strap is worked as a flat rectangle, then folded and seamed to create a firm doubled strap approximately 0.75 inches (2 cm) wide and 24 inches (61 cm) long before attachment.
Materials for each strap: Color B (Coral) and Color D (Magenta), approximately 30 yards each per strap.
Foundation: With Color B, ch 129. (Counts as 128 working chains plus 1 turning chain.)
Row 1: Sc in second ch from hook and in each ch across. Turn. (128 sc)
Row 2: Ch 1, sc in each sc across. Turn. (128 sc)
Row 3: Change to Color D. Ch 1, sc in each sc across. Turn. (128 sc)
Row 4: Ch 1, sc in each sc across. Turn. (128 sc)
Row 5: Change to Color B. Ch 1, sc in each sc across. Turn. (128 sc)
Row 6: Ch 1, sc in each sc across. Turn. (128 sc)
Row 7: Change to Color D. Ch 1, sc in each sc across. Turn. (128 sc)
Row 8: Ch 1, sc in each sc across. Turn. (128 sc)
Fasten off, leaving a long tail of approximately 24 inches (61 cm) for seaming.
Fold the strap in half lengthwise (WS together) so both long edges align. Using the long tail and a yarn needle, sl st or whipstitch the two long edges together along the full length of the strap. The stripe pattern will show on both the front and back face of the completed strap.
The finished strap should measure approximately 24 inches long and 0.75 inches wide.
Strap Attachment
Place the two finished straps symmetrically on the bag. Each strap end is attached approximately 4.5 inches (11.5 cm) from the center front and center back of the bag’s top opening, with both ends of each strap overlapping the inside of the top edge by approximately 2 inches (5 cm).
Using Color B and a yarn needle, whipstitch each strap end securely to the inside of the bag’s top opening, stitching through the top 2 to 3 rounds of the bag body for security. Reinforce with a box stitch pattern (stitch around the rectangle perimeter, then stitch diagonally across in an X pattern) for durability.
Leather Tab and Charm Embellishment
Cut or purchase a leather or faux-leather rectangle approximately 1 inch by 1.5 inches (2.5 by 4 cm). Fold the tab over the top edge of the bag at the center front, between Rounds 32 and 33 of the top band. Using a sewing needle and strong thread (or a leather hole punch and a small rivet), secure the tab through both layers. Attach the decorative "Handmade" charm or button to the front face of the tab using a jump ring or by threading it through a punched hole in the tab. This is purely decorative and optional, but it adds such a lovely finishing touch.
Finishing and Blocking
Weave in all ends securely using a yarn needle, working ends through at least 1 inch (2.5 cm) of stitches in two directions to prevent unraveling. Yes, there will be a lot of ends. Put on some music and take your time.
Wet blocking is strongly recommended. Hand wash the completed bag gently in cool water. Gently squeeze out excess water (do not wring). Stuff the bag with plastic bags or a balloon inflated to the desired shape to hold the oval base form and rounded sides. Allow to dry completely in a well-ventilated area away from direct sunlight. This step is essential for opening the granny stitch lace pattern and achieving the full finished dimensions.
If using acrylic yarn, steam blocking (holding a steam iron 1 to 2 inches above the surface without pressing) can be substituted, but test on a swatch first.
Size Customization Tips
To make the bag wider: Add 10 sc to the oval base (increasing the foundation chain from 19 to 24 chains) and adjust all stripe and granny rounds accordingly.
To make the bag taller: Add additional granny stitch rounds between Rounds 17 and 26. Each additional round adds approximately 0.6 to 0.7 inches of height. Add in pairs for visual balance.
To make the bag shallower: Work only 4 rounds of bobbles in the bottom stripe band instead of 5, and reduce the granny section to 7 rounds.
To adjust the strap length: Each 8 chains added to the foundation chain increases the strap by approximately 0.5 inches. Measure from the shoulder to the crook of the arm to determine your preferred drop length before beginning the straps.
Care Instructions
Hand wash in cool water with mild soap. Lay flat or stuff to dry. Do not machine wash unless the yarn label specifically states it is machine washable, as the bag structure may distort. Do not tumble dry. Do not iron directly. Store stuffed with tissue paper or a small bag insert to maintain shape. The leather tab embellishment should be kept away from prolonged soaking; blot dry if the bag becomes saturated.
Final Thoughts on This Crochet Tote Bag Pattern
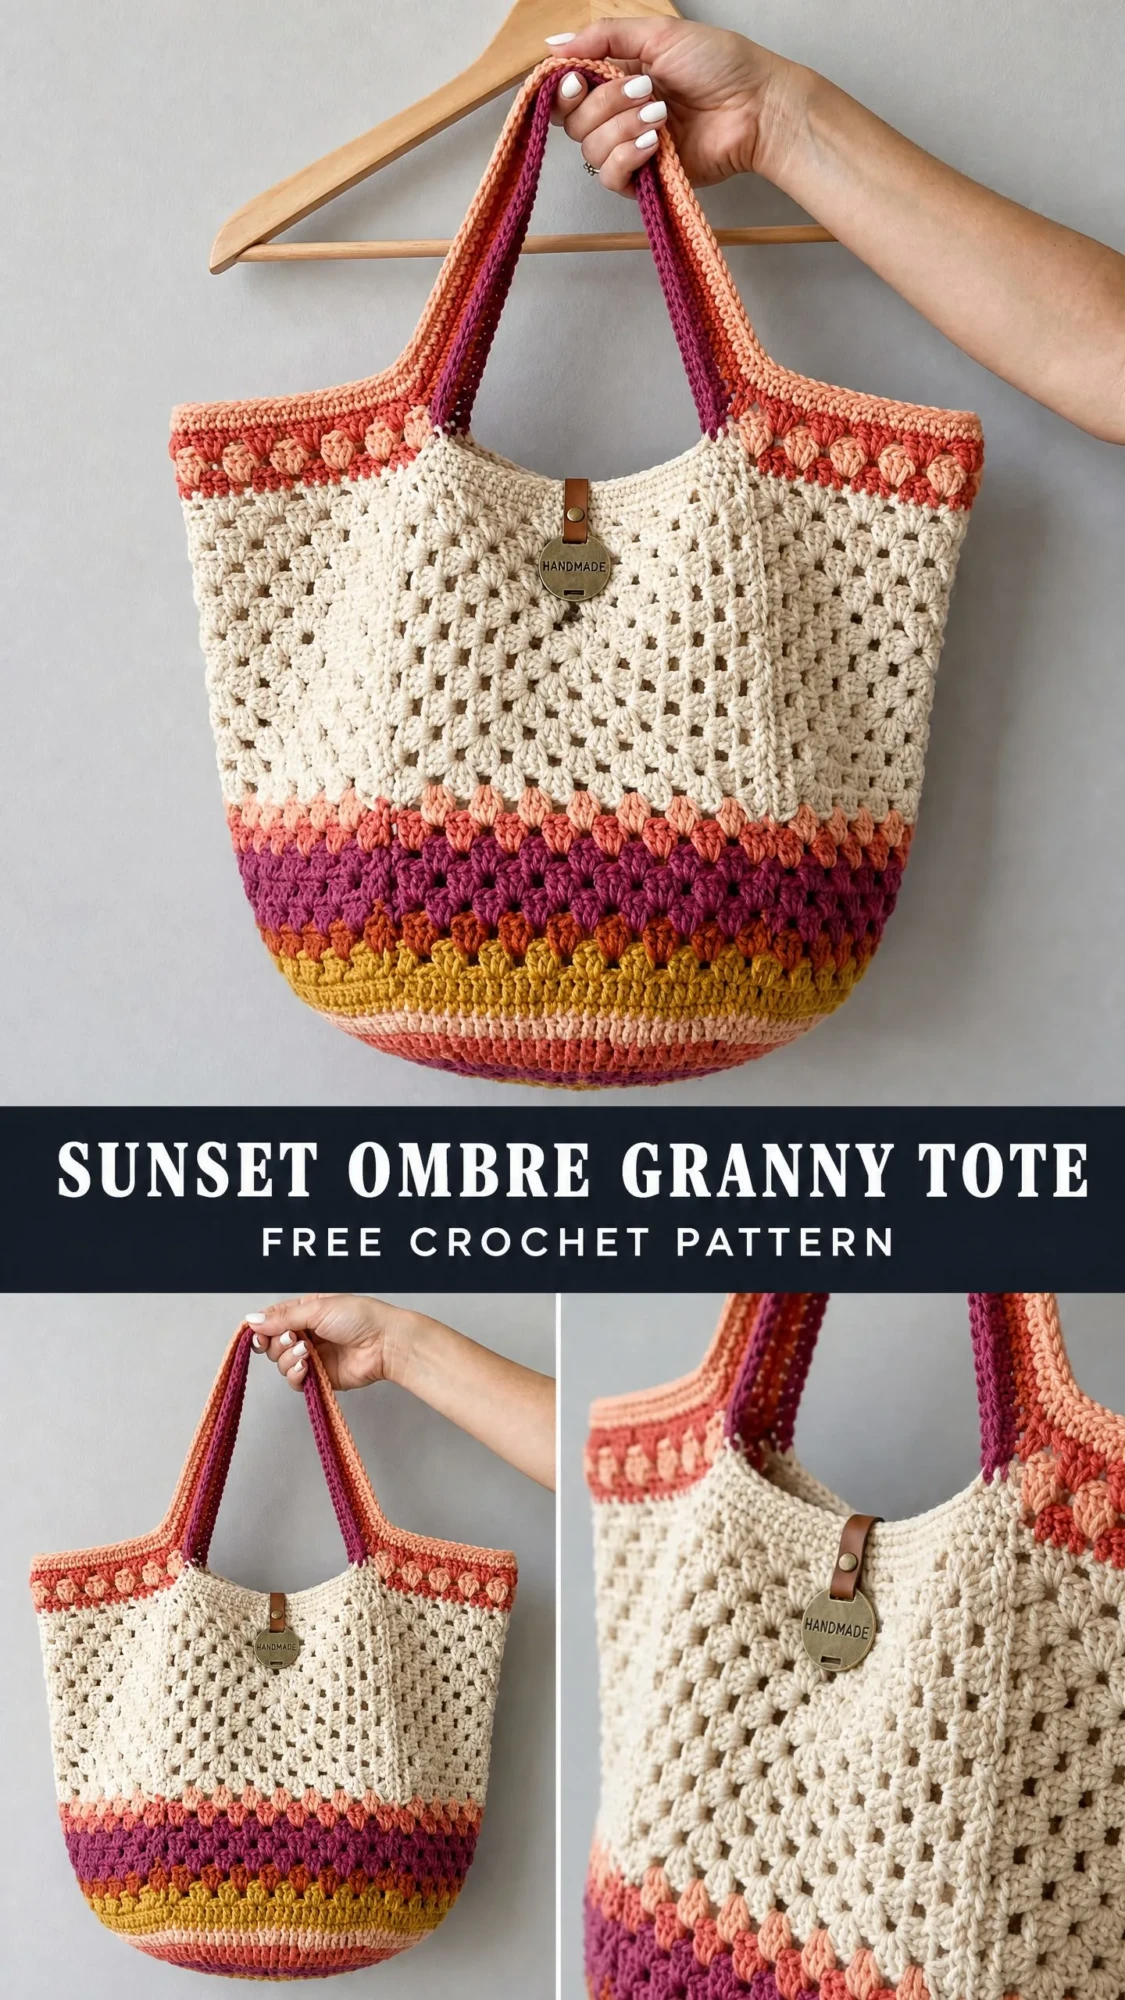
I hope you love making this Sunset Ombre Granny Tote as much as I enjoyed putting this tutorial together. The combination of those warm sunset colors with the classic granny stitch texture creates something truly special. It’s the kind of bag that gets compliments everywhere you go.
Thank you so much for being here and for trusting me with your crafting time. It means the world to me. If you make this bag, I would absolutely love to see it! Tag me on Instagram or share a photo in my Facebook group. Nothing makes my day quite like seeing your finished projects.
If you want to come back to this pattern later, go ahead and save it to your Pinterest boards so you can find it when you’re ready to start. And please drop a comment below if you make one. I’d love to hear how it turned out for you!
You Might Also Like
- Sage Green Boho Butterfly Earrings Free Crochet Pattern
- Lemon Sorbet Candy Bolster Pillow Free Crochet Pattern
- Cherry Blossom Butterfly Garden Charm Free Crochet Pattern
- Lavender Lace Summer Two-Piece Free Crochet Pattern
