
Last summer, I was wandering through a craft fair when a woman walked past wearing the most delicate pair of crocheted butterfly earrings. I stopped mid-step and just stared. She caught me looking and laughed, saying her grandmother had made them decades ago. I spent the rest of that afternoon thinking about those earrings, and honestly, I could not get them out of my head for weeks.
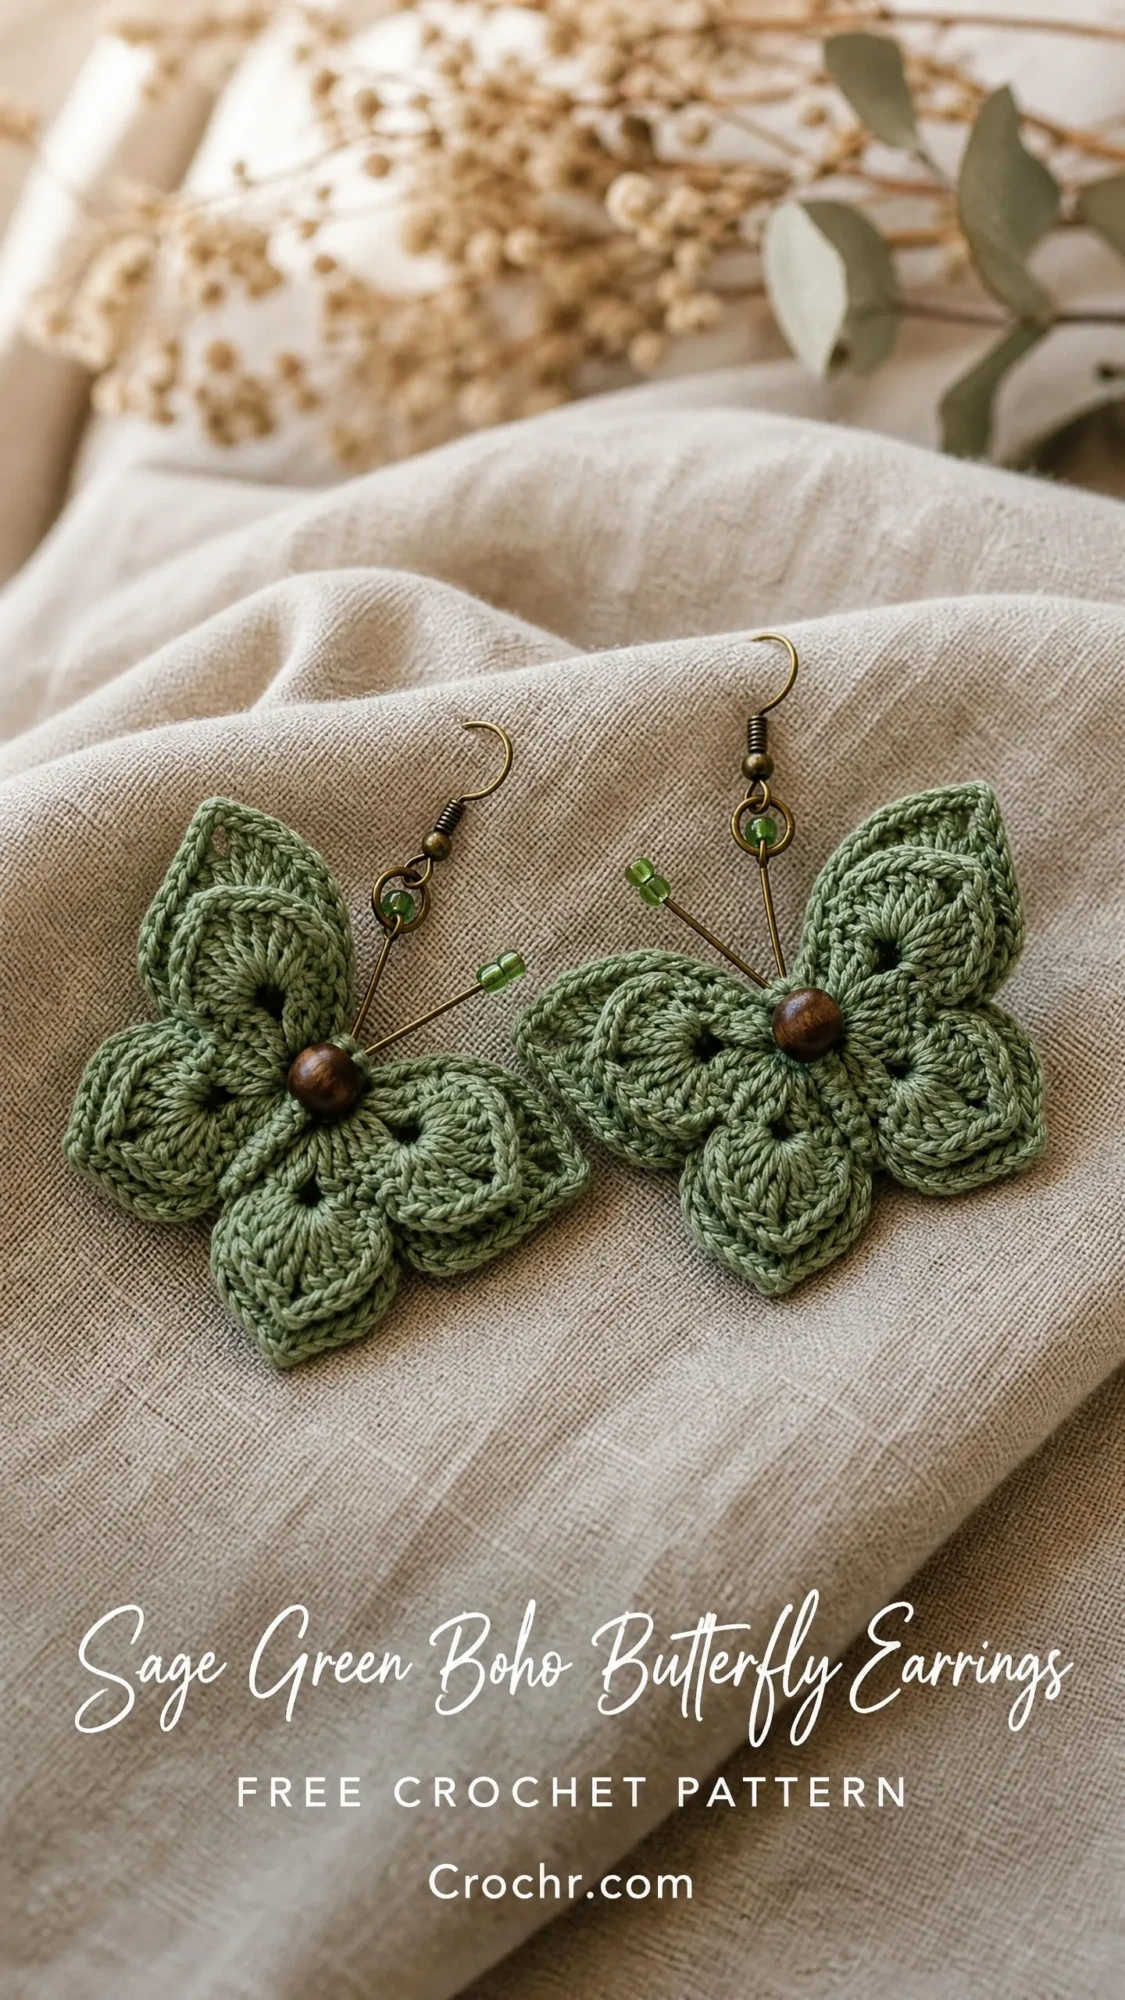
That moment sent me down a rabbit hole of sketching, swatching, and reworking until I finally landed on this design. These sage green boho butterfly earrings capture that same vintage, botanical charm I fell in love with at the fair. They are delicate without being fussy, and the combination of soft cotton thread, warm wooden beads, and antiqued brass gives them a timeless feel.
If you have ever wanted to try jewelry-scale crochet, this butterfly earrings crochet pattern is the perfect place to start. The individual wing motifs use only basic stitches, and the assembly comes together more easily than you might expect. Let me walk you through every single step.
Why You Will Love This Crochet Earrings Pattern
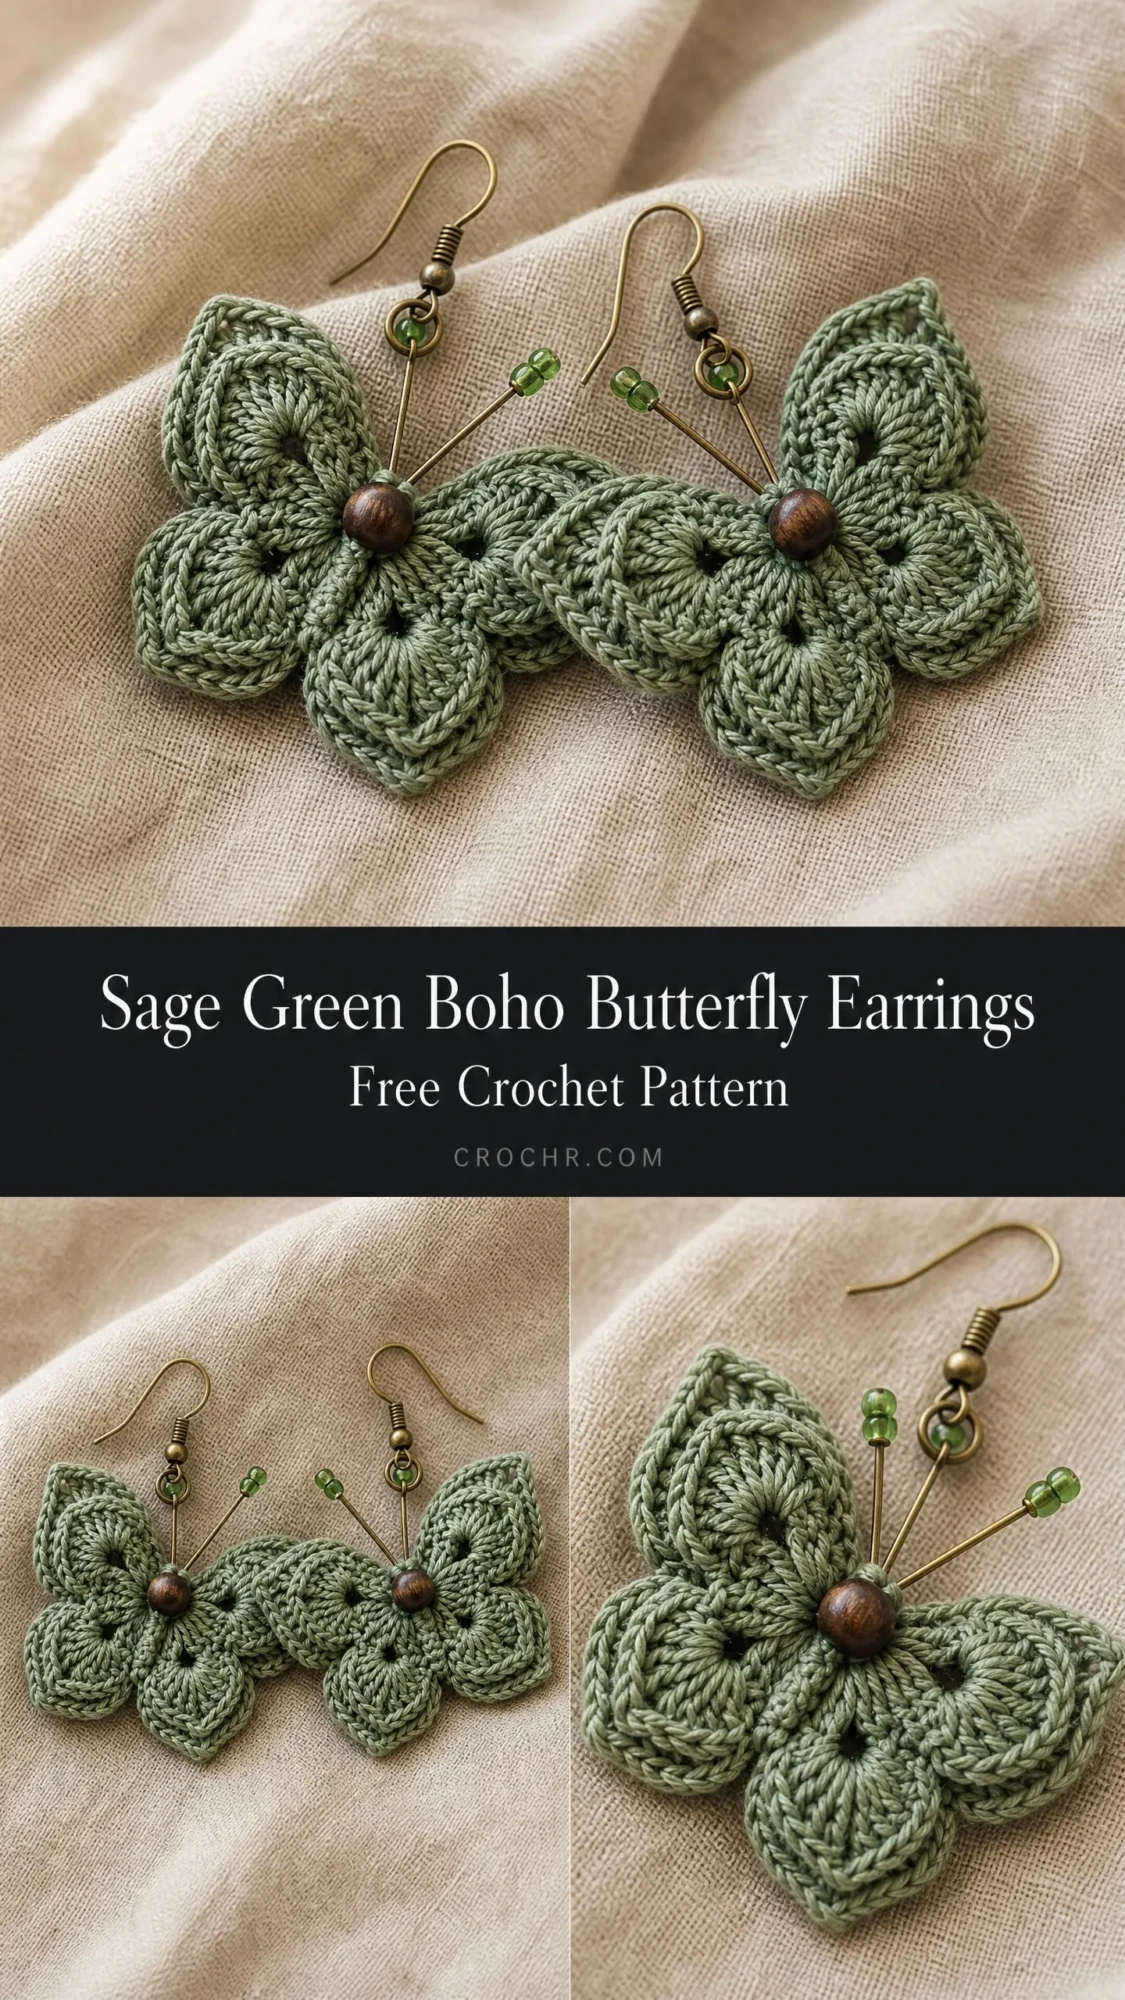
These butterfly earrings hit that sweet spot between handmade charm and wearable elegance. The sage green color reads as both earthy and sophisticated, making them versatile enough for jeans and a tee or a flowy summer dress. Each butterfly is constructed from four separate wing motifs joined at a central point, with a small wooden bead serving as the body. Wire antennae tipped with tiny seed beads add movement and visual interest.
The finished earrings measure approximately 1.75 inches wide by 1.5 inches tall, with a total drop of about 2.5 inches from the top of the ear wire. They are lightweight and comfortable for all-day wear. Plus, they make an absolutely thoughtful handmade gift for the nature lover or boho enthusiast in your life.
Skill Level
This crochet tutorial is rated intermediate. The stitches themselves are beginner-friendly, but working with fine thread and a tiny hook requires steady tension and a bit of patience. If you have never worked with crochet thread before, I recommend practicing a few swatches first to get comfortable with the scale. That said, if you have made granny squares or simple motifs, you already have the skills you need.
Time Estimate
Plan for approximately 2 to 3 hours per pair, including all the finishing and assembly work. If you are new to thread crochet, give yourself an extra hour. Pour a cup of tea, put on a podcast, and enjoy the process. These small projects are perfect for that kind of slow, meditative crafting.
Finished Dimensions
Each earring (excluding ear wire): approximately 1.75 inches wide by 1.5 inches tall (4.5 cm by 3.8 cm)
Total drop from top of ear wire hook to bottom of lower wing: approximately 2.5 inches (6.4 cm)
Materials
Yarn and Thread
You will need size 10 crochet cotton thread in sage green. The entire pair requires only about 30 yards (27 meters), so this is a fantastic stash-buster project.
Recommended thread options:
1. Aunt Lydia’s Classic Crochet Thread, Size 10 (100% mercerized cotton, 350 yards per ball). Color: Sage (0484). This is widely available and gives beautiful stitch definition.
2. DMC Natura Just Cotton Thread, Size 10 (100% combed cotton, 170 yards per ball). A smooth thread with a soft matte finish that looks wonderfully natural.
3. Lizbeth Cordonnet Cotton Thread, Size 10 (100% Egyptian cotton, 202 yards per ball). Higher twist for extra crisp stitches that hold their shape beautifully.
Substitution note: Stick with 100% cotton in size 10. Avoid blends with nylon or polyester, as they resist blocking and can look shinier than you want for this botanical aesthetic.
Hook
Steel crochet hook, size 7 (1.65 mm) or size needed to achieve gauge.
If you have never used a steel crochet hook before, they are numbered differently than regular hooks. A size 7 steel hook is quite small, about 1.65 mm in diameter. The higher the number, the smaller the hook. It feels strange at first, but you will adjust quickly.
Notions
Gauge
One completed wing motif = approximately 0.85 inches wide by 0.85 inches tall (2.2 cm by 2.2 cm) after light blocking.
Gauge matters here because these are tiny pieces that need to assemble correctly. If your motifs are too large or too small, the finished earring will not sit right. Make one lower wing motif first and measure it before continuing. Adjust your hook size up or down as needed.
Abbreviations and Stitch Definitions
Let me walk you through every abbreviation used in this pattern. If you are new to reading crochet patterns, bookmark this section.
Special Stitches
Picot
Chain 3. Slip stitch into the first chain made (the chain closest to the hook). This creates a small decorative loop at the edge of a stitch. After completing the picot, continue working into the next stitch as directed.
Think of picots as tiny decorative bumps that add texture and visual interest to your edges.
Dc2tog (Double Crochet Two Together)
This is a decrease stitch. Yarn over, insert hook into the first indicated stitch, yarn over, pull up a loop, yarn over, draw through 2 loops (2 loops remain on hook). Without finishing the stitch, yarn over, insert hook into the second indicated stitch, yarn over, pull up a loop, yarn over, draw through 2 loops (3 loops remain on hook). Yarn over, draw through all 3 loops. One decrease made.
Shell Stitch
Work 5 double crochet stitches into the same stitch or space. This creates a small fan of stitches that forms the rounded, petal-like lobe of each wing section.
Pattern Notes Before You Begin
Read through these notes before picking up your hook. They will save you confusion later.
1. Each butterfly earring is assembled from four wing motifs: two upper wings and two lower wings. The upper wings are slightly smaller because they are worked through only Round 3.
2. All motifs are worked in joined rounds. At the end of each round, join with a slip stitch to the first stitch of that round unless otherwise noted. Do not turn between rounds.
3. The magic ring (MR) is strongly recommended for starting each motif. It closes the center completely and avoids a visible hole, which would look disproportionate at this tiny scale. If you have never made a magic ring, there are many video tutorials online. It is easier than it looks.
4. Fasten off all motifs leaving a tail of at least 6 inches (15 cm) for sewing and joining later.
5. The wooden bead serves as the butterfly body and is sewn on after all four wings are joined.
6. The antennae are made from a single piece of fine brass wire per earring, shaped and threaded with seed beads, then inserted through the top of the joined wing assembly.
7. A jump ring connects the antenna wire loop to the ear wire hook.
8. Block each motif lightly before assembly for best results. Starch or fabric stiffener helps the earrings hold their shape during wear.
9. Stitch counts appear at the end of each round in parentheses.
10. This pattern is written for one earring. Repeat all steps for the second earring.
Step by Step Crochet Pattern Instructions
Lower Wing Motif (Make 2 per Earring, 4 Total per Pair)
The lower wings are the two larger wings that form the bottom half of the butterfly.
Begin with a magic ring.
Round 1: Ch 3 (counts as first dc here and throughout), work 11 dc into the MR, pull ring closed, join with sl st to top of beg ch-3. (12 dc)
Round 2: Ch 1, sc in same st as join. Ch 5, skip 1 st, sc in next st. Ch 3, skip 1 st, sc in next st. Ch 5, skip 1 st, sc in next st. Ch 3, skip 1 st, sc in next st. Ch 5, skip 1 st, sc in next st. Ch 3, skip 1 st, join with sl st to first sc. (3 ch-5 sps, 3 ch-3 sps, 6 sc)
Round 3: Sl st into first ch-5 sp. Ch 3, work 4 more dc into same ch-5 sp (shell made). Ch 2, sc into next ch-3 sp. Ch 2, work 5 dc into next ch-5 sp (shell made). Ch 2, sc into next ch-3 sp. Ch 2, work 5 dc into next ch-5 sp (shell made). Ch 2, sc into next ch-3 sp. Ch 2, join with sl st to top of beg ch-3. (3 shells of 5 dc, 3 sc, 6 ch-2 sps)
Round 4: Sl st across to center dc of first shell. Ch 1, sc in center dc of shell. Ch 4, picot, ch 4, sc in center dc of next shell. Ch 4, picot, ch 4, sc in center dc of next shell. Ch 4, picot, ch 4, join with sl st to first sc. (3 sc, 3 picots, 6 ch-4 sps)
Fasten off, leaving a 6-inch (15 cm) tail. Lower wing motif complete.
Upper Wing Motif (Make 2 per Earring, 4 Total per Pair)
The upper wings are slightly smaller than the lower wings because they are worked through only Round 3, omitting the final picot round.
Begin with a magic ring.
Round 1: Ch 3 (counts as first dc), work 11 dc into the MR, pull ring closed, join with sl st to top of beg ch-3. (12 dc)
Round 2: Ch 1, sc in same st as join. Ch 4, skip 1 st, sc in next st. Ch 2, skip 1 st, sc in next st. Ch 4, skip 1 st, sc in next st. Ch 2, skip 1 st, sc in next st. Ch 4, skip 1 st, sc in next st. Ch 2, skip 1 st, join with sl st to first sc. (3 ch-4 sps, 3 ch-2 sps, 6 sc)
Round 3: Sl st into first ch-4 sp. Ch 3, work 3 more dc into same ch-4 sp (4 dc shell made). Ch 1, sc into next ch-2 sp. Ch 1, work 4 dc into next ch-4 sp (4 dc shell made). Ch 1, sc into next ch-2 sp. Ch 1, work 4 dc into next ch-4 sp (4 dc shell made). Ch 1, sc into next ch-2 sp. Ch 1, join with sl st to top of beg ch-3. (3 shells of 4 dc, 3 sc, 6 ch-1 sps)
Fasten off, leaving a 6-inch (15 cm) tail. Upper wing motif complete.
Checkpoint After Motifs
Pause here and count your pieces. You should have 4 completed motifs per earring: 2 lower wing motifs and 2 upper wing motifs.
Each lower wing motif should measure approximately 0.9 inches (2.3 cm) across at its widest point.
Each upper wing motif should measure approximately 0.75 inches (1.9 cm) across.
If your motifs are significantly larger or smaller, adjust your hook size and rework before continuing to assembly. This checkpoint saves headaches later.
Assembly Instructions
Step 1: Arrange the Wings
Lay the four motifs on a flat surface in butterfly formation. Place the two upper wing motifs side by side at the top, with their flattest edge (the side opposite the most open shells) facing inward toward the center. Place the two lower wing motifs below them in the same manner. The center point where all four wings meet will become the butterfly body position.
Take a moment to arrange them until they look balanced and symmetrical.
Step 2: Join the Wings
Thread a tapestry needle with a 12-inch (30 cm) length of sage green thread. Hold one upper wing motif against one lower wing motif, aligning their inner edges. Using the thread tail or new thread, whipstitch the two motifs together at 2 to 3 stitches along their shared inner edge. Knot securely but do not trim yet.
Repeat to join the second upper and lower wing motif pair.
Then hold both assembled pairs together (mirroring each other) and whipstitch the two pairs together at the center join point, working 3 to 4 stitches to secure all four wings at a single center point.
Weave in and trim all joining tails except for one 6-inch (15 cm) tail, which you will use to anchor the bead.
Step 3: Attach the Body Bead
Thread the remaining long tail through the tapestry needle. Thread the needle through the center of the wooden bead, then back down through the center join of the wings, pulling the bead snugly against the front center of the wing assembly. Take the thread through the wings and bead one more time to secure, then knot firmly at the back and weave in the tail.
The bead should sit flush against the center front, covering the join point.
Step 4: Make the Antennae
Cut one piece of brass wire approximately 4 inches (10 cm) long. Find the center of the wire. Bend the wire in half into a narrow V shape, keeping the two halves parallel and close together at the top. This folded tip will become the loop that attaches to the jump ring.
Separate the two wire ends to form a slight upward spread. These are the antennae.
Thread 2 to 3 green seed beads onto each wire end. Bend the very tip of each wire end into a tiny closed loop using round-nose pliers to secure the beads and prevent them from sliding off.
Step 5: Attach the Antennae
Using a tapestry needle or a fine blunt-end wire tool, insert the folded V-tip of the antenna wire down through the top center of the wing assembly (between the upper wings), pushing it through to the back.
Open the folded wire tip slightly on the back side to anchor it flat against the back of the motifs so it cannot pull back through. If needed, secure with a small dab of jewelry adhesive or a few stitches of thread wrapped around the wire at the back.
The two antenna arms should spread upward and slightly apart from the front, each tipped with seed beads.
Step 6: Attach the Ear Wire
Open a 4 mm jump ring using two pairs of pliers. Always twist open sideways, never pull apart. Loop the jump ring through the folded wire tip at the top of the antenna assembly (or through the top center chain space of the upper wings if the wire tip is not accessible). Attach the ear wire hook to the jump ring. Close the jump ring securely.
Repeat all assembly steps for the second earring, mirror-imaging the antenna spread so the pair appears symmetrical when worn.
Checkpoint After Assembly
Each completed earring should measure approximately 1.75 inches (4.5 cm) wide and 2.5 inches (6.4 cm) from the top of the ear wire hook to the bottom of the lower wing.
The four wing motifs should lie flat. The wooden bead should sit flush and secure at the center front. The antennae should radiate upward naturally without drooping.
Blocking Instructions
Blocking makes a real difference with thread crochet jewelry. It gives your wings a defined shape that holds up during wear.
Place each completed earring right side up on a foam blocking board. Mist lightly with water or apply a diluted fabric stiffener (1 part white glue to 3 parts water, applied with a small brush).
Use rust-proof straight pins to pin each wing motif open to its fullest width, shaping the wing lobes into rounded petal shapes. Allow to dry completely, about 2 to 4 hours, before removing pins.
If you prefer a softer look, blocking with water alone (no stiffener) will add light definition without rigidity.
Size Customization Tips
For smaller earrings: Use size 20 crochet cotton thread with a size 10 or 11 steel hook (1.30 to 1.15 mm). The finished motifs will be approximately 25 percent smaller, producing a daintier earring suitable for minimalist styles.
For larger earrings: Use size 5 crochet thread or a lightweight fingering-weight cotton yarn with a size 5 or 6 steel hook (1.90 to 1.80 mm). Adding one additional round to each motif before fastening off will also increase the wingspan.
For a statement size: Use light fingering weight (size 1) cotton yarn with a 2.00 to 2.25 mm hook. In this weight, the earring will measure approximately 2.5 to 3 inches wide and will need a heavier ear wire to support the additional weight.
Regardless of size adjustment, the number of rounds, stitches, and stitch types stay the same. Only the thread weight and hook size change.
Care Instructions
Hand wash gently in cool water with a small amount of mild liquid soap. Do not wring or twist. Press flat between two clean towels to remove excess water. Reshape by hand and allow to air dry flat.
If the earrings lose their stiffness after washing, reapply a light mist of fabric stiffener and re-pin to dry.
Do not machine wash, machine dry, or iron directly. Store flat or hanging to prevent crushing the wing motifs. Keep away from prolonged direct sunlight to preserve the depth of the sage green color.
Final Thoughts on This Butterfly Earrings Crochet Pattern
I have made dozens of pairs of these sage green boho butterfly earrings now, and they never fail to make me smile. There is something deeply satisfying about creating wearable art from a ball of thread and a tiny hook. They look intricate and impressive, but once you get the rhythm of the wing motifs, they work up faster than you would expect.
These make wonderful gifts for birthdays, holidays, or just because. Pair them with a simple card explaining they are handmade, and watch the recipient’s face light up.
Thank you so much for choosing this pattern. I hope you love making these earrings as much as I loved designing them. If you give them a try, I would absolutely love to see your finished pair. Tag me on Instagram or share a photo on Facebook. Seeing your creations is genuinely the best part of sharing patterns.
If this pattern caught your eye, go ahead and save it to your Pinterest boards so you can find it when you are ready to start. And if you make these butterfly earrings, please drop a comment below. I love hearing how projects turn out and seeing all the color variations you choose.
You Might Also Like
- Ocean Blue Floral Crochet Bracelet Free Crochet Pattern
- Ocean Wave Blue Striped Clutch Free Crochet Pattern
- Cream Boho Tassel Purse Free Crochet Pattern
- Sage Green Boho Braided Bag Free Crochet Pattern
