Let me guess. You have been eyeing those gorgeous boho bucket bags all over Pinterest, but you are convinced they are way too complicated to make yourself. Too many techniques. Too many hardware pieces. Too much room for error.
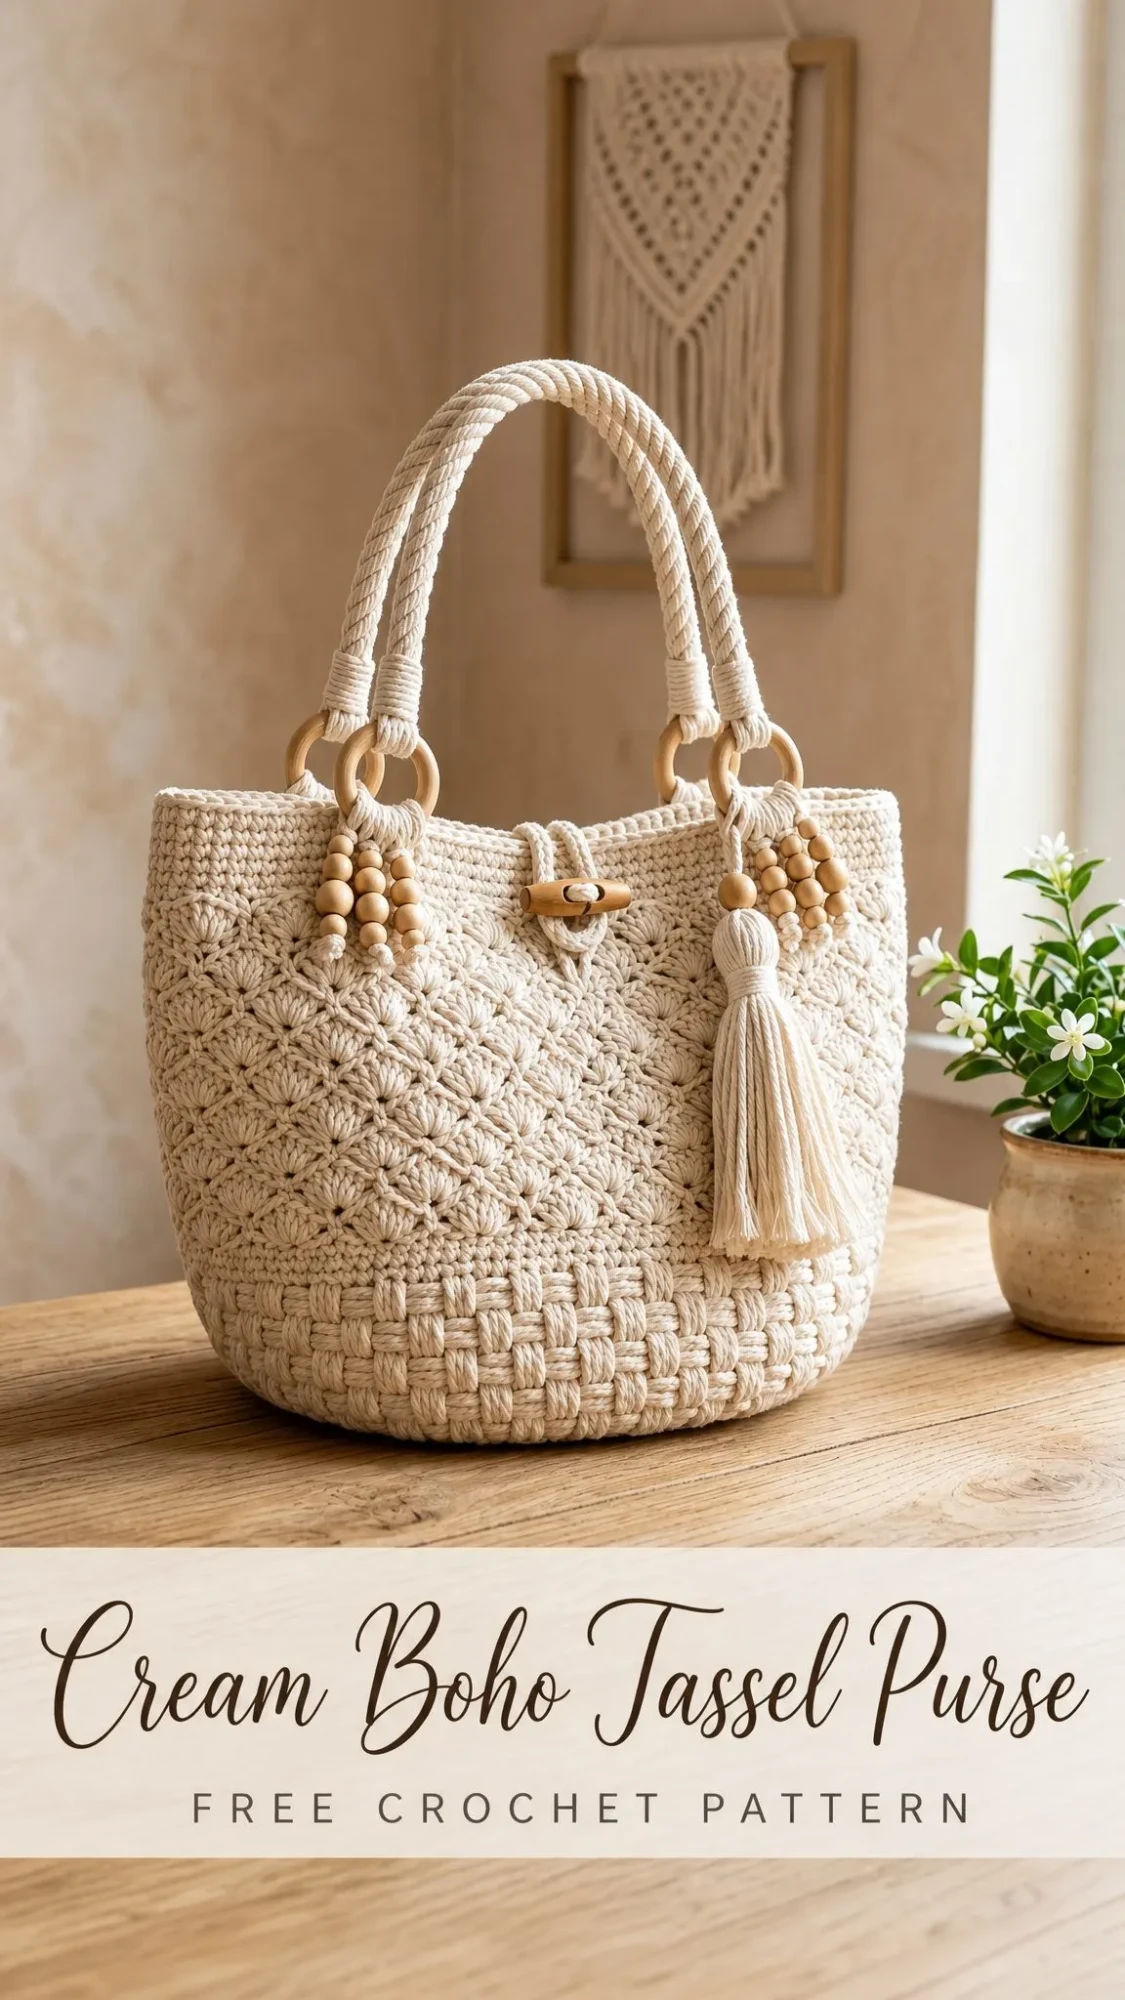
I am here to tell you that is simply not true. This Cream Boho Tassel Purse looks like it belongs in a boutique window, but it breaks down into straightforward sections that build on each other naturally. If you can single crochet in the round and you are willing to try a couple of new stitches, you can absolutely make this bag.
The basketweave base? Just front post and back post double crochets in a simple pattern. The shell stitch body? A repeating rhythm that clicks into place after the first round. The wooden rings, beads, and tassel? Those are the fun finishing touches that make everyone ask where you bought it. Let me walk you through every step.
About This Pattern
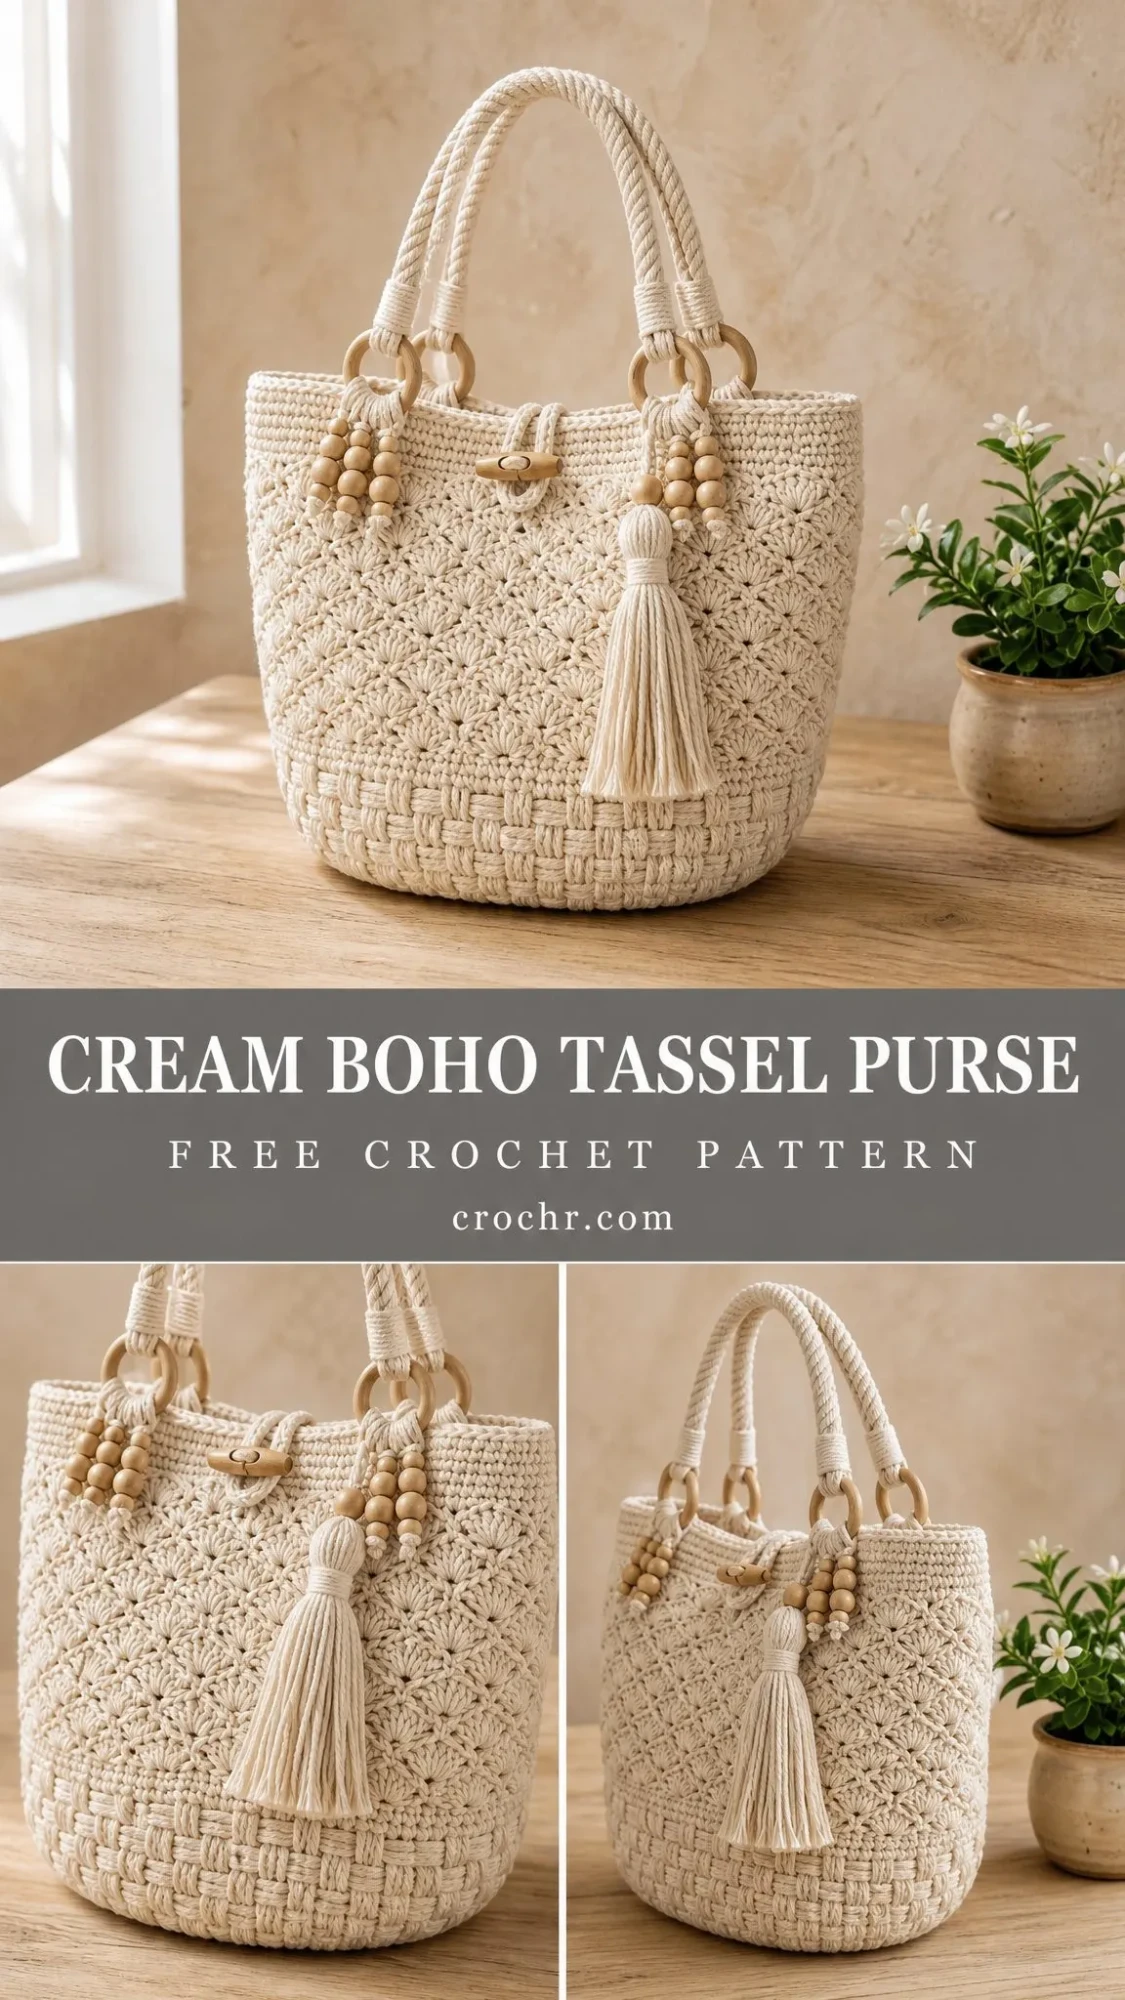
This hand crocheted shell and basketweave bucket bag combines two of my favorite textures. The lower third features a dense woven basketweave that gives the bag structure and helps it stand upright on its own. The upper body opens up into an airy shell stitch pattern that creates those beautiful diamond shaped fans you see in the photos.
The bag measures approximately 10 inches wide by 9 inches tall when finished. Everything is worked bottom up in continuous spiral rounds, which means no seams to sew along the body. The wooden rings, beaded dangles, toggle closure, and generous tassel give it that relaxed, sun bleached boho mood that works perfectly for summer markets, beach days, or everyday errands.
Skill Level: Intermediate
This pattern assumes you are comfortable with basic crochet stitches and working in the round. The post stitches and shell stitch pattern are explained fully, so even if they are new to you, you can learn as you go.
Materials You Will Need
Yarn
Yarn Suggestions:
Hook
Notions and Hardware
Gauge
14 single crochet (sc) stitches and 15 rounds equals 4 inches (10 cm) in single crochet with a 5.0 mm hook.
A firm, dense tension keeps the bag sturdy and helps it hold its shape. Take time to check your gauge before starting. If your gauge is off, your bag will end up a different size than intended.
Abbreviations and Stitch Definitions
This pattern uses US crochet terminology. If you typically work from UK patterns, I have included the UK equivalents below.
Special Stitches
Shell: Work 5 double crochets into the same stitch or space. These should fan open nicely. If your shell looks crowded, your tension may be too tight. Try going up a quarter hook size for the shell section only.
Basketweave: Alternating blocks of front post double crochet and back post double crochet that shift every two rounds to form a woven grid pattern.
Pattern Notes Before You Begin
Please read through these notes before starting. They will save you confusion later.
Part 1: The Base
The base is worked in a flat spiral from the center outward. The finished circle measures about 6.5 inches (16.5 cm) across.
Round 1: Work 6 sc in a magic ring. (6 sc)
Round 2: Work 2 sc in each stitch around. (12 sc)
Round 3: Sc in next stitch, inc in next stitch. Repeat from * around. (18 sc)
Round 4: Sc in next 2 stitches, inc in next stitch. Repeat from * around. (24 sc)
Round 5: Sc in next 3 stitches, inc in next stitch. Repeat from * around. (30 sc)
Round 6: Sc in next 4 stitches, inc in next stitch. Repeat from * around. (36 sc)
Round 7: Sc in next 5 stitches, inc in next stitch. Repeat from * around. (42 sc)
Round 8: Sc in next 6 stitches, inc in next stitch. Repeat from * around. (48 sc)
Round 9: Sc in next 7 stitches, inc in next stitch. Repeat from * around. (54 sc)
Round 10: Sc in next 8 stitches, inc in next stitch. Repeat from * around. (60 sc)
Round 11: Sc in next 9 stitches, inc in next stitch. Repeat from * around. (66 sc)
Round 12: Sc in next 10 stitches, inc in next stitch. Repeat from * around. (72 sc)
Round 13: Working in BLO, sc in each stitch around. (72 sc)
Round 13 sets the fold line. The sides will begin to rise from here.
Troubleshooting Tip: If your base is ruffling, you have too many stitches for your gauge. Rip back a round and skip an increase or two. If it is cupping, add a round of even single crochet.
Part 2: Basketweave Lower Band
This dense woven band forms the sturdy lower third of the bag. Post stitches are worked around the posts of the round below, not into the top of the stitches.
Round 14: Dc in each stitch around. (72 dc)
Round 15: Work 3 fpdc, then 3 bpdc. Repeat from * around 12 times. (72 sts)
Round 16: Repeat Round 15. Work fpdc over fpdc, bpdc over bpdc. (72 sts)
Round 17: Work 3 bpdc, then 3 fpdc. Repeat from * around 12 times. This shifts the blocks. (72 sts)
Round 18: Repeat Round 17. (72 sts)
Round 19: Sc in each stitch around. (72 sc)
The shift in Rounds 17 and 18 staggers the blocks into the brick like weave you see along the base of the bag.
Important Note: Post stitches pull in slightly. Do not add stitches to compensate. The band is meant to be a touch narrower than the shell body above it.
Part 3: Shell Stitch Body
The airy upper body is built from 12 shells per round. Each round places a shell into the single crochet below and a single crochet into the center of the shell below, so the fans stack into soft diamonds.
Round 20 (Set Up Round): Sc in next stitch, skip 2 stitches, 5 dc in next stitch, skip 2 stitches. Repeat from * around. (12 shells and 12 sc)
Round 21: 5 dc in next sc, sc in center (3rd) dc of next shell. Repeat from * around. (12 shells and 12 sc)
Rounds 22 through 27: Repeat Round 21. (12 shells and 12 sc)
That gives you 8 shell rounds total (Rounds 20 through 27), approximately 5 inches (12.5 cm) tall. For a deeper bag, work extra repeats of Round 21 in pairs.
Round 28: Sc evenly around, working 1 sc in each sc and 1 sc in each dc or space to true up the edge. (72 sc)
Part 4: Top Edge and Closure
Round 29: Sc in each stitch around. (72 sc)
Round 30: Hdc in each stitch around. (72 hdc)
Round 31: Sc in each stitch around, sl st in first stitch to join. Fasten off. (72 sc)
These three firm rounds at the top keep the opening from stretching and give a clean lip to anchor the handles.
Toggle Loop Closure
At the center front of your bag, count to the middle stitches of the top edge. Join your yarn, chain 12, and slip stitch back into the same stitch to form a loop. Fasten off and weave in your ends.
On the inside center back, securely sew the wooden toggle or short bamboo stick so the front loop slips over it to close the bag.
Tip: Test the loop length around your toggle before fastening off. It should slip on snugly but release without tugging the fabric. Adjust your chain count if needed.
Part 5: Handles, Rings, and Beads
Wrapped Handles (Make 2)
1. Cut 4 lengths of yarn about 36 inches (90 cm) each and hold them together as a core.
2. Thread the core through two wooden rings, centering the rings about 5 inches (12.5 cm) apart at the ends.
3. Using a separate working strand, tightly wrap (or sc closely over) the core along its full length to form a firm rope handle, securing each ring at the ends.
4. Knot and weave in so the wrap cannot slip.
Joining Handles to the Bag
Position one handle across the front and one across the back. Each ring should sit just below the top edge, about 3 inches (7.5 cm) in from the side folds.
Stitch each wooden ring firmly to the top band with doubled yarn, passing through the ring several times for security.
Beaded Dangles (Make 2)
Cut a 14 inch (35 cm) doubled strand. Fold it through a handle ring, then thread on 7 to 9 wooden beads. Knot above and below the cluster so the beads sit snug. Trim the tails short.
Repeat on the opposite ring.
Part 6: Tassel and Assembly
Make the Tassel
1. Wrap yarn around a 4 inch (10 cm) piece of cardboard about 35 to 40 times.
2. Slide a tie strand under the top and knot tightly. Cut the loops at the bottom.
3. Wrap a separate strand around the bundle about one third inch from the top to form the neck. Thread the tails down into the skirt to hide them.
4. Trim the ends level.
5. Use the top tie to attach the tassel to a front handle ring.
Final Assembly Checklist
Before calling your bag complete, run through this list:
Blocking Your Bag
Lightly steam or wet block the finished bag over a rolled towel to round out the base and open up the shell fans. This step makes a noticeable difference in how polished your finished bag looks.
Care Instructions
Size Customizing Tips
Want to make this bag bigger, smaller, or just different? Here are your options:
Wider bag: Continue the base increases past Round 12 in multiples of 6 (for example, to 78 or 84 stitches) so the shell and basketweave repeats still divide evenly.
Taller bag: Add shell rounds in pairs by repeating Round 21. Add one or two basketweave shift sequences for a deeper base band.
Sturdier bag: Hold two strands together or drop to a 4.5 mm hook for a tighter, more rigid fabric.
Softer drape: Swap to a single strand cotton blend and go up to a 5.5 mm hook.
The Rule of 6: Whatever size you choose, keep the body stitch count a multiple of 6 so both textured sections stay symmetrical all the way around.
You Did It!
Thank you so much for choosing this pattern for your next crochet project. I truly hope you love making this bag as much as I loved designing it. The combination of the structured basketweave and the delicate shell stitch creates something that looks far more complicated than it actually is, and that is exactly the kind of project I love most.
If you make this Cream Boho Tassel Purse, I would absolutely love to see it. Tag me on Instagram or share a photo in my Facebook group. Seeing your finished projects genuinely makes my day.
If you found this crochet pattern helpful, please save it to your Pinterest boards so you can find it easily when you are ready to start. And if you have any questions or want to share how yours turned out, leave a comment below. I read every single one and love hearing from you. Happy crocheting!
