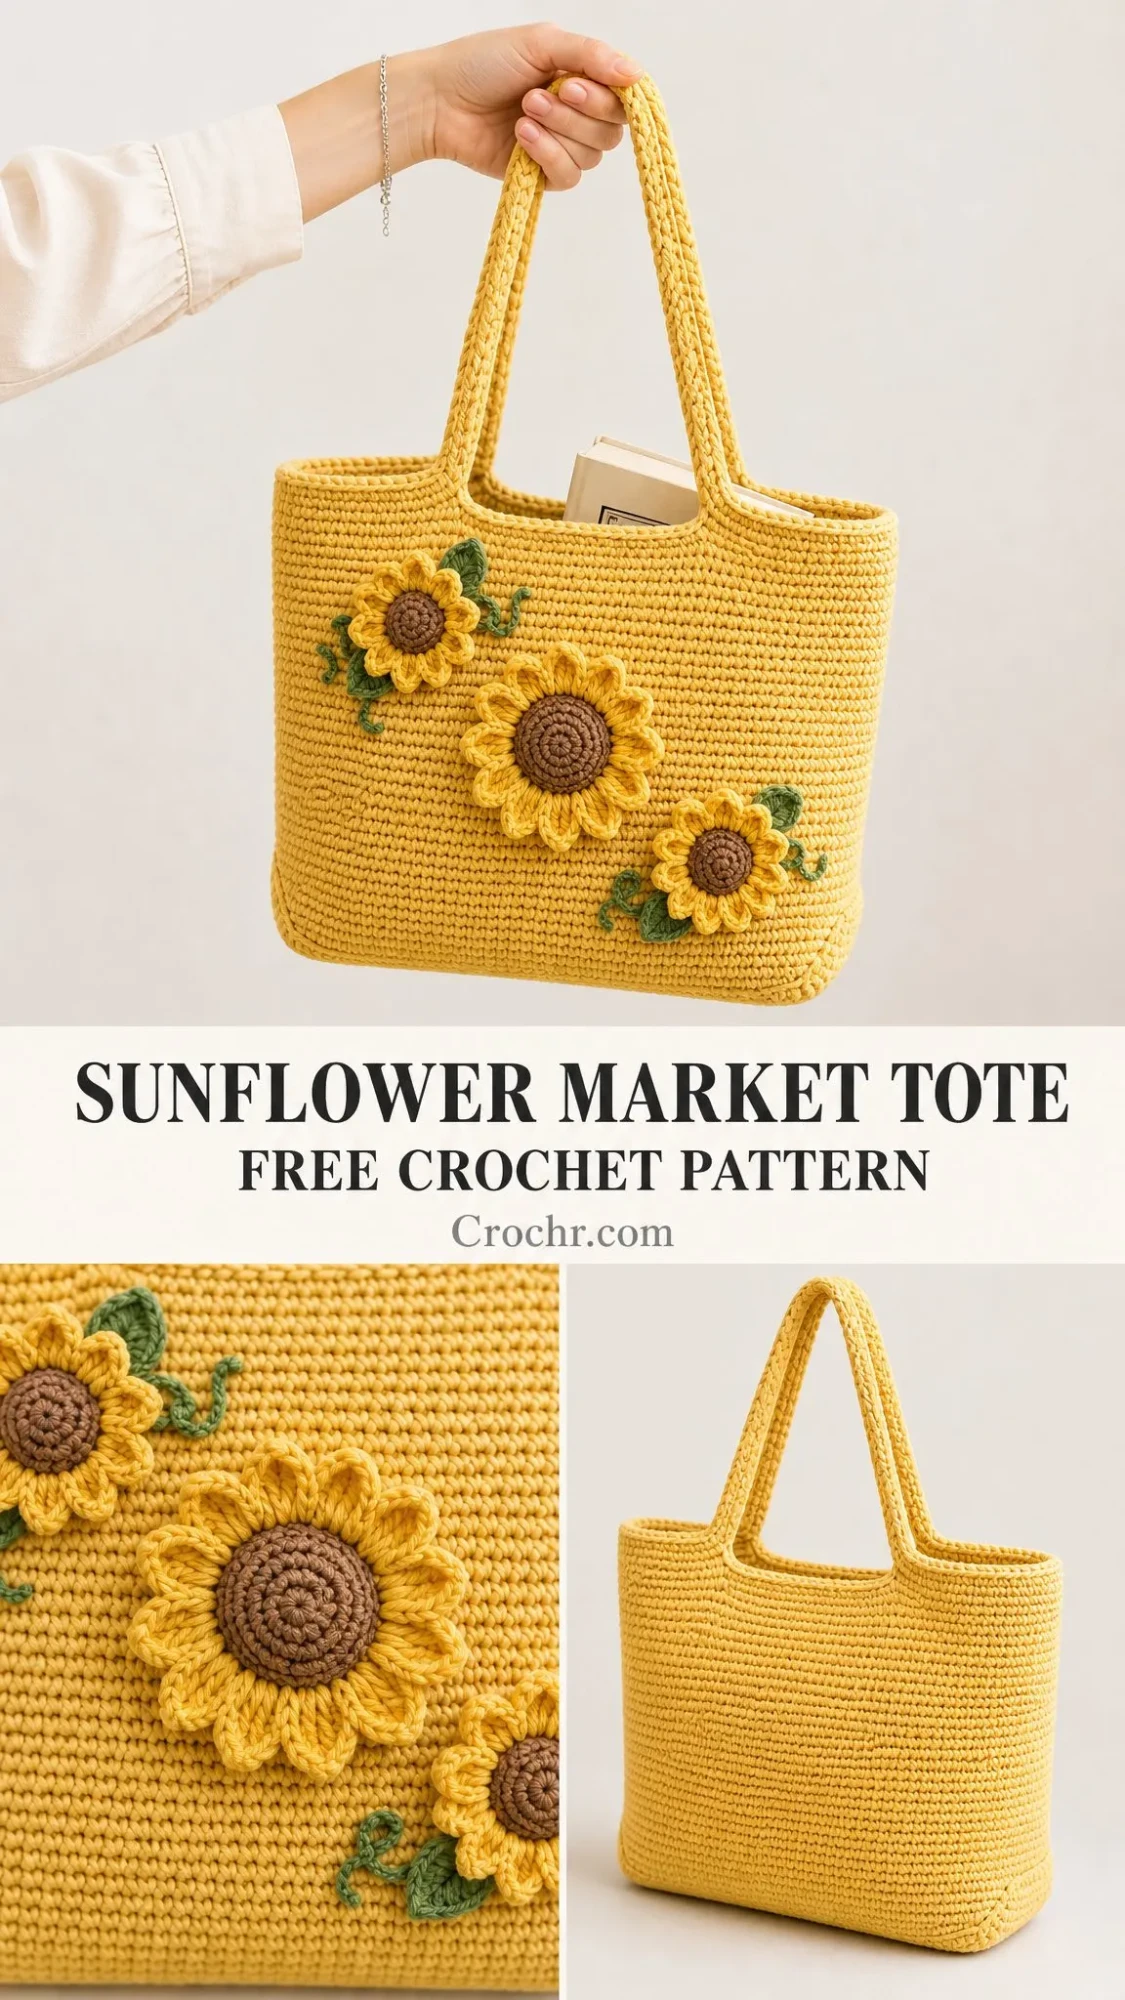
A sturdy tote bag can make all the difference on market day. Whether you’re picking up fresh produce, heading to the library, or just need a reliable everyday carryall, this Sunflower Market Tote delivers. It’s worked almost entirely in single crochet, which means even adventurous beginners can tackle it with confidence.

The construction is seamless from the base up, so there’s no fiddly seaming at the end. You’ll create the body in continuous spiral rounds, then build the handles right into the top edge for extra strength. The cheerful sunflower blooms and curling leaves are made separately and stitched on wherever you like them, giving you total control over the final look.
I love that this tote uses worsted weight cotton, which gives it structure and durability without adding bulk. It’s the kind of project that looks impressive but relies on simple techniques you probably already know. Let’s walk through everything you need to make your own.
Why You’ll Love This Crochet Tote Bag Pattern
This market tote strikes the perfect balance between pretty and practical. The honey gold color feels warm and summery, while the dimensional sunflowers add personality without being fussy. At approximately 13 x 11 x 4 inches (33 x 28 x 10 cm), it’s roomy enough for a farmers market haul but not so large that it becomes unwieldy.
The seamless construction means you start at the base and work your way up without ever having to join pieces together. That crisp fold where the base meets the sides? It comes from working in the back loop only (BLO) for just one round. Small techniques like this make a big visual difference.
Because cotton yarn has very little stretch, keeping consistent tension throughout the project is important. But don’t let that intimidate you. If you can single crochet in a spiral, you can absolutely make this bag.
Materials You’ll Need
Having everything ready before you start makes the whole process smoother. Here’s your complete supply list, pulled directly from the pattern.
Yarn
You’ll need a smooth, firm cotton or cotton blend in worsted/aran weight. The yarn’s structure is what gives the tote its ability to stand upright when loaded.
Main color (honey gold): 380 to 430 yards (350 to 395 meters)
Accent colors: Small amounts of golden yellow, chocolate brown, and leaf green for the sunflower blooms and leaves
Recommended yarns:
Hooks and Notions
Gauge
Getting gauge right matters for this project. A snug gauge keeps the tote from sagging when you load it up with groceries or books.
14 stitches and 16 rounds = 4 inches (10 cm) in single crochet with the 5.0 mm hook, worked firmly.
If your fabric feels loose or floppy, go down a hook size. It’s worth making a small swatch to check before diving into the base.
Abbreviations and Special Stitches
This pattern is written in US crochet terms. If you typically work from UK patterns, I’ve included the equivalents in brackets.
| Abbreviation | Meaning |
|---|---|
| ch | chain |
| sl st | slip stitch |
| sc | single crochet (UK: dc, double crochet) |
| hdc | half double crochet (UK: htr) |
| dc | double crochet (UK: tr, treble) |
| inc | 2 sc worked in the same stitch |
| BLO | back loop only |
| FLO | front loop only |
| st(s) | stitch(es) |
| rep | repeat |
| MR | magic ring |
| ( ) | stitch count at end of round |
Special Stitches
Petal Point: This creates the raised sunflower petals. Chain the stated number, then travel back down the chain with sc, hdc, and dc as written, anchoring with a slip stitch at the end.
Invisible Join: To close a round neatly, cut your yarn, thread it through the first stitch of the round, then back into the last stitch. This creates a seamless top edge that looks polished and professional.
Pattern Notes Before You Begin
A few important things to keep in mind as you work:
The body is worked in continuous spiral rounds. Do not join or turn unless the pattern specifically tells you to. Place a stitch marker in the first stitch of each round and move it up as you go. This keeps you from losing track of where each round begins.
The base is worked first as a flat oval. Then you’ll draw the stitches upward to form the sides without any seaming required.
Working in BLO on the first body round creates that crisp fold where the base meets the sides. It’s a small detail that makes a big difference in the finished look.
Stitch counts in parentheses appear at the end of every round. Pause and count. It’s much easier to fix a mistake early than to rip back multiple rounds later.
The three sunflowers and leaves are made separately and stitched to the front once the tote is complete. This means you can arrange them exactly where you want them.
The handles are built directly into the top edge, then reinforced with two extra rounds for strength. No separate handle pieces to attach.
Quick tip: Keep your tension firm and even throughout. Cotton has little stretch, so a consistent hand is what gives the finished tote its clean, upright shape.
The Base
Using honey gold yarn and your 5.0 mm hook, you’ll create a flat oval that becomes the bottom of your tote.
Foundation: Ch 45.
Round 1: Beginning in the 2nd ch from hook, sc in each of next 42 ch, 3 sc in last ch. Rotate to work along the opposite side of the foundation chain. Sc in each of next 42 ch, 3 sc in last ch. Join with sl st to first sc. (90 sc)
Round 2: Sc around, working 6 sc increases evenly spaced across the two curved ends. (96 sc)
Round 3: Sc around, working 6 increases evenly, staggered from the round below. (102 sc)
Round 4: Sc around, working 6 increases evenly. (108 sc)
Round 5: Sc around, working 6 increases evenly. (114 sc)
Round 6: Sc around, working 6 increases evenly. (120 sc)
Sizing check: Your finished base should measure about 12 x 4 inches (30 x 10 cm) and lie flat. If it cups upward or ruffles at the edges, adjust your increase placement before moving on to the body.
The Body and Handles
Now you’ll transition from the flat base to the upright sides of the tote.
Round 7: Working in BLO, sc in each st around. This bends the fabric upward to form the sides. (120 sc)
Rounds 8 through 46: Sc in each st around through both loops. Continue without joining for 39 rounds, until the body measures about 10 inches (25 cm) from the base fold. (120 sc each round)
This is the meditative part of the project. Put on a podcast or audiobook and let the repetitive stitching become relaxing rather than tedious.
Forming the Handles
The front face spans 46 stitches. Each side spans 14 stitches.
Round 47: Front face: sc in next 13 sts, ch 60, skip next 20 sts, sc in next 13 sts. Right side: sc in next 14 sts. Back face: sc in next 13 sts, ch 60, skip next 20 sts, sc in next 13 sts. Left side: sc in next 14 sts. (80 sc + two ch-60 handle loops = 200 sts)
Round 48: Sc in each sc and in each ch around, working firmly across the handle chains. (200 sc)
Rounds 49 through 50: Sc in each st around to reinforce the top band and handles. At the end of Round 50, sl st to next st and fasten off. Weave in ends. (200 sc each round)
For stronger straps: If you plan to carry heavier loads, work one additional round (Round 51) across the handles only. You can also slip stitch along both edges of each handle for a firmer grip.
Sunflower Blooms
Make 1 large and 2 small sunflowers using your 4.0 mm hook. The smaller hook creates tighter, more defined blooms.
Large Sunflower Center (brown)
Rnd 1: 6 sc in MR. (6 sc)
Rnd 2: Inc in each st around. (12 sc)
Rnd 3: [Sc in next st, inc] rep 6 times. (18 sc)
Rnd 4: [Sc in next 2 sts, inc] rep 6 times. (24 sc)
Rnd 5: Sc in BLO of each st around to cup the center. Sl st, fasten off brown. (24 sc)
Large Sunflower Petals (yellow)
Petal Round: Join yellow to a free front loop of Round 4. Ch 6, sc in 2nd ch from hook, hdc in next ch, dc in next 3 ch, sl st into next 2 front loops of the center. Repeat from * around. (12 petals)
Small Sunflower (make 2)
Center: Rnd 1: 6 sc in MR (6). Rnd 2: inc around (12). Rnd 3: [sc, inc] x6 (18). Fasten off brown.
Petals: Join yellow. Ch 5, sc in 2nd ch from hook, hdc in next, dc in next ch, sl st in next 2 sts. Repeat around. (9 petals)
Leaves and Assembly
Leaves (green)
Make 5 leaves total.
Leaf: Ch 7. Starting in 2nd ch from hook: sc in next ch, hdc in next, dc in next, hdc in next, sc in next, 3 sc in last ch. Rotate to work the opposite side. Sc in next, hdc in next, dc in next, hdc in next, sc in last. Sl st to join. Leave a long tail for sewing. (13 sts)
Putting It Together
This is the fun part where your tote really comes to life.
1. Lay the tote flat and place the large sunflower slightly left of center on the front, about 4 inches (10 cm) up from the base.
2. Set one small bloom upper left and the second lower right, following a gentle diagonal arrangement.
3. Tuck 1 to 2 leaves behind each bloom so just the tips peek out, then pin everything in place.
4. Using the long tails and a yarn needle, whip stitch each piece down through the cupped center and around the petal bases. Stitch leaves along their spines so they curl naturally.
5. Weave in all remaining ends on the inside of the tote.
Take your time with placement. You can shift things around until you find an arrangement that feels balanced and pleasing to your eye.
Customizing Your Tote
Making It Wider or Narrower
Adjust the foundation chain in pairs of stitches. Every 7 stitches added to the base adds approximately 2 inches (5 cm) of extra width. Keep the total a multiple that still lets your base increases sit evenly.
Making It Taller or Shorter
Add or remove plain body rounds (Rounds 8 through 46). Every 4 rounds equals approximately 1 inch (2.5 cm) of height.
Adjusting Handle Length
Lengthen or shorten the ch-60 handle loops in steps of 8 chains to change the drop by about 1 inch (2.5 cm). Keep both handles equal.
Care Instructions
Cotton bags are wonderfully practical, but they do need a bit of care to stay looking their best.
Always check your yarn’s ball band, as fiber content may change these steps.
Final Thoughts on This Crochet Tutorial
This Sunflower Market Tote is the kind of project that feels satisfying at every stage. The base comes together quickly, the body is mindless enough to work while watching TV, and attaching the blooms at the end brings the whole thing to life. It makes a wonderful gift for gardeners, farmers market enthusiasts, or anyone who appreciates a handmade accessory with personality.
The step by step construction means you’re never juggling too many techniques at once. Even if you’ve never made a bag before, the straightforward single crochet body gives you plenty of practice before you tackle the handles and flower appliqués.
I hope this crochet pattern brings you as much joy to make as it will to use. There’s something deeply satisfying about carrying a bag you made with your own hands, especially one this cheerful.
If you make this Sunflower Market Tote, I’d absolutely love to see it! Save this pattern to your Pinterest boards so you can find it when you’re ready to start, and please leave a comment below to share how yours turns out. Happy crocheting!
