
This is a wearable fiber art bracelet made entirely from crochet. It combines a dimensional spiral rose, detailed leaf motifs with embroidered veins, and an adjustable sliding closure. The project uses size 10 crochet cotton held with metallic thread throughout.
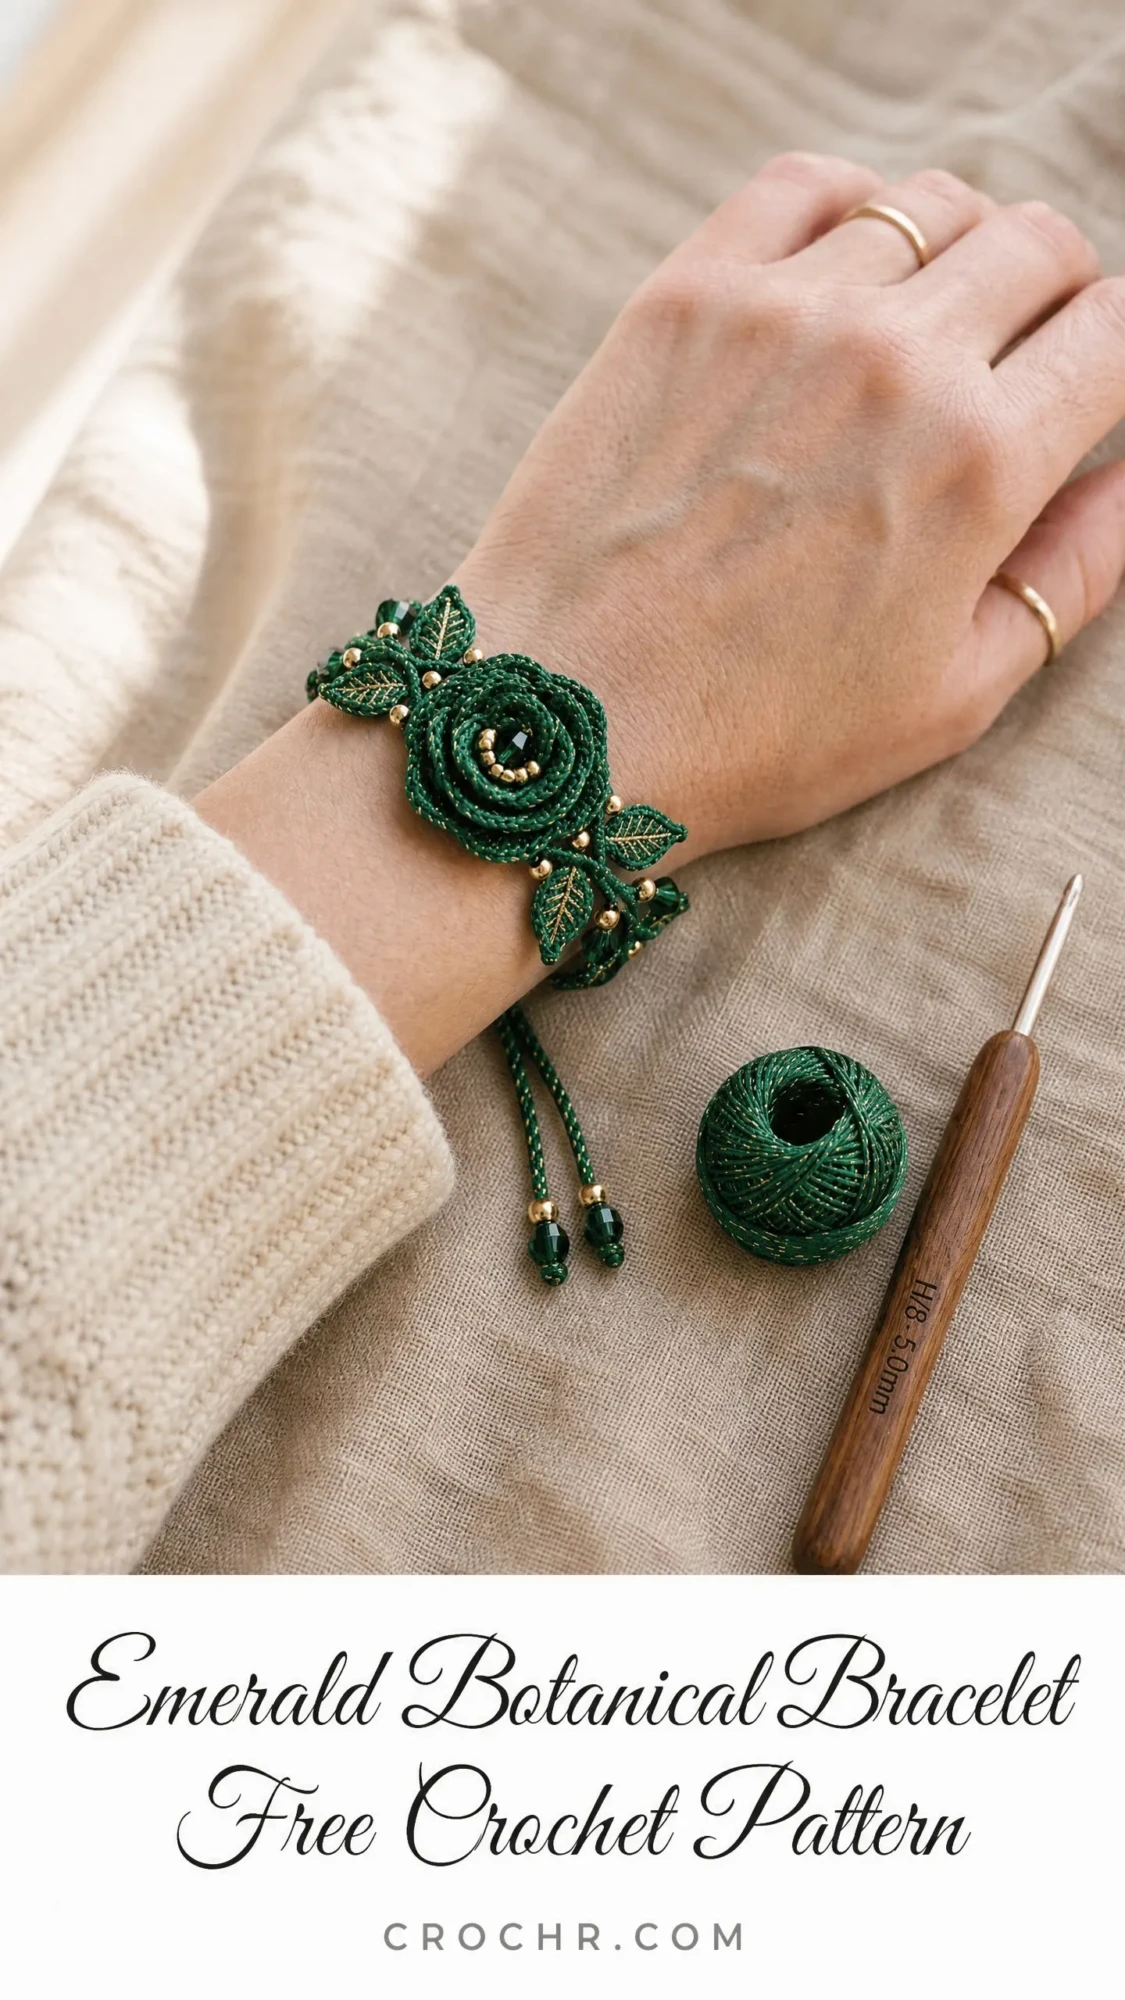
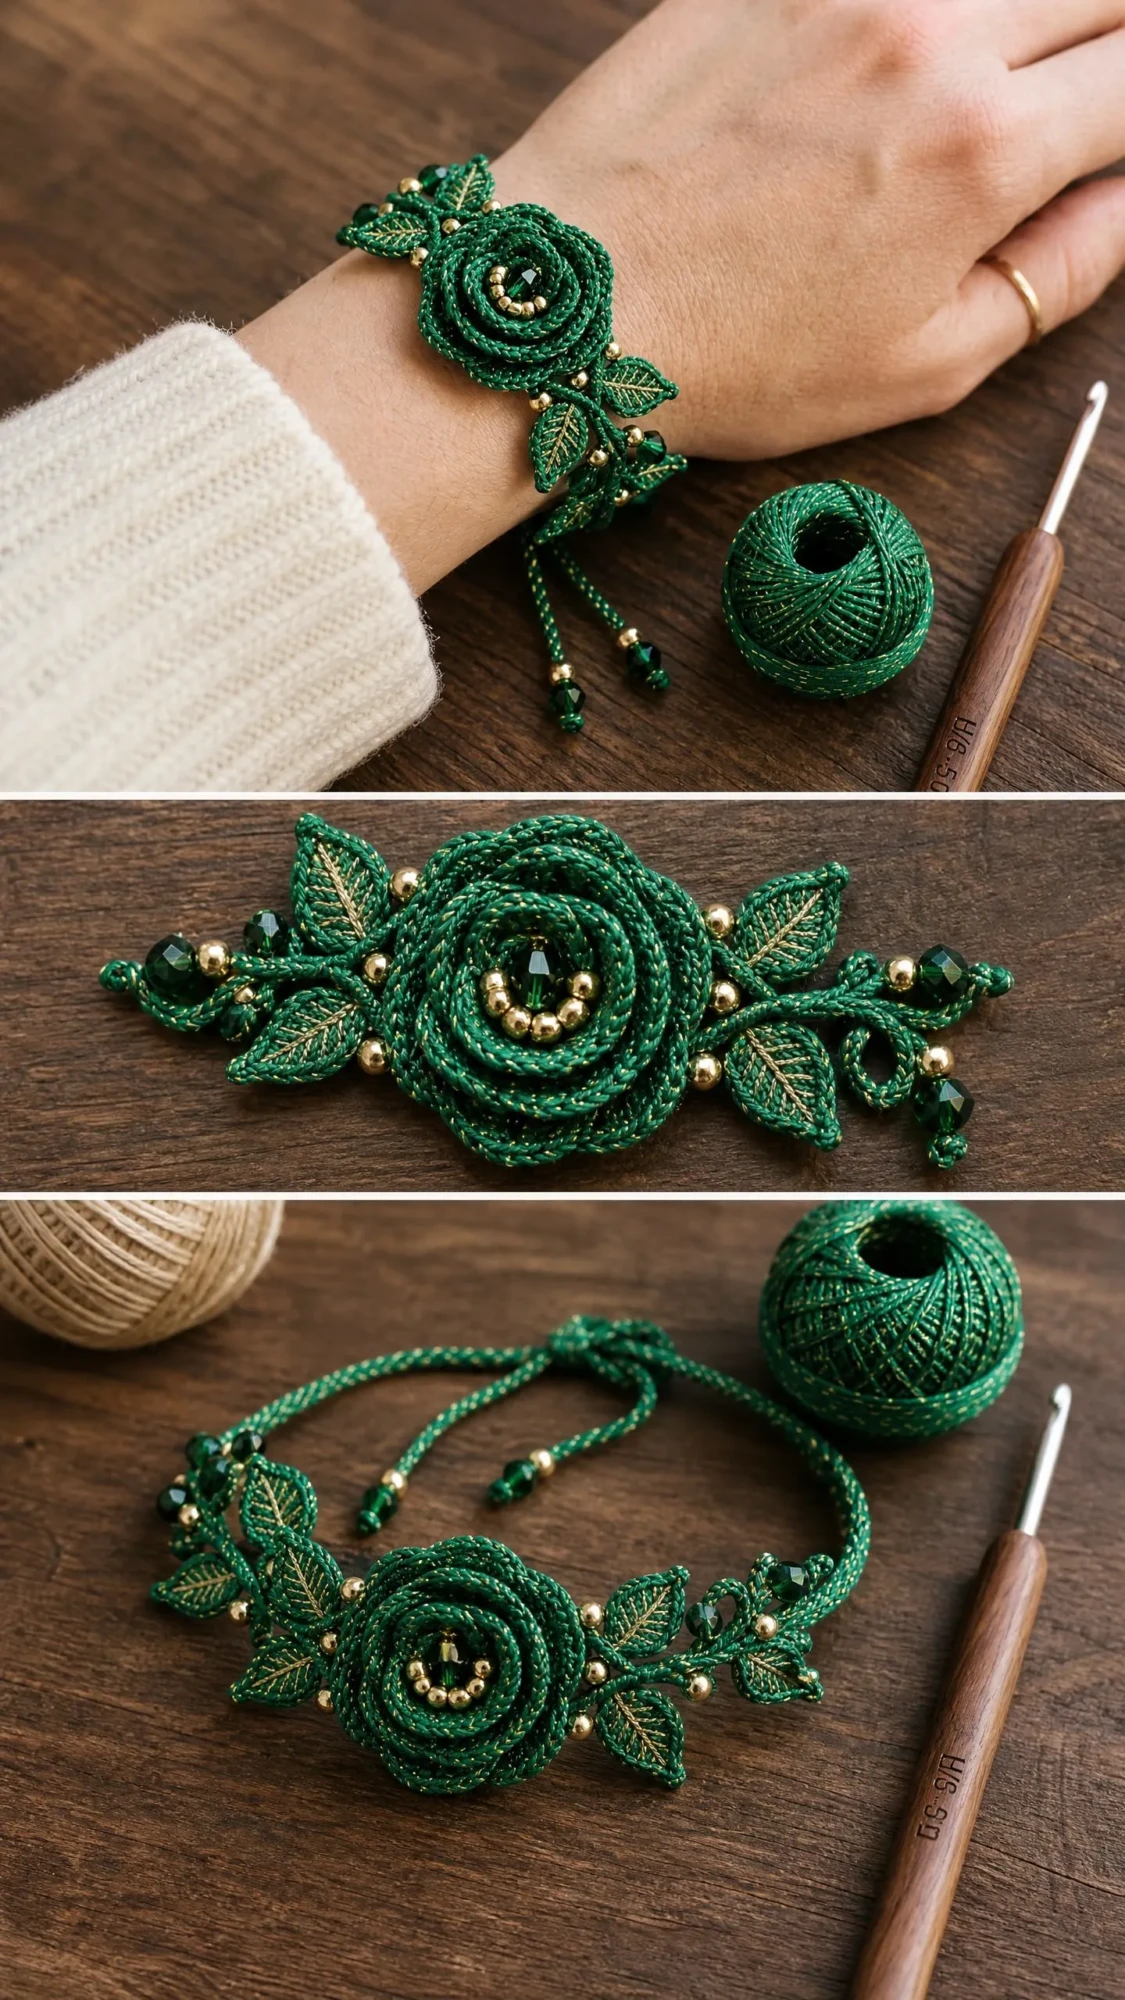
The centerpiece is a three-dimensional rose built in continuous spiral rounds. Four large leaves and four small leaves flank the bloom, each featuring surface slip stitch vein detailing. Gold seed beads accent the rose center and leaf junctions, while the sliding closure ends in beaded tassels.
This is an advanced pattern. You will need confident control of tight tension, experience with surface embroidery techniques, and comfort working in continuous spirals. If you have completed a structured accessory like a cuff or an amigurumi piece before, you will succeed with patience.
About This Emerald Botanical Bracelet Crochet Pattern
The finished bracelet adjusts from 6 inches to 8 inches in circumference, fitting most wrist sizes without any hardware clasp. The decorative focal panel measures approximately 2.75 inches wide by 1.5 inches tall. The rose bloom alone is about 1.25 inches in diameter.
Construction happens in a specific order. You make the adjustable band cord first. Then you crochet and attach the leaves. Next you build the rose centerpiece in spiral rounds and mount it to the band. Finally you sew in the beads and finish all the ends.
Expect this project to take six to ten hours across multiple sessions. The band takes about 45 minutes. Each leaf runs 20 to 30 minutes. The rose needs roughly 90 minutes of focused work. Assembly, beading, and finishing add another one to two hours.
Materials You Will Need
Yarn: Size 10 crochet cotton thread in deep emerald green. You need one ball of approximately 300 yards. The thread should have a tight, smooth twist. You also need one spool of fine gold metallic thread at size 10 equivalent, approximately 50 yards. Hold both threads together throughout the entire project.
Recommended yarn options:
Hook: Steel crochet hook size 7 (1.65 mm). A steel hook with an inline head gives the cleanest results for tight-tension cord work.
Notions:
Gauge
Working with both threads held together throughout:
Gauge is critical for the band length. The decorative motifs are worked to shape rather than to a specific gauge, so minor tension variations in the rose and leaves are acceptable as long as your band gauge is accurate.
How to swatch: Chain 30 tightly. Slip stitch back along the chain into the back bump only. Count 20 stitches and measure. If your swatch is looser, go down a hook size. If tighter, go up a hook size.
Abbreviations and Stitch Definitions
Let me walk you through every abbreviation you will encounter. I am defining each one with its full name and a plain-English explanation so nothing catches you off guard.
beg: beginning
blo: back loop only (insert your hook under just the back loop of the stitch, leaving the front loop unworked)
ch: chain (yarn over, pull through the loop on your hook)
ch-sp: chain space (the gap created by a chain in the previous row)
cont: continue
dc: double crochet (yarn over, insert hook, pull up a loop, yarn over and pull through 2 loops, yarn over and pull through remaining 2 loops)
dec: decrease
flo: front loop only (insert your hook under just the front loop of the stitch)
hdc: half double crochet (yarn over, insert hook, pull up a loop so you have 3 loops on hook, yarn over and pull through all 3)
inc: increase (work two single crochets in the same stitch)
lp: loop
MR: magic ring (an adjustable starting ring that closes completely when you pull the tail)
pm: place marker
rep: repeat
rnd: round
RS: right side
sc: single crochet (insert hook, pull up a loop, yarn over and pull through both loops)
sk: skip
sl st: slip stitch (insert hook, yarn over and pull through both the stitch and the loop on your hook in one motion)
sm: slip marker
sp: space
st(s): stitch(es)
tog: together
WS: wrong side
yo: yarn over
Special Stitches for This Crochet Tutorial
These techniques are specific to this bracelet pattern. Read through them before you start so you understand what each one means.
Cord Slip Stitch (CSS): This creates the bracelet band. Insert your hook into the back bump of the chain only, not both loops. Yarn over and pull through both loops on your hook. Keep your tension very tight and even. This produces a firm, rounded cord texture rather than a flat chain.
Twisted Cord Bind: This forms the adjustable closure. After the band is complete, two separate cord tails thread through a center channel. The ends are then individually slip-stitched into a gathered loop to create a sliding barrel-style knot. Pull both ends to tighten. Pull individual ends to loosen.
Surface Slip Stitch (SSS): This creates the leaf veins. With the right side facing you, insert your hook from front to back through a stitch. Draw up a loop of yarn from the wrong side to the right side. Insert hook one stitch forward and draw yarn through both loops on hook. Do not turn your work. This creates a raised line on the surface.
Picot-3: Chain 3, then slip stitch into the first chain of those 3. This creates a small triangular bump.
Petal Spiral Start (PSS): Make a magic ring, chain 1, work 6 single crochets into the ring. Do not join. Continue working in a continuous outward spiral. Place a stitch marker at the beginning of each round and move it up as you work.
Beaded Slip Stitch (BSS): Thread a bead onto your working yarn before making the slip stitch. Insert hook as normal, slide the bead snug against the work on the wrong side (which becomes the right side of the rose center), yarn over and draw through. The bead sits on the visible face.
Pattern Notes Before You Begin
Note 1: Both threads are held together as one throughout unless specifically stated otherwise. Cut both threads at the same point when fastening off.
Note 2: The band is made first as a single long piece, then folded and assembled before the motifs are attached. Do not skip ahead to the rose.
Note 3: All leaf pieces are made separately and pinned to the band for positioning before any sewing occurs. This lets you adjust placement and achieve symmetry.
Note 4: The rose is worked in continuous rounds without joining. Use a stitch marker to track the start of each round.
Note 5: Gold seed beads go at the rose center, at each leaf stem junction, and at the closure tassel ends. Green metallic beads go at the tassel tips only.
Note 6: The finished band should feel very firm, almost like paracord. If it feels floppy, your tension is too loose. Redo the band with tighter slip stitches or a smaller hook.
Note 7: The right side of the leaves is the side where the vein detail is embroidered. Keep track throughout assembly.
Note 8: All stitch counts appear in parentheses at the end of the relevant row or round.
Note 9: When working the rose spiral, the piece will want to curve inward naturally. Do not fight this. The curling creates the three-dimensional bloom shape.
Step-by-Step Instructions
Section 1: The Band
The band is a two-layer cord structure. You will make two identical cord strips, then layer and join them to form a smooth, slightly padded band.
Band Strip A
Foundation: Chain 110 tightly. (110 ch)
Row 1 (CSS Row): Working into back bumps only, sl st in second ch from hook and in each ch across. Turn. (109 sl st)
Row 2: Chain 1 (does not count as a stitch here or anywhere in the band), working into back loop only of each sl st, sl st in each st across. Turn. (109 sl st)
Row 3: Repeat Row 2. (109 sl st)
Fasten off, leaving a 12-inch tail for seaming.
Band Strip B
Repeat Band Strip A exactly. Do not fasten off the second strip yet.
Checkpoint: Each strip should measure approximately 5.5 inches (14 cm) long and be very firm. If your strips are longer than 6 inches, your tension is too loose. If shorter than 5 inches, your tension is too tight. Adjust and redo before continuing.
Joining the Band Strips
Hold Strip A and Strip B together with wrong sides facing each other. The right side of each strip faces outward on either side of the joined band.
Using the live yarn still attached to Strip B, insert hook through the corresponding edge stitches of both strips simultaneously. Sl st through both layers across the full length of one long edge, working through the outermost loop of each strip. (109 sl st joining seam)
Fasten off and weave in this end securely.
Using the tail from Strip A, join the opposite long edge in the same manner using a tapestry needle and whip stitch. Keep tension even and the band flat. Weave in all ends except the two original starting tails, which become the adjustable closure tails. Do not trim them. They should each be at least 10 inches long. If shorter, thread a new 14-inch length through the band end to replace the tail.
Closure Channel
At the center of the band, place a stitch marker on each side to mark the center 1.5-inch segment. This is where the rose will attach. Set the band aside.
Section 2: The Leaves
You will make 4 large leaves and 4 small leaves, totaling 8 leaves. The 4 large leaves flank the rose directly. The 4 small leaves extend outward along the band in pairs.
Large Leaf (Make 4)
Foundation: Chain 14. (14 ch)
Row 1 (RS): Sc in second ch from hook, sc in next 4 ch, hdc in next 2 ch, dc in next 2 ch, hdc in next 2 ch, sc in next ch, work 3 sc in the last ch (this turns the corner at the leaf tip). Now rotate work and work back along the opposite side of the foundation chain: sc in next ch, hdc in next 2 ch, dc in next 2 ch, hdc in next 2 ch, sc in next 4 ch. Do not join. Place marker in first sc of row. (29 sts total around the leaf)
Row 2: Working in continuous spiral, sl st in the first marked st, ch 1, sc in each st around the outer edge, working 3 sc into the center st of the 3-sc tip group. Join with sl st to first sc. (31 sc)
Fasten off, leaving a 10-inch tail for sewing.
Vein Detail for Large Leaf
Reattach yarn at the base of the leaf on the RS. Using Surface Slip Stitch, work a center vein line from base to tip: SSS in every other stitch along the center column of the leaf all the way to the tip. Fasten off and weave in ends. (approximately 7 SSS along the center vein)
Reattach yarn at one side of the center vein midpoint and work 3 SSS diagonally toward the leaf edge to create a side branch vein. Fasten off. Repeat on the other side to create a matching branch. Repeat for the lower portion of the leaf, making 2 more branch veins on each side closer to the base. You will have 1 center vein and 4 side branch veins per large leaf.
Small Leaf (Make 4)
Foundation: Chain 10. (10 ch)
Row 1 (RS): Sc in second ch from hook, sc in next 2 ch, hdc in next 2 ch, sc in next 2 ch, work 3 sc in the last ch. Rotate work and work back along the opposite side: sc in next 2 ch, hdc in next 2 ch, sc in next 2 ch. Do not join. (21 sts total around the leaf)
Row 2: Sl st in the first st at base, ch 1, sc in each st around, working 3 sc into the center st of the 3-sc tip group. Join with sl st to first sc. (23 sc)
Fasten off, leaving a 10-inch tail for sewing.
Vein Detail for Small Leaf
Reattach yarn at the base on the RS. Work SSS center vein from base to tip (approximately 5 SSS). Work 2 side branch veins on each side using 2 stitches per branch instead of 3. Fasten off and weave in ends.
Checkpoint: Before moving to the rose, you should have 4 large leaves measuring approximately 1 inch long by 0.5 inch wide, and 4 small leaves measuring approximately 0.75 inch long by 0.4 inch wide. All should have completed vein detail. Pin them to a blocking board and mist lightly. Allow to dry fully before assembly.
Section 3: The Rose
The rose is built from a center spiral worked outward in increasing rounds. It naturally coils up to create the bloom. Work in a continuous spiral without joining rounds.
Rose Center
Step 1: Using the PSS technique, make a magic ring. Ch 1, work 6 sc into the ring. Place stitch marker in first sc. Do not join. (6 sc)
Step 2 (Rnd 1 of spiral): Working in continuous spiral, inc in each of the 6 sc around. (12 sc)
Step 3 (Rnd 2): (Sc in next st, inc in next st) 6 times. (18 sc)
Step 4 (Rnd 3): (Sc in next 2 sts, inc in next st) 6 times. (24 sc)
Step 5 (Rnd 4): (Sc in next 3 sts, inc in next st) 6 times. (30 sc)
The disc should measure approximately 0.75 inch in diameter. It will have begun to cup upward at the edges naturally.
Petal Layer 1 (Inner Petals)
Step 6 (Rnd 5): Working now in the front loop only, (ch 3, sc in blo of next 2 sts) 10 times. (10 petal loops created, 30 sts consumed)
Step 7 (Rnd 6): Still in flo, (ch 4, sc in blo of next 3 sts) 8 times, ch 4, sc in blo of next 2 sts. (9 petal loops created)
Petal Layer 2 (Outer Petals)
Step 8 (Rnd 7): Working into the back loop only of the sts from Rnd 4 that were skipped by the flo working in Rnds 5 and 6, join yarn if necessary to the first unworked blo st from Rnd 4. Work (ch 5, sc in next 4 blo sts) 5 times, then ch 5, sc in next 2 blo sts to close the round. (6 large outer petal loops created)
Step 9: Working along the outer edge, sl st into each ch-5 loop around once more to reinforce and stiffen the outer petals. (6 reinforced petal loops)
Rose Stem Extension
Step 10: From the base of the rose, without fastening off, ch 12 (this becomes the first stem tendril). Sl st in second ch from hook and in each remaining ch back toward the rose. Sl st into the rose base. (11 sl st along tendril)
Repeat for a second tendril: ch 10, sl st in second ch from hook and in each remaining ch. Sl st into base. (9 sl st along second tendril)
Fasten off, leaving a 12-inch tail for attaching the rose to the band.
Rose Center Beading
Thread a beading needle with a 20-inch length of thread (single strand of crochet cotton, no metallic). Knot the end. Bring the needle up through the center of the rose from the wrong side. Thread on one gold seed bead and take the needle back down adjacent to where it came up. Repeat until the rose center is densely filled with approximately 8 to 10 gold seed beads arranged in the central spiral area. Knot securely on the WS.
Checkpoint: The finished rose should measure approximately 1.25 inches in diameter, be distinctly three-dimensional with layered petal loops rising from center outward, and have a densely beaded center. The two tendril stems should extend from the base.
Section 4: Assembly
Prepare the Band for Assembly
Fold the band in half to find the true center point. Mark with a stitch marker. The band ends with their long tails should be on opposite sides.
Overlap the band into a loop shape by laying the right end over the left end, forming a 1.5-inch overlap at the center. The overlap is held in place by the decorative panel stitched over it, so do not sew the overlap yet. Slide the band ends through each other loosely to form the adjustable closure mechanism before attaching the rose.
Assembling the Sliding Closure
At the point where the two band ends cross, make a small sliding barrel knot using the working tails. With one tail, chain 6, then wrap this chain tightly twice around both overlapping band strands, then sl st into the first ch. This creates a barrel that can slide along both strands simultaneously. Trim excess tail to 0.25 inch and secure with a small drop of clear nail polish for cotton thread. Repeat with the other tail to create a second barrel knot 0.25 inch away from the first.
Tassel Ends
Each of the four free cord ends now extends beyond the barrel knots. Cut each to 2.5 inches beyond the outermost barrel. Thread 2 gold seed beads and 1 green metallic bead onto each end. Tie an overhand knot after the last bead to secure. Apply a small drop of clear-drying craft glue behind each knot. Allow to dry fully.
Attaching the Leaves
Arrange the leaves on the band with the rose still set aside. Working outward from where the rose will sit, place one large leaf on each side angling upward and outward at approximately 30 degrees from horizontal. Place a second large leaf on each side angling slightly downward at 15 degrees. Place 2 small leaves on each side further along the band, one above and one below the band line.
Using the tapestry needle and sewing tails, stitch each leaf to the band with 6 to 8 small, tight whip stitches around each leaf base. Pull firmly. The leaf bases should overlap the band by approximately 0.25 inch. Weave all ends into the back of the band.
Add 2 gold seed beads at each leaf base junction by threading the beading needle through the band fabric at the join point, threading on 2 beads, and stitching back through.
Attaching the Rose
Center the rose over the band overlap point, covering it completely. Position the two tendril stems so they extend below and to either side of the rose base. Using the 12-inch tail and a tapestry needle, stitch the rose base firmly to the band using a tight circular whip stitch around the entire base perimeter, going through the band fabric at least 8 times. The rose should feel completely immobile when tugged gently. Weave the end through the band layers and trim.
The tendril stems can be tacked to the band surface at their ends with 2 to 3 stitches to prevent them lifting away.
Finishing and Blocking
Mist the entire finished bracelet lightly with water. Pin the leaf motifs flat on a blocking board, spreading the vein lines gently with fingertips. Allow the rose to remain three-dimensional and unpin. Allow to dry completely, at least 4 hours.
Once dry, check all bead attachments by gently tugging each bead. If any moves more than minimally, reinforce with the beading needle.
Trim all ends to within 0.125 inch of the fabric and apply clear-drying fabric glue to each trimmed end using a toothpick. Allow to cure for 1 hour.
Size Customization Tips
For a smaller wrist range of 5.5 to 7 inches, reduce each Band Strip foundation chain by 10 chains. Start with 100 chains, giving 99 working sl st. The finished band will be approximately 5 inches before the overlap.
For a larger wrist range of 7 to 9.5 inches, increase each Band Strip foundation chain by 10 chains. Start with 120 chains, giving 119 working sl st.
The rose and leaf motifs do not need resizing. Only the band length changes.
For a wider band, add one additional Row 2 repetition to each strip, giving 4 rows of sl st per strip instead of 3.
Care Instructions
Hand wash only in cool water with gentle dish soap or wool wash. Do not wring or twist. Press gently between clean towels to remove excess water. Reshape while damp and air dry flat. Do not machine wash, machine dry, or iron. Store flat or loosely coiled to protect the three-dimensional rose shape.
Keep away from prolonged moisture as metallic thread may tarnish. If tarnishing occurs, a light buffing with a dry soft cloth will restore some luster. Check bead attachments every few months of regular wear.
Thank you so much for choosing this Emerald Botanical Bracelet crochet pattern. This is one of those projects that looks incredibly intricate but builds logically piece by piece. Take your time with each section and trust the process.
I would love to see your finished bracelet! If you make one, please save this pattern to your Pinterest boards so you can find it again easily. And drop a comment below to share how it turned out. Your creations always inspire me and other makers in this community.
You Might Also Like
- Sage Green Botanical Lace Sundress Free Pattern
- Terracotta Sunset Floral Crochet Blouse Free Pattern
- Sunshine Bumble Bee Baby Dress Free Crochet Pattern
- Charcoal Gray Bathroom Storage Basket Free Crochet Pattern
