
My best friend called me in a panic last spring. Her sister was throwing a bee-themed baby shower in three weeks, and she desperately needed a handmade gift that would stand out. "Something adorable but not just another blanket," she pleaded. I grabbed my hook that night and started sketching ideas.
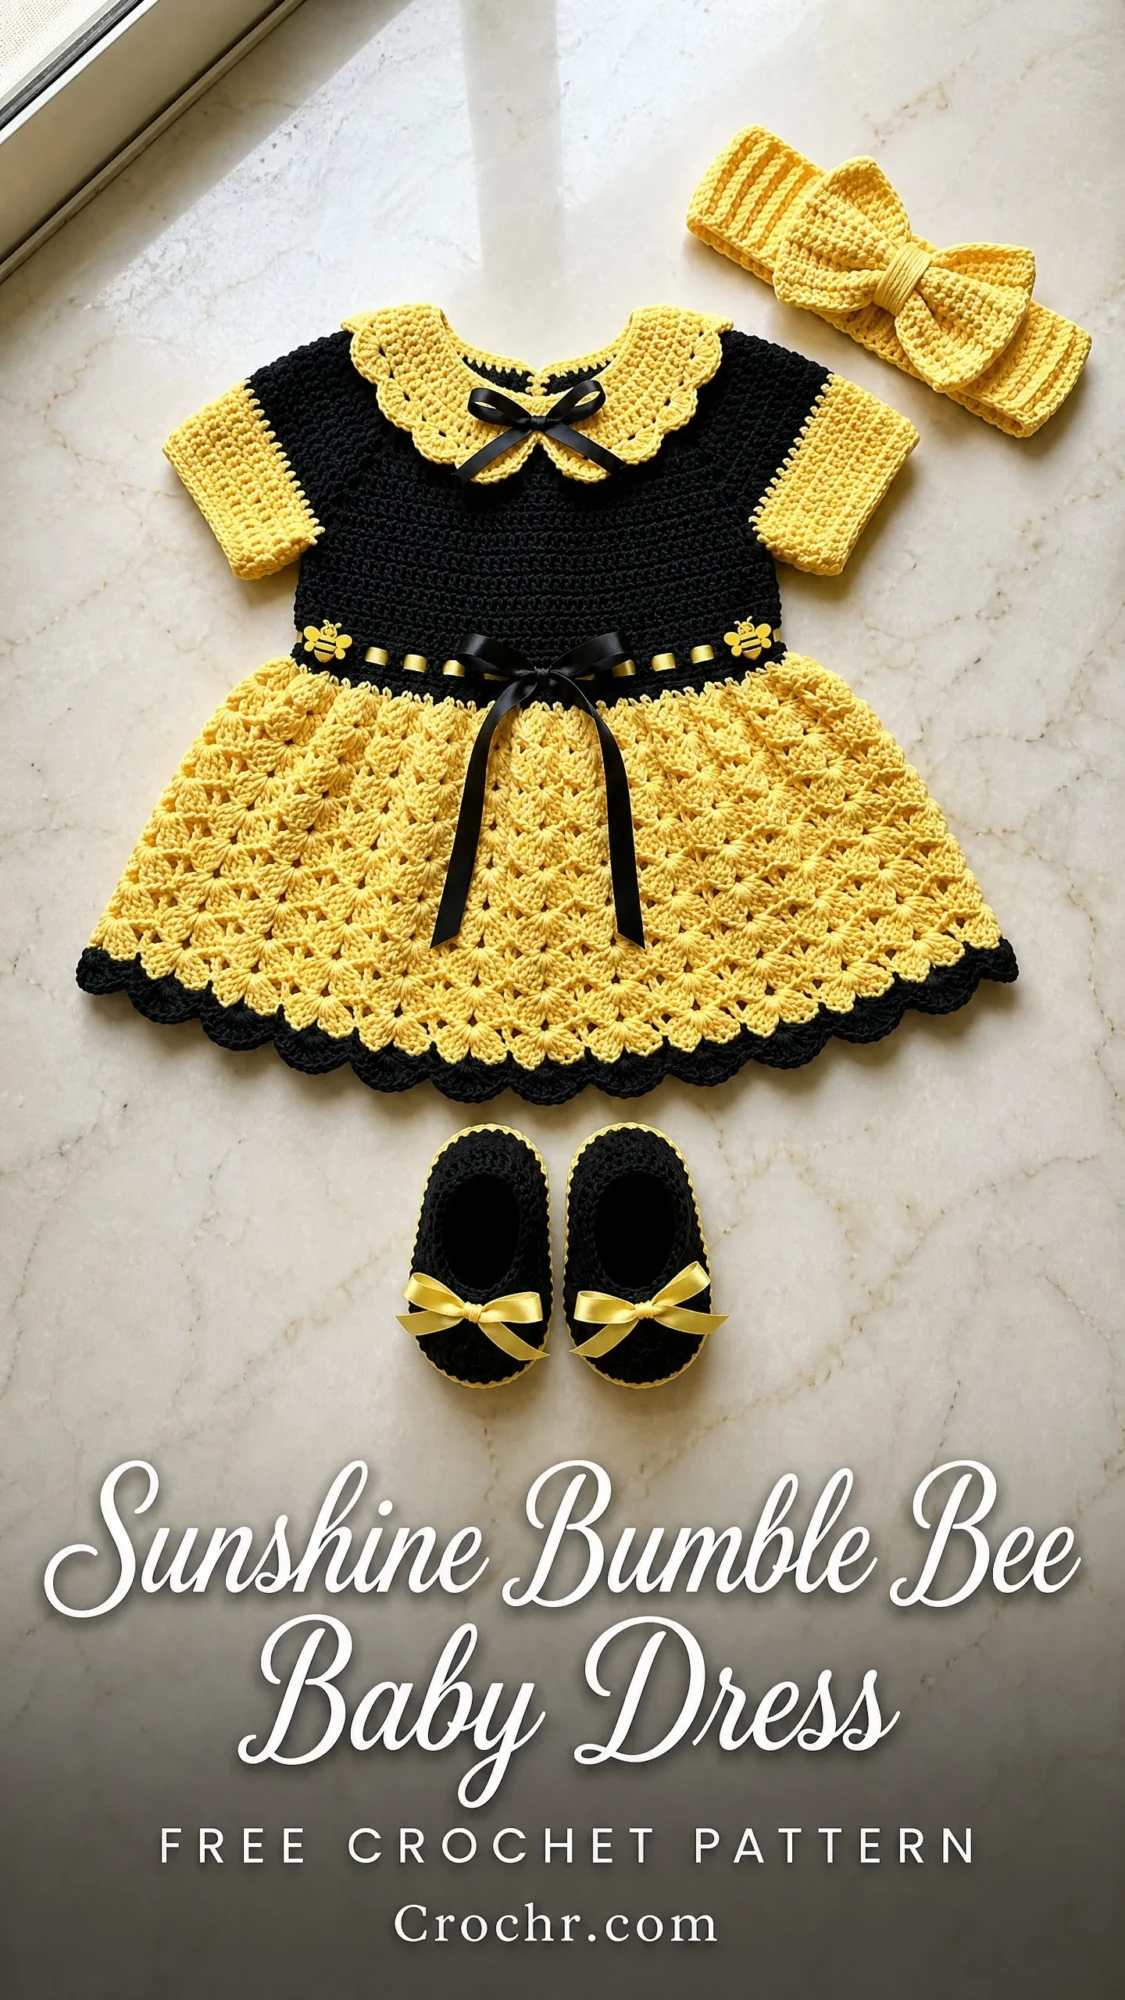
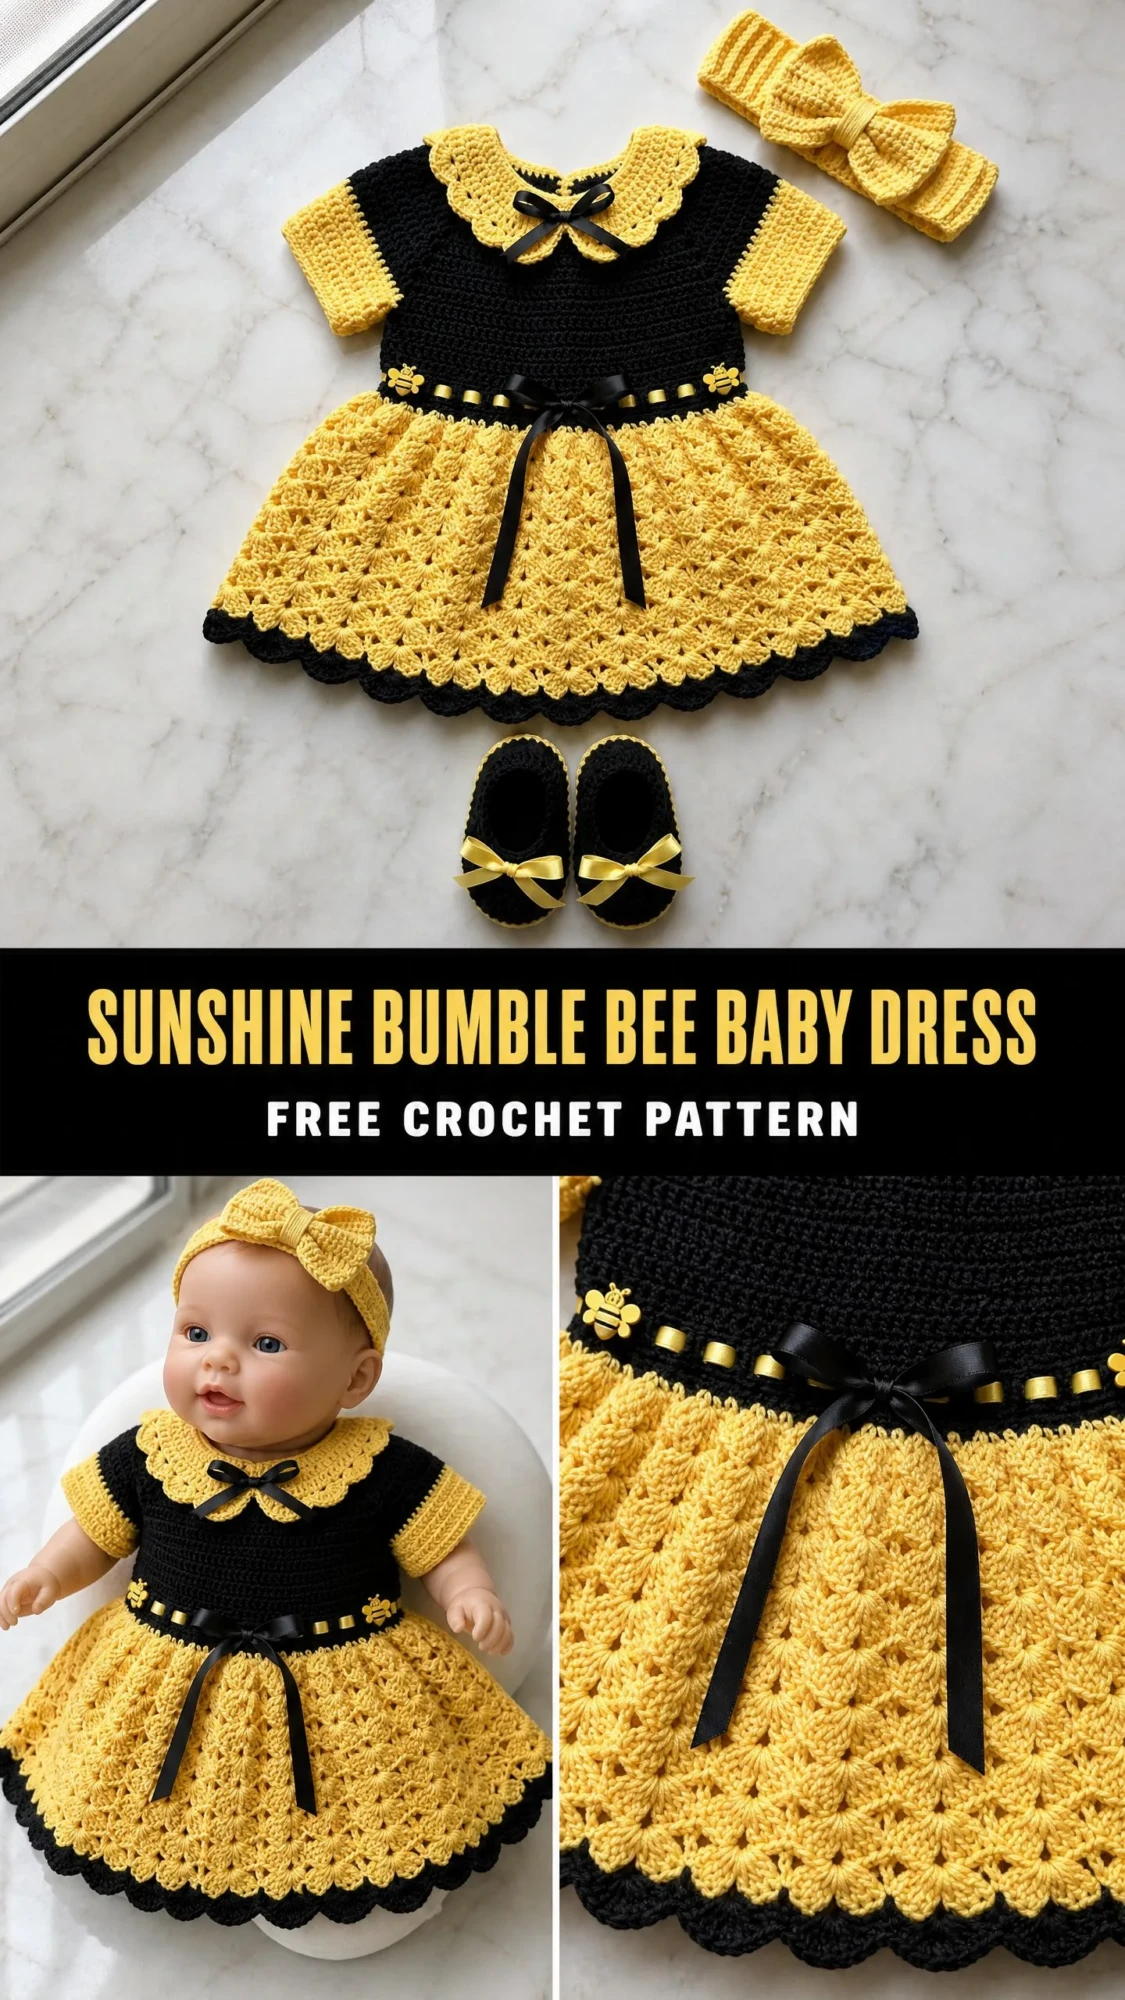
What emerged from that late-night designing session became one of my absolute favorite baby projects. This bumble bee dress set has everything. A sweet black bodice with golden yellow sleeves. A flouncy shell stitch skirt that swishes perfectly. A Peter Pan collar with delicate scalloped edges. Matching booties and a headband with a crocheted bow. The whole ensemble just screams "put me on Instagram."
I’ve made this set four times now for different baby showers, and every single time the mom-to-be tears up when she opens it. There’s something about those cheerful yellow and black stripes that captures pure joy. Let me walk you through every stitch so you can create this magic too.
Why This Baby Dress Set Works So Well
This pattern hits the sweet spot between impressive and achievable. The bodice uses simple single crochet (sc) throughout, which means you’re building confidence before tackling the fancier shell stitch skirt. The construction is logical. You make flat pieces, seam them together, then pick up stitches and work the skirt in rounds.
The sizing covers newborn to 3 months and 3 to 6 months. I’ve included both sizes throughout the instructions with the larger size in parentheses. The finished dress measures approximately 11 inches from shoulder to hem for the smaller size and 12 inches for the larger.
Skill level sits at intermediate. You should feel comfortable working in both rows and rounds, changing colors cleanly, and seaming garment pieces. If you’ve made a basic baby sweater before, you can absolutely handle this.
Materials You’ll Need for the Bumble Bee Baby Dress
Gather everything before you start. Nothing kills momentum like hunting for a yarn needle mid-project.
Yarn:
I recommend Lion Brand Pound of Love in Lemon Drop and Black for budget-friendly durability. Paintbox Yarns Simply DK in Banana Cream and Pure Black also works beautifully with excellent stitch definition. For an heirloom piece, try Scheepjes Catona mercerized cotton.
Hook: US size E-4 / 3.5 mm crochet hook
Notions:
Gauge Information
Getting gauge right matters for clothing. A too-loose dress looks sloppy. A too-tight dress won’t fit over baby’s head.
Gauge: 18 stitches and 20 rows equals 4 inches in single crochet using Color B.
Shell stitch gauge: 3 complete shell repeats equals approximately 4 inches wide. 4 rows of shell pattern equals approximately 2.5 inches tall.
Make a swatch. I know, I know. But seriously, make a swatch.
Abbreviations and Special Stitches
Let me walk you through every stitch you’ll encounter.
Basic abbreviations:
Shell Stitch: Work 5 double crochet all into the same stitch. This creates a fan shape. The repeat pattern is: skip 2 stitches, work 5 dc in next stitch, skip 2 stitches, sc in next stitch. Each repeat uses 6 stitches.
Scallop Edging: Slip stitch in next stitch, chain 3, 2 dc in same stitch, slip stitch in next stitch. Repeat across for that gorgeous bumpy border.
Buttonhole: Chain 2, skip 2 stitches. On the next row, work 2 sc into the chain-2 space.
Step by Step Crochet Pattern Instructions
Section 1: Front Bodice Panel
The front bodice is worked flat in rows using Color B (black).
Using Color B, chain 35 (39).
Row 1 (RS): Sc in 2nd ch from hook and in each ch across. Turn. (34 sc, or 38 sc for larger size)
Row 2: Ch 1, sc in each st across. Turn. (34 sc, 38 sc)
Rows 3 through 6: Repeat Row 2. Turn after each row. (34 sc, 38 sc)
After Row 6, your piece should measure approximately 1.25 inches tall.
Armhole Shaping:
Row 7: Ch 1, sl st in first 3 sts, ch 1, sc in next st and in each st across to last 3 sts, leave last 3 sts unworked. Turn. (28 sc, 32 sc)
Row 8: Ch 1, sc2tog, sc in each st across to last 2 sts, sc2tog. Turn. (26 sc, 30 sc)
Row 9: Ch 1, sc2tog, sc in each st across to last 2 sts, sc2tog. Turn. (24 sc, 28 sc)
Row 10: Ch 1, sc in each st across. Turn. (24 sc, 28 sc)
Rows 11 through 18: Ch 1, sc in each st across. Turn. (24 sc, 28 sc each row)
Fasten off Color B and set aside. Your front bodice should measure approximately 7.5 inches wide and 3.75 inches tall.
Section 2: Back Bodice Panels
You’ll make two back panels. The right panel is plain. The left panel includes buttonholes.
Right Back Panel:
Using Color B, chain 20 (22).
Row 1 (RS): Sc in 2nd ch from hook and in each ch across. Turn. (19 sc, 21 sc)
Rows 2 through 6: Ch 1, sc in each st across. Turn. (19 sc, 21 sc)
Row 7: Ch 1, sl st in first 3 sts, ch 1, sc in each st across. Turn. (16 sc, 18 sc)
Row 8: Ch 1, sc in each st across to last 2 sts, sc2tog. Turn. (15 sc, 17 sc)
Row 9: Ch 1, sc in each st across to last 2 sts, sc2tog. Turn. (14 sc, 16 sc)
Rows 10 through 18: Ch 1, sc in each st across. Turn. (14 sc, 16 sc)
Fasten off.
Left Back Panel (with buttonholes):
Using Color B, chain 20 (22).
Row 1 (RS): Sc in 2nd ch from hook and in each ch across. Turn. (19 sc, 21 sc)
Rows 2 through 6: Ch 1, sc in each st across. Turn. (19 sc, 21 sc)
Row 7: Ch 1, sc in each st across to last 3 sts, leave last 3 sts unworked. Turn. (16 sc, 18 sc)
Row 8: Ch 1, sc2tog, sc in each st across. Turn. (15 sc, 17 sc)
Row 9: Ch 1, sc2tog, sc in each st across. Turn. (14 sc, 16 sc)
Rows 10 through 13: Ch 1, sc in each st across. Turn. (14 sc, 16 sc)
Row 14 (buttonhole row): Ch 1, sc in first 2 sts, ch 2, sk 2 sts, sc in each st across to last 4 sts, ch 2, sk 2 sts, sc in last 2 sts. Turn.
Row 15: Ch 1, sc in first 2 sts, 2 sc in ch-2 sp, sc in each st across to next ch-2 sp, 2 sc in ch-2 sp, sc in last 2 sts. Turn. (14 sc, 16 sc)
Row 16: Ch 1, sc in first 2 sts, ch 2, sk 2 sts, sc in each remaining st across. Turn.
Row 17: Ch 1, sc in each st across, working 2 sc into ch-2 sp. Turn. (14 sc, 16 sc)
Row 18: Ch 1, sc in each st across. Turn. (14 sc, 16 sc)
Fasten off.
Seaming the Bodice:
With right sides together, sew shoulder seams by joining the top 7 (8) stitches on each side of the front panel to the top edge of each back panel. Then join side seams from waist up to armhole edges, leaving armholes open.
Section 3: Peter Pan Collar
This sweet collar is worked flat in Color A (yellow) and sewn on after completion.
Using Color A, chain 23.
Row 1 (WS): Sc in 2nd ch from hook and in each ch across. Turn. (22 sc)
Row 2 (RS): Ch 1, 2 sc in first st, sc in next 4 sts, 2 sc in next st, sc in next 9 sts, 2 sc in next st, sc in next 4 sts, 2 sc in last st. Turn. (26 sc)
Row 3: Ch 1, sc in each st across. Turn. (26 sc)
Row 4: Ch 1, 2 sc in first st, sc in next 5 sts, 2 sc in next st, sc in next 11 sts, 2 sc in next st, sc in next 5 sts, 2 sc in last st. Turn. (30 sc)
Row 5: Ch 1, sc in each st across. Turn. (30 sc)
Scallop Edge: Join Color B to corner of outer edge. Work (sl st in next st, ch 1, 4 dc in same st, sl st in next st) across. Fasten off.
Sew the collar to the neckline with the wrong side of the collar against the right side of the bodice. Tie a small bow with black satin ribbon and tack it to the center front of the collar.
Section 4: Sleeves
Sleeves are picked up around the armhole and worked downward in joined rounds.
Using Color B, join yarn at center underarm seam.
Round 1: Ch 1, sc evenly around armhole opening, picking up approximately 18 (20) sc. Join with sl st. (18 sc, 20 sc)
Round 2: Ch 1, sc in each st around. Join. (18 sc, 20 sc)
Round 3: Ch 1, sc2tog, sc in each st around to last 2 sts, sc2tog. Join. (16 sc, 18 sc)
Rounds 4 through 5: Ch 1, sc in each st around. Join. (16 sc, 18 sc)
Round 6: Ch 1, sc2tog, sc in each st around to last 2 sts, sc2tog. Join. (14 sc, 16 sc)
Rounds 7 through 9: Ch 1, sc in each st around. Join. (14 sc, 16 sc)
Edging: Join Color A, ch 1, sc in each st around. Join. Fasten off.
Repeat for second sleeve.
Section 5: Shell Stitch Skirt
The skirt is worked in joined rounds, picked up at the bodice waist.
Pickup Round: With RS facing and Color A, join at center back waist edge. Ch 1, sc evenly around entire waist edge, adjusting to 54 (60) sc total. Join. (54 sc, 60 sc)
Waistband (optional): Join Color B, ch 1, sc in each st around. Join. Then ch 1, sc in BLO of each st around. Join. Thread black ribbon through the BLO spaces and tie at center front. Add bee buttons along ribbon.
Increase Round: Ch 1, (sc in next 2 sts, 2 sc in next st) around. Join. (72 sc for newborn, 78 sc for larger size)
Shell Pattern Round 4: Ch 1, sc in first st, sk 2 sts, 5 dc in next st, sk 2 sts, (sc in next st, sk 2 sts, 5 dc in next st, sk 2 sts) 11 times. Join. (12 shells)
Round 5: Ch 3, 2 dc in same sc, sc in center dc of first shell, (5 dc in next sc, sc in center dc of next shell) 11 times, 2 dc in same sc as ch-3. Join. (12 shells)
Round 6: Ch 1, sc in same sp, sk 2 dc, 5 dc in next sc, sk 2 dc, (sc in center of shell, sk 2 dc, 5 dc in next sc, sk 2 dc) 11 times. Join. (12 shells)
Rounds 7 through 11: Repeat Rounds 5 and 6 alternately.
Hem Edging: Join Color B, ch 1, sc in each st around (approximately 72 sc). Join. Then work scallop edging: (sl st in next st, ch 1, 4 dc in same st, sl st in next st, sl st in next st) around. Fasten off.
Section 6: Headband with Bow
Using Color A, chain 7.
Row 1: Sc in 2nd ch from hook and in each ch across. Turn. (6 sc)
Rows 2 through 60: Ch 1, sc in each st across. Turn. (6 sc each row)
The piece should measure 14 inches. Fasten off, leaving a long tail. Sew short ends together to form a loop.
Bow: Chain 7. Work 16 rows of 6 sc each. Pinch the center tightly and wrap with a 10-inch length of Color A yarn. Secure at back. Sew bow to headband center.
Section 7: Booties
Sole:
Using Color B, make a magic ring.
Round 1: 6 sc in ring. Join. (6 sc)
Round 2: 2 sc in each st around. Join. (12 sc)
Round 3: (Sc in next st, 2 sc in next st) 6 times. Join. (18 sc)
Round 4: (Sc in next 2 sts, 2 sc in next st) 6 times. Join. (24 sc)
Round 5: (Sc in next 3 sts, 2 sc in next st) 6 times. Join. (30 sc)
Round 6: Working in BLO, sc in each st around. Join. (30 sc)
Upper Foot Rounds 7 through 10: Ch 1, sc in each st around. Join. (30 sc)
Toe Shaping:
Round 11: Ch 1, sc in first 10 sts, (sc2tog) 5 times, sc in last 10 sts. Join. (25 sc)
Round 12: Ch 1, sc in first 9 sts, (sc2tog) 3 times, sc in last 10 sts. Join. (22 sc)
Round 13: Ch 1, sc in first 8 sts, (sc2tog) 3 times, sc in last 8 sts. Join. (19 sc)
Join Color A and work 1 round of sc for the cuff edging. Fasten off. Add yellow satin ribbon bows to the front of each bootie.
Finishing Your Bumble Bee Baby Dress Set
Weave in all ends. Block the pieces gently if desired, especially the skirt to open up the shell stitches. Sew buttons to the right back panel, aligning with the buttonholes on the left panel.
For the waistband, thread the black satin ribbon through the BLO round, weaving in and out. Tie in a bow at center front. If using bee buttons or appliques, sew them evenly spaced along the ribbon. Always ensure any small embellishments are securely attached for baby safety.
Time Investment for This Crochet Tutorial
Plan for approximately 12 to 18 hours total. The dress takes about 8 to 11 hours, the headband needs 1 to 2 hours, and the booties require 2 to 4 hours. Breaking it into smaller sessions makes the project feel manageable. I usually complete the bodice in one evening, the skirt over a weekend, and finish with the accessories.
Tips for Success
Work your color changes on the last yarn over of the stitch before the color change. This keeps your color transitions crisp and clean.
The shell stitch skirt looks complicated but follows a simple rhythm once you get going. After 2 or 3 rounds, your hands will know what to do.
If your gauge is slightly off, go up or down a hook size. A half-size adjustment often solves the problem.
The Peter Pan collar should lay flat against the bodice. If it cups or ripples, check your increase placement in Rows 2 and 4.
This pattern makes an incredible baby shower gift. The matching headband and booties elevate it from "nice handmade dress" to "keepsake heirloom piece." Package it in a gift box with tissue paper and watch the recipient’s face light up.
I really hope you love making this bumble bee baby dress as much as I loved designing it. Pin this pattern to your crochet boards on Pinterest so you can find it when you’re ready to start. And please, drop a comment below if you make this set. I would absolutely love to see your finished projects and hear which colorways you chose!
You Might Also Like
- Navy Blue Nautical Barrel Purse Free Crochet Pattern
- Mint Green Spring Highland Cow Amigurumi Free Crochet Pattern
- Pastel Rainbow Cloud Dress Free Crochet Pattern
- Blush Pink Feminine Shell Bag Free Crochet Pattern
