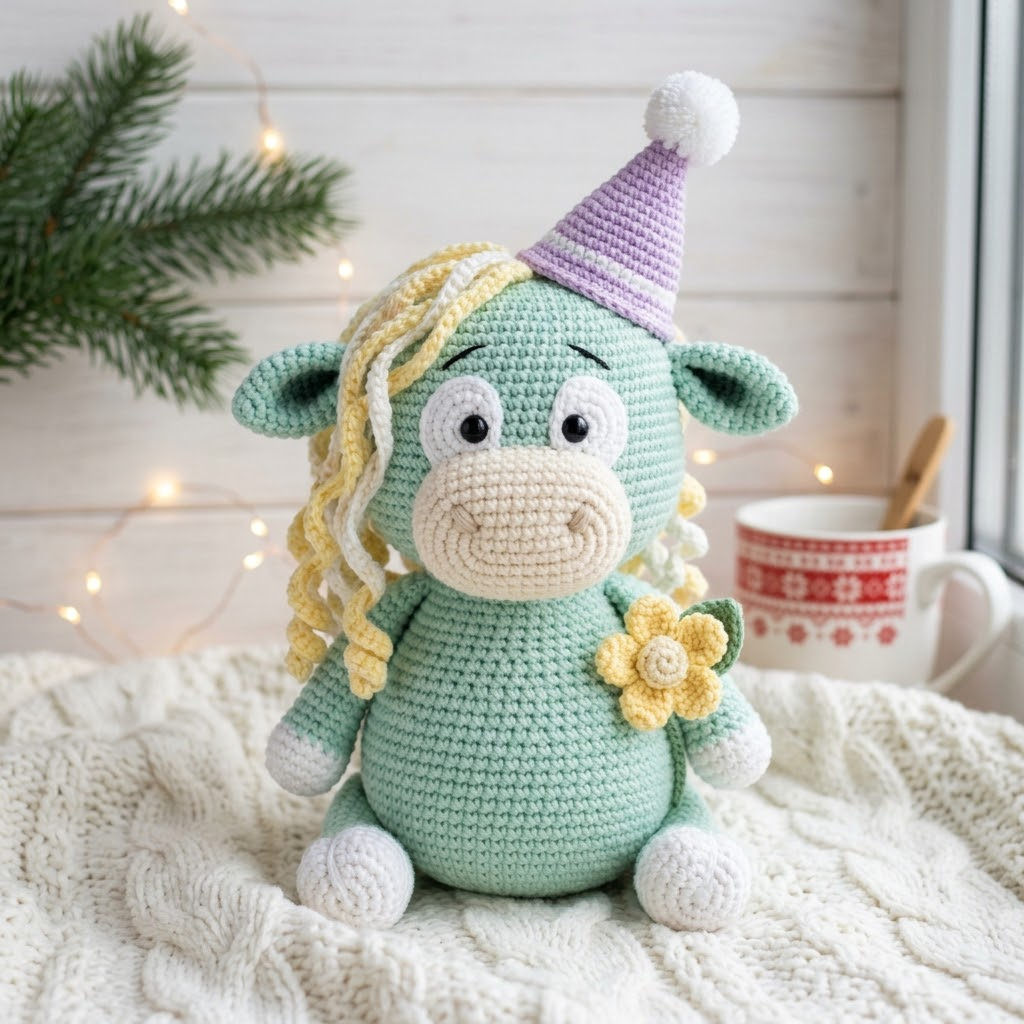
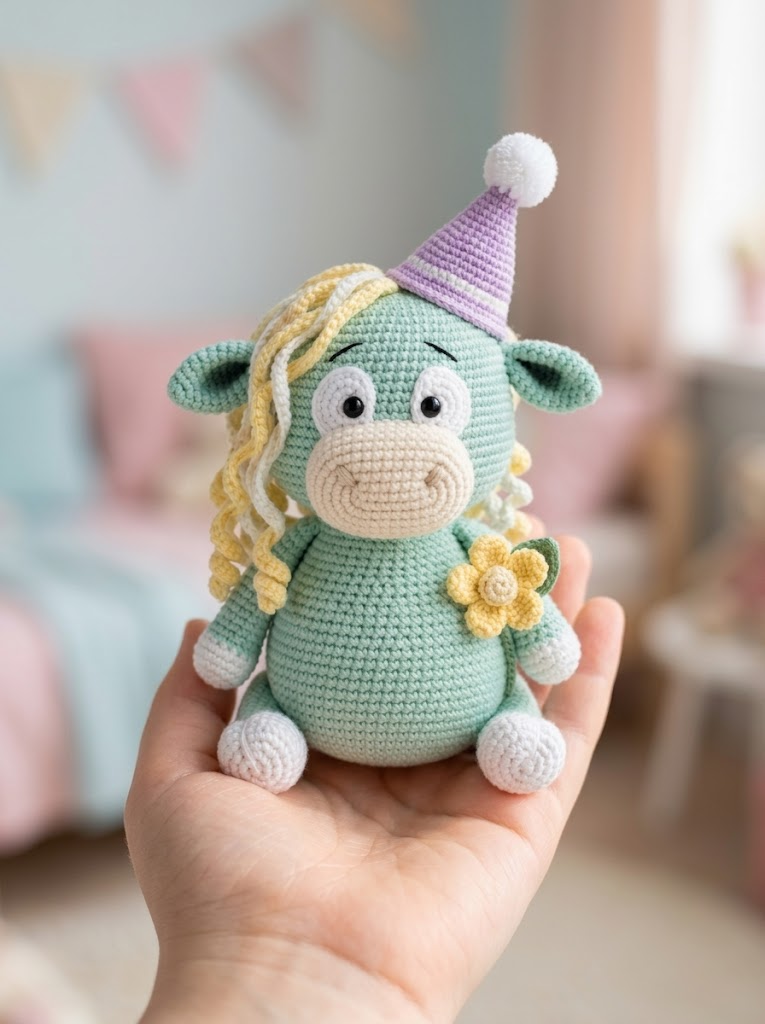
Oh, this little one stole my heart the moment I finished stuffing her chubby body. This mint green spring highland cow amigurumi is the perfect blend of whimsy and sweetness, complete with flowing blonde curls, a lavender party hat, and the cutest yellow flower accent. She sits about 8 inches tall and makes an absolutely darling handmade gift, nursery decoration, or just a cheerful companion for your desk.

If you have basic amigurumi experience, you can absolutely make this highland cow crochet pattern. We are working in continuous rounds with simple increases and decreases. The trickiest part is attaching all those curly locks, but I will walk you through every single step. Take your time, trust your hands, and you will have your own springtime cow friend before you know it.
Why You Will Love This Highland Cow Crochet Pattern
Highland cows are having a major moment right now, and honestly, I understand why. Those shaggy bangs and sweet faces are irresistible. This amigurumi version captures all that charm while adding a festive spring twist with the party hat and flower embellishment.
What makes this step by step crochet tutorial special is the attention to detail. The raised muzzle with embroidered smile, the dimensional ears, those cascading curls in yellow and cream. Every element comes together to create a toy with real personality.
This pattern is also wonderfully portable. Most pieces are small enough to tuck into a project bag and work on during lunch breaks or evening TV time.
Materials Needed
Gather these supplies before you begin:
Yarn (worsted weight, category 4):
Hook:
Other Supplies:
Abbreviations and Stitch Definitions
Let me explain every abbreviation before we dive in. These definitions will help you follow along confidently.
Magic ring (MR): An adjustable starting loop that pulls completely closed. You wrap yarn around your fingers, insert your hook, pull up a loop, then chain one to secure it. Work your first round stitches into this ring, then pull the tail tight to close the center hole.
Chain (ch): The foundation stitch. Yarn over, pull through the loop on your hook. For example, ch 6 means make 6 chain stitches in a row.
Single crochet (sc): Insert hook into stitch, yarn over and pull up a loop (2 loops on hook), yarn over and pull through both loops. This is your bread and butter stitch for amigurumi.
Increase (inc): Work 2 single crochet stitches into the same stitch. This adds one stitch to your total count.
Invisible decrease (invdec): Insert hook through the front loops only of the next 2 stitches, yarn over, pull through both front loops, yarn over, pull through both loops on hook. This creates a tidier decrease than the standard method.
Slip stitch (sl st): Insert hook, yarn over, pull through stitch and loop on hook in one motion. Used for joining and finishing.
Fasten off (FO): Cut yarn leaving a tail, pull through final loop, tighten to secure.
Gauge and Sizing Notes
For amigurumi, you want a tight gauge so stuffing does not peek through. If you see white fiberfill showing between stitches, try going down one hook size.
Using the recommended materials, your finished highland cow will measure approximately 8 inches tall when seated and about 5 inches wide at the body.
The Pattern
Work in continuous spirals unless otherwise noted. Place a stitch marker at the beginning of each round and move it up as you go. This keeps you from losing your place.
Head (Mint Green)
Rnd 1: MR, 6 sc into ring. (6 sts)
Rnd 2: Inc in each st around. (12 sts)
Rnd 3: *Sc 1, inc* repeat around. (18 sts)
Rnd 4: *Sc 2, inc* repeat around. (24 sts)
Rnd 5: *Sc 3, inc* repeat around. (30 sts)
Rnd 6: *Sc 4, inc* repeat around. (36 sts)
Rnd 7: *Sc 5, inc* repeat around. (42 sts)
Rnds 8 to 14: Sc in each st around. (42 sts) — 7 rounds total
Rnd 15: *Sc 5, invdec* repeat around. (36 sts)
Rnd 16: *Sc 4, invdec* repeat around. (30 sts)
Insert safety eyes between rounds 10 and 11, approximately 8 stitches apart. Add white eye patches first if desired by cutting small circles of white yarn or crocheting tiny circles (MR, 6 sc, sl st, FO) and positioning behind each eye.
Rnd 17: *Sc 3, invdec* repeat around. (24 sts)
Begin stuffing firmly.
Rnd 18: *Sc 2, invdec* repeat around. (18 sts)
Rnd 19: *Sc 1, invdec* repeat around. (12 sts)
Continue stuffing until nicely rounded.
Rnd 20: Invdec around. (6 sts)
FO, leave a long tail, sew hole closed.
Muzzle (Cream)
Rnd 1: MR, 6 sc into ring. (6 sts)
Rnd 2: Inc in each st around. (12 sts)
Rnd 3: *Sc 1, inc* repeat around. (18 sts)
Rnd 4: *Sc 2, inc* repeat around. (24 sts)
Rnds 5 to 7: Sc in each st around. (24 sts) — 3 rounds
Rnd 8: Working in back loops only, sc in each st around. (24 sts)
This creates a raised edge that gives the muzzle dimension.
Rnds 9 to 10: Sc in each st around. (24 sts)
Sl st to next st, FO leaving a long tail for sewing.
Stuff muzzle lightly. Using pink embroidery floss, stitch a curved smile and two small nostril dots. Sew muzzle to lower front of head, positioned below the eyes.
Body (Mint Green)
Rnd 1: MR, 6 sc into ring. (6 sts)
Rnd 2: Inc in each st around. (12 sts)
Rnd 3: *Sc 1, inc* repeat around. (18 sts)
Rnd 4: *Sc 2, inc* repeat around. (24 sts)
Rnd 5: *Sc 3, inc* repeat around. (30 sts)
Rnd 6: *Sc 4, inc* repeat around. (36 sts)
Rnd 7: *Sc 5, inc* repeat around. (42 sts)
Rnd 8: *Sc 6, inc* repeat around. (48 sts)
Rnds 9 to 20: Sc in each st around. (48 sts) — 12 rounds
Rnd 21: *Sc 6, invdec* repeat around. (42 sts)
Rnd 22: Sc in each st around. (42 sts)
Rnd 23: *Sc 5, invdec* repeat around. (36 sts)
Rnd 24: Sc in each st around. (36 sts)
Rnd 25: *Sc 4, invdec* repeat around. (30 sts)
Begin stuffing body firmly. Keep stuffing as you decrease.
Rnd 26: *Sc 3, invdec* repeat around. (24 sts)
Rnd 27: *Sc 2, invdec* repeat around. (18 sts)
Sl st to next st, FO leaving a very long tail for attaching head.
Arms (Make 2, Mint Green)
Rnd 1: MR, 6 sc into ring. (6 sts)
Rnd 2: Inc in each st around. (12 sts)
Rnds 3 to 5: Sc in each st around. (12 sts) — 3 rounds
Rnd 6: *Sc 1, invdec* repeat around. (8 sts)
Rnds 7 to 14: Sc in each st around. (8 sts) — 8 rounds
Sl st, FO leaving tail for sewing. Stuff lower portion lightly, leave upper arm unstuffed for flexibility.
Legs (Make 2)
Foot sole (cream):
Rnd 1: Ch 5. Starting in 2nd ch from hook: sc 3, 3 sc in last ch. Working along opposite side of chain: sc 2, inc in last st. (10 sts)
Rnd 2: Inc, sc 2, inc 3 times, sc 2, inc 2 times. (16 sts)
Rnd 3: Sc 1, inc, sc 3, *sc 1, inc* 3 times, sc 3, *sc 1, inc* 2 times. (22 sts)
Rnd 4: Working in back loops only, sc in each st around. (22 sts)
Change to mint green.
Rnds 5 to 6: Sc in each st around. (22 sts)
Rnd 7: Sc 7, invdec 4 times, sc 7. (18 sts)
Rnd 8: Sc 5, invdec 4 times, sc 5. (14 sts)
Rnds 9 to 14: Sc in each st around. (14 sts) — 6 rounds
Sl st, FO leaving long tail. Stuff legs firmly.
Ears (Make 2)
Outer ear (mint green):
Rnd 1: MR, 6 sc. (6 sts)
Rnd 2: *Sc 1, inc* repeat around. (9 sts)
Rnd 3: *Sc 2, inc* repeat around. (12 sts)
Rnds 4 to 5: Sc in each st around. (12 sts)
Sl st, FO leaving tail.
Inner ear (cream):
Work rounds 1 to 3 only. FO leaving tail. Sew inner ear centered on outer ear. Flatten ear and sew to sides of head.
Party Hat (Lavender)
Rnd 1: MR, 4 sc. (4 sts)
Rnd 2: *Sc 1, inc* repeat around. (6 sts)
Rnd 3: Sc in each st around. (6 sts)
Rnd 4: *Sc 2, inc* repeat around. (8 sts)
Rnd 5: Sc in each st around. (8 sts)
Rnd 6: *Sc 3, inc* repeat around. (10 sts)
Rnd 7: Sc in each st around. (10 sts)
Rnd 8: *Sc 4, inc* repeat around. (12 sts)
Rnds 9 to 10: Sc in each st around. (12 sts)
Rnd 11: *Sc 5, inc* repeat around. (14 sts)
Rnds 12 to 13: Sc in each st around. (14 sts)
Rnd 14: *Sc 6, inc* repeat around. (16 sts)
Rnd 15: Sc in each st around. (16 sts)
Sl st, FO leaving tail.
For the pom pom, make a small white puff using a fork or pom pom maker, or crochet a tiny ball (MR, 6 sc, inc around to 12 sts, 2 rounds even, decrease to close). Attach to hat tip.
Hair Curls
This is the fun part that gives your highland cow her signature look.
Cut 40 to 50 strands of yellow and white yarn, each about 14 inches long. Using your hook, pull each strand through a stitch along the top front of the head, then fold in half.
To create curls, dampen the strands slightly and wrap around a pencil or straw. Let dry completely, then release. Alternatively, braid sections loosely for wavy texture.
Arrange curls to cascade around the face and over the party hat band area.
Flower Embellishment
Flower center (yellow):
Rnd 1: MR, 5 sc. Do not close ring completely.
Petals: *Ch 3, sl st in same st, sl st in next st* repeat 5 times around center.
FO leaving tail.
Leaves (green):
Ch 8. Starting in 2nd ch from hook: sl st, sc, hdc, dc, hdc, sc, sl st. FO.
Make 2 leaves. Attach flower and leaves to body front.
Assembly Instructions
1. Sew head to body, adding extra stuffing at the neck junction for stability.
2. Attach arms at shoulder height, angled slightly forward.
3. Position legs at front bottom of body so cow sits upright.
4. Sew ears to sides of head.
5. Attach party hat, tilted slightly to one side.
6. Secure hair curls, arranging them naturally.
7. Sew flower embellishment to body front.
Weave in all ends. Give your cow a gentle squeeze to distribute stuffing evenly.
Helpful Tips for Success
Tension matters. Amigurumi works best when your stitches are tight and consistent. If your first attempt feels loose, try a smaller hook.
Stuff as you go. It is much harder to stuff evenly once pieces are nearly closed. Add fiberfill in small amounts, poking it into corners with the eraser end of a pencil.
Use locking stitch markers. They will not slip out of your work like bobby pins or scraps of yarn.
Take photos before sewing. Pin pieces in place and snap a picture. This helps you visualize placement and catch any symmetry issues.
You Did It
Thank you so much for choosing this mint green highland cow amigurumi crochet pattern for your next project. I genuinely hope you enjoy every stitch of the process and absolutely love your finished creation.
She is going to look adorable sitting on a shelf, peeking out of a gift basket, or snuggled up with her new best friend. The combination of that soft mint body, flowing blonde curls, and sweet party hat makes her such a joyful piece.
I would absolutely love to see your version when she is finished. Tag me on Instagram or share in my Facebook group. Seeing your makes is honestly the best part of sharing patterns. Happy crocheting, friend.
