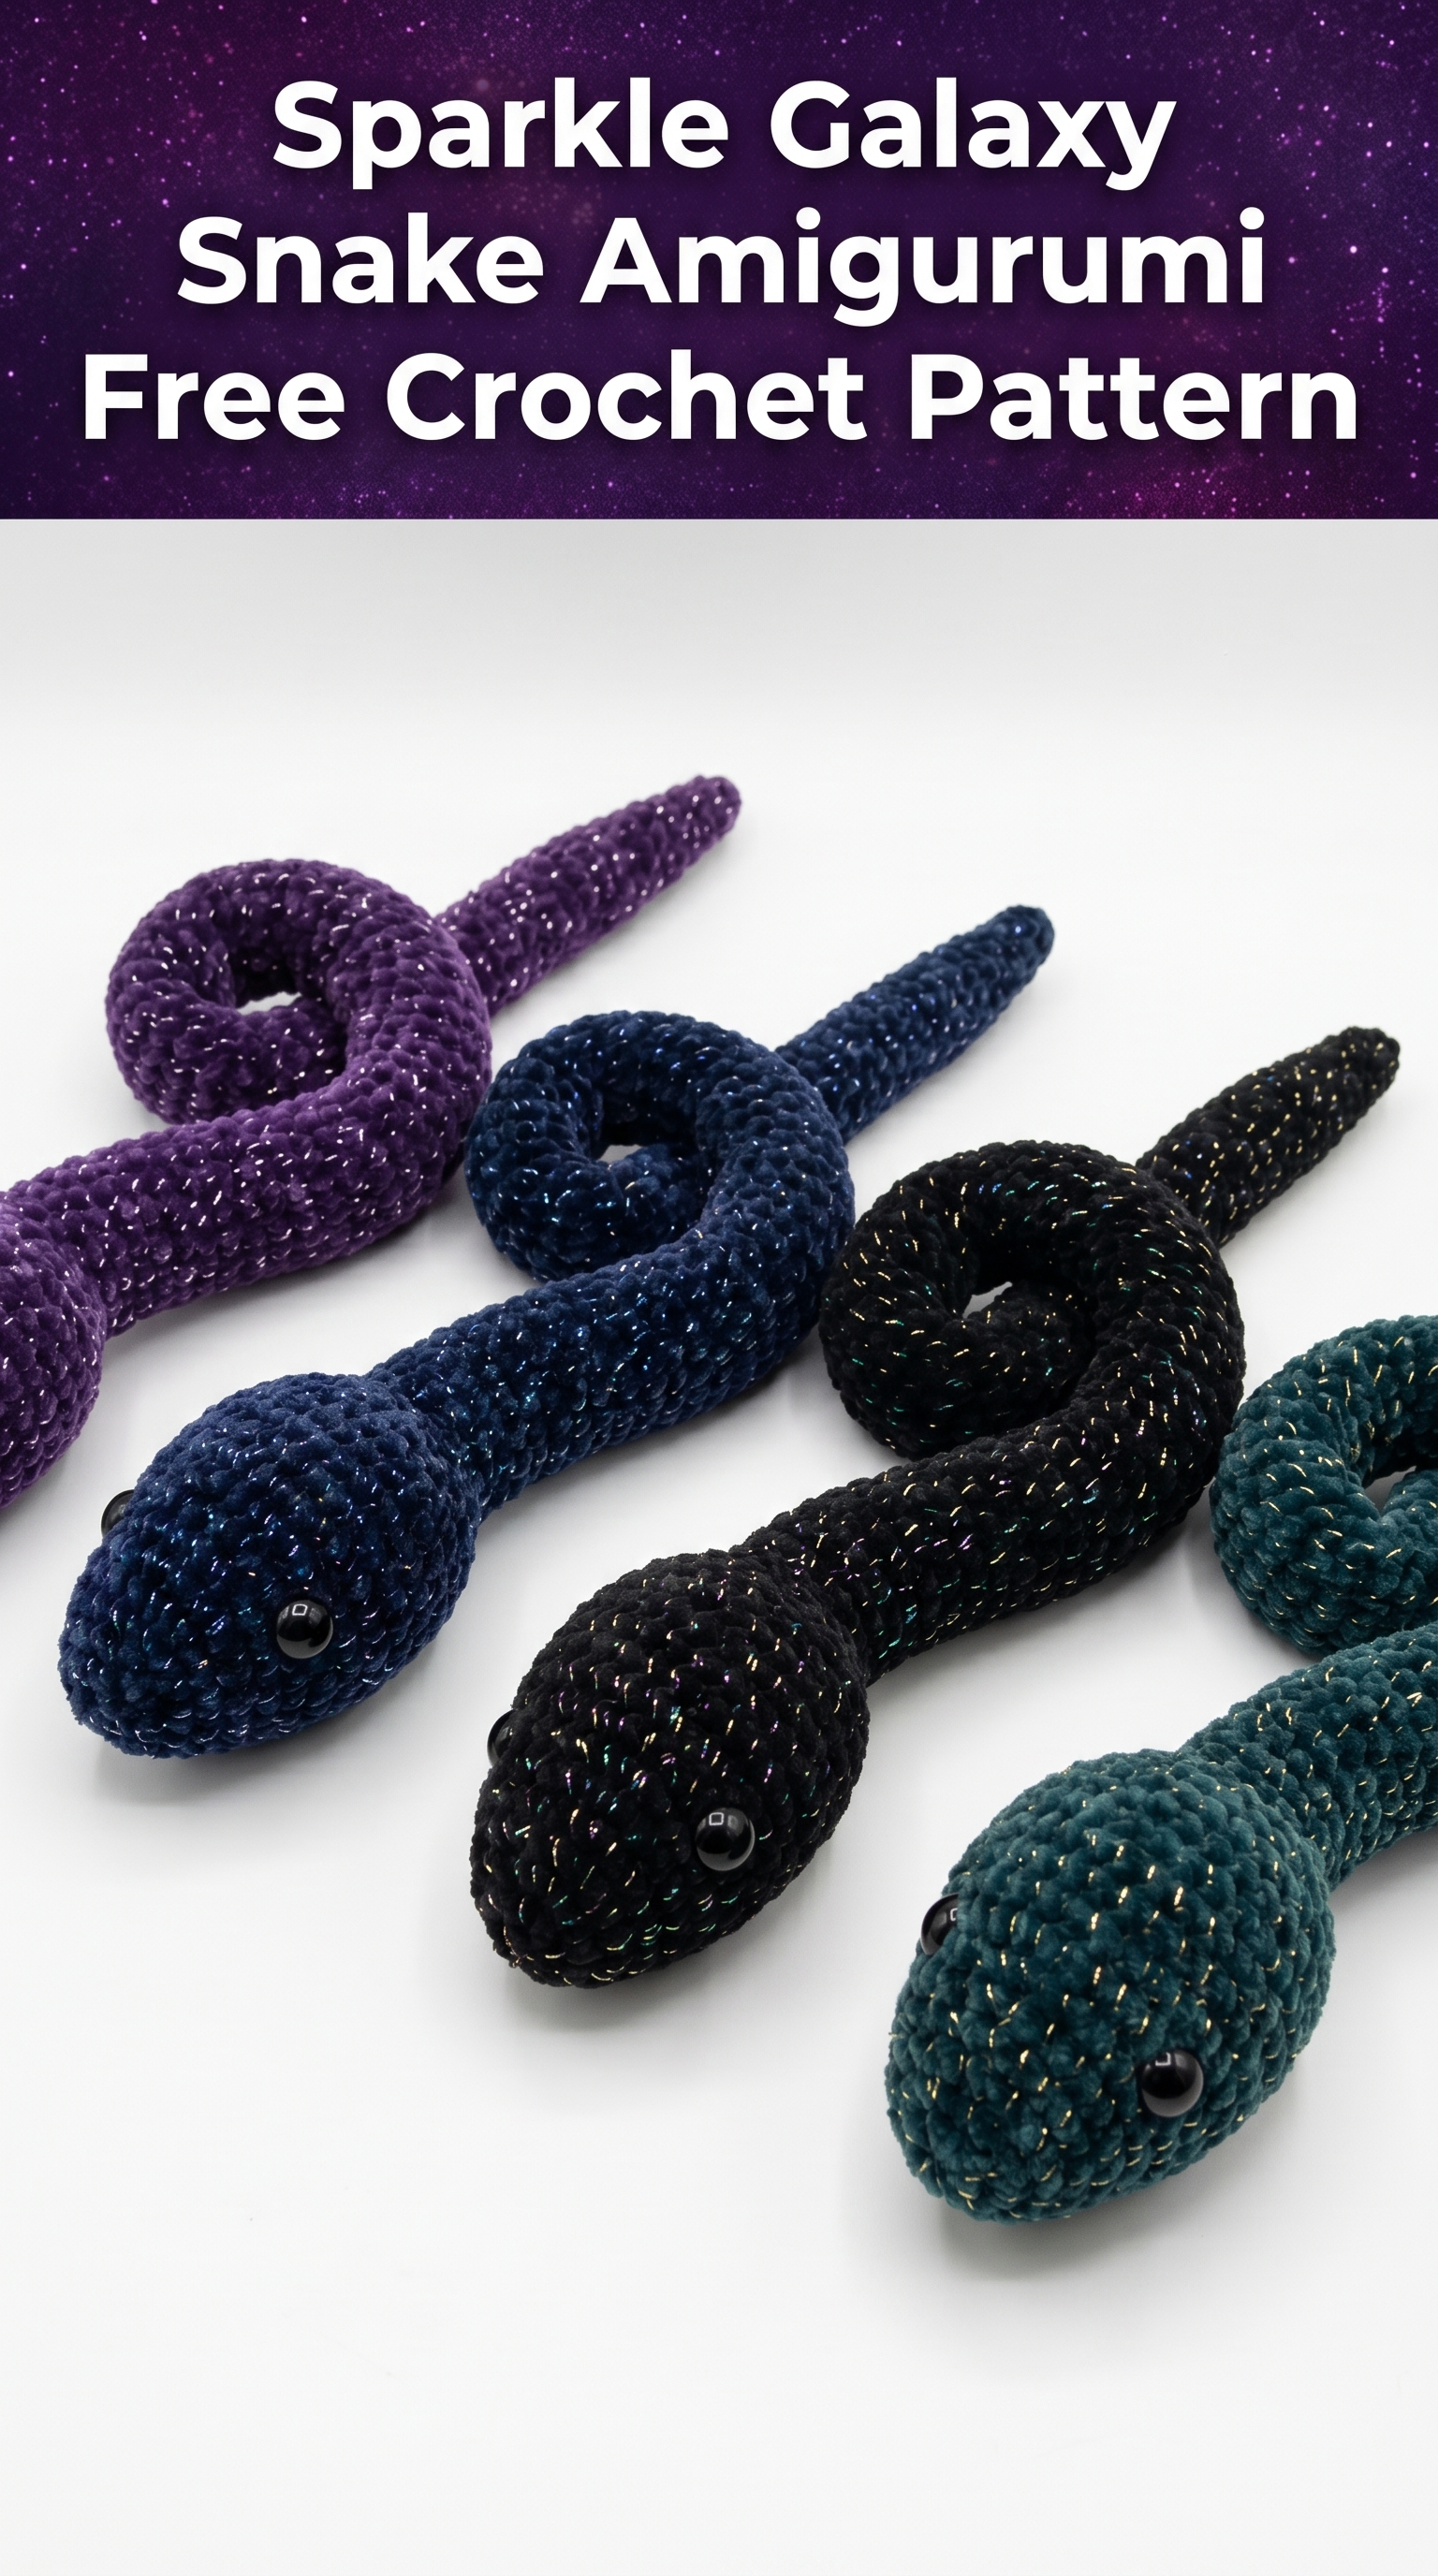
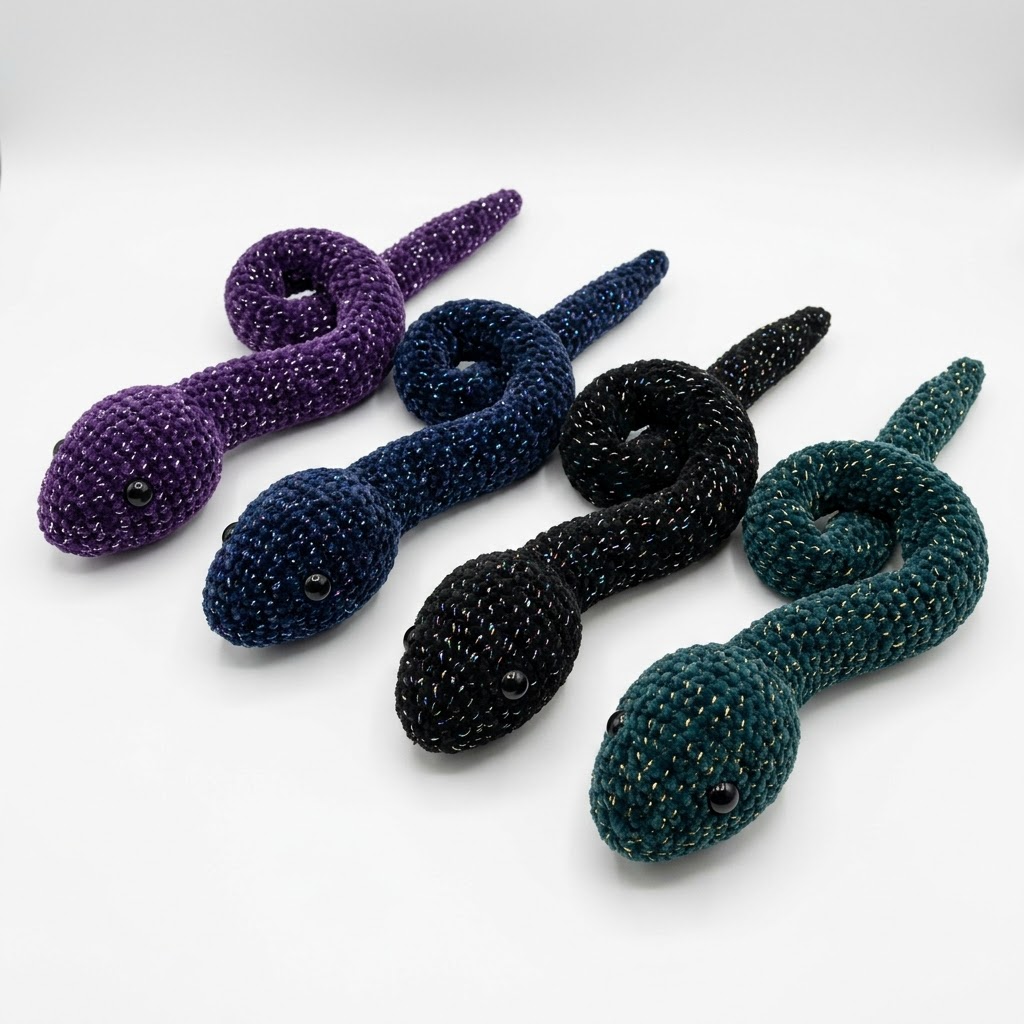
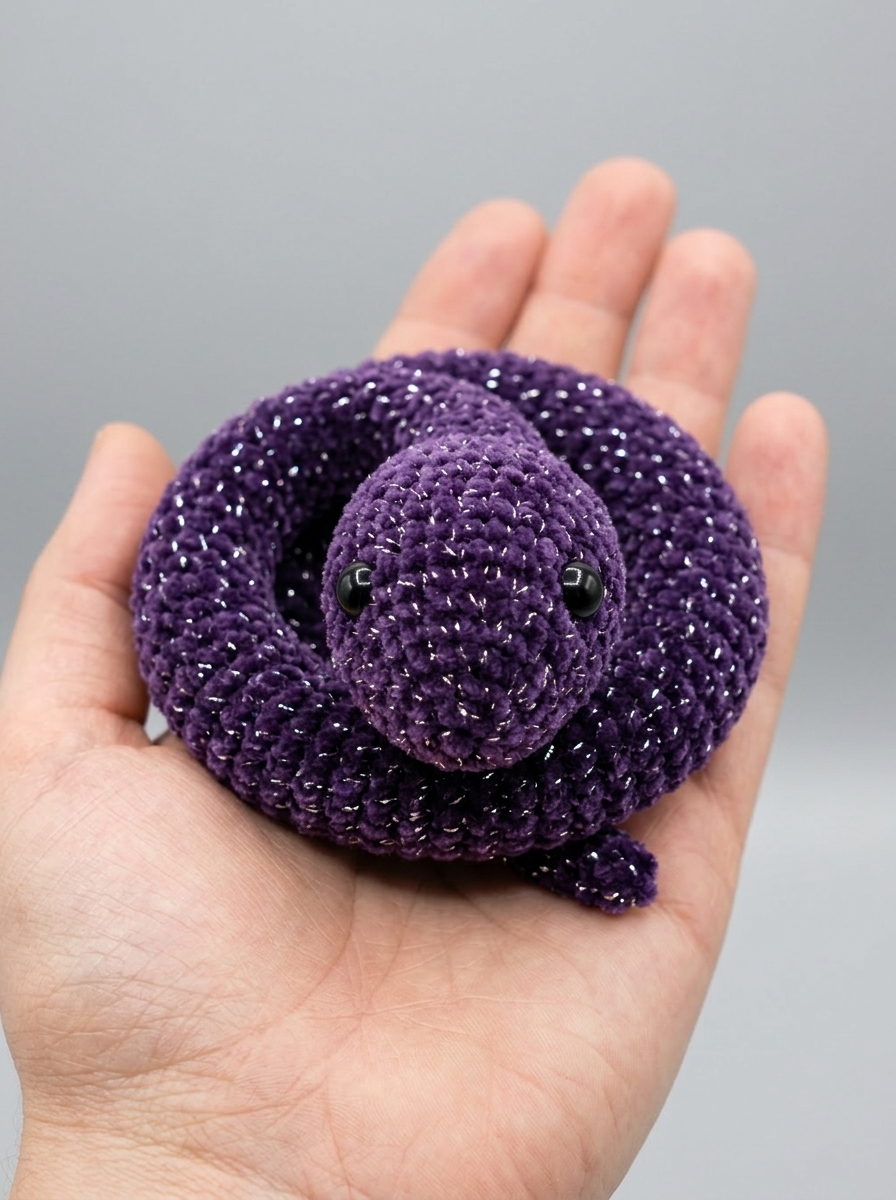
These little snakes have stolen my heart, and I think they are about to steal yours too. This Sparkle Galaxy Snake amigurumi crochet pattern creates an adorable coiled serpent with a chubby head, tapered tail, and that gorgeous sparkly texture that catches the light beautifully. The finished snake measures approximately 12 inches long when uncoiled, making it the perfect size for desk decor, a unique gift, or a fun addition to your amigurumi collection.
I designed this pattern to be beginner friendly while still giving you a stunning finished piece. If you can single crochet in the round and know how to increase and decrease, you can absolutely make this snake. The construction is simpler than it looks. You are basically crocheting one continuous tube that starts wide at the head and gradually tapers to a pointy tail. No seaming multiple pieces together. No complicated shaping. Just relaxing spiral crochet that practically works itself.
The magic here is in the yarn choice. That metallic sparkle running through each stitch gives these snakes their galaxy inspired look without any extra effort on your part. The yarn does all the work while you just crochet along.
Why This Crochet Snake Pattern Works So Well
What I love about this sparkle galaxy snake amigurumi is how forgiving the construction is. Snakes are naturally a bit lumpy and organic looking, so minor tension variations just add character. This makes the pattern perfect for beginners who are still finding their amigurumi rhythm.
The continuous spiral construction means no joining rounds and no turning chains to remember. You simply keep crocheting round after round, stuffing as you go, and watching your snake grow longer and skinnier toward the tail. It is oddly meditative.
The coiled pose shown in the photos is achieved after crocheting by simply twisting and arranging your finished snake. No special shaping or wire required. The snake holds its coil through the natural stiffness of the stuffed amigurumi fabric.
Materials You Will Need
Yarn:
Worsted weight yarn with metallic thread running through it. Look for yarn labeled as having a “sparkle” or “glitter” component. You will need approximately 80 to 100 yards per snake. The snakes in the photos appear to use colors like deep purple, navy blue, black, and teal, all with silver or gold metallic threading throughout.
Yarn suggestions: Red Heart Super Saver Shimmer, Caron Simply Soft Party, or any acrylic blend with metallic content. The metallic thread creates that beautiful galaxy sparkle effect that makes these snakes special.
Hook:
3.5mm (US E/4) crochet hook. You want a slightly smaller hook than typically recommended for worsted weight yarn. This creates a tighter fabric that holds the stuffing inside and gives your snake a firm, structured feel.
Notions:
Stitches and Abbreviations
Let me walk you through every stitch abbreviation before we start. I want you feeling confident before you pick up your hook.
Magic Ring (MR): An adjustable starting loop that closes completely, leaving no hole in the center of your work. You wrap yarn around your fingers, pull up a loop, and crochet your first stitches into that ring before pulling it tight.
Chain (ch): The foundation stitch. Yarn over and pull through the loop on your hook.
Single Crochet (sc): Insert hook into stitch, yarn over and pull up a loop (2 loops on hook), yarn over and pull through both loops. This is your main stitch for the entire pattern.
Increase (inc): Work 2 single crochet stitches into the same stitch. This adds one stitch to your round total. For example, if you have 6 stitches and work increases in each one, you end with 12 stitches.
Invisible Decrease (dec): Insert hook through the front loops only of the next 2 stitches, yarn over and pull through both front loops (2 loops on hook), yarn over and pull through both loops. This creates a neater decrease than the standard method and prevents gaps in your amigurumi fabric.
Slip Stitch (sl st): Insert hook into stitch, yarn over and pull through both the stitch and the loop on your hook in one motion. Used for joining and finishing.
FO: Fasten off. Cut your yarn and pull the tail through the last loop to secure.
Gauge and Sizing Notes
Exact gauge is not critical for amigurumi, but your fabric should be tight enough that stuffing does not show through. If you can see white fiberfill peeking between your stitches, go down a hook size.
Work with consistent tension throughout. The snake will naturally taper as the stitch counts decrease, so you do not need to adjust your tension to create the shape.
Finished Dimensions:
Step by Step Crochet Pattern Instructions
This pattern is worked in continuous spiral rounds. Do not join rounds unless instructed. Use a stitch marker to track the beginning of each round, moving it up as you work.
The Head
Round 1: Create a magic ring. Work 6 sc into the ring. Pull tight to close. (6 sts)
Round 2: Inc in each st around. (12 sts)
Round 3: *Sc in next st, inc in next st* repeat around. (18 sts)
Round 4: *Sc in next 2 sts, inc in next st* repeat around. (24 sts)
Round 5: *Sc in next 3 sts, inc in next st* repeat around. (30 sts)
Rounds 6 through 10: Sc in each st around. (30 sts) Work these 5 rounds even with no increases or decreases.
This completes the top dome of the head. Now add the safety eyes between Rounds 7 and 8, spacing them approximately 8 to 10 stitches apart. Push the posts through from the outside, then secure with the safety backs on the inside. Make sure they are firmly attached before continuing.
Round 11: *Sc in next 3 sts, dec* repeat around. (24 sts)
Round 12: *Sc in next 2 sts, dec* repeat around. (18 sts)
Begin stuffing the head firmly. You want it nice and plump. The head should feel solid but not stretched.
Round 13: *Sc in next st, dec* repeat around. (12 sts)
Add more stuffing to fully fill the head before the opening gets too small.
The Neck and Upper Body
Rounds 14 through 18: Sc in each st around. (12 sts) Work these 5 rounds even.
Round 19: *Sc in next 3 sts, inc in next st* repeat around. (15 sts)
Rounds 20 through 24: Sc in each st around. (15 sts)
Round 25: *Sc in next 4 sts, inc in next st* repeat around. (18 sts)
Rounds 26 through 35: Sc in each st around. (18 sts) Work these 10 rounds even.
Continue stuffing as you work. Add small amounts frequently rather than trying to stuff a long section at once. Use the eraser end of a pencil or a chopstick to push stuffing into the narrow neck area.
The Mid Body
Rounds 36 through 50: Sc in each st around. (18 sts) Work these 15 rounds even.
This creates the longest section of the body at consistent thickness. Keep stuffing as you go. The body should be firm but flexible enough to coil and pose.
The Lower Body and Tail Taper
Now we begin decreasing gradually to create that tapered tail shape.
Round 51: *Sc in next 7 sts, dec* repeat around. (16 sts)
Rounds 52 through 55: Sc in each st around. (16 sts)
Round 56: *Sc in next 6 sts, dec* repeat around. (14 sts)
Rounds 57 through 60: Sc in each st around. (14 sts)
Round 61: *Sc in next 5 sts, dec* repeat around. (12 sts)
Rounds 62 through 65: Sc in each st around. (12 sts)
Round 66: *Sc in next 4 sts, dec* repeat around. (10 sts)
Rounds 67 through 70: Sc in each st around. (10 sts)
Round 71: *Sc in next 3 sts, dec* repeat around. (8 sts)
Rounds 72 through 75: Sc in each st around. (8 sts)
Round 76: *Sc in next 2 sts, dec* repeat around. (6 sts)
Rounds 77 through 80: Sc in each st around. (6 sts)
Round 81: *Sc in next st, dec* repeat around. (4 sts)
Rounds 82 through 85: Sc in each st around. (4 sts)
Stuff the tail as firmly as possible, using a chopstick or pencil to push fiberfill all the way to the tip.
Round 86: Dec twice. (2 sts)
FO. Cut yarn leaving a 6 inch tail. Thread through remaining stitches and pull tight to close. Weave end through nearby stitches to secure, then trim.
Finishing Your Sparkle Galaxy Snake
Once you have fastened off, examine your snake from snout to tail tip. Add any additional stuffing through the fabric if needed by gently pushing fibers apart and tucking in small bits of fiberfill.
To create the coiled pose shown in the photos, simply twist your snake into a spiral shape. The stuffed amigurumi fabric has enough stiffness to hold a gentle coil. Start by making one loop near the midsection, then let the head and tail drape naturally.
Weave in any remaining yarn tails securely. With metallic yarn, I recommend weaving through at least 2 inches of stitches to prevent the slippery thread from working loose.
Pattern Tips and Troubleshooting
Metallic yarn splitting: The sparkly thread can be grabby and prone to splitting. Work slowly and make sure your hook goes cleanly through the yarn strand rather than piercing it.
Uneven head shape: If your snake’s head looks lopsided, adjust the stuffing before closing up the neck. You can poke and prod fiberfill into position even after several rounds have been worked.
Tail too floppy: Stuff more firmly. The tail should hold its shape when you let go. Understuffed tails droop sadly.
Losing your place: With continuous spiral construction, it is easy to lose track of rounds. Move your stitch marker religiously at the start of each round and consider using a row counter app on your phone.
Customization Ideas
These sparkle galaxy snakes are perfect for customizing to your taste.
Try different metallic yarn colors for a whole snake family. The four colorways shown prove how gorgeous different combinations can be.
Add a forked tongue by crocheting a tiny chain, folding it in half, and stitching it to the front of the head below the eyes.
Use larger safety eyes for a more cartoonish look, or smaller eyes for something more realistic.
Experiment with variegated metallic yarns for a truly cosmic effect.
Thank You for Making This Pattern
I hope you have as much fun making your sparkle galaxy snake as I did designing this crochet tutorial. There is something deeply satisfying about watching that long serpentine body grow round by round, especially when the metallic thread catches the light.
I would absolutely love to see your finished snakes. Tag me on Instagram or share your photos in my Facebook group. Seeing your makes genuinely makes my day, and I always reshare reader projects.
Happy crocheting, friend. May your stitches be even and your yarn never tangle.
