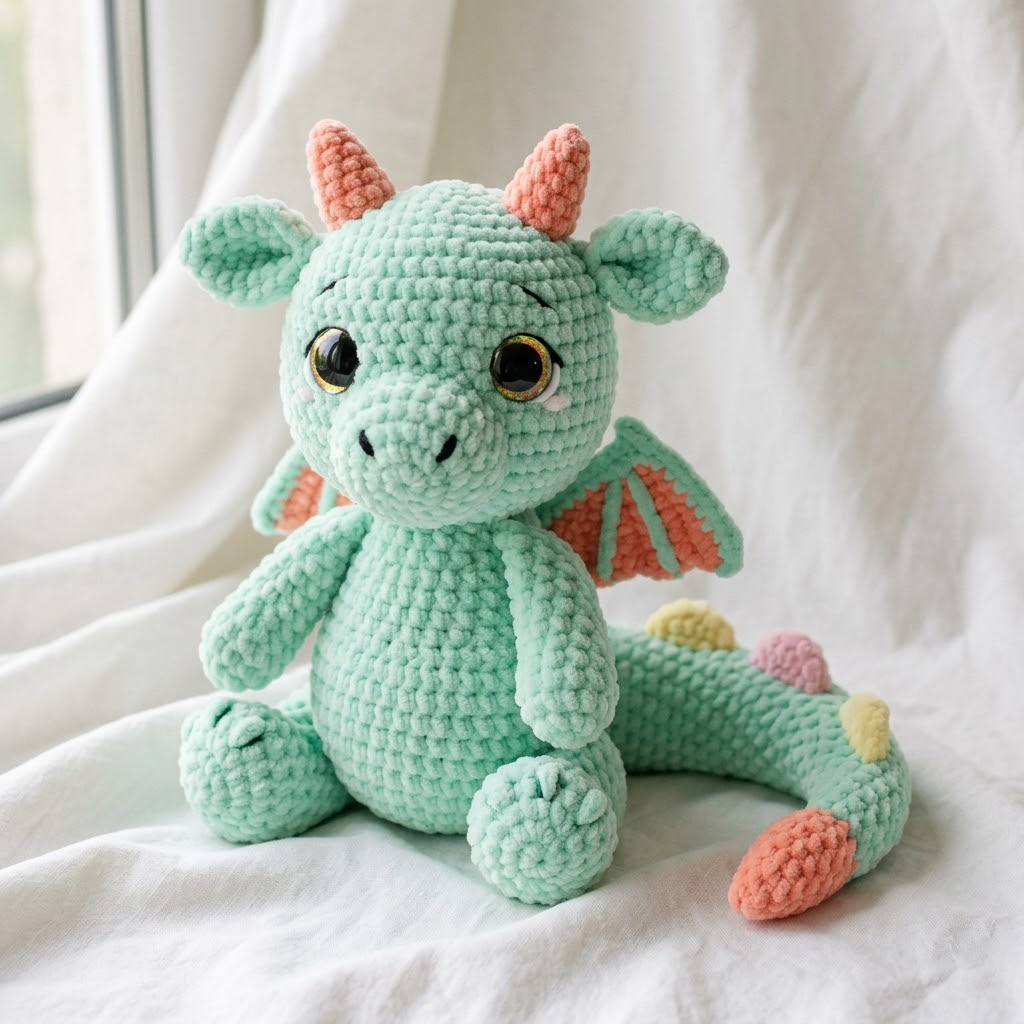
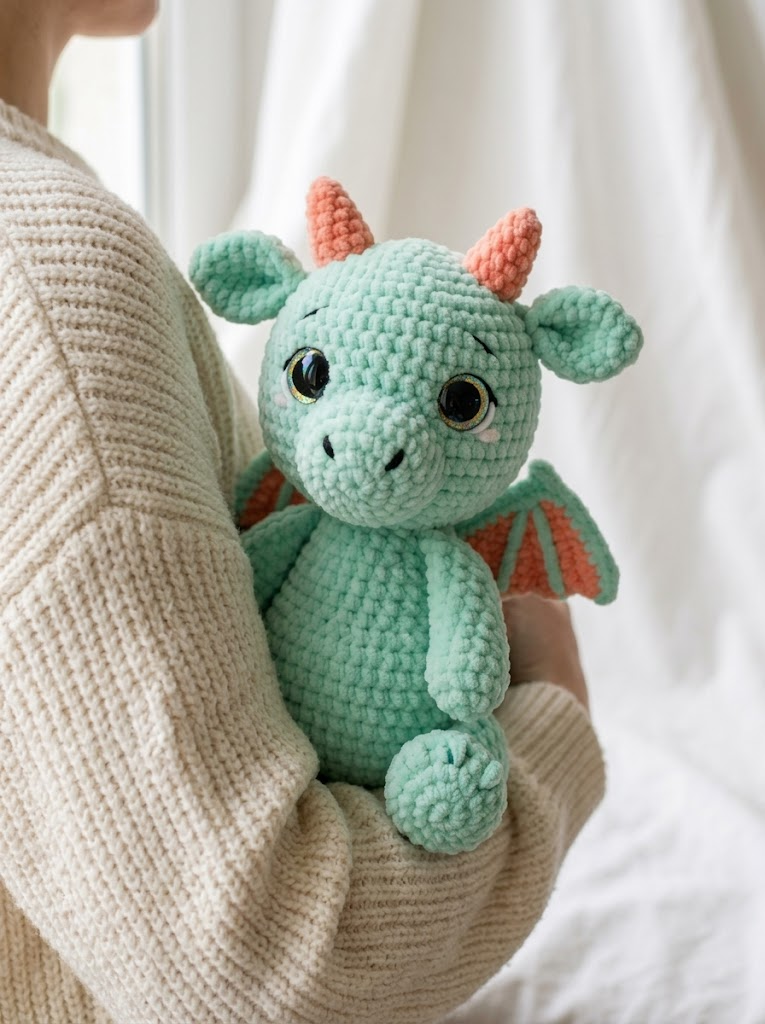
Oh, this little dragon is going to steal your heart! I designed this mint green dragon amigurumi to be cuddly, whimsical, and absolutely huggable. Standing about 10 to 12 inches tall when finished, this plush dragon features sweet coral pink accents on the horns, wings, and tail spikes, plus adorable pastel spots running down the tail. The oversized golden safety eyes give this dragon so much personality.
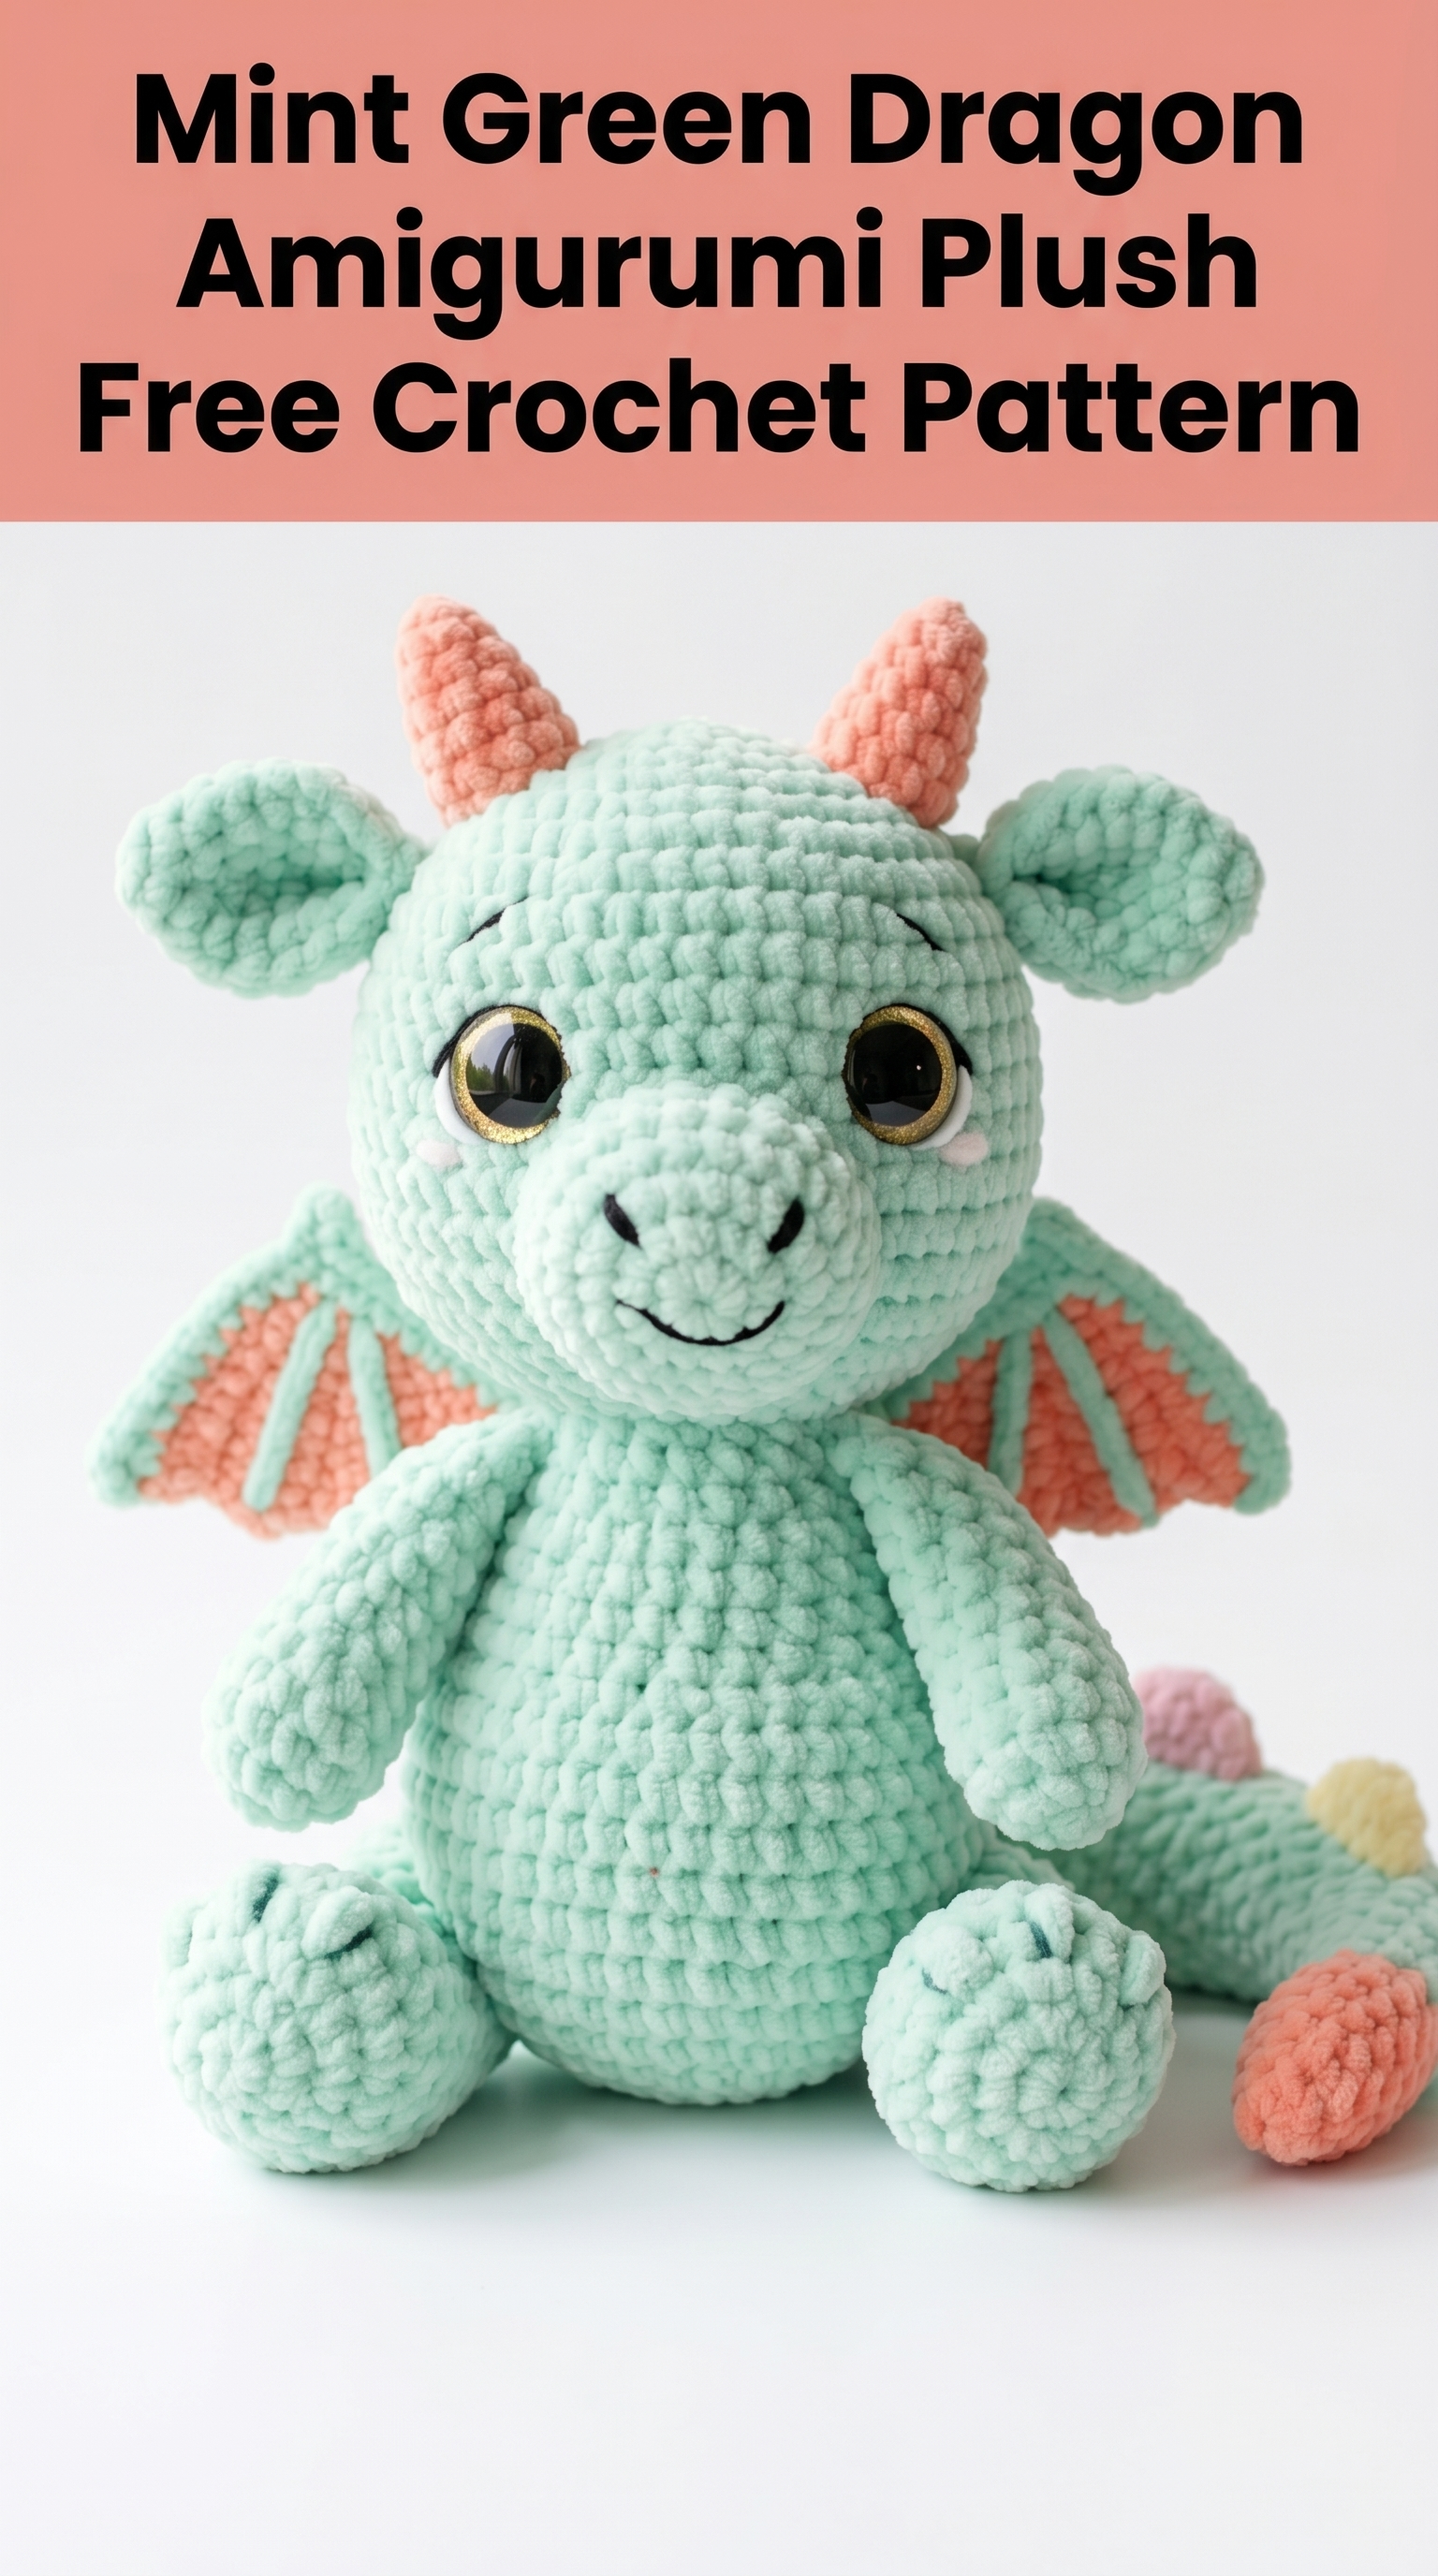
If you have worked a few amigurumi projects before, you can absolutely make this. The construction uses basic single crochet throughout, and I will walk you through every single piece. Take your time, and you will have a showstopping handmade dragon to keep or gift.
Let me show you exactly how to bring this magical creature to life.
Why This Dragon Crochet Pattern Works So Well
This crochet dragon pattern uses chenille or velvet yarn, which creates that incredibly soft, plush texture you see in the photos. The stitches sink into the yarn beautifully, giving your finished dragon a professional, store-bought quality. The chunky yarn also means faster progress, so you are not spending months on a single project.
The design breaks down into manageable pieces: head, body, arms, legs, ears, horns, wings, tail, and decorative spikes. You will crochet each piece separately, then assemble everything at the end. This approach lets you work in small sessions and see progress quickly.
Materials You Will Need
Before you start, gather these supplies:
Yarn:
Hook:
Other Supplies:
Skill Level and Techniques
This step by step crochet tutorial is suitable for intermediate crocheters. You should feel comfortable with:
If you are newer to amigurumi, do not let that scare you. I will explain each technique as we go.
Abbreviations and Stitch Definitions
Let me define every stitch before we begin. Read through this section once so nothing surprises you later.
Magic ring (MR): An adjustable starting loop that closes completely, leaving no hole in the center. You wrap yarn around your fingers, pull a loop through, chain one, then work your first round stitches into the ring. Pull the tail to close.
Chain (ch): The foundation loop. Yarn over, pull through the loop on your hook. One chain made.
Single crochet (sc): Insert hook into stitch, yarn over, pull up a loop (two loops on hook), yarn over, pull through both loops. One single crochet complete.
Increase (inc): Work two single crochet stitches into the same stitch. This adds one stitch to your count.
Invisible decrease (dec): Insert hook through the front loops only of the next two stitches, yarn over, pull through both front loops, yarn over, pull through both loops on hook. This creates a neater decrease than the standard method.
Slip stitch (sl st): Insert hook, yarn over, pull through the stitch and the loop on your hook in one motion. Used for joining or moving across stitches.
Fasten off: Cut yarn leaving a tail, pull tail through final loop, pull tight to secure.
FO: Fasten off.
The Pattern: Step by Step Instructions
Now for the fun part. Work each piece in the order listed. I recommend stuffing pieces firmly as you go, especially the head and body.
Head
The head is worked from the top down in continuous rounds. Do not join rounds unless specified. Use your stitch marker to track the first stitch of each round.
Using mint green yarn:
Round 1: MR, 6 sc into ring. Pull closed. (6 sts)
Round 2: Inc in each st around. (12 sts)
Round 3: *Sc 1, inc* repeat around. (18 sts)
Round 4: *Sc 2, inc* repeat around. (24 sts)
Round 5: *Sc 3, inc* repeat around. (30 sts)
Round 6: *Sc 4, inc* repeat around. (36 sts)
Round 7: *Sc 5, inc* repeat around. (42 sts)
Round 8: *Sc 6, inc* repeat around. (48 sts)
Rounds 9 to 16: Sc in each st around. (48 sts) — 8 rounds total
Install safety eyes between Rounds 11 and 12, approximately 8 to 10 stitches apart. The exact placement depends on your preference. I positioned mine slightly lower on the face for that innocent look.
Round 17: *Sc 6, dec* repeat around. (42 sts)
Round 18: *Sc 5, dec* repeat around. (36 sts)
Round 19: *Sc 4, dec* repeat around. (30 sts)
Begin stuffing the head firmly now.
Round 20: *Sc 3, dec* repeat around. (24 sts)
Round 21: *Sc 2, dec* repeat around. (18 sts)
Continue stuffing as you close.
Round 22: *Sc 1, dec* repeat around. (12 sts)
Round 23: Dec around. (6 sts)
FO, leaving a long tail. Weave through remaining stitches, pull closed, and secure.
Snout
The snout creates that adorable rounded nose area. You will sew this onto the lower front of the head.
Using mint green yarn:
Round 1: MR, 6 sc into ring. (6 sts)
Round 2: Inc in each st around. (12 sts)
Round 3: *Sc 1, inc* repeat around. (18 sts)
Round 4: *Sc 2, inc* repeat around. (24 sts)
Rounds 5 to 7: Sc in each st around. (24 sts)
FO, leaving a long tail for sewing. Stuff lightly before attaching.
Tip: Embroider two small nostrils using black embroidery floss after attaching the snout. Simple straight stitches or French knots work well.
Body
The body is a rounded oval shape, wider at the bottom for stability when sitting.
Using mint green yarn:
Round 1: MR, 6 sc into ring. (6 sts)
Round 2: Inc in each st around. (12 sts)
Round 3: *Sc 1, inc* repeat around. (18 sts)
Round 4: *Sc 2, inc* repeat around. (24 sts)
Round 5: *Sc 3, inc* repeat around. (30 sts)
Round 6: *Sc 4, inc* repeat around. (36 sts)
Round 7: *Sc 5, inc* repeat around. (42 sts)
Rounds 8 to 18: Sc in each st around. (42 sts) — 11 rounds total
Round 19: *Sc 5, dec* repeat around. (36 sts)
Round 20: Sc in each st around. (36 sts)
Round 21: *Sc 4, dec* repeat around. (30 sts)
Round 22: Sc in each st around. (30 sts)
Round 23: *Sc 3, dec* repeat around. (24 sts)
Stuff the body very firmly now.
Round 24: *Sc 2, dec* repeat around. (18 sts)
FO, leaving a long tail. Do not close the opening. You will sew the head directly onto this opening.
Arms (Make 2)
The arms are simple tubes with rounded ends for the paws.
Using mint green yarn:
Round 1: MR, 6 sc into ring. (6 sts)
Round 2: Inc in each st around. (12 sts)
Round 3: *Sc 1, inc* repeat around. (18 sts)
Rounds 4 to 6: Sc in each st around. (18 sts)
Round 7: *Sc 1, dec* repeat around. (12 sts)
Rounds 8 to 14: Sc in each st around. (12 sts) — 7 rounds total
FO, leaving a tail for sewing. Stuff the paw area firmly, leave the upper arm lightly stuffed or flat so it bends naturally.
Legs (Make 2)
The legs are thicker than the arms and include a foot shaping.
Using mint green yarn:
Round 1: MR, 6 sc into ring. (6 sts)
Round 2: Inc in each st around. (12 sts)
Round 3: *Sc 1, inc* repeat around. (18 sts)
Round 4: *Sc 2, inc* repeat around. (24 sts)
Rounds 5 to 8: Sc in each st around. (24 sts)
Round 9: Sc 6, dec 6 times, sc 6. (18 sts)
Round 10: Sc 6, dec 3 times, sc 6. (15 sts)
Rounds 11 to 16: Sc in each st around. (15 sts)
FO, leaving a tail. Stuff the foot firmly, upper leg medium.
Ears (Make 2)
These floppy ears add so much charm.
Using mint green yarn:
Round 1: MR, 6 sc into ring. (6 sts)
Round 2: Inc in each st around. (12 sts)
Round 3: *Sc 1, inc* repeat around. (18 sts)
Rounds 4 to 6: Sc in each st around. (18 sts)
Round 7: *Sc 1, dec* repeat around. (12 sts)
Round 8: Sc in each st around. (12 sts)
FO, leaving a tail. Flatten the opening and sew to sides of head.
Horns (Make 2)
Using coral pink yarn:
Round 1: MR, 5 sc into ring. (5 sts)
Round 2: *Sc 1, inc* repeat twice, sc 1. (7 sts)
Round 3: Sc in each st around. (7 sts)
Round 4: *Sc 2, inc* repeat twice, sc 1. (9 sts)
Round 5: Sc in each st around. (9 sts)
Round 6: *Sc 2, inc* repeat around. (12 sts)
Rounds 7 to 8: Sc in each st around. (12 sts)
FO, leaving a tail. Stuff lightly and sew between the ears.
Wings (Make 2)
The wings use both mint green and coral pink. You will work flat panels and join them.
Wing membrane (coral pink):
Ch 10.
Row 1: Sc in second ch from hook, sc across. (9 sts)
Rows 2 to 8: Ch 1, turn, sc across. (9 sts)
Row 9: Ch 1, turn, dec, sc 5, dec. (7 sts)
Row 10: Ch 1, turn, dec, sc 3, dec. (5 sts)
FO, leaving a tail.
Wing ribs (mint green):
Using mint green, embroider or surface crochet three vertical lines across the coral panel to create the wing veins you see in the photo.
Sew wings to the upper back of the body.
Tail
Using mint green yarn:
Round 1: MR, 6 sc into ring. (6 sts)
Round 2: Sc in each st around. (6 sts)
Round 3: *Sc 1, inc* repeat around. (9 sts)
Rounds 4 to 5: Sc in each st around. (9 sts)
Round 6: *Sc 2, inc* repeat around. (12 sts)
Rounds 7 to 10: Sc in each st around. (12 sts)
Round 11: *Sc 3, inc* repeat around. (15 sts)
Rounds 12 to 18: Sc in each st around. (15 sts)
Switch to coral pink for the last 3 rounds.
Rounds 19 to 21: Sc in each st around. (15 sts)
FO. Stuff medium. Attach to back of body.
Tail Spikes (Make 3 to 5)
Using pastel yellow and pastel pink, alternate colors:
Round 1: MR, 4 sc. (4 sts)
Round 2: *Sc 1, inc* twice. (6 sts)
Rounds 3 to 4: Sc around. (6 sts)
FO. Sew along the top of the tail.
Assembly
1. Sew the snout to the lower front of the head.
2. Attach ears to the sides of the head, slightly behind the eyes.
3. Sew horns between the ears, angled slightly outward.
4. Sew the head to the body opening.
5. Attach arms to the sides of the body, just below the head.
6. Attach legs to the bottom front so the dragon sits upright.
7. Sew wings to the upper back.
8. Attach the tail to the lower back.
9. Sew tail spikes along the tail.
10. Embroider nostrils and optional eyebrow lines.
Final Thoughts on This Dragon Amigurumi Pattern
You did it! This mint green dragon amigurumi plush crochet pattern creates such a lovable finished piece. Whether you made this for your own collection or as a gift, I hope you enjoyed every stitch.
Thank you so much for choosing this pattern and trusting me to guide you through. I would absolutely love to see your finished dragon. Tag me on Instagram or share in my Facebook group. Seeing your creations truly makes my day.
Happy crocheting, friend. You made something magical.
