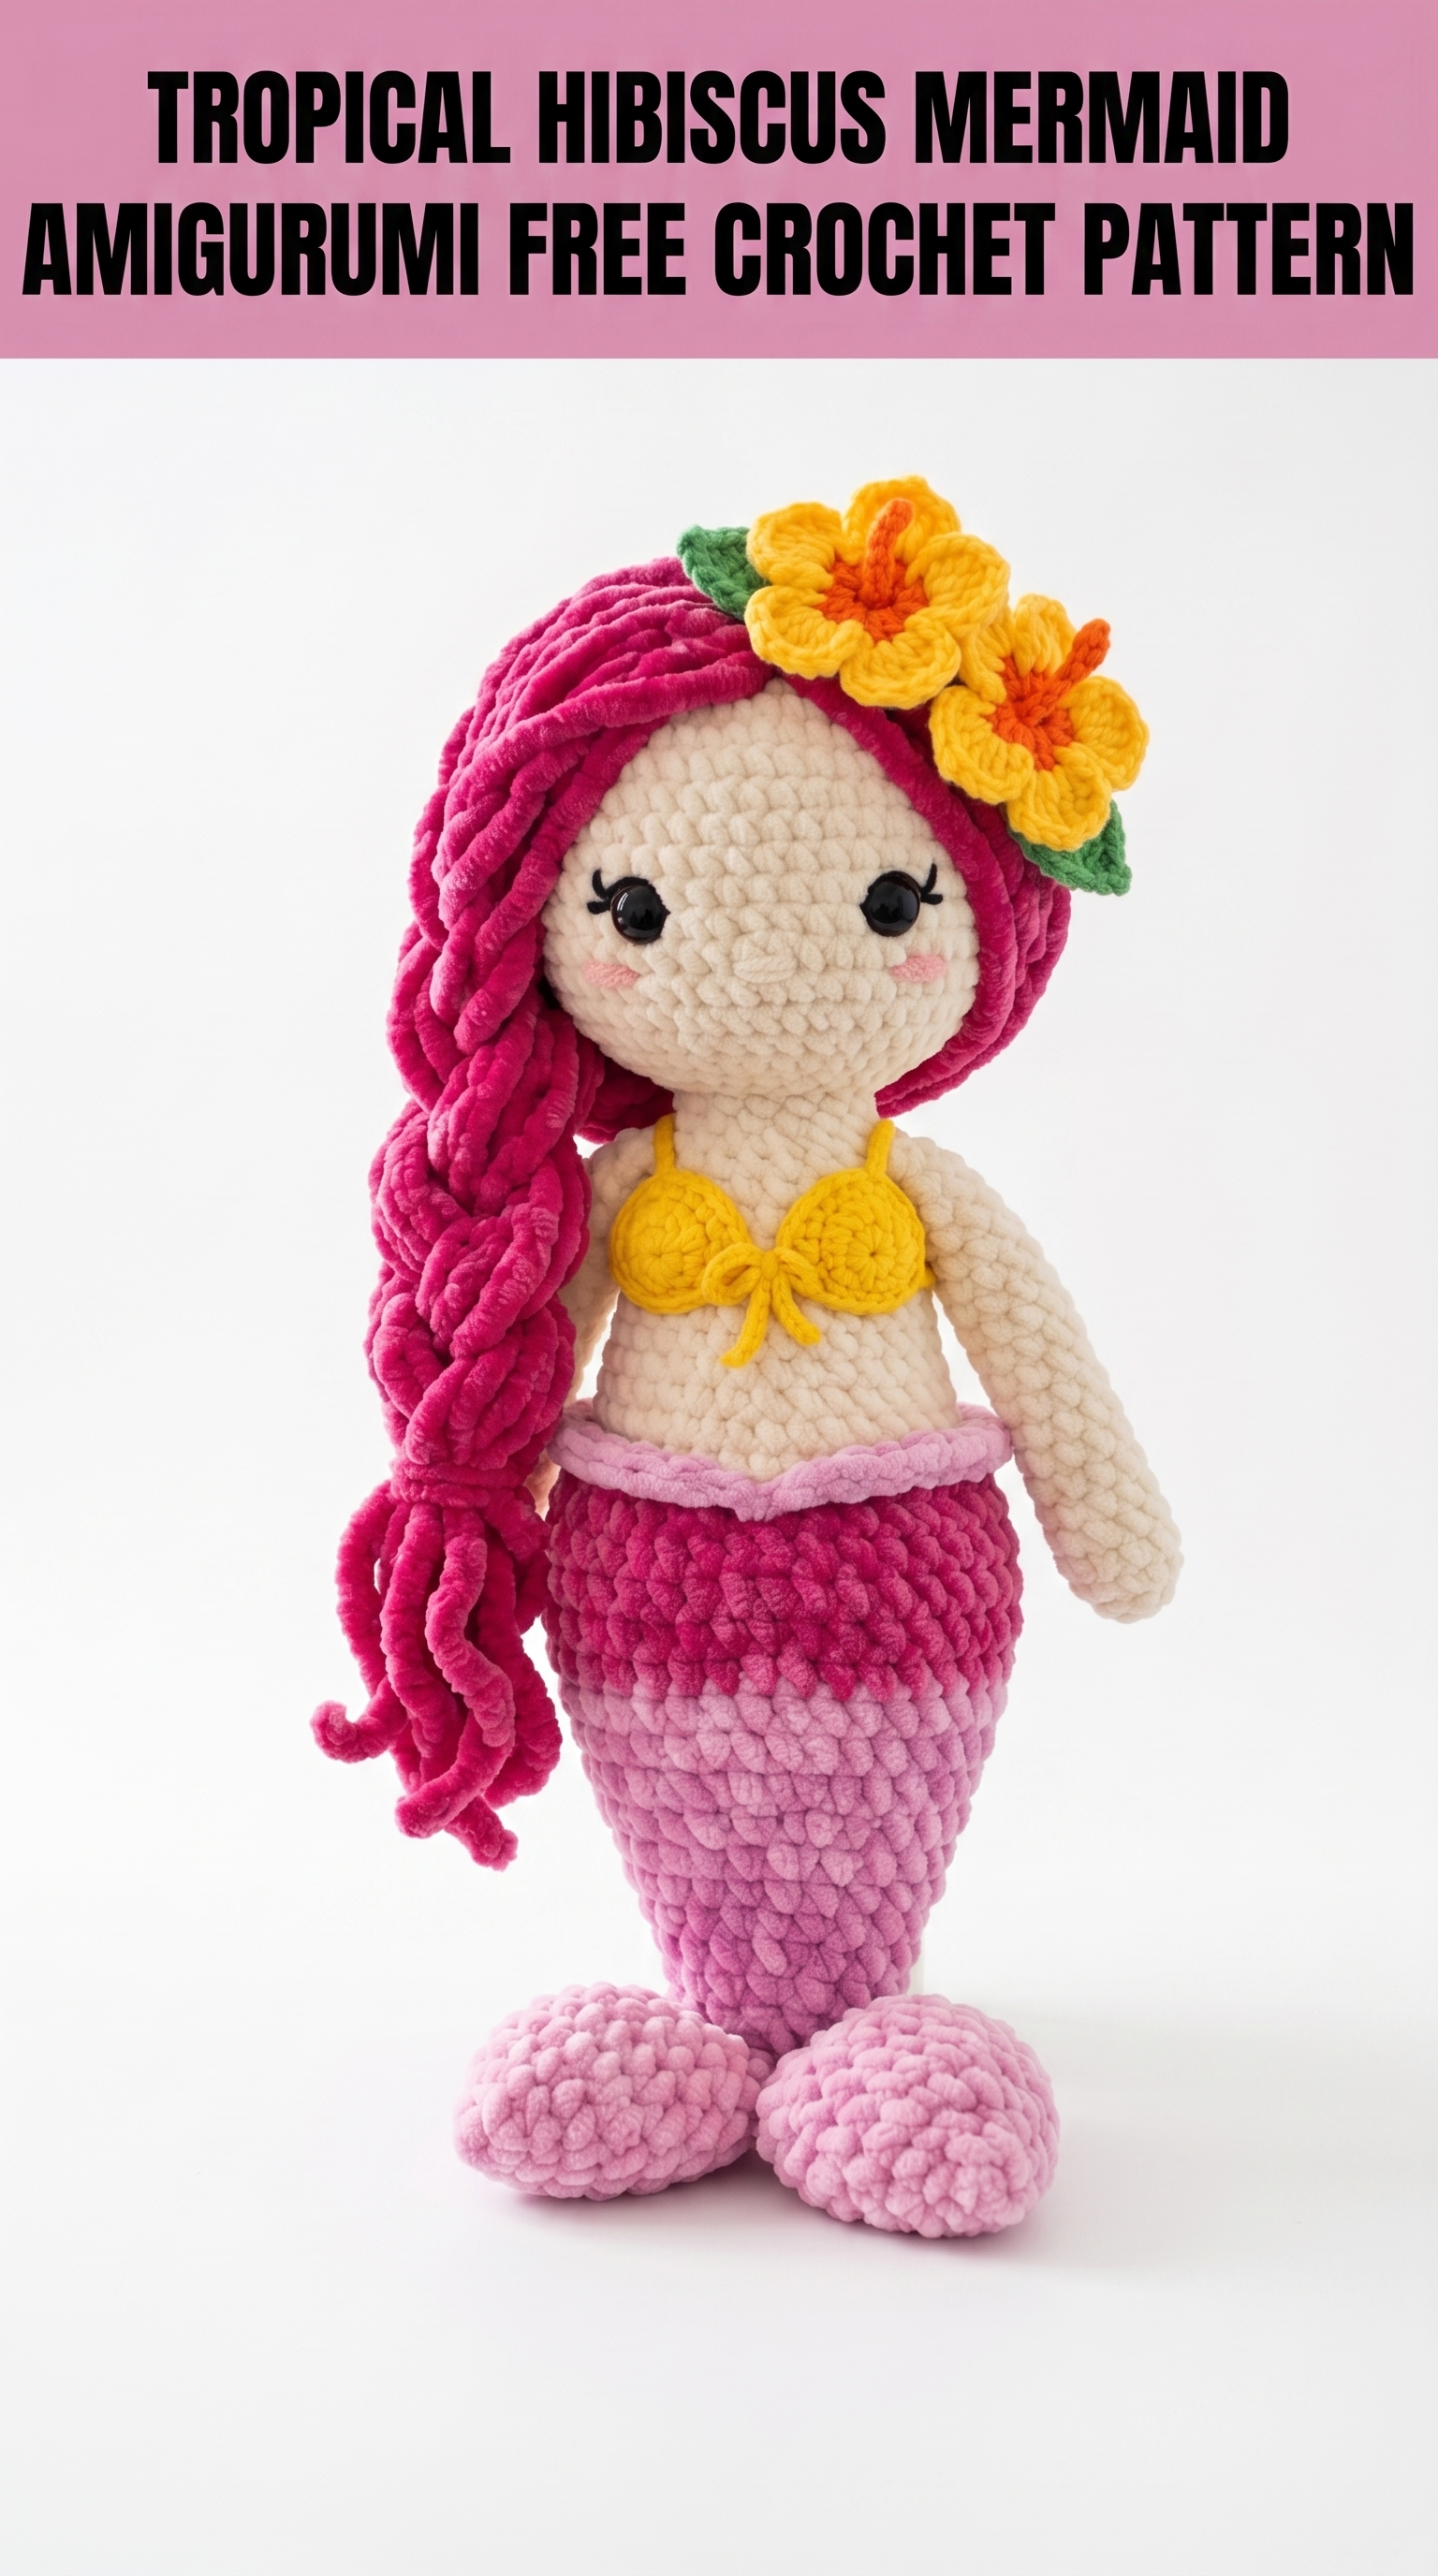
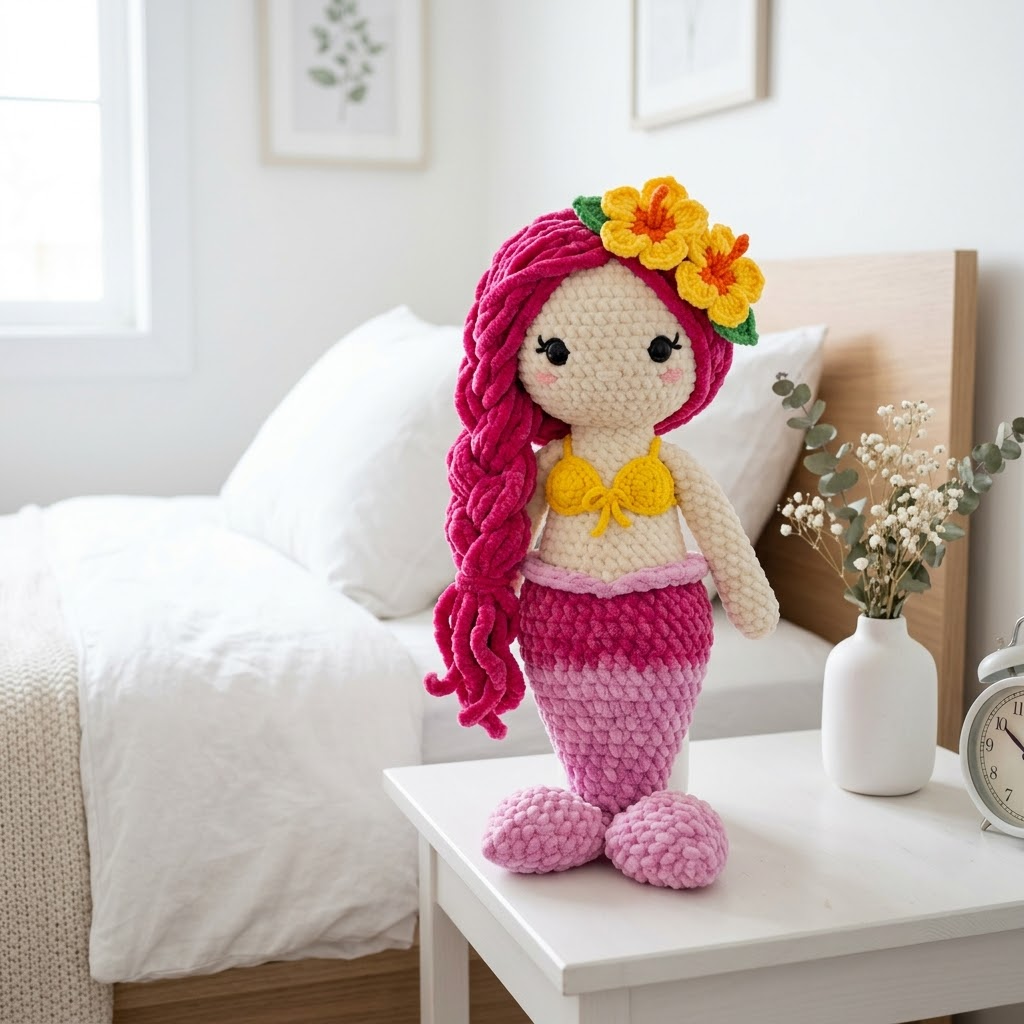
She is absolutely adorable, and I cannot wait to walk you through making her. This Tropical Hibiscus Mermaid Amigurumi is everything a crochet doll should be: cuddly, colorful, and full of personality. Standing approximately 14 to 16 inches tall, she features flowing magenta hair styled in a loose braid, a gorgeous ombre tail that fades from deep pink to soft lavender, sunny yellow hibiscus flowers tucked behind her ear, and the sweetest little shell bikini top.
If you have made a basic amigurumi before, you can absolutely make this mermaid. She looks intricate, but I promise she is built from simple shapes worked in continuous rounds. We will tackle each piece one at a time, and before you know it, you will have a stunning handmade doll ready to gift or display.
Let me show you exactly how to bring this ocean beauty to life.
What Makes This Mermaid Crochet Pattern Special
This mermaid amigurumi pattern uses chunky velvet yarn for most of the body, which gives her that irresistibly soft, huggable texture you see in the photo. The plush yarn also means she works up faster than you might expect. Most of the construction uses basic single crochet (sc) stitches worked in a spiral, which is the foundation of nearly all amigurumi.
The ombre effect on her tail happens naturally when you switch yarn colors at specific rounds. No complicated color work required. And those tropical hibiscus flowers? They are small flat motifs worked separately and sewn on at the end.
Her long braided hair uses a simple loop technique that creates volume without endless yarn cutting and knotting.
Materials You Will Need
Yarn:
Hook:
Notions:
Abbreviations and Stitch Definitions
Let me define every stitch before we begin so you never feel lost.
ch = chain: Wrap yarn over hook, pull through loop on hook. This creates foundation links.
sc = single crochet: Insert hook into stitch, yarn over, pull up a loop (2 loops on hook), yarn over, pull through both loops.
inc = increase: Work 2 single crochet stitches into the same stitch. This adds one stitch to your total.
dec = invisible decrease: Insert hook through front loops only of the next 2 stitches, yarn over, pull through both front loops (2 loops on hook), yarn over, pull through both. This decreases one stitch cleanly.
sl st = slip stitch: Insert hook, yarn over, pull through stitch and loop on hook in one motion. Used for joining.
hdc = half double crochet: Yarn over, insert hook into stitch, yarn over, pull up a loop (3 loops on hook), yarn over, pull through all 3 loops.
dc = double crochet: Yarn over, insert hook into stitch, yarn over, pull up a loop (3 loops on hook), yarn over, pull through 2 loops, yarn over, pull through remaining 2 loops.
magic ring = adjustable loop that allows you to pull the center hole completely closed. If this intimidates you, you can chain 2 and work your first round into the second chain from the hook instead.
FLO = front loop only: Work into just the front loop of each stitch instead of both loops.
Gauge and Sizing Notes
Gauge is not critical for amigurumi, but tension matters. You want your stitches tight enough that stuffing does not show through. If you see white fiberfill peeking between stitches, go down a hook size.
With chunky velvet yarn and a 5.0mm hook, your finished mermaid should stand approximately 14 to 16 inches tall. Using different yarn weights will change the final size significantly.
Step by Step Crochet Pattern
Head
Using cream velvet yarn and 5.0mm hook.
Rnd 1: 6 sc in magic ring (6 sts)
Rnd 2: Inc in each st around (12 sts)
Rnd 3: [Sc 1, inc] 6 times (18 sts)
Rnd 4: [Sc 2, inc] 6 times (24 sts)
Rnd 5: [Sc 3, inc] 6 times (30 sts)
Rnd 6: [Sc 4, inc] 6 times (36 sts)
Rnd 7: [Sc 5, inc] 6 times (42 sts)
Rnds 8 to 15: Sc in each st around (42 sts) for 8 rounds total
Insert safety eyes between rounds 10 and 11, approximately 8 stitches apart. This placement gives her that sweet, slightly wide-eyed look.
Rnd 16: [Sc 5, dec] 6 times (36 sts)
Rnd 17: [Sc 4, dec] 6 times (30 sts)
Rnd 18: [Sc 3, dec] 6 times (24 sts)
Begin stuffing the head firmly.
Rnd 19: [Sc 2, dec] 6 times (18 sts)
Rnd 20: [Sc 1, dec] 6 times (12 sts)
Finish stuffing. Fasten off, leaving a long tail for sewing.
Body
Using cream velvet yarn and 5.0mm hook.
Rnd 1: 6 sc in magic ring (6 sts)
Rnd 2: Inc in each st around (12 sts)
Rnd 3: [Sc 1, inc] 6 times (18 sts)
Rnd 4: [Sc 2, inc] 6 times (24 sts)
Rnds 5 to 12: Sc in each st around (24 sts) for 8 rounds
Rnd 13: [Sc 2, dec] 6 times (18 sts)
Fasten off, stuff firmly, leave tail for sewing.
Arms (Make 2)
Using cream velvet yarn and 5.0mm hook.
Rnd 1: 5 sc in magic ring (5 sts)
Rnd 2: Inc in each st around (10 sts)
Rnds 3 to 14: Sc in each st around (10 sts) for 12 rounds
Stuff lightly, mainly in the hand area. Leave the upper arm softer so it bends naturally. Fasten off, leave tail for sewing.
Mermaid Tail
This is where the magic happens. We start at the waist and work down to the fin, changing colors as we go.
Waist Section using light pink velvet yarn:
Rnd 1: Ch 24, sl st to join in a ring, being careful not to twist (24 sts)
Rnds 2 to 3: Sc in each st around (24 sts)
Change to deep magenta.
Upper Tail:
Rnd 4: Working in FLO, sc in each st around (24 sts)
This front loop only round creates that nice ridge you see at the waist transition.
Rnds 5 to 8: Sc in each st around (24 sts)
Rnd 9: [Sc 6, dec] 3 times (21 sts)
Rnds 10 to 12: Sc in each st around (21 sts)
Change to medium pink.
Mid Tail:
Rnd 13: [Sc 5, dec] 3 times (18 sts)
Rnds 14 to 17: Sc in each st around (18 sts)
Rnd 18: [Sc 4, dec] 3 times (15 sts)
Change to light pink or lavender.
Lower Tail:
Rnds 19 to 22: Sc in each st around (15 sts)
Rnd 23: [Sc 3, dec] 3 times (12 sts)
Rnds 24 to 26: Sc in each st around (12 sts)
Begin stuffing the tail from the top down.
Rnd 27: [Sc 2, dec] 3 times (9 sts)
Rnd 28: Sc in each st around (9 sts)
Stuff the lower section. Fasten off. We will add the fin separately.
Tail Fins (Make 2)
Using light pink velvet yarn and 5.0mm hook.
Rnd 1: 6 sc in magic ring (6 sts)
Rnd 2: Inc in each st around (12 sts)
Rnd 3: [Sc 1, inc] 6 times (18 sts)
Rnds 4 to 6: Sc in each st around (18 sts)
Rnd 7: [Sc 1, dec] 6 times (12 sts)
Stuff lightly. Flatten the opening and sew closed. Sew both fin pieces to the bottom of the tail, angling them slightly outward.
Bikini Top
Using golden yellow cotton yarn and 3.5mm hook.
Shell Cups (Make 2):
Rnd 1: 4 sc in magic ring (4 sts)
Rnd 2: Inc in each st around (8 sts)
Rnd 3: [Sc 1, inc] 4 times (12 sts)
Rnds 4 to 5: Sc in each st around (12 sts)
Fasten off, leave tail for sewing.
Ties:
Chain 30. Sew one end to the side of one shell cup. Repeat for the other side, creating straps that tie behind the body.
Center Bow:
Chain 8, sl st to first chain to form a ring. Wrap yarn around the center several times and secure. Sew between the two shell cups.
Hibiscus Flowers (Make 2)
Using golden yellow cotton yarn and 3.5mm hook.
Rnd 1: 5 sc in magic ring (5 sts)
Rnd 2: [Ch 3, 2 dc in same st, ch 3, sl st in same st, sl st in next st] 5 times (5 petals)
Fasten off.
Using orange yarn, make a French knot or small cluster of chain stitches in the center for the stamen.
Leaves (Make 2 to 3)
Using green cotton yarn and 3.5mm hook.
Ch 8. Starting in second ch from hook: sl st, sc, hdc, dc, hdc, sc, sl st. Fasten off.
Hair
This is easier than it looks. Cut approximately 40 to 50 strands of deep magenta velvet yarn, each about 24 inches long.
Using your hook, pull each strand through a stitch on the head, folding it in half so both ends hang down. Start at the hairline and work in rows toward the back, leaving the face clear.
Once all strands are attached, gather them to one side and loosely braid. Secure the end with a small piece of matching yarn tied in a bow.
The velvet yarn creates that beautifully textured, slightly messy braid you see in the photo.
Facial Details
Using black embroidery floss, stitch 3 to 4 small straight stitches above each safety eye to create eyelashes. Fan them slightly for a natural look.
Using pink embroidery floss or light pink yarn, make small circles or straight stitches below each eye for rosy cheeks.
Assembly Instructions
Now for the satisfying part. Putting her all together.
1. Sew the head to the body. Position the head centered on top of the body and whip stitch all around using your yarn tail.
2. Attach the arms. Sew one arm to each side of the upper body, just below where the head attaches. Position them slightly forward so they hang naturally.
3. Slip the body into the tail. The tail opening should fit snugly around the waist. Sew the body inside the tail waist, stitching through both layers to secure.
4. Add the bikini top. Position the shell cups on the chest and sew in place. Tie the straps behind the body or sew them for a permanent finish.
5. Attach the flowers and leaves. Arrange the hibiscus flowers and leaves near her temple, tucked into the hair. Sew securely.
Tips for Working with Velvet Yarn
Velvet yarn can be slippery and tricky to see your stitches in. Here are my best tips:
Use a stitch marker religiously. Move it up every round so you always know where your round begins.
Work in good lighting. Natural daylight or a bright craft lamp helps you see into those fluffy stitches.
Go slowly when decreasing. It is easy to miss a stitch with this yarn texture.
If you drop a stitch, do not panic. Gently pull the yarn and work backward until you find it.
Customization Ideas
Want to make her your own? Here are some ideas:
Change the tail colors to blue and teal for an ocean palette. Swap the hibiscus for a starfish applique. Use a different hair color like coral, turquoise, or classic blonde. Add tiny pearl beads along the tail for extra sparkle.
You Did It
I am so proud of you for making this beautiful Tropical Hibiscus Mermaid Amigurumi. She is truly a showstopper, and every stitch you put into her shows. Whether she lives on a little one’s bed, decorates a shelf, or becomes a heartfelt gift, she carries your creativity and care.
Thank you for crocheting along with me today. If you make this mermaid, I would absolutely love to see her. Tag me on Instagram or share in my Facebook group. Seeing your finished projects genuinely makes my day.
Happy hooking, friend. Now go show off that gorgeous mermaid.
