
I named this one Ocean Wave because the first time I sketched it out, I was sitting on my sister’s porch watching the tide roll in. She had asked for a beach bag that could hold everything from sunscreen to her latest paperback, and I kept thinking about how the colors of the water changed from deep teal near the horizon to pale aqua where it kissed the sand. That original sketch lived in my notebook for almost two years before I finally sat down to work out the math.
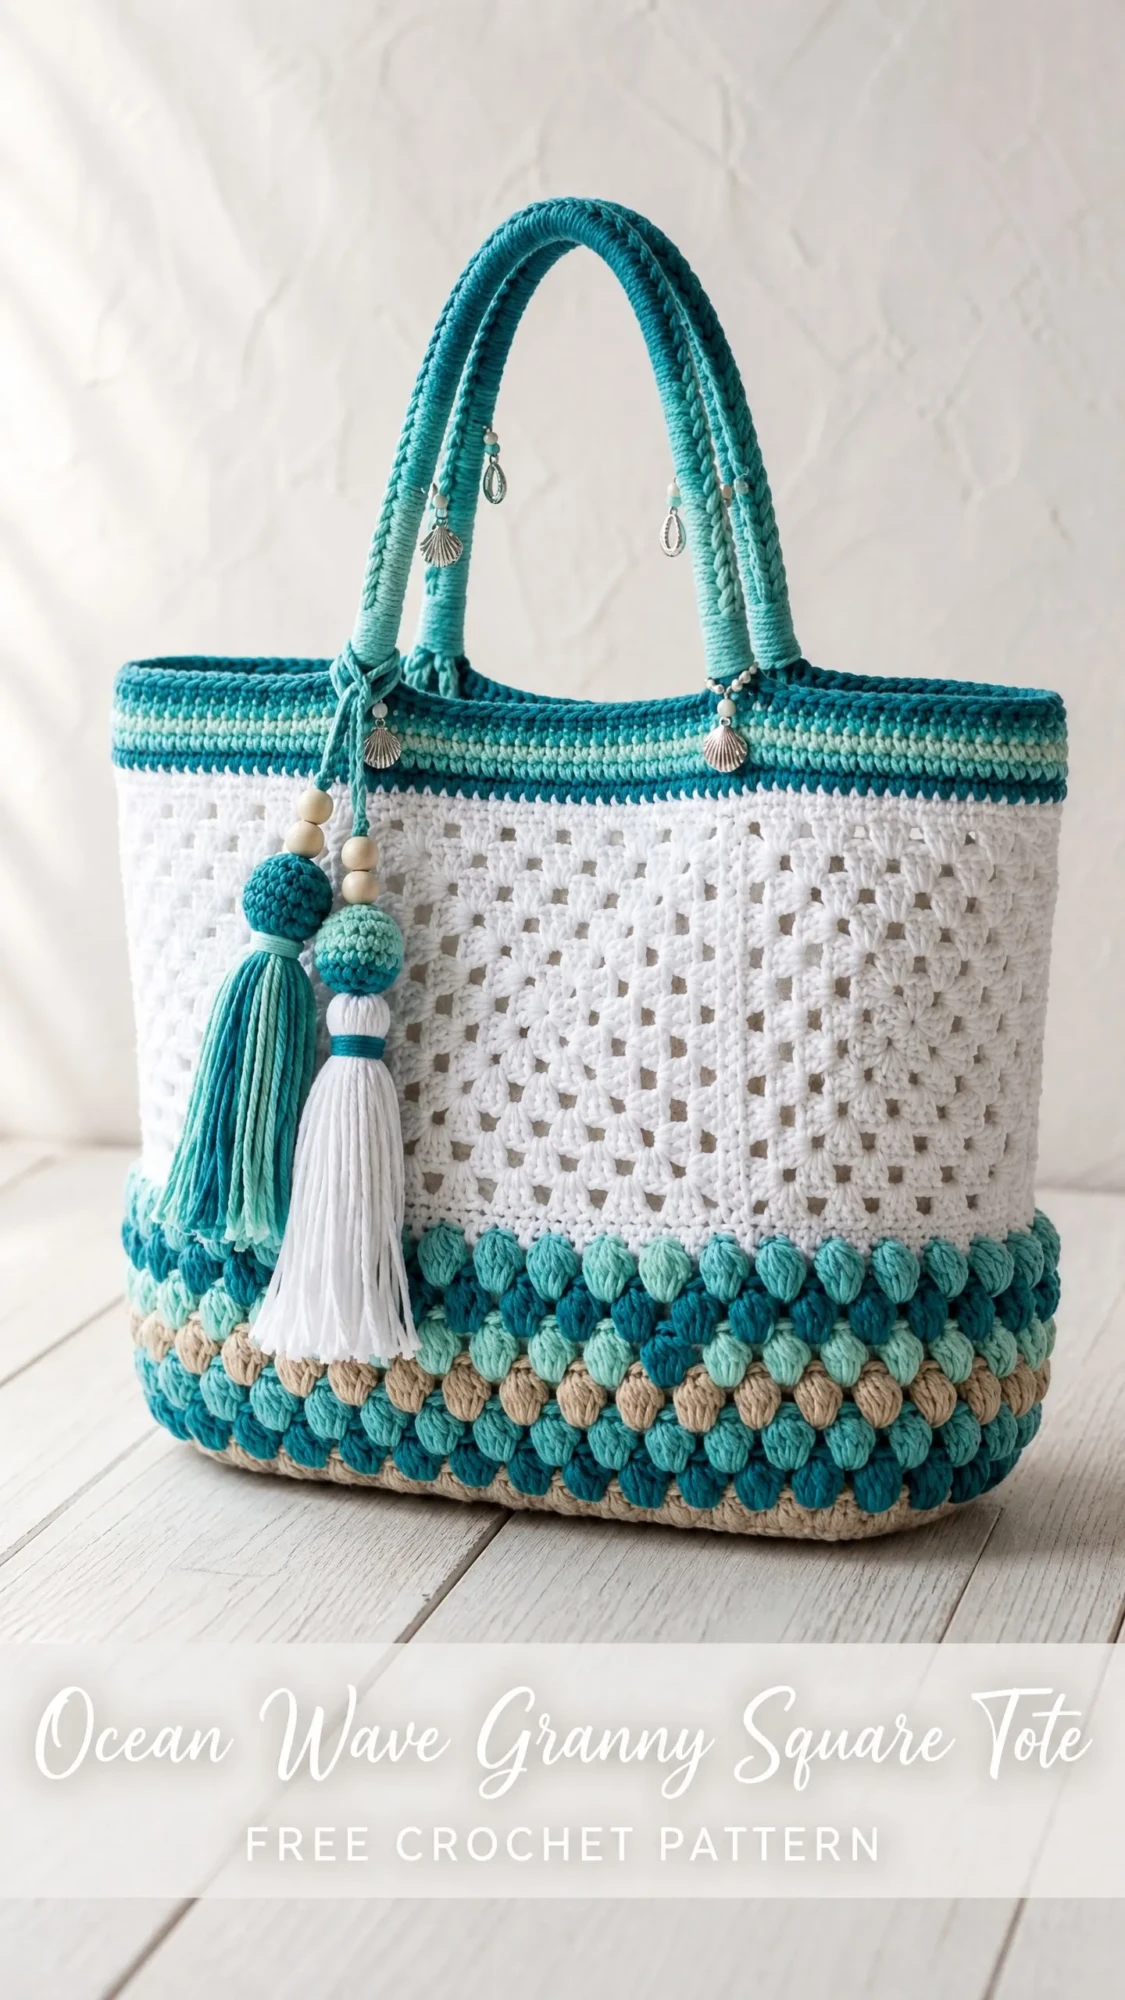
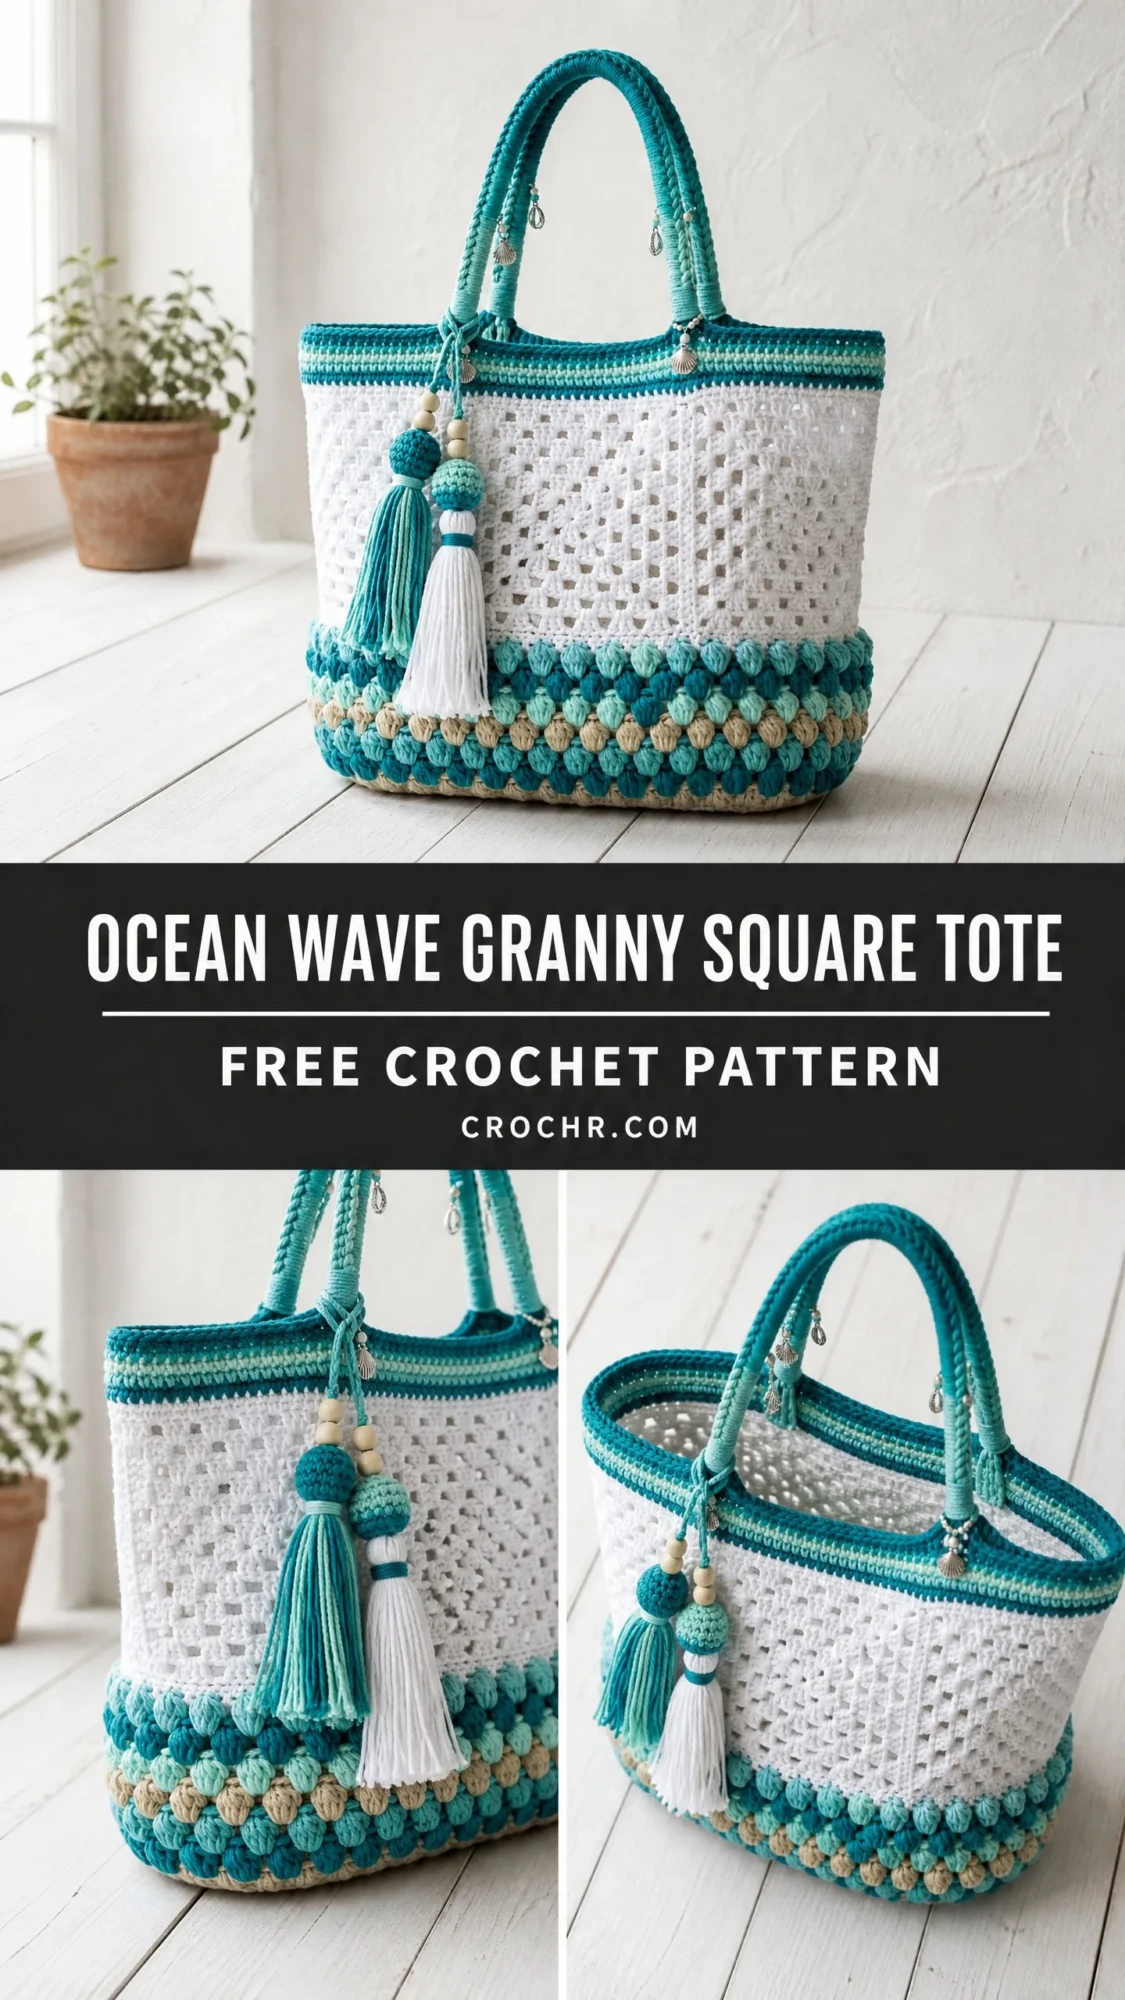
The finished bag turned out even better than I hoped. Those chunky puff stitches at the bottom mimic seafoam bubbles. The open granny mesh lets sand fall right through. And those braided handles with the little shell charms? My sister has not stopped using this bag since I gave it to her last summer.
Now I get to share it with you. This Ocean Wave Granny Square Tote crochet pattern combines three different textures into one stunning, functional piece. It looks complex, but I promise the techniques are more approachable than they appear. Let me walk you through every single step.
What Makes This Crochet Tote Bag Special
This is not your average granny square project. Instead of joining individual squares together, you will work a continuous granny mesh pattern in the round. This creates that beautiful lattice appearance without any seaming. The puff stitch border at the bottom adds structure and visual weight, while the slip stitch colorwork band at the top provides a clean, professional finish.
The combination of textures keeps the project interesting from start to finish. You will never get bored working the same stitch for hours on end. Each section introduces something new while building on skills from the previous section.
Skill level: Intermediate. You should be comfortable working in the round, changing colors, and following multi-step stitch instructions. If you have made granny squares before and tried basic colorwork, you are ready for this.
Time estimate: Plan for 20 to 28 hours of crochet time, including all finishing work.
Finished Dimensions
Your completed tote will measure approximately:
This is a generous size that holds beach essentials, farmer’s market finds, or a weekend’s worth of craft supplies.
Materials You Will Need
Yarn (all worsted weight, category 4):
Hook: US size J / 6.0 mm
Notions:
Yarn suggestions that work beautifully: Lion Brand Pound of Love, Paintbox Yarns Simply DK held double, or WeCrochet Brava Worsted. Any smooth worsted weight yarn that meets gauge will work. Avoid fuzzy or textured yarns since they will obscure your stitch definition.
Gauge (Please Swatch)
14 single crochet stitches and 16 rows equals 4 inches (10 cm) using a J / 6.0 mm hook.
One granny mesh repeat (cluster plus chain 2 space) measures approximately 1.5 inches (3.8 cm) wide.
Gauge matters here. If your gauge is off, your bag dimensions and proportions will change. Take ten minutes to swatch before diving in.
Abbreviations and Stitch Definitions
Let me explain every abbreviation you will encounter:
Special Stitches Explained Step by Step
Puff Stitch (ps)
This creates a puffy, rounded stitch that adds wonderful texture. Here is exactly how to make one:
1. Yarn over, insert hook into the indicated stitch or space.
2. Yarn over and pull up a loop to half double crochet height. You have 3 loops on hook.
3. Yarn over, insert hook into the same spot.
4. Yarn over and pull up a loop. You have 5 loops on hook.
5. Yarn over, insert hook into the same spot one more time.
6. Yarn over and pull up a loop. You have 7 loops on hook.
7. Yarn over and draw through all 7 loops.
8. Chain 1 to close and secure. This closing chain does not count as a stitch.
Each completed puff stitch counts as 1 stitch.
Granny Mesh Cluster (cl)
This is a 3 double crochet cluster worked into a chain space:
1. Yarn over, insert hook into the chain space.
2. Yarn over, pull up a loop, yarn over, draw through 2 loops. (First incomplete dc made.)
3. Repeat step 2 two more times in the same space. You now have 4 loops on hook.
4. Yarn over and draw through all 4 loops. Cluster complete.
Pattern Instructions
Section 1: The Base
The base is worked flat in rows of single crochet using Color A.
With Color A, chain 57.
Row 1 (RS): Sc in 2nd ch from hook and in each ch across. Turn. (56 sc)
Rows 2 through 24: Ch 1, sc in each sc across. Turn. (56 sc)
After Row 24, do not fasten off. Your base should measure approximately 16 inches wide by 6 inches tall.
Checkpoint: Count 56 stitches across any row and verify 24 total rows before continuing.
Section 2: Pick-Up Round
This round transforms your flat rectangle into the starting point for the bag sides. Do not turn after your last base row. Keep the right side facing you.
Round 1 (Color A):
Working across the top edge (the row you just finished): Ch 1, sc in each of the 56 sc. (56 sc)
At the corner: Work 2 sc into the corner stitch. Place a marker here.
Working down the right short side: Sc evenly along the row ends, working 1 sc per row for 24 rows. (24 sc)
At the corner: Work 2 sc, place marker.
Working along the bottom edge (starting chain side): Sc in each of the 56 foundation chain loops. (56 sc)
At the corner: Work 2 sc, place marker.
Working up the left short side: Sc along 24 row ends. (24 sc)
At the final corner: Work 2 sc, place marker. Join with sl st to first sc.
Total: (168 sc)
Checkpoint: You should have 168 stitches total with a marker at each of the 4 corners.
Section 3: Puff Stitch Border
This creates the gorgeous textured band at the bottom of your tote. Work 8 rounds following this color sequence:
Round 1 (Color A): Join Color A with standing sc in any stitch. Ch 1. [Ps in next st, ch 1, sk 1 st] around. Join with sl st to first ps. (84 ps)
Round 2 (Color A): Sl st into first ch-1 sp. Ch 1. [Ps in ch-1 sp, ch 1] around. Join. (84 ps)
Round 3 (Color B): Join Color B with sl st into any ch-1 sp. Ch 1. [Ps in ch-1 sp, ch 1] around. Join. (84 ps)
Round 4 (Color C): Join Color C with sl st into any ch-1 sp. Ch 1. [Ps in ch-1 sp, ch 1] around. Join. (84 ps)
Rounds 5 through 8: Continue the pattern, changing colors as indicated above. Each round: [Ps in ch-1 sp, ch 1] around. Join. (84 ps each round)
After Round 8, fasten off Colors B and C. Keep Color A attached.
Checkpoint: Your puff border should measure approximately 3.5 inches tall with 8 visible rounds of puff stitches.
Section 4: Transition Round
This round converts from puff stitches to the stitch count needed for granny mesh.
Round 9 (Color D): Join Color D with standing sc in any ch-1 sp. Work [sc in next 3 sts, sc2tog] 40 times around, then sc in remaining 8 sts. Join with sl st to first sc. (128 sc)
Section 5: Granny Mesh Body
This is where the magic happens. The open lattice pattern is worked entirely in Color D for 14 rounds.
Round 10 (Color D): Ch 4 (counts as dc plus ch 1). Sk 2 sc. [Cl in next sc, ch 2, sk 3 sc] 31 times. Cl in next sc, ch 2. Join with sl st to 3rd ch of beginning ch-4. (32 ch-2 sps)
Rounds 11 through 23 (Color D): Ch 3 (counts as first dc). Work 2 more dc in same ch-2 sp to complete the first cluster. Ch 2. [Cl in next ch-2 sp, ch 2] 31 times. Join with sl st to top of ch-3. (32 ch-2 sps per round)
Repeat for 13 more rounds total.
Checkpoint: Your mesh body should measure approximately 7 inches tall with 14 rounds of open lattice.
Section 6: Upper Border
This creates the clean striped band at the top of your bag.
Round 24 (Color D): Ch 1. Work 1 sc in top of each cluster and 2 sc in each ch-2 sp around. Join. Fasten off Color D. (96 sc)
Round 25 (Color A): Join Color A with sl st in back loop only of any sc. Sl st in blo of each sc around. Join. (96 sl sts)
Round 26 (Color B): Join Color B with sl st in blo of any sl st. Sl st in blo of each st around. Join. (96 sl sts)
Rounds 27 through 29: Continue alternating Colors A and B, working sl st in blo around each round. Fasten off all colors after Round 29. (96 sl sts each round)
Section 7: Handles (Make 2)
Cut two lengths of 5 mm rope, each 26 inches long. Seal the ends with tape.
Using 3 strands of Color A held together:
1. Make a slip knot and hold the rope against your hook.
2. Insert hook under the rope and slip stitch around it.
3. Continue slip stitching around the rope, rotating it slightly to cover evenly. Work approximately 3 slip stitches per inch.
4. Cover the entire 26-inch rope. Fasten off, leaving a long tail.
Attach handles centered on the front and back panels, sewing through at least 4 rounds of the upper border for stability. Thread shell charms and wooden beads onto short lengths of Color A and knot at the handle bases.
Section 8: Tassel
For the teal tassel: Wrap Color A 40 times around a 5-inch piece of cardboard. Tie at the top with a 10-inch length of yarn. Wrap tightly around the neck about 1 inch from the top. Cut the bottom loops and trim to 4 inches.
For the white tassel: Repeat with Color D, wrapping 30 times around 4-inch cardboard.
Thread wooden beads onto the teal tassel’s hanging loop. Stack the white tassel behind the teal one. Tie both to the left front handle base.
Finishing Your Ocean Wave Tote
Weave in all ends at least 2 inches in both directions before trimming. Block by stuffing the bag lightly with plastic bags, spritzing with water, and allowing to dry completely.
For the optional lining, cut cotton canvas into two rectangles (17 x 13 inches) and two side panels (7 x 13 inches). Sew into a box shape, fold the top edge down 1 inch, and whipstitch inside the bag.
Care Instructions
For acrylic yarn: Machine wash gentle, cold water, lay flat to dry.
For cotton yarn: Machine wash gentle or hand wash, reshape while damp, lay flat to dry.
Store stuffed lightly to maintain shape.
You Did It!
I hope this Ocean Wave Granny Square Tote pattern brings you as much joy to make as it brought me to design. Every time I see my sister grab hers on her way out the door, I smile. There is something special about creating handmade items that become part of someone’s everyday life.
Thank you so much for trusting me with your crafting time. I would absolutely love to see your finished totes! Tag me on Instagram or share in our Facebook group. Seeing your color combinations and personal touches is honestly the best part of sharing patterns.
If this pattern is calling to you, go ahead and save it to your Pinterest boards so you can find it when you are ready to start. And please drop a comment below if you make one. I read every single comment and love hearing how your projects turn out!
You Might Also Like
- Strawberry Sweet Bow Crochet Vest Free Crochet Pattern
- Blush Pink Diamond Lattice Mermaid Gown Free Crochet Pattern
- Sage Green Bohemian Lace Dress Free Crochet Pattern
- Ivory White Bridal Tote with Pearl Embellished Tassels Pattern
