If you’re looking for a cozy layering piece that keeps you warm while showing off your crochet skills, this vest is exactly what you need. The Strawberry Sweet Bow Crochet Vest uses a combination of textured bobble stitches and simple single crochet to create a stunning finished garment. It’s perfect for gift-giving, works up in a reasonable timeframe for an intermediate crocheter, and makes a real statement piece for anyone who loves whimsical, feminine details. The adorable strawberry bow appliqués around the neckline add a charming touch that’s easier to achieve than you might think.
About This Strawberry Bow Crochet Vest Pattern
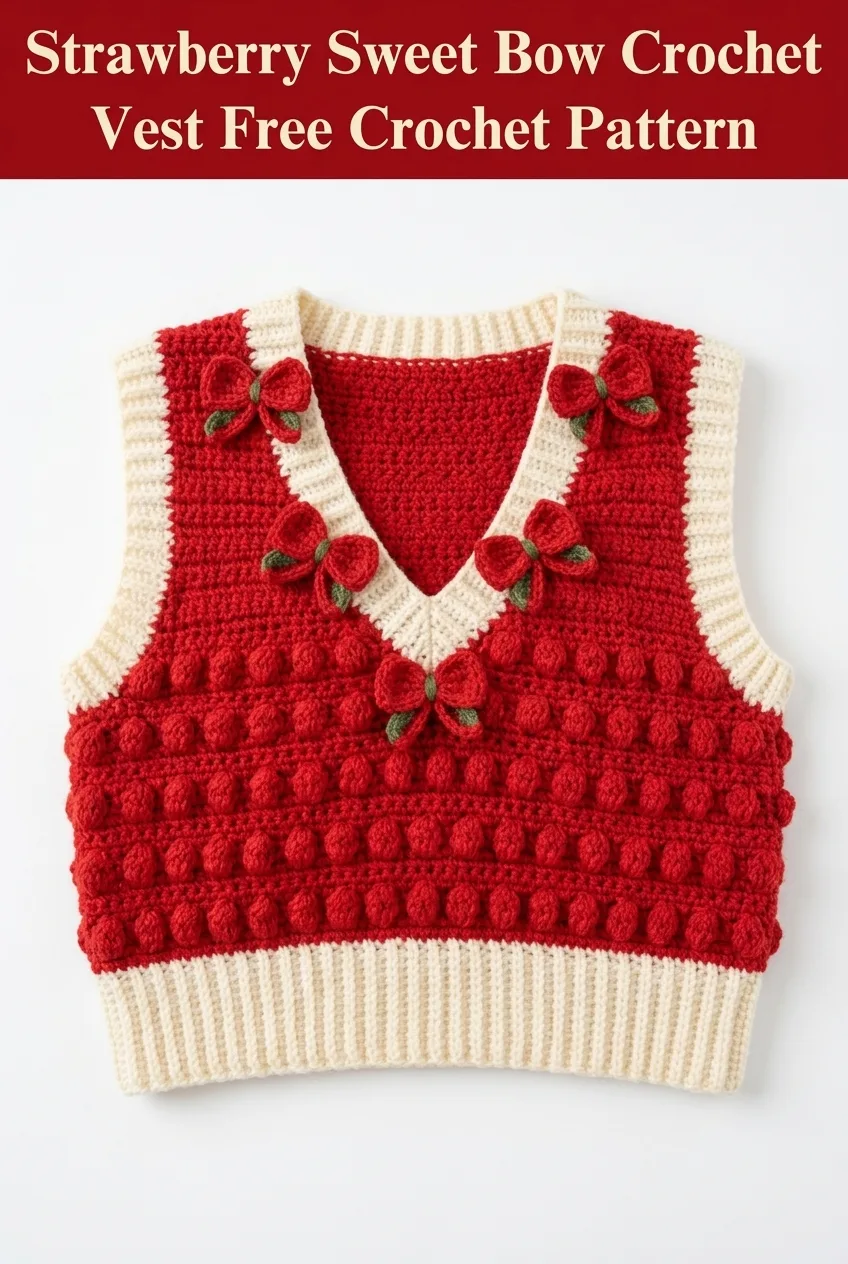
This crochet vest pattern creates a classic V-neck sweater vest with a cropped fit that layers beautifully over t-shirts, blouses, or turtlenecks. The body features rows of textured bobble stitches arranged in horizontal stripes against a solid single crochet background. The contrast cream ribbed hem and V-neck trim frame the bold red body perfectly.
What really sets this design apart are the dimensional strawberry bow appliqués. Each bow is worked separately and sewn on after the vest is complete. They feature red petals with olive green leaves, giving that sweet strawberry aesthetic.
Skill Level: Intermediate
This vest requires you to be comfortable with garment construction, working in rows, shaping for armholes and necklines, and creating bobble stitches. If you’ve made a few scarves and blankets and want to try your first wearable, this is a great challenge project. Don’t worry, I’ll walk you through every step.
Materials Needed
Yarn:
A smooth acrylic or cotton blend works beautifully for this project. Look for yarn with good stitch definition so your bobbles really pop. I recommend something like Paintbox Yarns Simply Aran or Lion Brand Vanna’s Choice.
Hook:
Notions:
Gauge:
16 stitches and 18 rows = 4 inches in single crochet with H/8 hook
Always make a gauge swatch before starting. This ensures your vest will fit properly. If your swatch is too small, go up a hook size. If it’s too large, go down a hook size.
Finished Measurements
This pattern is written for a cropped fit as shown. The sample appears to fit approximately a size Small/Medium with the following approximate measurements:
Abbreviations and Stitch Definitions
ch = chain: Yarn over, pull through loop on hook. This creates the foundation for your work.
sc = single crochet: Insert hook into stitch, yarn over, pull up a loop (2 loops on hook), yarn over, pull through both loops.
sl st = slip stitch: Insert hook into stitch, yarn over, pull through both the stitch and the loop on your hook in one motion. Used for joining and creating ribbing texture.
BLO = back loop only: Instead of inserting your hook under both loops of the stitch, only go under the back loop. This creates ribbing texture.
bob = bobble stitch: This creates those beautiful puffy texture bumps. To make a bobble, work 5 double crochets into the same stitch but stop each one before the final yarn over. You’ll have 6 loops on your hook. Yarn over and pull through all 6 loops at once. The bobble pops to the front of your work.
dc = double crochet: Yarn over, insert hook into stitch, yarn over, pull up a loop (3 loops on hook), yarn over, pull through 2 loops, yarn over, pull through remaining 2 loops.
sk = skip: Pass over the indicated number of stitches without working into them.
st(s) = stitch(es)
rep = repeat
Crochet Vest Pattern Instructions
Back Panel
With MC (red) and H/8 hook, ch 73.
Row 1: Sc in 2nd ch from hook and in each ch across. (72 sts)
Row 2: Ch 1, turn. Sc in each st across. (72 sts)
Rows 3-6: Rep Row 2. (72 sts)
Row 7 (Bobble Row): Ch 1, turn. Sc in first 3 sts, *bob in next st, sc in next 3 sts* rep across to last st, sc in last st. (72 sts, 17 bobbles)
Row 8: Ch 1, turn. Sc in each st across. (72 sts)
Rows 9-10: Rep Row 2. (72 sts)
Row 11 (Bobble Row): Ch 1, turn. Sc in first st, *bob in next st, sc in next 3 sts* rep across to last 3 sts, bob in next st, sc in last 2 sts. (72 sts, 18 bobbles)
This staggers your bobbles so they create a brick-like pattern rather than straight vertical lines.
Row 12: Ch 1, turn. Sc in each st across. (72 sts)
Continue alternating between 2-3 rows of plain sc and bobble rows, staggering the bobble placement each time, until piece measures approximately 10 inches from beginning.
Armhole Shaping
Next Row: Sl st in first 5 sts, ch 1, sc in same st and in each st across to last 5 sts, leave remaining 5 sts unworked. (62 sts)
Next Row: Ch 1, turn. Sc2tog (single crochet 2 together: insert hook in first st, pull up loop, insert hook in next st, pull up loop, yarn over, pull through all 3 loops), sc across to last 2 sts, sc2tog. (60 sts)
Next Row: Rep decrease row. (58 sts)
Continue in established bobble pattern without further decreases until armhole measures 7-8 inches.
Shoulder Shaping
Right Shoulder: Ch 1, turn. Sc in first 18 sts only. Leave remaining sts unworked. Fasten off.
Left Shoulder: Skip center 22 sts for back neck. Join MC in next st. Ch 1, sc in same st and in remaining 17 sts. (18 sts) Fasten off.
Front Panel (Make 2)
The front is worked in two pieces to create the V-neck. Each piece mirrors the other.
Right Front:
With MC and H/8 hook, ch 37.
Row 1: Sc in 2nd ch from hook and in each ch across. (36 sts)
Rows 2-6: Ch 1, turn. Sc in each st across. (36 sts)
Row 7 (Bobble Row): Ch 1, turn. Sc in first 3 sts, *bob in next st, sc in next 3 sts* rep across. (36 sts)
Continue in established bobble pattern, matching the back panel, until piece measures 10 inches.
Armhole Shaping:
At beginning of right side row, sl st in first 5 sts, ch 1, sc in same st and across. (31 sts)
Decrease 1 st at armhole edge every row twice. (29 sts)
V-Neck Shaping:
At the same time as armhole shaping, begin decreasing at neck edge.
At the end of wrong side rows, sc2tog over last 2 sts.
Continue decreasing 1 st at neck edge every other row until 18 sts remain for shoulder.
Work even until armhole matches back. Fasten off.
Left Front:
Work as for Right Front, reversing all shaping. Armhole decreases happen at the opposite edge, and neck decreases happen at the beginning of wrong side rows instead of the end.
Ribbed Hem Band
With CC (cream) and smaller hook, ch 11.
Row 1: Sc in 2nd ch from hook and in each ch across. (10 sts)
Row 2: Ch 1, turn. Sc BLO in each st across. (10 sts)
Rep Row 2 until band, slightly stretched, fits around bottom edge of joined front and back pieces.
Sl st ends together to form a loop. Whip stitch to bottom edge of vest using tapestry needle.
V-Neck Trim
With CC and smaller hook, join yarn at bottom of V-neck.
Round 1: Ch 1, sc evenly up right front neck edge, placing approximately 3 sc for every 4 rows. Work 3 sc in corner at shoulder seam. Sc across back neck. Work 3 sc in corner at left shoulder seam. Sc down left front neck edge. Sl st to first sc to join.
Rounds 2-3: Ch 1, sc in each st around, working sc3tog at the bottom point of the V to keep it laying flat. Sl st to join.
Fasten off and weave in ends.
Armhole Trim
Join CC at underarm seam.
Round 1: Ch 1, sc evenly around armhole opening, approximately 3 sc for every 4 rows. Sl st to first sc to join.
Round 2: Ch 1, sc in each st around. Sl st to join.
Fasten off. Repeat for second armhole.
Strawberry Bow Appliqués (Make 7-9)
Each bow consists of two petals and two leaves.
Bow Petals (Make 2 per bow)
With MC and H/8 hook, ch 4.
Row 1: Sc in 2nd ch from hook and in next 2 ch. (3 sts)
Row 2: Ch 1, turn. 2 sc in first st, sc in next st, 2 sc in last st. (5 sts)
Row 3: Ch 1, turn. Sc in each st across. (5 sts)
Row 4: Ch 1, turn. Sc2tog, sc in next st, sc2tog. (3 sts)
Row 5: Ch 1, turn. Sc3tog. Fasten off, leaving a long tail for sewing.
Bow Center
With MC, ch 6. Sc in 2nd ch from hook and in each ch across. Fasten off, leaving tail for sewing.
Pinch the two petals together at their points. Wrap the center piece around the middle and sew in place.
Leaves (Make 2 per bow)
With olive green, ch 7.
Row 1: Sl st in 2nd ch from hook, sc in next ch, hdc in next ch, dc in next ch, hdc in next ch, sc in last ch. Fasten off.
Sew leaves to the back of each completed bow, angling them outward.
Assembly
1. Block all pieces gently with steam or wet blocking to even out stitches.
2. With tapestry needle and matching yarn, seam front panels to back panel at shoulders using mattress stitch or whip stitch.
3. Seam side seams from bottom of armhole to top of ribbed hem band.
4. Attach hem band to bottom edge.
5. Work armhole and neckline trim.
6. Arrange strawberry bows around V-neckline as shown, with 3-4 bows along each side of the V and 1 at the center front. Pin in place before sewing.
7. Sew bows securely to vest using matching thread or yarn.
8. Weave in all remaining ends.
Tips for Success
Bobble Tip: Push your bobbles to the right side of the work as you complete them. They naturally want to pop to the back, so give them a little nudge. On the following row, make sure you’re working into the top of the bobble stitch, not skipping over it.
Gauge Matters: For garments, gauge is everything. A half stitch off per inch adds up to several inches across your finished piece. Take time to swatch.
Trying It On: Once you’ve completed the back panel, hold it up to yourself in a mirror. Does it cover where you want it to? Adjust your row count now rather than later.
Seaming: For the neatest seams, use mattress stitch. It’s invisible from the right side and creates a professional finish.

Styling Your Strawberry Bow Crochet Vest
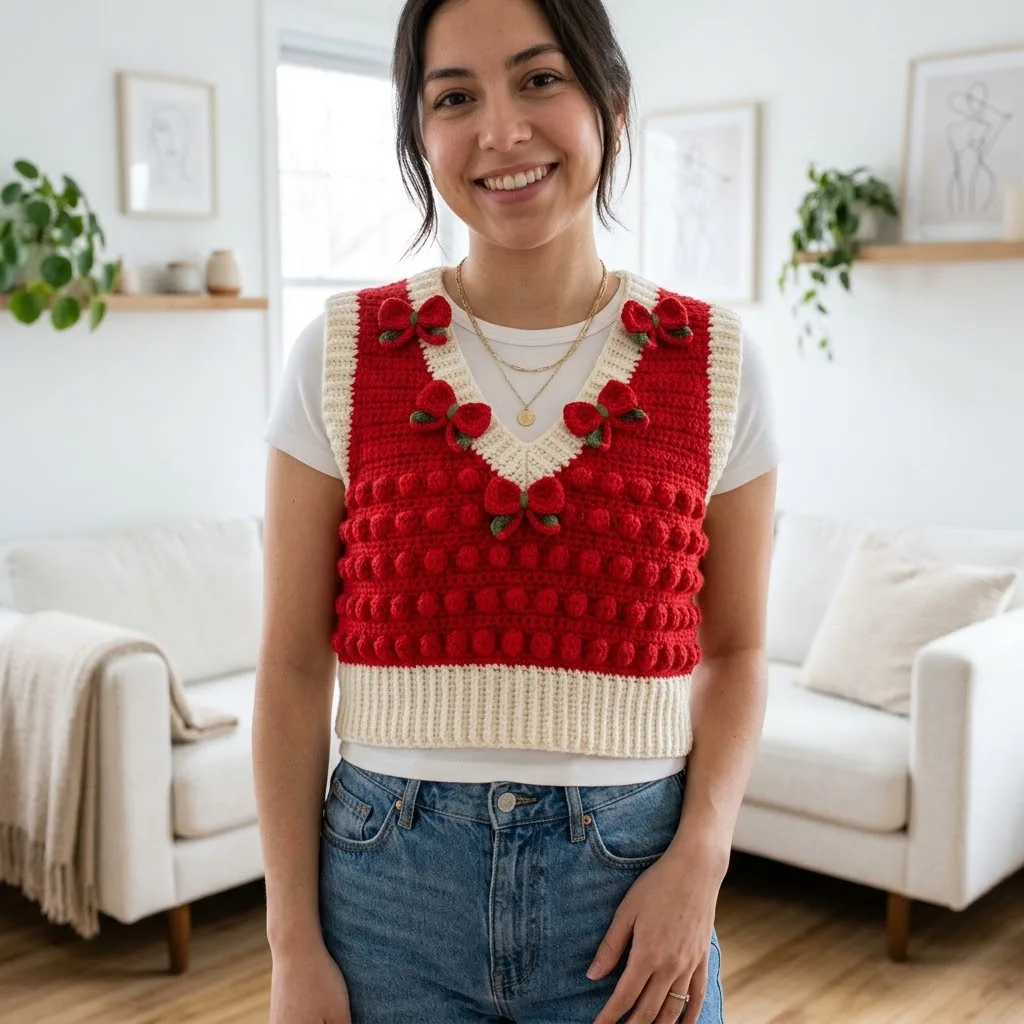
This crochet vest pattern creates a versatile statement piece. Layer it over a crisp white t-shirt like shown for a casual daytime look. Try it over a black turtleneck for something more sophisticated. The cropped length pairs perfectly with high-waisted jeans or skirts.
The strawberry bow details make this especially lovely for spring gatherings, brunches, or anytime you want to add a touch of whimsy to your outfit.
I hope you love making this Strawberry Sweet Bow Crochet Vest as much as I enjoyed designing it. If you found this pattern helpful, please save it to your Pinterest boards so you can find it easily when you’re ready to start. And I would absolutely love to see your finished vests, so drop a comment below or tag me on social media when you make yours!
