
THIS BAG. I cannot even tell you how excited I am to share this one with you. If you have been looking for a project that looks absolutely stunning but breaks down into manageable pieces, you just found it.
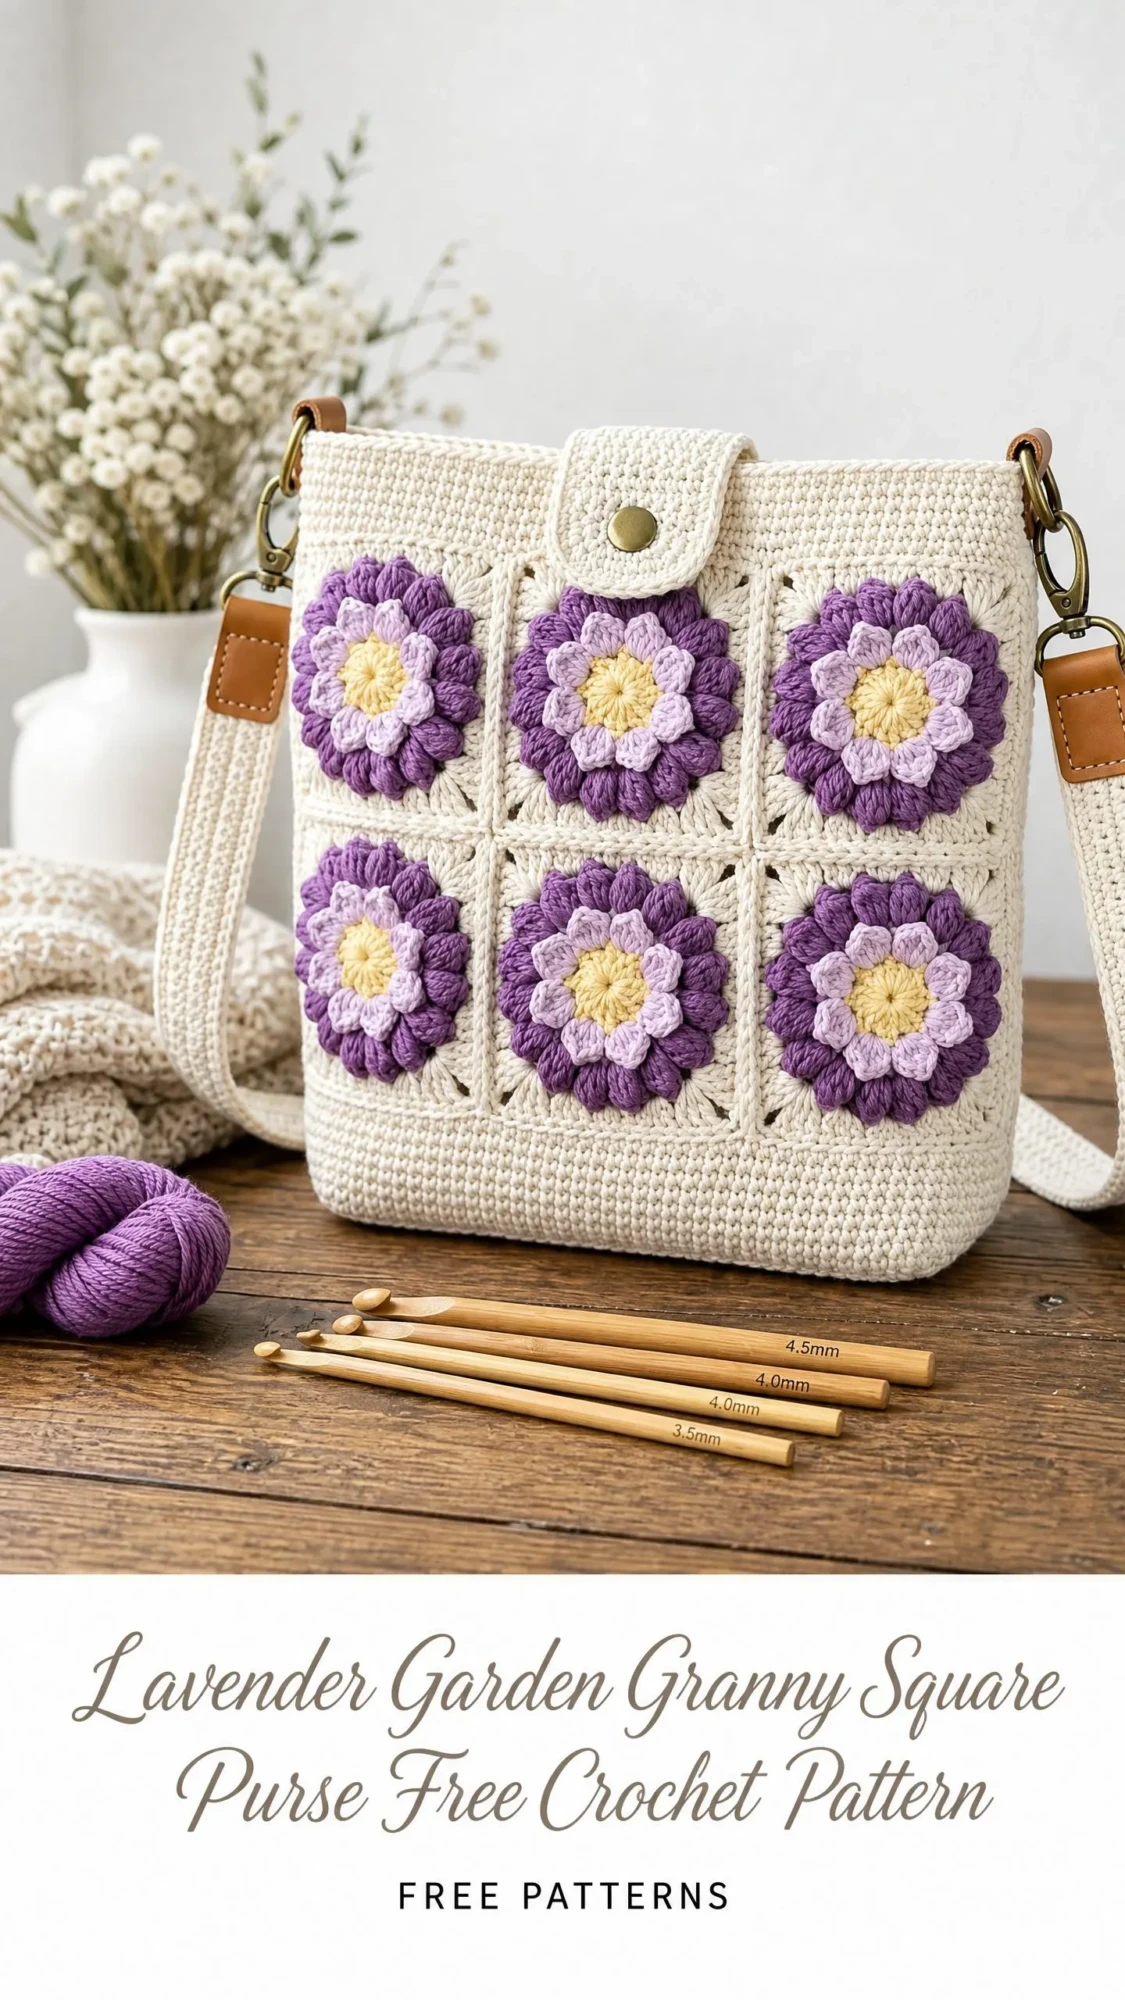
The Lavender Garden Granny Square Purse is one of those impressive projects that gets you compliments everywhere you go. We are talking dimensional layered flowers, a structured canvas-like body, and professional hardware details. The whole thing takes about 12 to 18 hours depending on your pace, and the result looks like something from a boutique.
Here is the best part. If you can make a basic granny square and follow along with clear instructions, you can absolutely do this. The flowers look complicated, but they are built in layers using puff stitches you will master quickly. Let me walk you through every single step.
About This Crochet Purse Pattern
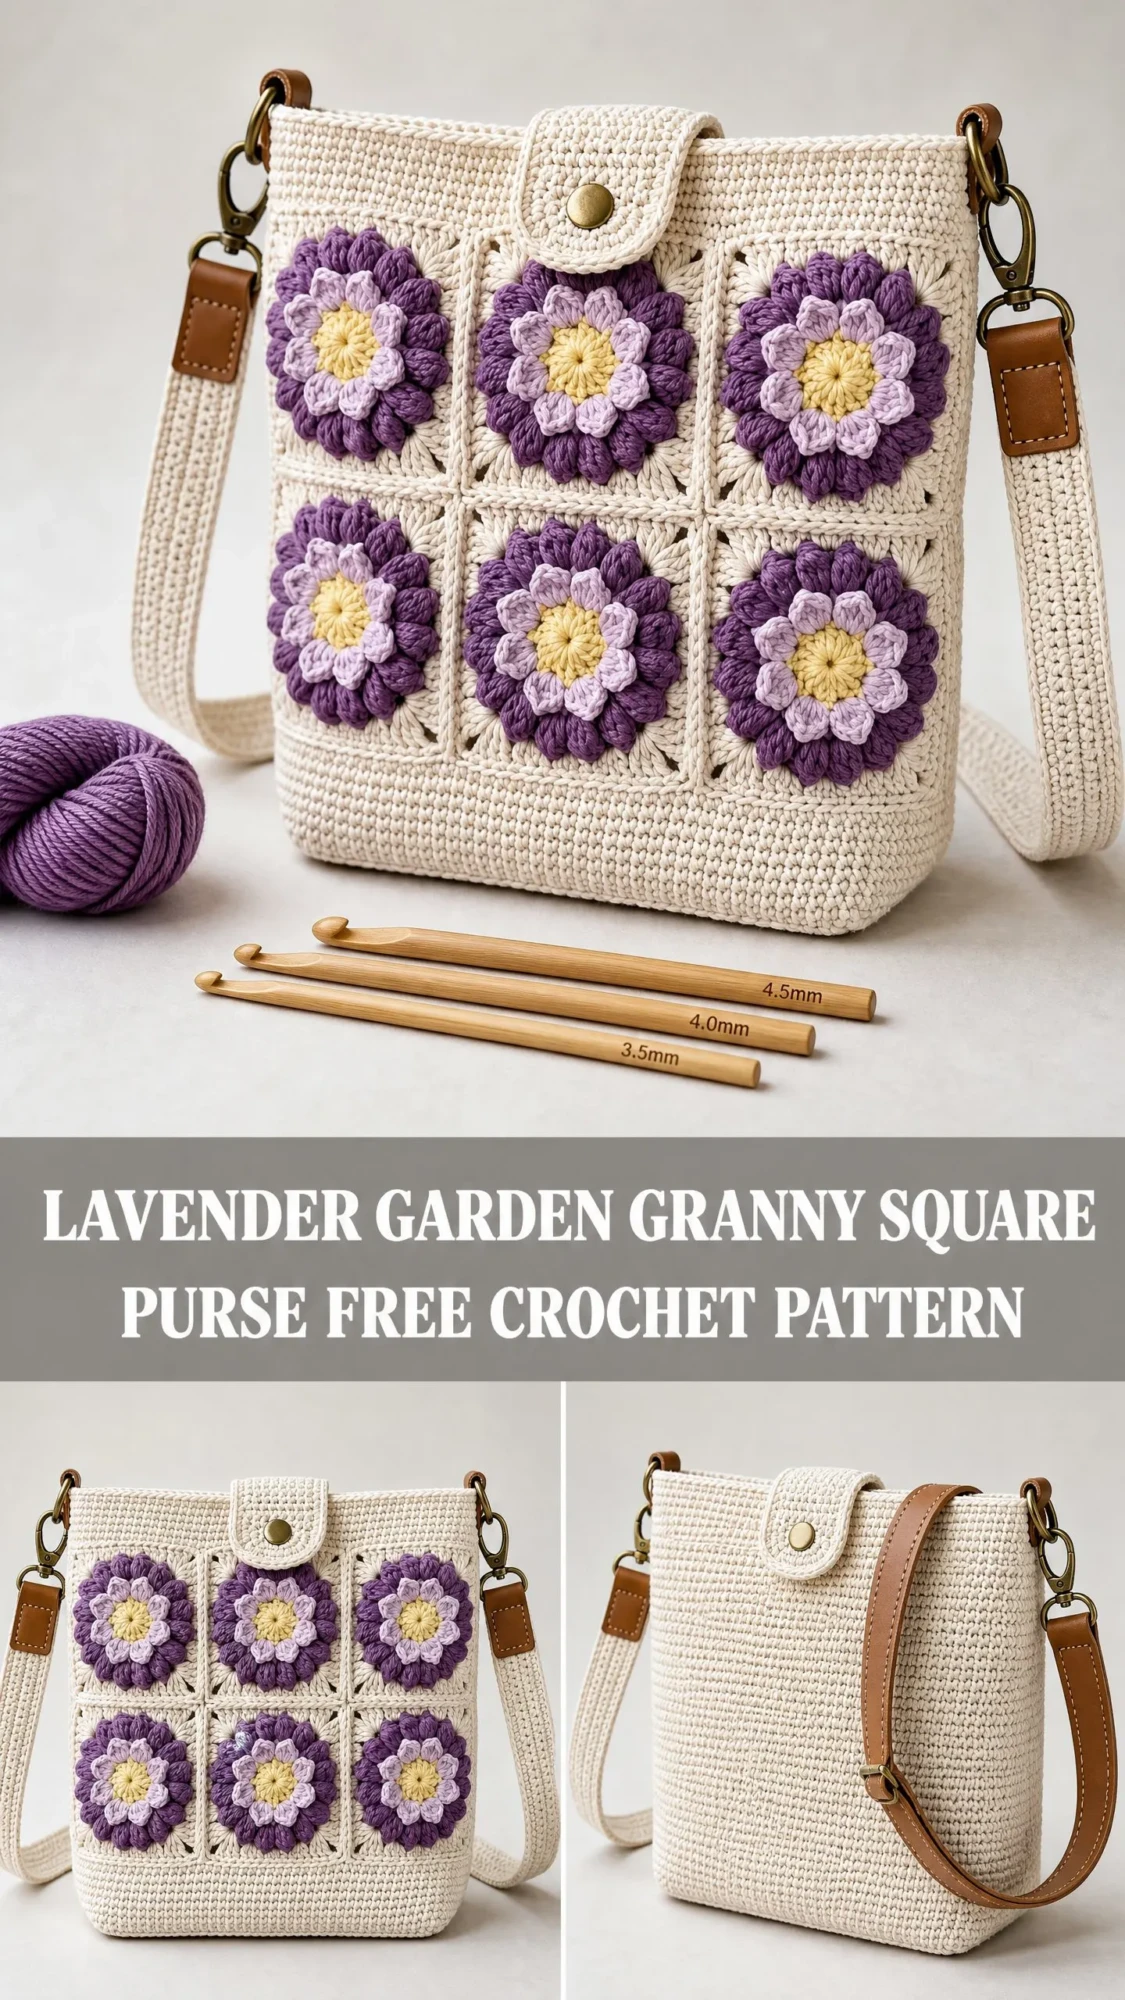
This structured crossbody purse features six dimensional floral granny squares arranged in a 3×2 grid on the front panel. Each square contains a raised three-layer flower worked in cream, lavender, and deep purple with a soft yellow center. The body uses slip stitch through the back loop for a dense fabric that holds its shape without any lining.
The finished bag measures approximately 9.5 inches wide by 10.5 inches tall, not including the strap. In metric, that is about 24 cm wide by 26.5 cm tall. The flap adds approximately 2.5 inches (6.5 cm) to the total height before folding.
Each floral granny square measures approximately 3 inches (7.5 cm) square after joining.
Skill Level
This is an intermediate to advanced project. You will need comfort with granny square construction, 3D raised petal techniques, working in the back loop only for extended sections, seaming panels, and attaching hardware.
But here is what I want you to know. If you have made a standard granny square before and have basic assembly experience, you will succeed with careful attention to the petal rounds. The techniques are not difficult once you understand the layering concept.
Materials You Will Need
Yarn (Worsted Weight, 100% Cotton or Cotton-Acrylic Blend):
Hook: US size G-6 / 4.0 mm (use a 3.5 mm for the granny squares if your tension runs loose)
Notions:
Yarn Suggestions
Option 1: Lion Brand 24/7 Cotton in Ecru (Color A), Iris (Color B), Lavender (Color C), and Butter (Color D). This 100% mercerized cotton gives excellent stitch definition and washes beautifully.
Option 2: Paintbox Yarns Simply DK Cotton in Paper White, Pansy Purple, Wisteria Purple, and Buttercup Yellow. A lighter DK cotton that pairs well with a 3.75 mm hook.
Option 3: Drops Safran in Off White, Dark Purple, Light Purple, and Yellow. This yarn has a subtle sheen that enhances the dimensional petals beautifully.
Substitution Note: Any smooth worsted or heavy DK 100% cotton or cotton-blend yarn will work. Avoid fuzzy or textured yarns as stitch definition is essential for the petal technique.
Gauge
Front and Back Body Panel (working in slip stitch BLO):
18 stitches and 22 rows = 4 inches / 10 cm, using Color A and a 4.0 mm hook.
Floral Granny Square:
Each finished square measures 3 inches / 7.5 cm x 3 inches / 7.5 cm using a 3.5 mm hook for the flower rounds and a 4.0 mm hook for the granny frame rounds.
Gauge is essential for this project. The body panels and granny squares must coordinate in size or the assembly will not lie flat. Swatch both and adjust hook size as needed before beginning.
Abbreviations (US Terms)
Special Stitches for This Crochet Tutorial
Slip Stitch BLO Fabric
Insert hook into the back loop only of the indicated stitch. Yarn over and pull through both the back loop and the loop on hook in one motion. This produces a dense, ridged, canvas-like fabric. All body panel rows are worked this way unless noted.
Puff Petal (used in flower construction)
Step 1: Insert hook into the indicated stitch or space.
Step 2: Yarn over, pull up a loop to approximately 0.5 inch / 1.3 cm height.
Step 3: Repeat Steps 1 and 2 in the same stitch two more times, giving you 7 loops on hook.
Step 4: Yarn over and pull through all 7 loops on hook.
Step 5: Chain 1 to close. This chain-1 does not count as a stitch.
This creates one rounded, raised petal cluster.
Granny Corner Cluster
(3 dc, ch 2, 3 dc) all worked into the same corner ch-2 space. This is the standard granny square corner.
Granny Side Cluster
3 dc worked into a chain-1 space along the side of a granny square.
Pattern Notes Before You Begin
The bag is constructed in this order: (1) six floral granny squares, (2) front body panel, (3) back body panel including flap, (4) granny panel attachment, (5) side and bottom seams, (6) top edging, (7) hardware and strap attachment.
Color changes within granny squares: fasten off and rejoin cleanly at each color change. Do not carry yarn across the work.
All granny squares are worked with the right side facing for each round. The body panels are worked flat, turning at the end of each row.
A 4.0 mm hook is used for body panels. A 3.5 mm hook is recommended for the granny flower center rounds to keep the dimensional petals tight and raised.
Step By Step Crochet Pattern Instructions
Floral Granny Square (Make 6)
Each square is worked in four stages: yellow center, lavender petal ring, purple outer petal ring, and cream granny frame.
Use 3.5 mm hook for Rounds 1 through 4. Switch to 4.0 mm hook for Rounds 5 and 6.
ROUND 1 (Yellow Center):
With Color D, make a magic ring (or ch 4, join with sl st to form ring).
Ch 3 (counts as first dc here and throughout), work 11 dc into ring. Join with sl st to top of beg ch-3. (12 dc)
Fasten off Color D.
ROUND 2 (First Petal Base, Lavender):
Join Color C with sl st to any st of Round 1.
Working in FLO of Round 1:
(Puff Petal, ch 1) in each of the 12 sts around.
Join with sl st to top of first puff petal. (12 puff petals, 12 ch-1 spaces)
Do not fasten off Color C yet. Leave the back loops of Round 1 free.
ROUND 3 (Second Petal Base, Purple):
Join Color B with sl st to any skipped back loop of Round 1 (the loops left unworked in Round 2).
Working in BLO of Round 1:
(Puff Petal, ch 2) in each of the 12 back loops around.
Join with sl st to top of first puff petal. (12 puff petals, 12 ch-2 spaces)
Fasten off Color B. The purple petals now fan outward and over the lavender petals, creating the layered effect.
ROUND 4 (Stabilizing Round, Color C):
Return to working Color C. You may still have it attached, or rejoin.
Working behind all petals, sl st into the back loop of each puff petal top from Round 3 (not into the ch spaces, but the petal tops themselves, pulling the thread flat behind the flower). This round simply stabilizes the center before the granny frame is applied.
Ch 1. Sl st to each of the 12 petal tops from Round 3, working from behind. Join. (12 sl st)
Fasten off Color C.
ROUND 5 (Granny Frame, Round 1, Color A):
Switch to 4.0 mm hook.
Join Color A with sl st to any ch-2 space from Round 3.
Ch 3 (counts as dc), 2 dc in same ch-2 space (this is the first granny cluster).
Ch 1.
(3 dc, ch 2, 3 dc) in next ch-2 space (corner made).
Ch 1.
3 dc in next ch-2 space.
Ch 1.
(3 dc, ch 2, 3 dc) in next ch-2 space (corner made).
Ch 1.
3 dc in next ch-2 space.
Ch 1.
(3 dc, ch 2, 3 dc) in next ch-2 space (corner made).
Ch 1.
3 dc in next ch-2 space.
Ch 1.
(3 dc, ch 2, 3 dc) in next ch-2 space (corner made).
Ch 1.
Join with sl st to top of beg ch-3.
(4 corner clusters, 4 side clusters, 8 ch-1 spaces, 4 ch-2 corner spaces)
Fasten off Color A.
ROUND 6 (Granny Frame, Round 2, Color A):
Join Color A with sl st to any corner ch-2 space.
Ch 3 (counts as dc), (2 dc, ch 2, 3 dc) in same corner sp (corner made).
Ch 1.
3 dc in next ch-1 sp (side cluster).
Ch 1.
(3 dc, ch 2, 3 dc) in next corner ch-2 sp (corner made).
Ch 1.
3 dc in next ch-1 sp.
Ch 1.
Rep from corner to corner around, working a corner cluster at each ch-2 sp and a side cluster in each ch-1 sp between corners.
Join with sl st to top of beg ch-3.
(4 corner clusters, 8 side clusters, 12 ch-1 spaces between clusters, 4 ch-2 corner spaces)
Fasten off and weave in all ends. Block lightly. Square should measure 3 inches / 7.5 cm.
MAKE 6 SQUARES TOTAL.
Joining the Squares Into a Panel
Arrange 6 squares in a 3-column by 2-row grid on a flat surface, all with right sides facing up. Align the flowers so they all face the same direction.
Row 1 of grid (top row): Squares 1, 2, 3 from left to right.
Row 2 of grid (bottom row): Squares 4, 5, 6 from left to right.
JOIN HORIZONTALLY WITHIN EACH ROW:
Hold Square 1 and Square 2 with right sides facing. Using Color A and a 4.0 mm hook, whip stitch through the outer loops of each corresponding stitch along the shared side. Join Square 2 to Square 3 the same way. Repeat for the bottom row: join Square 4 to Square 5, and Square 5 to Square 6.
JOIN ROWS TOGETHER:
Hold the top row and bottom row with right sides together. Whip stitch along the full bottom edge of the top row, matching stitch for stitch with the top edge of the bottom row across all three columns.
The finished joined panel should measure approximately 9 inches / 23 cm wide by 6 inches / 15 cm tall.
Front Body Panel
The front panel is a flat rectangle worked entirely in slip stitch BLO using Color A and a 4.0 mm hook.
Foundation Chain:
Ch 44.
ROW 1: Sl st into second ch from hook and into each ch across. Turn. (43 sl st)
ROWS 2 through 48: Ch 1, sl st in BLO of each st across. Turn. (43 sl st each row)
After Row 48, the panel should measure approximately 9.5 inches / 24 cm wide and 8.5 inches / 21.5 cm tall.
Fasten off. Weave in ends.
Back Body Panel With Flap
The back panel is the same width and height as the front panel, with a flap extension.
Foundation Chain:
Ch 44.
ROW 1: Sl st into second ch from hook and into each ch across. Turn. (43 sl st)
ROWS 2 through 48: Ch 1, sl st in BLO of each st across. Turn. (43 sl st each row)
Do not fasten off. Continue for the flap.
FLAP ROW 1: Ch 1, sk first 2 sts, sl st in BLO of each st across to last 2 sts, sk last 2 sts. Turn. (39 sl st)
FLAP ROWS 2 through 12: Ch 1, sl st in BLO of each st across. Turn. (39 sl st each row)
FLAP ROW 13 (rounded edge row):
Ch 1, sl st in BLO of each st across. Turn. (39 sl st)
Fasten off.
Front Panel Edging and Granny Panel Attachment
Position the granny panel so its bottom edge aligns with Row 20 of the front panel and its top edge aligns with Row 48 (the top edge of the front panel). The granny panel should be centered horizontally.
Using Color A and a yarn needle, whip stitch the granny panel to the front panel along all four edges. The granny squares sit on top of the front panel fabric, not replacing it.
Seaming the Bag
Place the front panel and back panel with right sides together.
BOTTOM SEAM:
Using Color A and a yarn needle, whip stitch along the bottom edge through both layers. (43 sts across)
LEFT SIDE SEAM:
Whip stitch along the left side edge from bottom to top edge of the body only (not into the flap rows). (48 rows)
RIGHT SIDE SEAM:
Whip stitch along the right side edge from bottom to top edge of the body only. (48 rows)
Turn the bag right side out.
Top Edge Finish
Using Color A and a 4.0 mm hook, work one round of sc around the entire top opening of the bag.
FRONT TOP EDGE: Join Color A at the top right corner of the front panel with sl st. Sc evenly across the top edge of the front panel. Approximately 43 sc.
Work 1 sc into each side corner joining point.
BACK TOP EDGE: Sc evenly across the top edge of the back panel from right to left. Approximately 43 sc.
Work 1 sc into the remaining side corner.
Join with sl st to first sc. (approximately 90 sc total)
Fasten off. Weave in ends.
Flap Edging
Using Color A and a 4.0 mm hook, work 1 round of sc around all three exposed edges of the flap.
Start at the top right corner where the flap begins.
Sc down the right side of the flap. (approximately 13 sc)
Work 3 sc in the bottom right corner.
Sc across the bottom of the flap. (39 sc)
Work 3 sc in the bottom left corner.
Sc up the left side of the flap. (approximately 13 sc)
Join with sl st to first sc.
Total approximate: 71 sc.
Fasten off. Weave in ends.
Snap Closure Placement
Fold the flap over the front of the bag. Mark the center of the underside of the flap bottom edge and the corresponding spot on the front panel top edge directly below.
Sew one side of the magnetic snap or large sew-on snap to the underside center of the flap, approximately 0.5 inch up from the bottom edge of the flap.
Sew the corresponding snap piece to the outside of the front panel, approximately 0.5 inch below the front top edge, centered.
Hardware and Strap Attachment
Fold each leather tab in half around a D-ring, aligning the holes or edges. Stitch or rivet through both layers to secure.
On the left side of the bag at the top edge, push the raw ends of one leather tab to the inside of the bag at the side seam. Position the tab so the D-ring extends just above the top edge. Stitch the leather tab securely to the inside of the bag.
Repeat on the right side with the second tab and D-ring.
Clip the crossbody strap’s hook clips to each D-ring. Adjust the strap length to your desired length, typically 48 to 54 inches for a comfortable crossbody fit.
Optional Crocheted Strap
If a fabric strap is not preferred, work the following:
Using 2 strands of Color A held together and a 5.0 mm hook:
Ch 7.
ROW 1: Sl st in second ch from hook and each ch across. Turn. (6 sl st)
ROWS 2 through 120 (or until strap reaches desired length): Ch 1, sl st in BLO across. Turn. (6 sl st)
Fasten off. Attach each end to a D-ring tab using a secure whip stitch.
Size Customization Tips
To make the bag wider: Add stitches to the foundation chain in multiples of 3 and add one more granny square column, making a 4×2 panel of 8 squares.
To make the bag taller: Add rows to the front and back body panels before the flap. Every 4 to 5 rows added equals approximately 1 inch in height.
To create a smaller phone pouch version: Work a foundation chain of 28 stitches and 30 rows for the body panels. Make 4 granny squares in a 2×2 arrangement.
Finishing and Blocking Your Lavender Garden Purse
Wet blocking is strongly recommended for the granny squares before assembling the panel. Soak completed squares in cool water for 10 minutes, squeeze gently without wringing, and pin each square to a foam blocking board to exact dimensions. Allow to dry fully.
The body panels benefit from light misting and gentle hand smoothing while pinned to shape. The slip stitch BLO fabric is already dense and typically holds shape without extensive blocking.
Weave all ends securely on the wrong side, using a yarn needle to work ends back through at least 1 inch of fabric in two directions.
After full assembly, lightly steam the exterior of the bag (do not iron directly onto the dimensional petals) to set the shape. Use a pressing cloth.
Care Instructions
Machine wash on gentle/delicate cycle in cool water if using 100% cotton yarn. Lay flat to dry. Do not tumble dry, as the structure of the bag can distort with heat. If leather tabs are attached, hand wash only to protect the hardware and leather. Remove the strap before washing if it is not crochet. Store the bag stuffed lightly with tissue paper to maintain its shape.
You Did It!
Thank you so much for choosing this pattern for your next crochet project. I really hope you love making it as much as I loved designing it. This bag is one of those projects that feels like such an accomplishment when you are done.
If you make one, I would absolutely love to see it! Tag me on Instagram or share a photo in my Facebook group. Seeing your finished projects is honestly the best part of my day.
Save this Lavender Garden Granny Square Purse crochet pattern to your Pinterest boards so you can find it whenever you are ready to start. And please drop a comment below if you make one. I love hearing how your projects turn out!
You Might Also Like
- Sage Green Textured Slipper Socks Free Crochet Pattern
- Cream Boho Tassel Purse Free Crochet Pattern
- Sunny Daisy Baby Dress Free Crochet Pattern
- Cherry Blossom Spring Charm Bracelet Free Crochet Pattern
