
THIS ONE IS A SHOWSTOPPER. Seriously, if you want a project that looks absolutely impressive but uses skills you probably already have, this granny square tote is going to make you so happy. We’re talking classic granny squares, beautiful color blending, and a finished bag that looks like it belongs in a boutique. The best part? You can knock out a square in about 20 minutes once you get going, and watching those gorgeous floral medallions stack up is genuinely addictive.
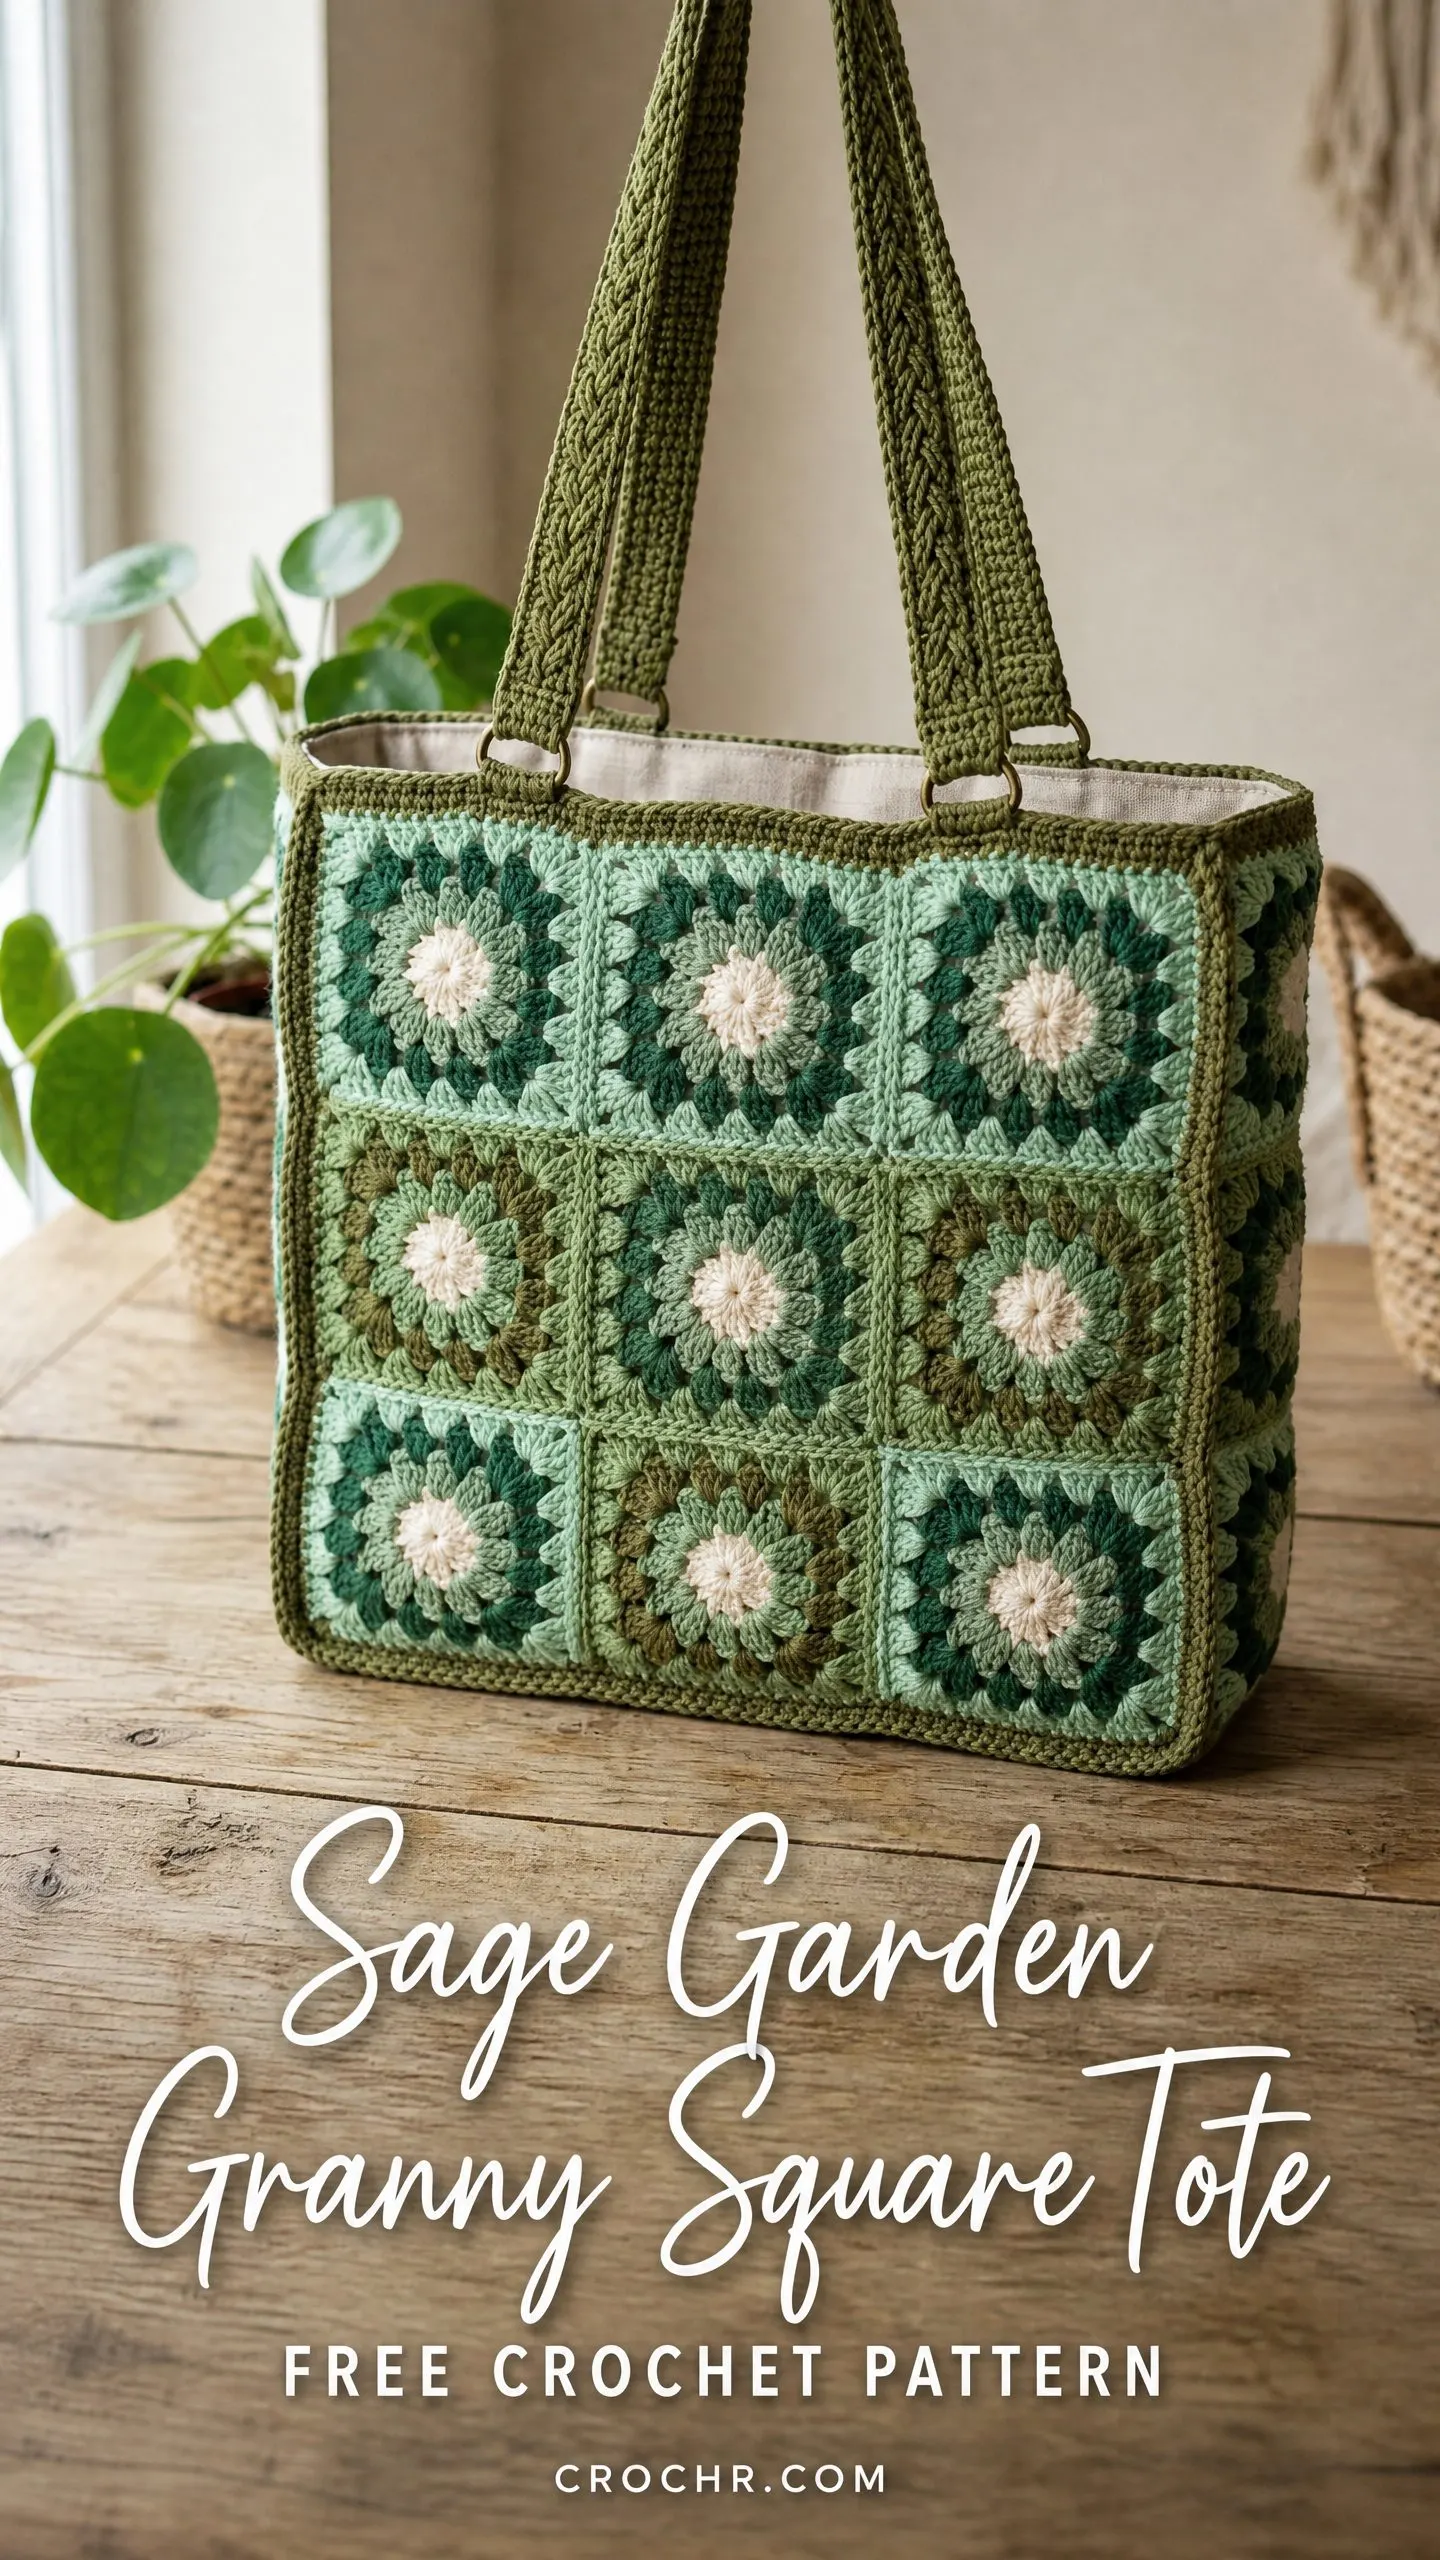
I know a lined tote with straps sounds like a big undertaking. But here’s the truth: if you can make a granny square and sew a basic seam, you can absolutely make this bag. The construction breaks down into simple, manageable steps. Make squares. Join squares. Add a bottom. Sew in a lining. Attach straps. That’s it.
This Sage Garden Granny Square Tote makes an incredible gift for someone you love, or honestly, for yourself. The earthy green palette works year round, the structure holds up beautifully, and every time someone asks where you got it, you get to say you made it. Let’s dive in.
About This Crochet Pattern
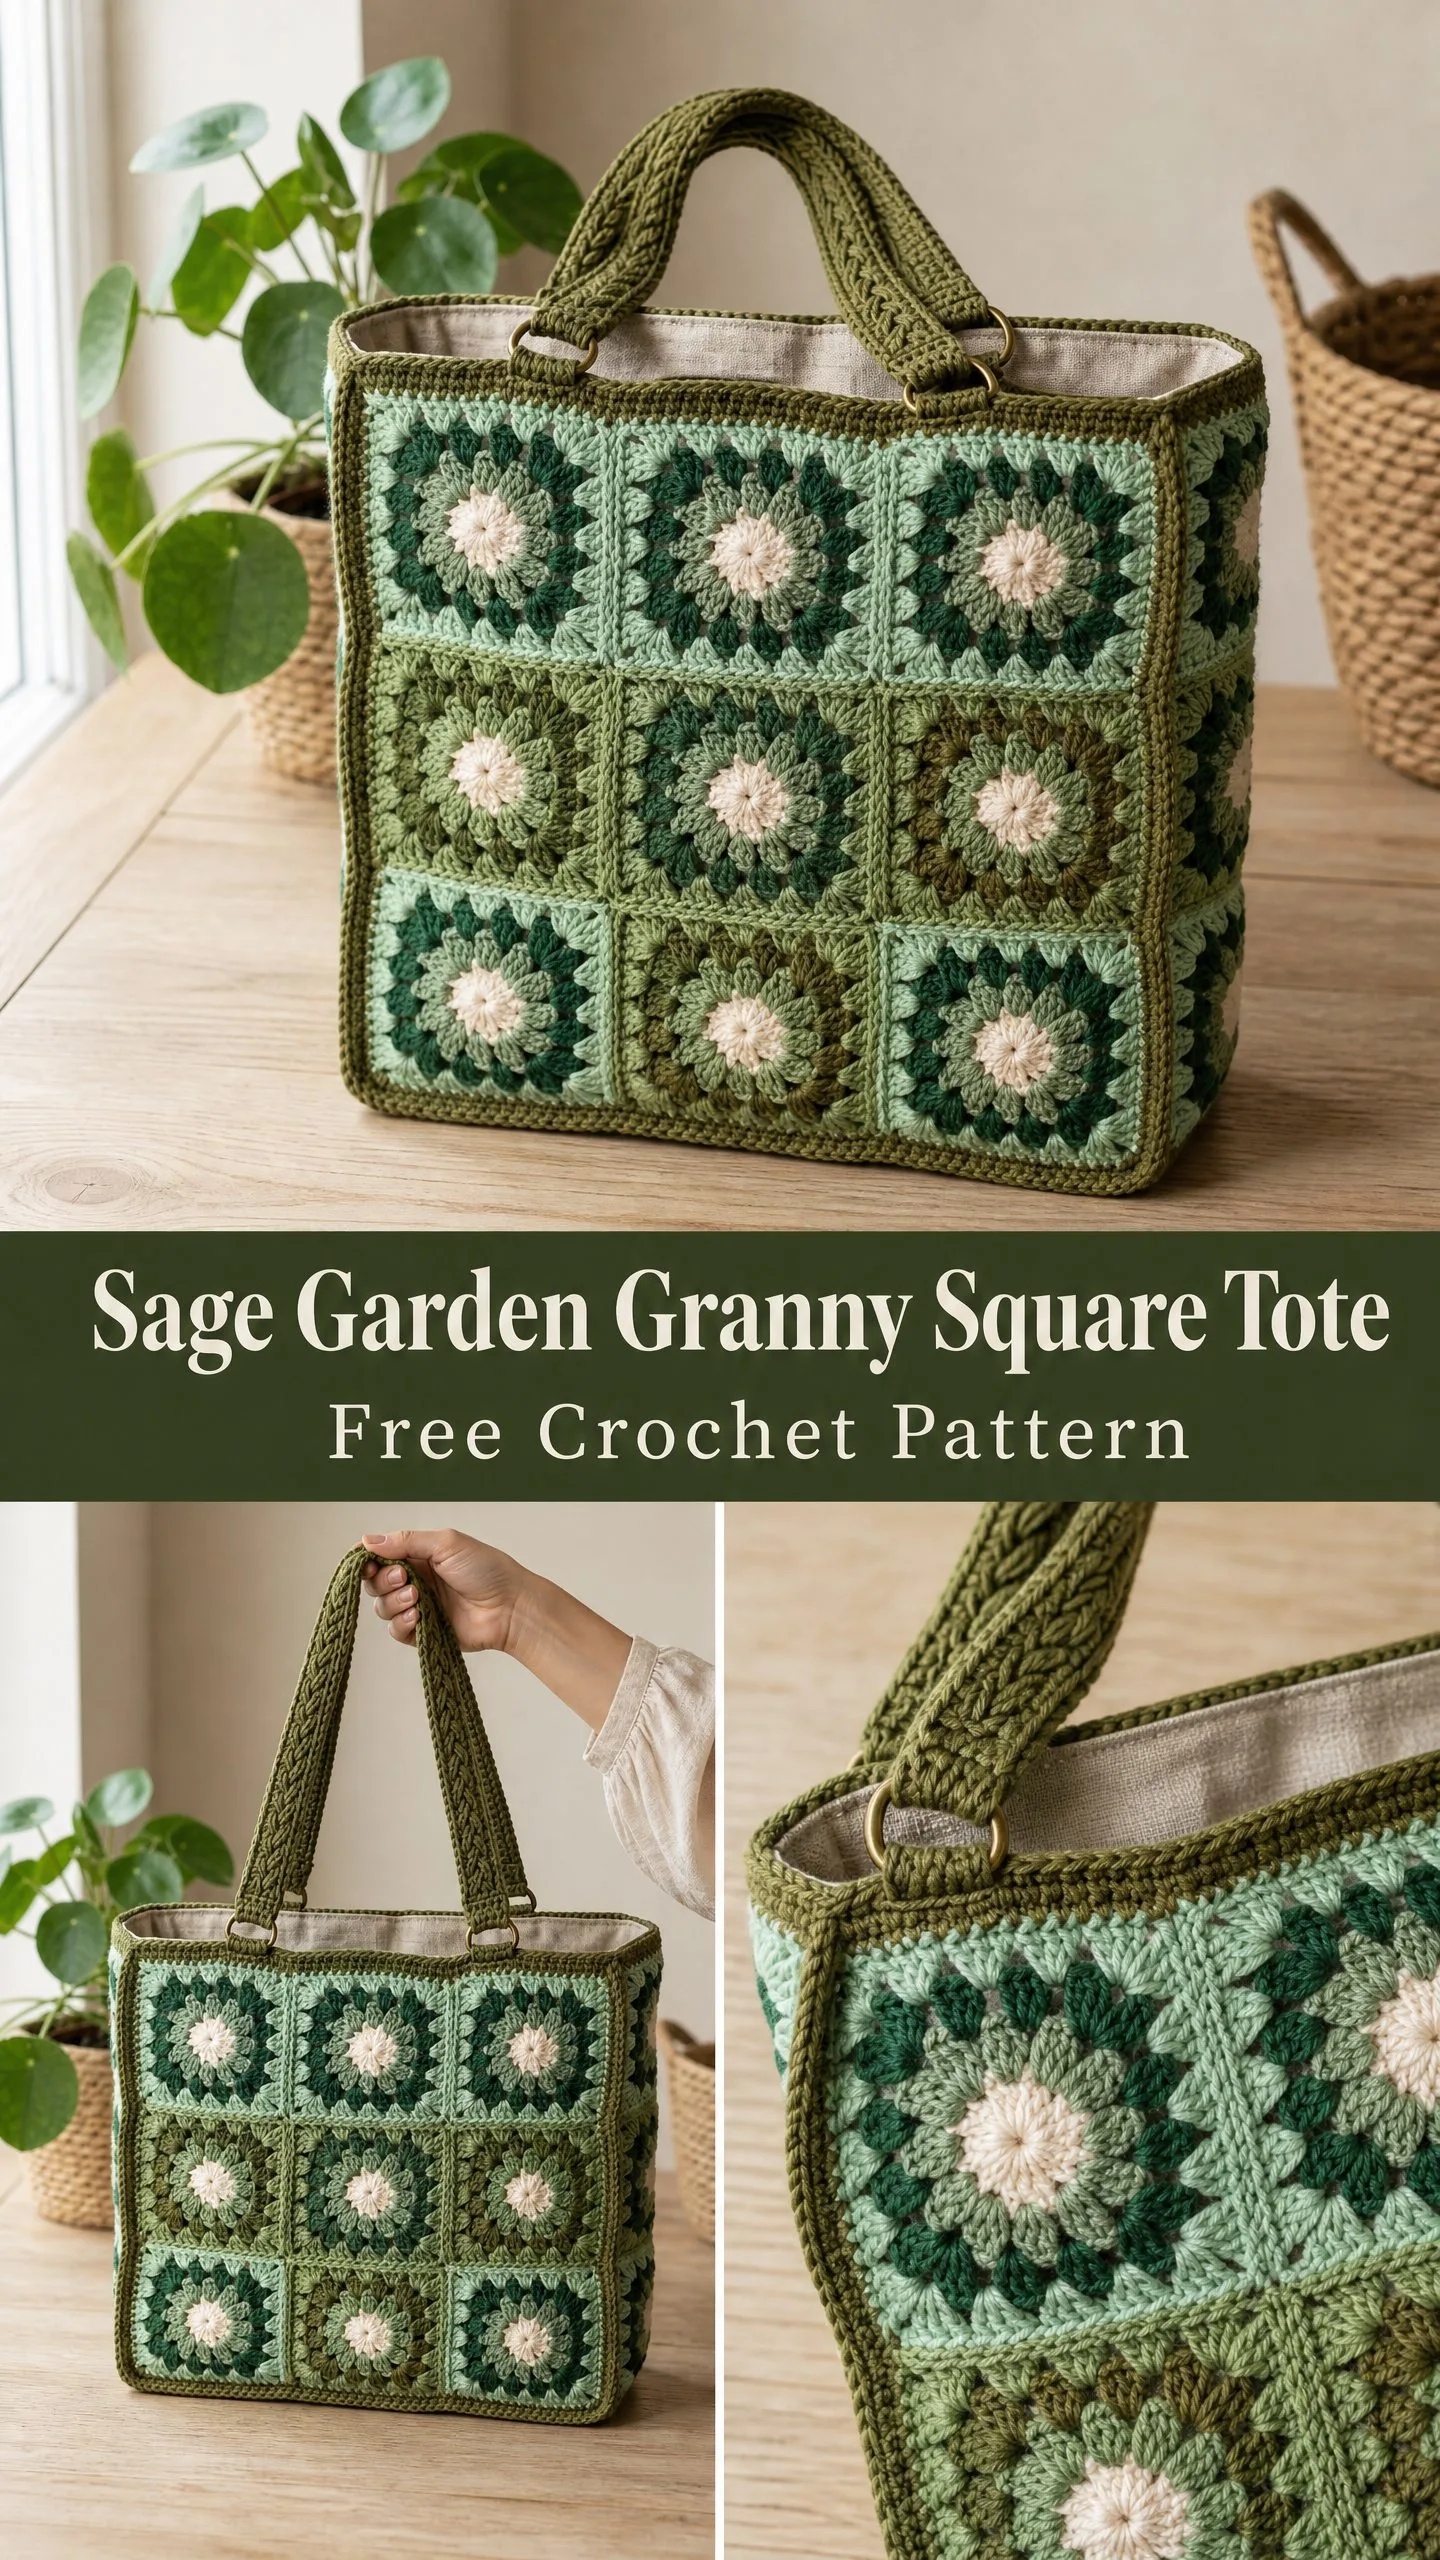
The Sage Garden Granny Square Tote is a structured, lined bag built from 18 classic granny squares arranged in two panels of nine squares each. The color palette moves through cream, mint, sage, forest green, and olive, creating layered floral medallions that catch the eye without being overwhelming.
What makes this design special is the thoughtful construction. The squares are joined using a flat slip stitch method that creates a neat visible ridge on the right side. This ridge becomes a design element, not something to hide. A separate crocheted bottom piece gives the bag depth and structure, while a fabric lining and braided straps with brass D-rings elevate the whole piece to something truly professional looking.
Skill level: Intermediate. You should be comfortable working in the round, changing colors, and basic seaming. If you’ve made granny squares before, you’re ready for this.
Finished dimensions: Approximately 14 inches wide by 13 inches tall by 3 inches deep. Strap drop is about 10 inches from the top edge of the bag.
Time estimate: 14 to 20 hours total, including blocking and lining assembly.
Materials You’ll Need
Gathering your materials before you start makes the whole process smoother. Here’s everything you’ll need for this crochet tutorial.
Yarn
You’ll need worsted weight or DK weight yarn in five colors. The pattern calls for:
Color E is your main color. It’s used for the outer round of all squares, the border, the bottom piece, and the straps, so you’ll need significantly more of it.
Yarn suggestions: Lion Brand 24/7 Cotton works beautifully for this project. The mercerized cotton creates a sturdy, structured fabric. Paintbox Yarns Simply DK is an affordable acrylic option that’s machine washable. WeCrochet Dishie gives excellent stitch definition if you prefer a 100% cotton worsted.
Substitution note: Any DK to light worsted weight yarn works well. Choose a smooth, plied yarn without fuzz or halo so your granny square architecture reads cleanly. Avoid fluffy or bouclé textures.
Hooks and Notions
Lining Materials
Gauge
Getting gauge right matters for this project because your finished bag dimensions depend on it.
Granny square gauge: One completed granny square (5 rounds, blocked) should measure 4.25 inches by 4.25 inches.
Single crochet gauge: In single crochet with Color E and your G-6 hook, 18 single crochet stitches by 20 rows should equal 4 inches by 4 inches.
Make one test square before committing to all 18. If your square runs smaller, try a larger hook. If it runs larger, try a smaller hook.
Abbreviations and Stitch Definitions
Here are all the abbreviations used in this pattern with plain English definitions:
Special Stitches
Granny Cluster (GC): Work 3 double crochet stitches into the same stitch or space. This group of 3 dc counts as one cluster.
Flat Slip Stitch Join: This is how you’ll connect your squares. Hold two squares with wrong sides facing each other and right sides facing outward. Working through the back loop only of both squares simultaneously, slip stitch across the edge. This creates a visible ridge on the right side that looks intentional and neat.
Pattern Notes Before You Begin
Read through these notes before you start crocheting. They’ll save you confusion later.
1. You’ll make 18 granny squares total: 9 for the front panel and 9 for the back panel.
2. There are two colorway variations. Variation A uses 10 squares. Variation B uses 8 squares. Both use the same stitch structure with different color placement.
3. All rounds begin with chain 3 (which counts as your first double crochet) unless noted otherwise.
4. Join each round with a slip stitch to the top of the beginning chain 3.
5. Fasten off and weave in ends after each color change. The lining will cover the inside, so you don’t need to carry colors.
6. Block all squares before joining. This step is not optional. Wet block by soaking in cool water, gently pressing out excess moisture, pinning to 4.25 inches by 4.25 inches on blocking mats, and allowing to dry completely.
How to Crochet the Granny Square: Variation A
Make 10 squares in this colorway.
Color sequence:
Make a magic ring. If you prefer, chain 4 and join with a slip stitch to form a ring instead.
Round 1 (Color A):
Chain 3 (counts as first dc here and throughout). Work 2 dc into ring. Chain 2. [3 dc into ring, ch 2] 3 times. Join with sl st to top of beginning ch 3. Fasten off Color A.
(4 clusters of 3 dc, 4 ch-2 corner spaces)
Round 2 (Color B):
Join Color B with sl st in any ch-2 corner sp. Ch 3, work 2 dc in same corner sp. Ch 2. Work 3 dc in same corner sp. [Ch 1. Work 3 dc in next ch-2 corner sp. Ch 2. Work 3 dc in same corner sp.] 3 times. Ch 1. Join with sl st to top of beginning ch 3. Fasten off Color B.
(8 clusters of 3 dc, 4 ch-2 corner spaces, 4 ch-1 side spaces)
Round 3 (Color D):
Join Color D with sl st in any ch-2 corner sp. Ch 3, work 2 dc in same corner sp. Ch 2. Work 3 dc in same corner sp. [Ch 1. Work 3 dc in next ch-1 side sp. Ch 1. Work 3 dc in next ch-2 corner sp. Ch 2. Work 3 dc in same corner sp.] 3 times. Ch 1. Work 3 dc in next ch-1 side sp. Ch 1. Join with sl st to top of beginning ch 3. Fasten off Color D.
(12 clusters of 3 dc, 4 ch-2 corner spaces, 8 ch-1 side spaces)
Round 4 (Color C):
Join Color C with sl st in any ch-2 corner sp. Ch 3, work 2 dc in same corner sp. Ch 2. Work 3 dc in same corner sp. [Ch 1. (Work 3 dc in next ch-1 sp. Ch 1.) twice. Work 3 dc in next ch-2 corner sp. Ch 2. Work 3 dc in same corner sp.] 3 times. Ch 1. (Work 3 dc in next ch-1 sp. Ch 1.) twice. Join with sl st to top of beginning ch 3. Fasten off Color C.
(16 clusters of 3 dc, 4 ch-2 corner spaces, 12 ch-1 side spaces)
Round 5 (Color E):
Join Color E with sl st in any ch-2 corner sp. Ch 3, work 2 dc in same corner sp. Ch 2. Work 3 dc in same corner sp. [Ch 1. (Work 3 dc in next ch-1 sp. Ch 1.) 3 times. Work 3 dc in next ch-2 corner sp. Ch 2. Work 3 dc in same corner sp.] 3 times. Ch 1. (Work 3 dc in next ch-1 sp. Ch 1.) 3 times. Join with sl st to top of beginning ch 3. Fasten off Color E.
(20 clusters of 3 dc, 4 ch-2 corner spaces, 16 ch-1 side spaces)
Your square should measure approximately 4.25 inches by 4.25 inches after blocking.
How to Crochet the Granny Square: Variation B
Make 8 squares in this colorway.
Color sequence:
Work Rounds 1 through 4 exactly as Variation A, substituting colors as listed above. Round 5 is worked in two steps for Variation B.
Round 5a (Color B):
Join Color B with sl st in any ch-2 corner sp. Ch 3, work 2 dc in same corner sp. Ch 2. Work 3 dc in same corner sp. [Ch 1. (Work 3 dc in next ch-1 sp. Ch 1.) 3 times. Work 3 dc in next ch-2 corner sp. Ch 2. Work 3 dc in same corner sp.] 3 times. Ch 1. (Work 3 dc in next ch-1 sp. Ch 1.) 3 times. Join with sl st to top of beginning ch 3. Do NOT fasten off.
Round 5b (Color E):
Without turning, join Color E in any ch-2 corner sp. Sc evenly around the entire perimeter of the square, working 3 sc in each ch-2 corner sp and 1 sc in each dc and 1 sc in each ch-1 sp around. Join with sl st to first sc. Fasten off Color E.
This creates the olive outline on the outer edge that unifies all squares when assembled.
(Approximately 68 sc total around perimeter)
Assembling the Panels
Checkpoint: After completing all 18 squares and blocking them, lay out 9 squares per panel in a 3 by 3 grid. Verify your color arrangement before joining.
Join Into Rows (Horizontal Seams)
Using Color E and the Flat Slip Stitch Join method, join the top-left square to the top-center square along their shared vertical edge. Join the top-center square to the top-right square. Repeat for the middle row and the bottom row. You now have three horizontal strips of 3 squares each.
Join Strips Together (Vertical Seams)
Join the top strip to the middle strip along their shared horizontal edge using the Flat Slip Stitch Join. Join the middle strip to the bottom strip along their shared horizontal edge.
The assembled front panel should measure approximately 13 inches wide by 13 inches tall including seam ridges.
Repeat all steps to assemble the back panel.
Adding the Border to Each Panel
Join Color E to any outer corner ch-2 sp of the assembled panel.
Work 1 round of sc evenly around the entire perimeter:
Join with sl st to first sc. Do not fasten off.
Work 1 additional round of sc, working 3 sc in each corner sc at the 4 outer corners of the panel.
Fasten off and weave in ends.
Each panel after border should measure approximately 14 inches wide by 14 inches tall.
Creating the Bag Bottom
The bottom is worked flat in Color E.
Foundation: Ch 64.
Row 1: Sc in 2nd ch from hook and in each ch across. Ch 1, turn. (63 sc)
Rows 2 through 14: Sc in each st across. Ch 1, turn. (63 sc each row)
Row 15: Sc in each st across. Fasten off, leaving a 24-inch sewing tail. (63 sc)
The bottom piece should measure approximately 14 inches wide by 3 inches tall.
Checkpoint: Hold the bottom piece against the panel bottom edge to confirm the width matches before seaming.
Joining the Bag Body
Step 1: With wrong sides together, align the bottom edge of the front panel with one long edge of the bottom piece. Using Color E and a tapestry needle, whipstitch or sl st join the two pieces together through both layers. (63 sts joined)
Step 2: Align the bottom edge of the back panel with the other long edge of the bottom piece. Join in the same manner. (63 sts joined)
Step 3: With wrong sides together, align the side edges of the front and back panels. Join each side seam using Color E and the Flat Slip Stitch Join, working from the bottom corner up to the top edge. (Approximately 3 inches of seam on each side)
Your bag body is now assembled and should hold a boxy, structured shape.
Top Edge Border
Join Color E to any st at the top edge of the bag opening.
Round 1: Sc evenly around the full top opening, working 1 sc into each st and adjusting as needed at the corner join points so the edge lies flat. Join with sl st. (approximately 142 sc)
Rounds 2 and 3: Ch 1. Sc in each sc around. Join with sl st. Fasten off after Round 3. (142 sc)
Strap Construction
Make 2 straps using either the braided method or simplified method below.
Braided Strap Method
For each strap, work 3 single crochet cords in Color E.
Cord (make 3 per strap, 6 total):
Ch 121.
Row 1: Sc in 2nd ch from hook and in each ch across. Fasten off. (120 sc)
Hold 3 cords parallel. Tie or sl st the ends together at one short end. Braid the three cords snugly for the full length. Tie or sl st the other ends together.
Work a row of sc along each long edge of the braid in Color E to neaten: join yarn, sc approximately 120 sts along the edge, fasten off. Repeat on other long edge.
Thread one end of the strap through a D-ring. Fold 1 inch of the strap end back over itself and whipstitch securely through all layers.
Simplified Strap Method (Alternative)
Ch 121.
Row 1: Sc in 2nd ch from hook and in each ch across. Ch 1, turn. (120 sc)
Rows 2 through 6: Sc in each st across. Ch 1, turn. (120 sc each row)
Row 7: Sc in each st across. Fasten off. (120 sc)
Fold strap in half lengthwise (wrong sides together). Sl st the two long edges together. Attach D-ring as above.
Attaching Straps to the Bag
Mark two attachment points on the front panel top edge, each located approximately 3.5 inches from the side seams. Repeat on the back panel.
At each attachment point, use Color E yarn threaded on a tapestry needle to whipstitch the D-ring tab of the strap to the wrong side of the top border. Pass the needle through the Round 3 top border stitches and through the strap tab multiple times for security.
Reinforce each attachment with a box stitch (a small square of whipstitches with an X across the center) for maximum durability.
Adding the Lining
Cut fabric pieces:
With right sides together, sew one short end of the bottom strip to the bottom edge of one lining panel using 0.5 inch seam allowance. Sew the other short end of the bottom strip to the bottom edge of the second lining panel. Press seams open.
Fold the assembled lining so the two panels are right sides together. Sew both side seams from bottom corner to top edge using 0.5 inch seam allowance. Leave the top edge open. Press all seams.
Fold the top raw edge of the lining down 0.75 inches toward the wrong side and press.
Insert the lining into the bag with wrong side of lining facing wrong side of crochet. Align the folded top edge of the lining just below the top border of the bag. Pin in place.
Using sewing needle and thread matched to the lining, slip stitch the folded lining edge to the wrong side of the top border round.
Blocking and Finishing
Individual squares: Wet block each square before assembly to 4.25 inches by 4.25 inches.
Assembled bag: After joining all squares but before attaching the lining, wet block the assembled bag body. Submerge in cool water, press out excess moisture in a towel, then shape the bag over a book or box measuring approximately 14 by 13 by 3 inches. Allow to dry fully (12 to 24 hours for cotton yarn) before proceeding to lining attachment.
Final touches: Weave in all remaining yarn ends securely on the wrong side using a tapestry needle. Work ends into the back of dc clusters rather than across open chain spaces. Trim all tails close but leave approximately 0.25 inch beyond the securing knot.
Care Instructions
Hand wash in cool water with a gentle detergent. Do not wring. Press out excess moisture by rolling in a clean towel. Reshape and dry flat away from direct sunlight or heat.
If made with machine washable acrylic yarn, machine wash on a gentle cycle in a mesh laundry bag, cold water, and lay flat to dry.
Do not place in the dryer regardless of fiber content. Heat will distort the granny squares and may damage the lining fabric.
Store the bag stuffed with tissue paper or a small pillow to retain its shape between uses.
You Did It!
Thank you so much for making this Sage Garden Granny Square Tote with me. I really hope you love how yours turns out. There’s something so satisfying about watching those squares come together into something you’ll actually use every day. If you make one, I would absolutely love to see it! Tag me on Instagram or share a photo in my Facebook group.
If this crochet pattern is calling your name, go ahead and save it to your Pinterest boards so you can find it when you’re ready to start. And if you do make one, drop a comment below and tell me which colorway you chose. I love hearing from you!
You Might Also Like
- Cream and Peach Ombre Baby Dress Free Crochet Pattern
- Blush Pink Diamond Lattice Mermaid Gown Free Crochet Pattern
- Dusty Rose Bobble Purse Free Crochet Pattern
- Sunset Garden Floral Crochet Blouse Free Pattern
