
Got a gorgeous gradient skein hiding in your stash? Maybe a cream and peach ombre you picked up at a yarn festival because the colors made your heart skip? This is the project to finally use it.
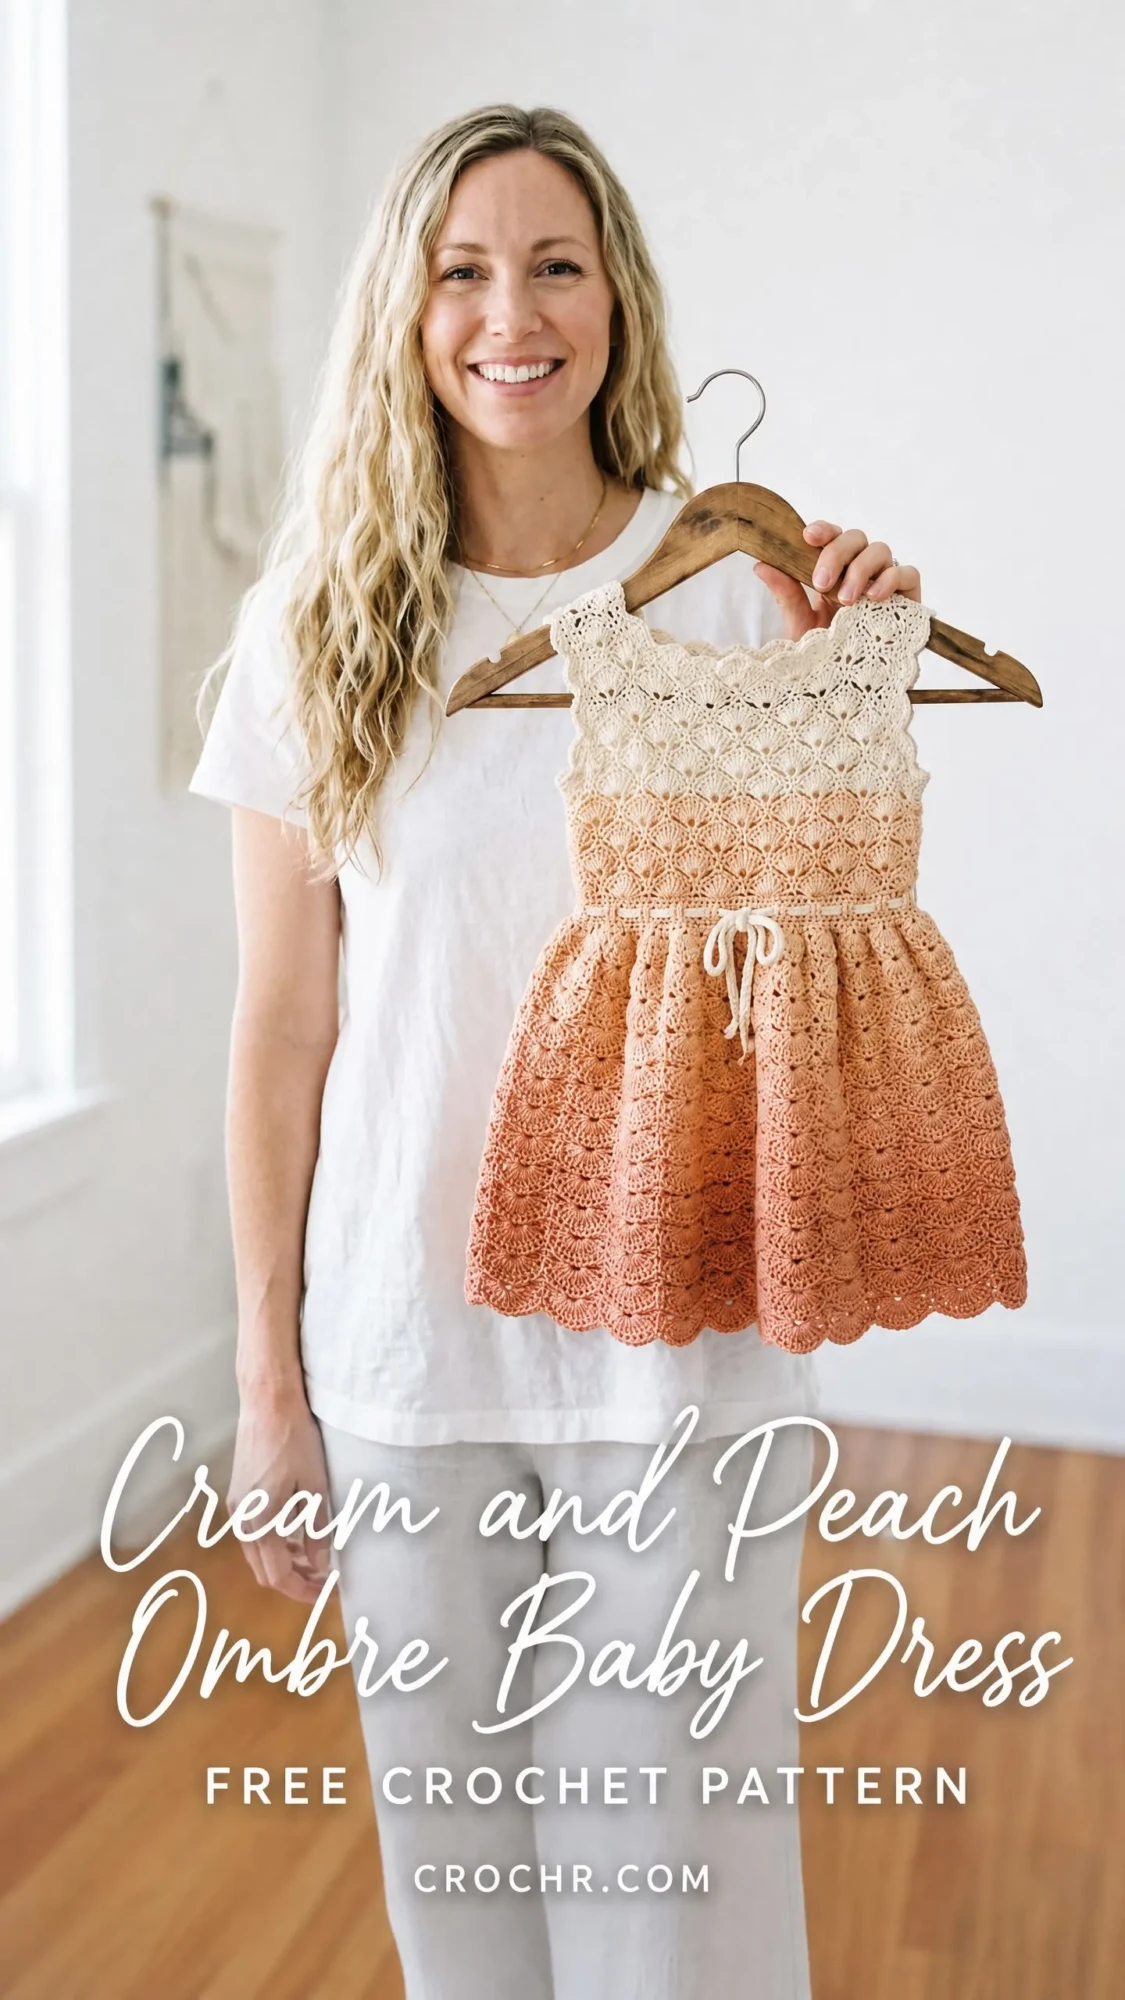
This baby dress pattern combines a fitted lace bodice with a flared fan shell skirt, creating an heirloom piece that looks far more complicated than it actually is. The construction is interesting without being overwhelming. You will work the bodice flat in panels, seam them together, then pick up stitches and work the skirt in the round.
Fair warning though. This one sits firmly in the intermediate to advanced category. If you have made a couple of garments before and feel comfortable with shaping, you will be just fine. If this is your first wearable, maybe bookmark it for later and come back when you have a few projects under your belt.
About This Crochet Pattern
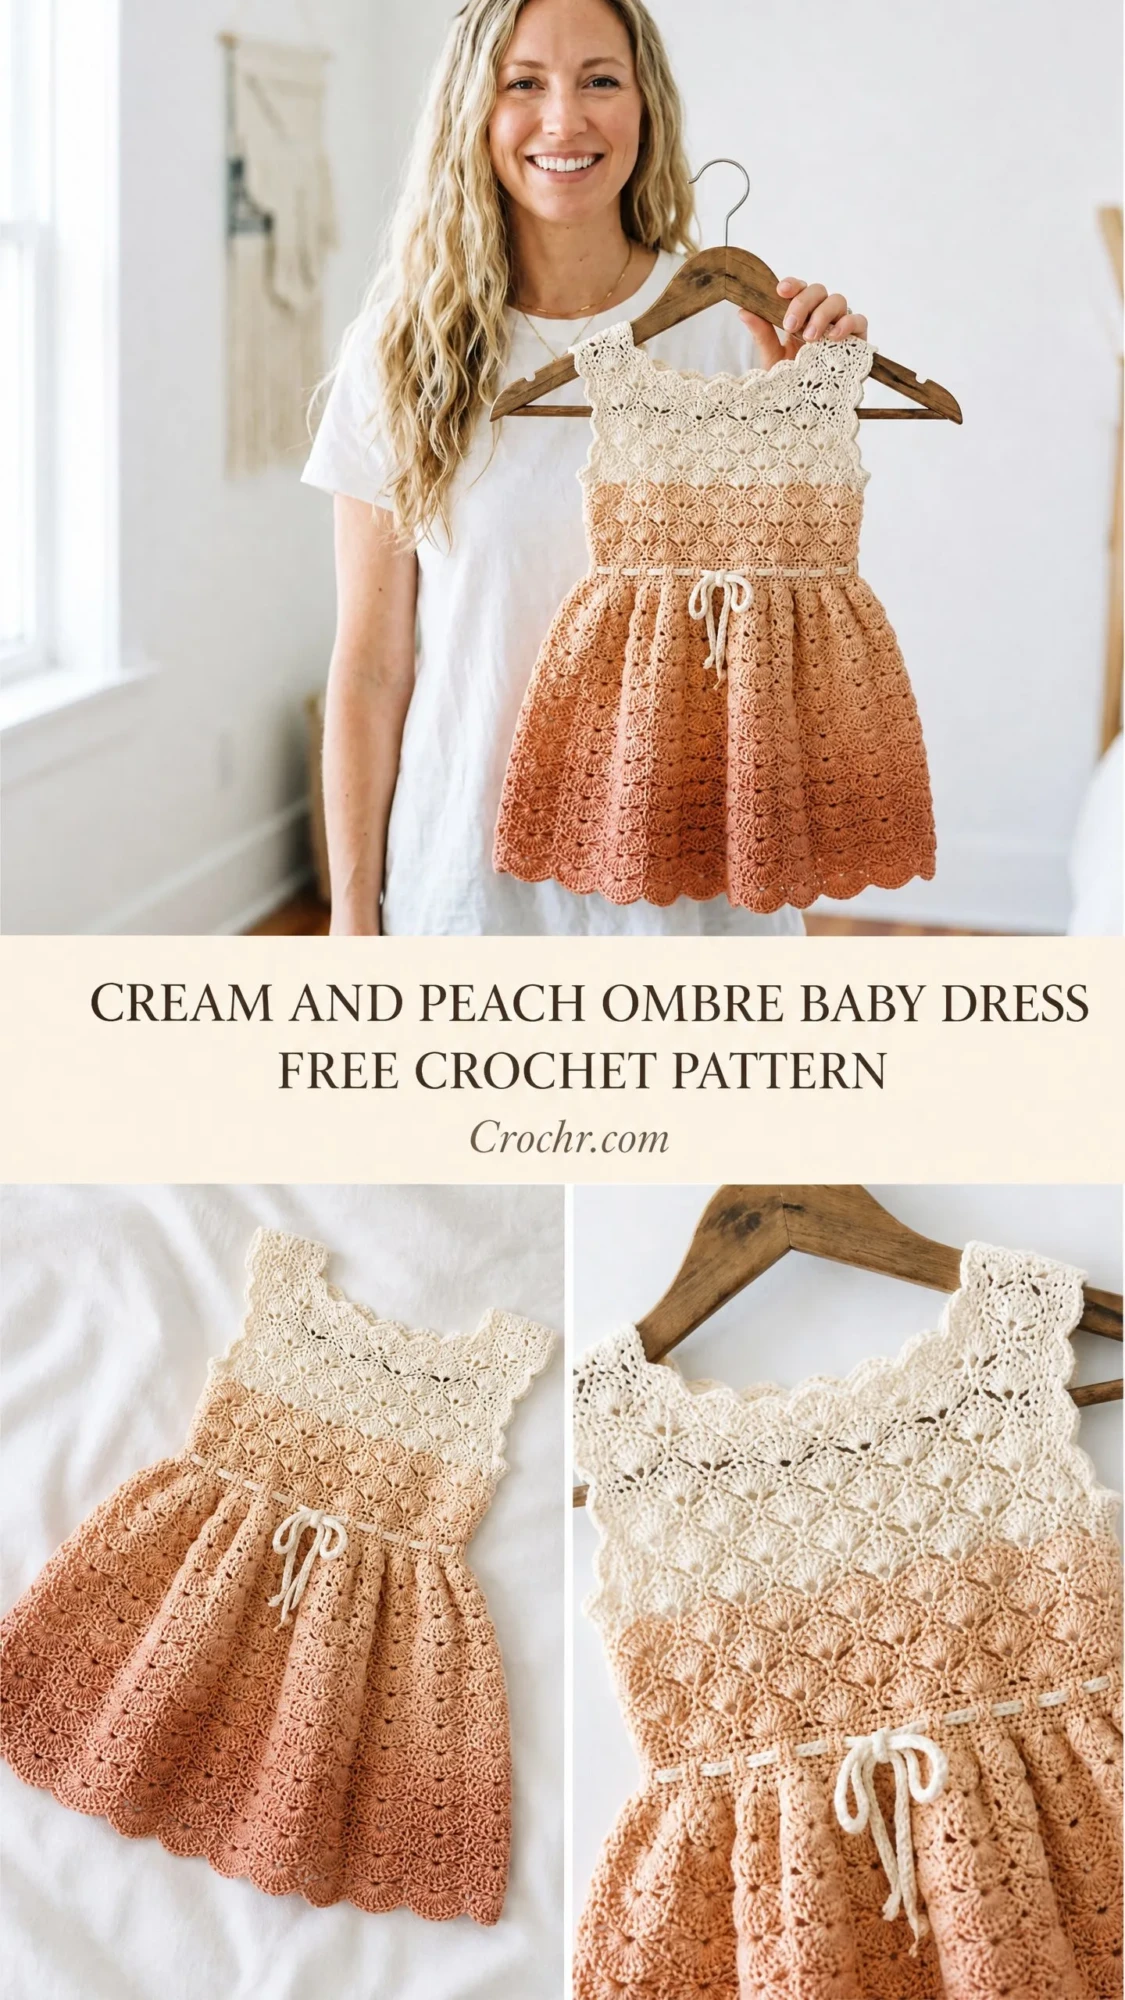
This cream and peach ombre baby dress features everything I love about heirloom crochet. The bodice uses an interlocking shell and eyelet construction that creates a delicate lace fabric with beautiful drape. The skirt uses a fan shell stitch that naturally forms that scalloped hem you see at the bottom edge.
The color gradient flows from cream at the neckline down through warm peach at the hem. If you are using a gradient yarn, the shift happens naturally. If you are working with two separate colors, I have included detailed instructions for blending them smoothly through the bodice.
A few design details make this dress special. There is a keyhole opening at the center back for easy dressing. A twisted cord or ribbon drawstring threads through an eyelet row at the waist to define the silhouette. The neckline and armhole edges get finished with scallop edging that mirrors the hem. Everything ties together beautifully.
Skill Level
Intermediate to Advanced. You will need comfort with working flat and in the round, reading shell and lace stitch repeats, managing color gradients, working decreases for armhole and neckline shaping, and finishing with seaming and edging.
If you have completed at least two or three garment projects, you will find this achievable. Take your time with the shaping sections and trust the stitch counts.
Time Estimate
Approximately 12 to 18 hours for an experienced crocheter working at a steady pace. Allow extra time for weaving in ends related to color transitions. This is not a weekend project, but it is absolutely worth the investment.
Finished Size
Size: 12 to 18 months
Chest circumference: 19 to 20 inches (48 to 51 cm), with 1 to 2 inches of ease
Bodice length (shoulder to waist): approximately 6.5 inches (16.5 cm)
Skirt length (waist to hem): approximately 7 inches (18 cm)
Total length (shoulder to hem): approximately 13.5 inches (34 cm)
Materials
Yarn: Sport weight yarn (CYCA #2), approximately 600 to 700 yards (549 to 640 m) total
If using a gradient yarn: 1 skein of a cream to peach gradient in sport weight, approximately 700 yards
If using two separate colors: approximately 350 yards (320 m) cream and 350 yards (320 m) peach
Hook: US E-4 / 3.5 mm crochet hook
Notions:
Yarn Suggestions
Option 1: Paintbox Yarns Simply DK (used at sport weight gauge) in shades "Champagne White" and "Peach Orange." This cotton acrylic blend is machine washable, widely available, and takes color gradients beautifully. Note that this yarn is technically DK but works to sport weight gauge with the recommended hook.
Option 2: Lion Brand Pound of Love in "Antique White" and "Pale Peach." A soft acrylic that is baby safe, machine washable, and widely accessible. The yardage per skein is generous, making it economical.
Option 3: Paintbox Yarns Cotton DK in "Paper White" and "Peach." A 100 percent cotton option that provides excellent stitch definition for the lace pattern and is ideal for warm weather garments. Cotton has less stretch, so swatching is essential.
Substitution note: Choose a smooth, plied yarn with good stitch definition so the fan shell pattern reads clearly. Avoid fuzzy or bouclé yarns. If substituting, always work a gauge swatch and adjust hook size as needed to match gauge exactly, as stitch count accuracy is critical for fit in a garment.
Gauge
With US E-4 / 3.5 mm hook:
Bodice lace pattern: 1 complete repeat (6 stitches) = 1 inch (2.5 cm) wide; 4 rows = 1.25 inches (3.2 cm) tall
Fan shell stitch (skirt): 1 complete fan repeat (12 stitches) = 2 inches (5 cm) wide; 4 rows = 1.5 inches (3.8 cm) tall
General: 20 stitches x 24 rows in single crochet = 4 x 4 inches (10 x 10 cm)
Gauge is mandatory for this garment. Even a small deviation will significantly alter the finished size. Work your swatch, wash and block it, then measure before beginning.
Abbreviations (US Terms)
Special Stitches
Bodice Shell (used in bodice lace pattern)
Step 1: Skip 2 stitches.
Step 2: Work 5 double crochet into the next stitch.
Step 3: Skip 2 stitches.
Step 4: This group of 5 dc is the shell. It sits over a cluster of 6 stitches total (2 skipped, 1 worked into, 2 skipped, with the anchor stitch counted once).
Bodice V-stitch (used to anchor bodice shells)
Step 1: Work 1 dc, ch 1, 1 dc all into the same stitch or space.
Step 2: This creates a V shape that serves as the anchor point for the next row of shells.
Fan Shell (used in skirt)
Step 1: Skip 2 stitches.
Step 2: Work 7 double crochet into the next stitch.
Step 3: Skip 2 stitches.
Step 4: Work 1 single crochet into the next stitch.
Step 5: This 12 stitch unit (2 sk + 1 anchor + 2 sk + 1 sc = 6 consumed stitches, 7 dc + 1 sc = 8 worked stitches per repeat) forms one fan. Each fan repeat consumes 6 foundation stitches.
Scallop Edging (used at neckline and armholes)
Step 1: Join yarn, ch 1.
Step 2: Work 1 sc into same stitch.
Step 3: Skip 2 stitches.
Step 4: Work 6 dc into next stitch.
Step 5: Skip 2 stitches.
Step 6: Work 1 sc into next stitch.
Step 7: Repeat steps 3 through 6 across or around.
Eyelet Row (used at waistband for drawstring)
Step 1: Ch 3 (counts as dc), dc into next st.
Step 2: Ch 1, skip 1 st, dc into next st.
Step 3: Repeat ch 1, skip 1, dc across.
Step 4: End with dc into last st. This creates a row of alternating dc and ch 1 spaces for threading the drawstring.
Twisted Cord (optional, for waist tie)
Step 1: Cut 6 strands of cream yarn, each 48 inches (122 cm) long.
Step 2: Hold all strands together and fold in half at the midpoint. Anchor the fold to a fixed point.
Step 3: Twist the strands tightly in one direction until they begin to kink when released.
Step 4: Fold the twisted length in half at the midpoint, allowing the two halves to twist around each other naturally.
Step 5: Knot both ends. Trim to desired length, approximately 20 inches (51 cm) finished.
Pattern Notes
The dress is constructed in three main sections: the front bodice panel, the back bodice (worked in two panels to create the center back keyhole opening), and the skirt (worked in the round after panels are seamed).
The front bodice is worked flat from the bottom edge upward toward the neckline. The back bodice is worked as two separate flat panels that meet at the center back with a small button or snap closure.
The lace bodice pattern is a 6 stitch repeat. The foundation chain for each panel must be a multiple of 6 plus any edge stitches specified.
The fan shell skirt is a 6 stitch repeat. The skirt pickup row must be a multiple of 6, adjusted as specified.
Color change guidance for two color version:
Always turn work unless specified otherwise.
A turning chain of 3 counts as the first dc throughout.
Right side (RS) is the public facing side with the shells visible as smooth bumps.
Step by Step Instructions
Front Bodice Panel
The front bodice panel is worked flat over 48 stitches (8 complete 6 stitch shell repeats), producing a front panel approximately 8 inches (20 cm) wide before seaming.
Foundation: With cream yarn, ch 50.
Row 1 (WS): Sc in 2nd ch from hook and in each ch across. Turn. (49 sc)
Row 2 (RS): Ch 3 (counts as dc), sk first st, dc in next st. Sk 2 sts, work Bodice Shell (5 dc) in next st, sk 2 sts, work V-st (dc, ch 1, dc) in next st. Rep from 6 more times. Sk 2 sts, Bodice Shell in next st, sk 2 sts, dc in last 2 sts. Turn. (8 shells + 7 V-sts + 4 edge dc)
Row 3 (WS): Ch 1, sc in first dc, sc in each dc of shell (5 sc), sc in dc of V-st, sc in ch 1 sp, sc in 2nd dc of V-st. Rep from across, ending sc in top of t-ch. Turn. (49 sc)
Row 4 (RS): Same as Row 2. (8 shells established)
Row 5 (WS): Same as Row 3. (49 sc)
Row 6 (RS): Same as Row 2.
Row 7 (WS): Same as Row 3. (49 sc)
Rows 8 through 13: Repeat Rows 2 and 3, continuing in lace pattern. Begin color transition in these rows if using two separate colors. After Row 13, piece measures approximately 5.5 inches (14 cm) from beginning.
Checkpoint: After Row 13, your front bodice panel should measure approximately 5.5 inches (14 cm) tall and 8 inches (20 cm) wide. The lace pattern should show 6 complete rows of shells.
Armhole Shaping for Front Bodice
Row 14 (RS, armhole shaping): Sl st across first 6 sts (1 full V-st + shell base). Ch 3, work in established lace pattern across until 6 sts rem. Leave last 6 sts unworked. Turn. (37 working sts)
Row 15 (WS): Ch 1, sc across. Turn. (37 sc)
Row 16 (RS): Ch 3, sk 1, dc in next st. Sk 2, shell in next, sk 2, V-st in next. Rep from 5 more times. Sk 2, shell in next, sk 2, dc in last 2. Turn. (6 shells + 5 V-sts + 4 edge dc)
Row 17 (WS): Ch 1, sc across. Turn. (37 sc)
Row 18 (RS): Dec row. Ch 3, dc2tog over next 2 sts (decrease at armhole edge), work in pattern across until 3 sts rem, dc2tog, dc in last st. Turn. (35 sts)
Row 19 (WS): Ch 1, sc across. Turn. (35 sc)
Row 20 (RS): Ch 3, sk 1, dc in next. Work in pattern as established across. Turn. (35 sts)
Row 21 (WS): Ch 1, sc across. Turn. (35 sc)
Neckline Shaping for Front Bodice
Row 22 (RS, first shoulder): Work across first 12 sts only in pattern. Turn. Leave remaining sts on hold. (12 sts, left shoulder section)
Row 23 (WS): Dec 1 at neck edge. Ch 1, sc2tog over first 2 sts, sc across. Turn. (11 sc)
Row 24 (RS): Work in pattern to last 2 sts, dc2tog. Turn. (10 sts)
Row 25 (WS): Sc2tog, sc across. Turn. (9 sc)
Row 26 (RS): Work even in pattern. Turn. (9 sts)
Fasten off. This completes the left shoulder of the front.
Return to held stitches for Row 22. Skip center 11 sts for front neckline opening. Rejoin yarn to next st.
Row 22 cont (RS, second shoulder): Work across remaining 12 sts in pattern. Turn. (12 sts)
Row 23 (WS): Sc across to last 2 sts, sc2tog. Turn. (11 sc)
Row 24 (RS): Dc2tog at neck edge, work in pattern across. Turn. (10 sts)
Row 25 (WS): Sc across to last 2 sts, sc2tog. Turn. (9 sc)
Row 26 (RS): Work even. Turn. (9 sts)
Fasten off.
Checkpoint: The front bodice panel is complete. Shoulder straps measure approximately 1.5 inches (3.8 cm) wide. Total bodice height from foundation to shoulder tip is approximately 6.5 inches (16.5 cm). Set aside.
Left Back Panel
Foundation: With cream yarn, ch 29.
Row 1 (WS): Sc in 2nd ch from hook and in each ch across. Turn. (28 sc)
Row 2 (RS): Ch 3, sk 1, dc in next. Sk 2, shell in next, sk 2, V-st in next. Rep from 3 more times. Sk 2, shell in next, sk 2, dc in last 2. Turn. (4 shells + 3 V-sts + 4 edge dc)
Row 3 (WS): Ch 1, sc across. Turn. (28 sc)
Rows 4 through 13: Repeat Rows 2 and 3, continuing in lace pattern and color transition as for front. (28 sc after each WS row)
Armhole and Back Keyhole Shaping for Left Back
Row 14 (RS): Sl st across first 6 sts. Ch 3, work in pattern to end. Turn. (22 sts)
Row 15 (WS): Ch 1, sc across. Turn. (22 sc)
Row 16 (RS): Dc2tog at armhole edge (beg of row), work in pattern across. Turn. (21 sts)
Row 17 (WS): Sc across, sc2tog at center back edge. Turn. (20 sc)
Row 18 (RS): Work even in pattern. Turn. (20 sts)
Row 19 (WS): Ch 1, sc across. Turn. (20 sc)
Rows 20 and 21: Work even. (20 sts after each row)
Neckline Shaping for Left Back
Row 22 (RS): Work across first 9 sts for shoulder. Leave remaining sts for neckline extension. Turn. (9 sts)
Row 23 (WS): Dec 1 at neck edge. Sc2tog, sc across. Turn. (8 sc)
Row 24 (RS): Work across to neck edge, dec 1. Turn. (7 sts)
Row 25 (WS): Work even. (7 sc)
Row 26 (RS): Work even. (7 sts)
Fasten off.
Right Back Panel
Work as for Left Back Panel, reversing all shaping (armhole decrease at end of RS rows, back edge decrease at start of WS rows, neckline worked on opposite side).
Foundation: With cream yarn, ch 29.
Row 1 (WS): Sc in 2nd ch from hook and in each ch across. Turn. (28 sc)
Row 2 (RS): Ch 3, sk 1, dc in next. Sk 2, shell in next, sk 2, V-st in next. Rep from 3 more times. Sk 2, shell in next, sk 2, dc in last 2. Turn.
Rows 3 through 13: As for Left Back Panel. (28 sc after each WS row)
Row 14 (RS): Work in pattern to last 6 sts. Leave last 6 sts unworked. Turn. (22 sts)
Row 15 (WS): Sc2tog at center back edge (beg of WS row), sc across. Turn. (21 sc)
Row 16 (RS): Work in pattern to last 2 sts, dc2tog at armhole edge. Turn. (20 sts)
Row 17 (WS): Ch 1, sc across. Turn. (20 sc)
Rows 18 through 21: Work even. (20 sts)
Row 22 (RS): Skip first 11 sts (neckline). Rejoin to next st, work remaining 9 sts for shoulder. Turn. (9 sts)
Row 23 (WS): Sc across to last 2 sts, sc2tog at neck edge. Turn. (8 sc)
Row 24 (RS): Dec 1 at neck edge, work across. Turn. (7 sts)
Row 25 (WS): Work even. (7 sc)
Row 26 (RS): Work even. (7 sts)
Fasten off.
Checkpoint: Both back panels are complete. Each panel measures approximately 4.5 inches (11.5 cm) wide and 6.5 inches (16.5 cm) tall.
Seaming
With yarn needle and matching yarn, seam the front panel to each back panel at the side edges using whipstitch or mattress stitch on the WS. Seam the shoulder sts of front and back panels together (7 to 9 sts per shoulder, aligned). The center back remains open, forming the keyhole.
After seaming, the bodice should measure approximately 19 to 20 inches (48 to 51 cm) in circumference at the lower edge.
Waistband and Eyelet Row
With RS facing and peach yarn, join to side seam at lower edge of bodice.
Setup Round: Ch 1, sc evenly around the entire lower edge of bodice. Work approximately 3 sc per 2 rows on side edges and 1 sc per st across the panel lower edges. Target 120 sc total (must be a multiple of 6). Join with sl st to first sc. (120 sc)
Eyelet Round: Ch 3 (counts as dc), dc in next st. Ch 1, sk 1 st, dc in next st. Rep from around. Join with sl st to top of beg ch 3. (60 dc, 60 ch 1 sps)
Transition Round: Ch 1, sc in each dc and in each ch 1 sp around. Join. (120 sc)
Gathering Setup Round: Sc2tog, sc in next 4 sts. Rep from around. Join. (100 sc)
Skirt
The skirt is worked in the round, in the fan shell stitch, beginning from the 100 stitch gathered waist.
Skirt Expansion Round: Sc in next 4 sts, 2 sc in next st. Rep from around. End with sc in last 5 sts. Join. (120 sc)
Skirt Round 1 (fan setup): Ch 3 (counts as dc). Sk 2 sts, work Fan Shell (7 dc) in next st, sk 2 sts, sc in next st. Rep from 19 more times. Join with sl st to top of beg ch 3. (160 sts)
Skirt Round 2: Ch 1, sc in same st (this sc is between fans). Sk 3 dc, Fan Shell (7 dc) in center (4th) dc of previous fan, sk 3 dc, sc in next sc. Rep from around. Join. (160 sts)
Skirt Rounds 3 through 8: Repeat Skirt Round 2. (160 sts each round)
After Round 8, the skirt measures approximately 4 inches (10 cm) from the waist.
Skirt Expansion for A-line Flare
Skirt Round 9 (expansion): Ch 1, sc in every st around including inside the fans. This is a full sc flattening round: sc in each of the 160 sts. Join. (160 sc)
Then increase: Sc in next 7 sts, 2 sc in next st. Rep from 20 times. Join. (180 sc)
Skirt Round 10 (new fan round): Ch 3. Sk 2, Fan Shell (7 dc) in next st, sk 2, sc in next st. Rep from 29 more times. Join. (240 sts)
Skirt Rounds 11 through 16: Work in established fan pattern (each fan worked into center dc of previous fan). (240 sts each round)
After Round 16, skirt measures approximately 7 inches (18 cm) from waist.
Checkpoint: The skirt should be approximately 7 inches (18 cm) long and flare to approximately 28 to 30 inches (71 to 76 cm) in circumference at the widest point.
Skirt Hem
The hem is finished by the last round of fan shells, which naturally creates a scalloped lower edge. No additional hem edging is needed.
Optional additional scallop at hem: Join in any sc between fans. Ch 3, sl st in 3rd ch from hook (picot), sc in each dc of fan (7 sc across top of fan), ch 3, sl st in 3rd ch from hook (picot), sl st in next sc. Rep from around.
Neckline Edging
With RS facing and cream yarn, join at right back neck edge.
Work 1 round of Scallop Edging around entire neckline, spacing sc anchors approximately 3 sts apart. Approximate neckline stitch count: 72 sts around full neckline (adjust to nearest multiple of 4).
Join with sl st. Fasten off.
Armhole Edging
With RS facing and cream yarn, join at underarm seam of right armhole.
Work 1 round of Scallop Edging around armhole opening. Approximate stitch count: 48 sts around each armhole. Adjust to nearest multiple of 4. Join with sl st. Fasten off.
Repeat for left armhole.
Center Back Edging and Keyhole
With RS facing and cream yarn, join at top of right back neck edge at center back.
Work 1 row of sc down the right back center edge to the keyhole opening (approximately 14 sc).
At base of keyhole: ch 4, sl st to left back edge at same level to bridge the keyhole. Continue sc up left back center edge to top.
Fasten off.
Work button loops on one side: On RS of one back edge, join yarn approximately 0.75 inch (2 cm) from top. Ch 5, sk 3 sts on edge, sl st to edge. Rep 0.75 inch (2 cm) below first loop for second button. Sew buttons to opposite back edge aligned with loops.
Drawstring
Thread ribbon or twisted cord through eyelet row at waist, entering and exiting through the same eyelet space at center front. Tie in a small bow at front center. Trim ends evenly. Knot ends to prevent fraying if using ribbon.
Size Customization Tips
To size down to 0 to 6 months: Reduce foundation chain by 12 stitches (2 shell repeats) for front and 6 stitches for each back panel. Reduce skirt expansion round to add 15 increases instead of 20, producing 150 sc and working 25 fan repeats. Adjust total length by eliminating 2 rounds from bodice and 2 rounds from skirt.
To size up to 2T to 3T: Increase foundation chain by 12 stitches (2 shell repeats) for front and 6 stitches for each back panel. Target 144 sc at waist gather pickup, expand to 168 or 180 sc for skirt, and work 2 extra rounds of fan pattern before expansion round and 2 extra rounds after. Add 0.5 inch to bodice length before armhole shaping.
General rule: Each additional 6 stitch repeat in the bodice adds approximately 1 inch (2.5 cm) to the circumference. Each additional round of fan shells adds approximately 0.75 inch (2 cm) to skirt length.
Finishing and Blocking
Weave in all ends securely, especially at color transition points. Do not knot yarn. Weave each tail in at least 1 inch (2.5 cm) in two different directions through the lace fabric.
Block the finished dress by soaking in lukewarm water with a drop of wool wash, then gently squeeze out excess water without wringing. Lay flat on a blocking mat and pin to measurements, paying special attention to opening up the lace pattern and ensuring the scalloped edges lay flat and even.
Allow to dry completely before removing pins.
Final Thoughts on This Baby Dress Crochet Pattern
Thank you so much for choosing this cream and peach ombre baby dress crochet pattern for your next project. I truly hope the step by step instructions make the process smooth and enjoyable. There is something really satisfying about creating an heirloom piece that can be passed down and treasured.
If you make this dress, I would absolutely love to see it. Tag me on Instagram or share a photo in my Facebook group. Seeing your finished projects genuinely makes my day.
If this pattern caught your eye, go ahead and save it to your Pinterest boards so you can find it when you are ready to cast on. And if you do make it, please leave a comment below. I love hearing how patterns work up for you and seeing the color combinations you choose.
You Might Also Like
- Ocean Blue Bobble Flower Bag Free Crochet Pattern
- Sage Green Boho Lace Crochet Pullover Free Pattern
- Sunset Dahlia Crochet Flower Bracelet Free Pattern
- Ivory White Bridal Tote with Pearl Embellished Tassels Pattern
