
I don’t know about you, but I absolutely melt when I see a tiny handmade dress. There’s just something about those delicate stitches on something so small that makes my crafter heart skip a beat.
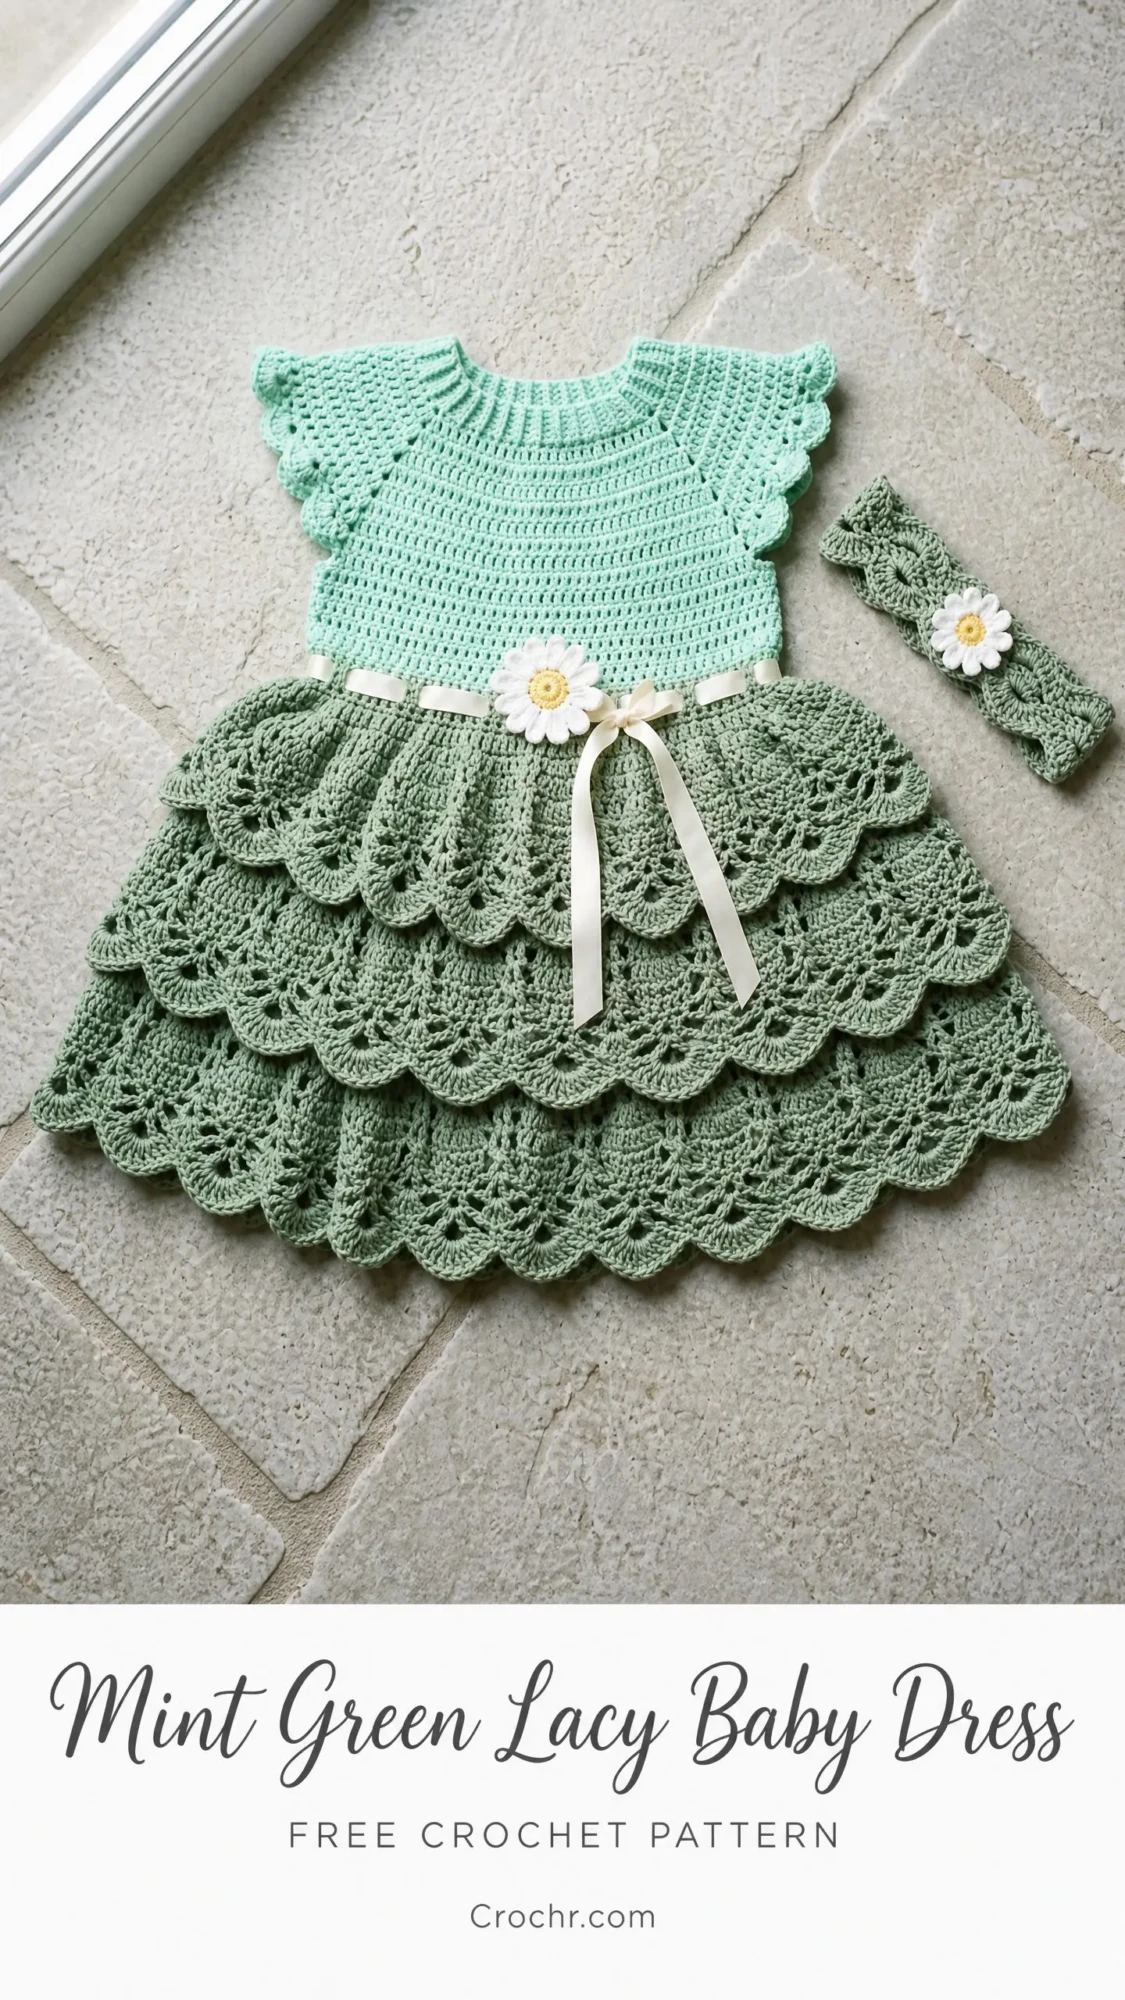
This mint green baby dress has been living rent-free in my head since I first sketched it out. The two-tone color palette, those dreamy tiered ruffles, the sweet little flutter sleeves. It checks every box for a show-stopping baby gift.
And here’s the best part. Despite looking incredibly intricate, this dress is totally doable for anyone comfortable with basic crochet garment construction. If you’ve made at least one project in the round before, you’re ready for this.
About This Crochet Baby Dress Pattern
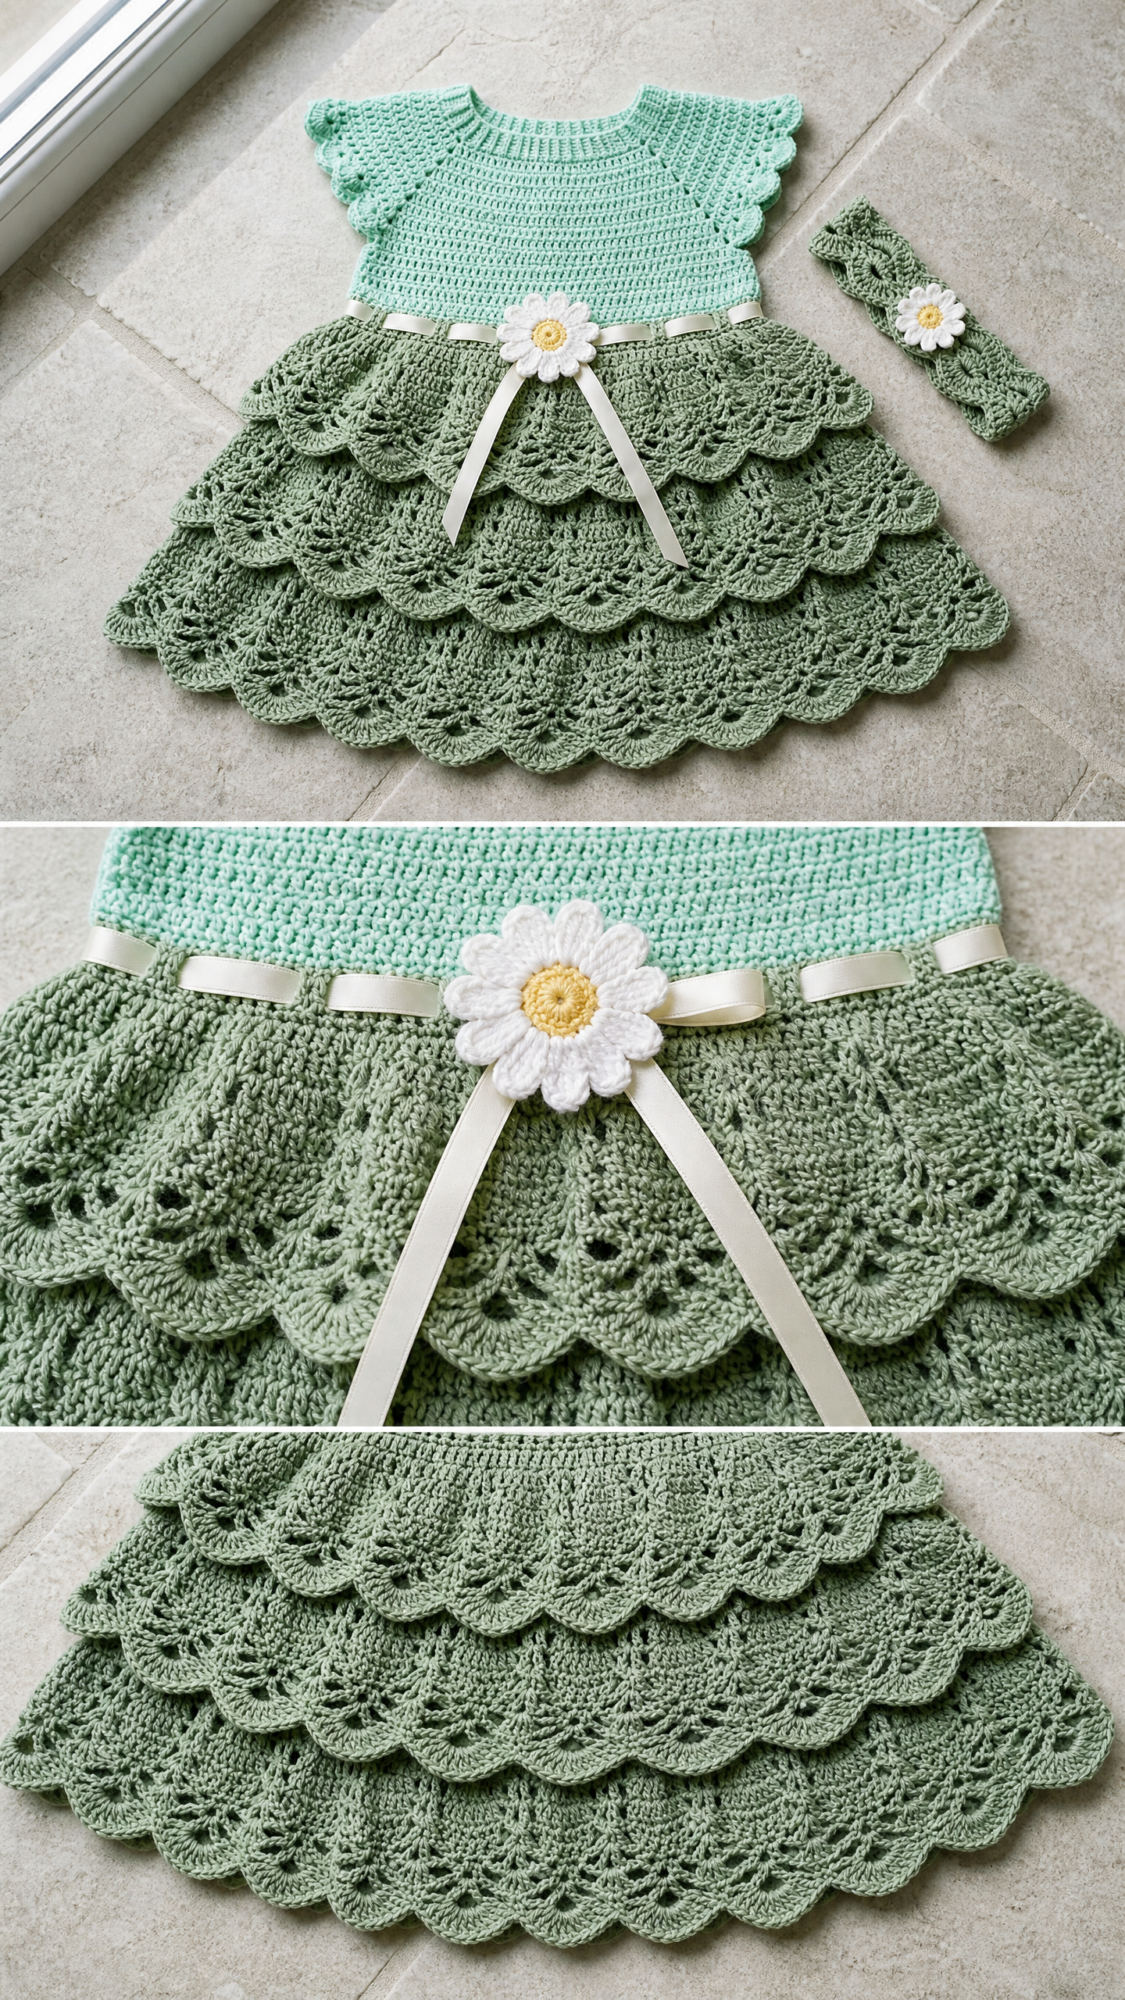
This heirloom-quality baby dress features a fitted round yoke bodice worked seamlessly from the top down. The bodice uses simple single crochet (sc) in a gorgeous mint shade, while the skirt transitions to a deeper sage green with three tiers of lacy pineapple fan stitches.
The construction is clever and satisfying. You start at the neckline and work down through the yoke with raglan shaping. Then you separate the sleeves, join the body in the round, and add that pretty ribbon channel at the waist. The flutter sleeves get a sweet shell edging, and the three skirt tiers are each worked separately before being attached.
A matching headband completes the set, and both pieces are embellished with crocheted daisy appliques and satin ribbon.
Finished measurements for size 3 to 6 months:
Skill level: Intermediate. You should be comfortable working in the round, following top-down yoke shaping with evenly spaced increases, reading a lacy stitch repeat, and making color changes.
Time estimate: Approximately 12 to 18 hours depending on your working speed.
Materials You’ll Need
Yarn:
Hooks:
Notions:
Yarn Suggestions
Option 1: Lion Brand 24/7 Cotton in Mint and Sage. This 100 percent mercerized cotton has excellent stitch definition and washes beautifully. Approximately 186 yards per 3.5 oz skein. You’ll need two skeins of each color.
Option 2: Paintbox Yarns Simply DK in Spearmint and Pistachio. Affordable and widely available with crisp stitch definition perfect for the lace tiers. Approximately 137 yards per 50 g skein. Purchase two skeins Color A and three skeins Color B.
Option 3: Drops Safran in Mint and Light Moss Green. A cotton-polyamide blend that’s slightly stretchier, making the fitted yoke more forgiving. Approximately 183 yards per 50 g skein. You’ll need two skeins of each color.
Substitution tip: Choose any DK weight yarn that achieves the listed gauge. For baby items, prioritize machine-washable cotton or cotton blends. Avoid yarns with a strong halo since the lace stitch pattern will be obscured.
Gauge
Bodice gauge (E-4 hook, single crochet, worked in the round):
20 stitches and 22 rounds = 4 inches (10 cm)
Skirt gauge (F-5 hook, fan lace pattern, worked in the round):
One 12-stitch fan repeat = approximately 2 inches (5 cm) wide
4 rounds of fan pattern = approximately 1.5 inches (3.8 cm) tall
Please check your gauge before beginning. The fitted yoke is the most gauge-sensitive section. Adjust hook size as needed to match.
Abbreviations
Let me walk you through every abbreviation you’ll encounter in this pattern:
Special Stitches
Shell Stitch
Work 5 dc into a single stitch or designated chain space. This creates one shell and is used in the flutter sleeve edging.
Pineapple Fan Stitch
This is a 12-stitch, 6-round repeat used in all three skirt tiers. Each fan consists of a central group of double crochet worked into a chain space, flanked by chain bridges and single crochet anchors. Full instructions are included in the skirt tier sections below.
Foundation Single Crochet (fsc)
This is optional and used to begin the headband.
Step 1: Make a slip knot. Ch 2.
Step 2: Insert hook into second ch from hook, yo, pull up a loop (2 loops on hook), yo, pull through first loop only (this creates the chain base), yo, pull through both loops (sc made).
Step 3: Insert hook under the 2 loops of the chain just created in that same stitch, yo, pull up a loop, yo, pull through first loop, yo, pull through both loops.
Repeat Step 3 for each additional fsc.
Daisy Applique (make 2, worked in white)
Using E-4 hook and white yarn:
Magic ring, ch 1, work 10 sc into ring, join to first sc. (10 sc)
Round 2: (Ch 4, sl st into second ch from hook, sc in next ch, hdc in next ch, sl st into next sc of round 1) 10 times. Fasten off leaving a tail for sewing.
Attach a small yellow button or work a French knot in yellow yarn at the center.
Pattern Notes Before You Begin
1. The dress is worked top-down, starting at the neckline. The yoke is worked flat (back and forth in rows) to create a back opening, then joined and worked in rounds for the lower bodice.
2. The back opening runs from the neckline to the waist. Three button loops are worked along one edge during finishing.
3. Color A (mint) is used for the entire bodice including the yoke, armhole edging, and flutter sleeves. Color B (sage) is introduced at the waist for all three skirt tiers.
4. Each skirt tier is worked as an independent piece in rounds. Alternatively, each tier can be worked flat in rows and then seamed at the side back. Both methods work well.
5. Stitch counts are given in parentheses at the end of each row or round.
6. The ribbon is woven through a row of chain spaces created at the waist join round. The daisy applique is sewn over the ribbon bow on the front.
Step by Step Crochet Instructions
Section 1: Yoke (worked flat in rows, Color A, E-4 hook)
The yoke is worked from the neckline down. You’ll work flat to allow for the back opening, then join into rounds at the lower bodice.
Foundation Chain: With Color A and E-4 hook, ch 62.
Row 1 (WS): Sc in second ch from hook and in each ch across. Turn. (61 sc)
This chain forms the neckline. The 61 stitches will be divided as follows: 10 sts for left back, 13 sts for left sleeve, 15 sts for front, 13 sts for right sleeve, 10 sts for right back.
Place markers at the following positions: after st 10 (left back/sleeve divide), after st 23 (left sleeve/front divide), after st 38 (front/right sleeve divide), after st 51 (right sleeve/right back divide). The remaining 10 stitches are the right back.
Row 2 (RS, Increase Row): Ch 1, turn. Sc in first st, sc in each st to 1 st before first marker, (sc, ch 1, sc) in st before marker, sm, (sc, ch 1, sc) in st after marker, sc across to 1 st before next marker, (sc, ch 1, sc) in st before marker, sm, (sc, ch 1, sc) in st after marker, repeat for all 4 markers in this manner, sc to end. Turn. (69 sts)
A note on the raglan increases: On every RS row, work (sc, ch 1, sc) at each of the 4 raglan points. On WS rows, sc across treating ch-1 spaces as stitches. This adds 8 stitches every 2 rows.
Row 3 (WS): Ch 1, turn. Sc in each st and each ch-1 sp across. Turn. (69 sc)
Row 4 (RS Increase Row): Repeat Row 2 increase method. (77 sts)
Row 5 (WS): Sc across. (77 sc)
Row 6 (RS Increase Row): Repeat Row 2 increase method. (85 sts)
Row 7 (WS): Sc across. (85 sc)
Row 8 (RS Increase Row): Repeat Row 2 increase method. (93 sts)
Row 9 (WS): Sc across. (93 sc)
Row 10 (RS Increase Row): Repeat Row 2 increase method. (101 sts)
Row 11 (WS): Sc across. (101 sc)
Row 12 (RS Increase Row): Repeat Row 2 increase method. (109 sts)
Row 13 (WS): Sc across. (109 sc)
Row 14 (RS Increase Row): Repeat Row 2 increase method. (117 sts)
Row 15 (WS): Sc across. (117 sc)
Row 16 (RS Increase Row): Repeat Row 2 increase method. (125 sts)
Row 17 (WS): Sc across. (125 sc)
After Row 17, stitch distribution is approximately: 18 sts each back panel, 25 sts each sleeve, 39 sts front panel.
Checkpoint: After completing Row 17, the yoke should measure approximately 3.5 inches (9 cm) from the foundation chain edge to the working edge.
Section 2: Joining the Bodice (separating sleeves, Color A, E-4 hook)
Now you’ll place sleeve stitches on holders and join the body into a round.
Row 18 (Joining Row, RS): Ch 1, turn. Sc across 18 left back sts to first marker. Place next 25 sleeve sts on a stitch holder or scrap yarn. Ch 3 (this bridges the underarm and counts as 3 sts). Sc across 39 front sts. Place next 25 sleeve sts on a holder. Ch 3. Sc across 18 right back sts. Turn. (81 sts)
Row 19 (WS): Ch 1, turn. Sc in each st and each ch across. (81 sc)
To join: Do not turn after Row 19. Sl st the last stitch of Row 19 to the first stitch of Row 19, being careful not to twist. Place marker for beginning of round.
Section 3: Lower Bodice (worked in rounds, Color A, E-4 hook)
Rounds 20 through 25: Ch 1, sc in each st around, join. (81 sc)
Checkpoint: After Round 25, the lower bodice below the yoke join should measure approximately 2 to 2.25 inches (5 to 5.7 cm).
Section 4: Waist Ribbon Channel (Color A, E-4 hook)
Round 26 (Ribbon Channel): Ch 4 (counts as dc + ch 1), sk 1 st, dc in next st, (ch 1, sk 1, dc in next) 38 times, ch 1, sk 2, dc in next, ch 1, join to third ch of beg ch-4. (81 sts equivalent)
Round 27: Ch 1, sc in each dc and each ch-1 sp around, join. (81 sc)
Checkpoint: After Round 27, weave the ribbon through the ch-1 spaces of Round 26. Leave tails at the back opening. Tie in a bow at the front center. Sew the daisy applique over the bow.
Section 5: Flutter Sleeves (worked in the round, Color A, E-4 hook)
Return held sleeve stitches to hook (25 sts).
Round 1: Join Color A with sc at the center underarm chain. Pick up 1 sc in each of 3 underarm ch, sc in each of 25 held sleeve sts, 1 sc in each remaining underarm ch. Join. (28 sc)
Round 2: Ch 1, sc in each st around, join. (28 sc)
Round 3 (Flutter Sleeve Edging): Ch 1, sc in first st, sk 1 st, 5 dc in next st, sk 1 st, sc in next st, (sk 1 st, 5 dc in next st, sk 1 st, sc in next st) around, ending sk 1, 5 dc in next, sk 1, join to first sc. (7 shells)
Fasten off. Repeat for second sleeve.
Section 6: Neckline Edging (Color A, E-4 hook)
Join Color A at top right back corner of neckline opening.
Row 1: Ch 1, sc evenly along the right back edge (approximately 17 sc), sc across the 61 neckline foundation chain edge sts, sc evenly down the left back edge (17 sc). Do not join; turn. (95 sc approximately)
Row 2: Ch 1, sc in each st across. Fasten off.
Button loops (worked on right back edge):
Rejoin yarn at bottom right back edge. Sc 5 sts up the edge, ch 3, sk 2 sts, sc next 5 sts, ch 3, sk 2, sc next 5 sts, ch 3, sk 2, sc to top. Fasten off.
Sew 3 buttons on the left back edge corresponding to the button loops.
Section 7: Skirt Tier 1 (Color B, F-5 hook)
Attach Color B with a standing sc to the first stitch of Round 27 (waist).
Tier 1, Round 1 (Increase Round): Ch 1, sc in first st, 2 sc in next st, (sc in next 2 sts, 2 sc in next st) around, join. (108 sc)
Tier 1, Round 2: Ch 1, sc in first st, (ch 5, sk 5 sts, sc in next st, ch 5, sk 5 sts, sc in next st) around working last sc into base of beg ch-1, join. (18 ch-5 arches)
Tier 1, Round 3: Sl st into first ch-5 arch, ch 3 (counts as dc), work 6 more dc into same arch (7 dc total in this arch), sc into next ch-5 arch, (7 dc into next ch-5 arch, sc into next ch-5 arch) around, join to top of beg ch-3. (9 fans)
Tier 1, Round 4: Ch 1, sc in same st, ch 3, (sk 1 dc, sc in next dc, ch 3) 3 times over first fan, sk sc anchor, (sc in first dc of next fan, ch 3, sk 1, sc in next, ch 3, sk 1, sc in next, ch 3, sk 1, sc in next, ch 3, sk sc anchor) around, join. (36 ch-3 sps, 36 sc)
Tier 1, Round 5: Sl st to first ch-3 sp, ch 3, 2 dc in same sp, ch 1, (3 dc in next ch-3 sp, ch 1) around, join to top of beg ch-3. (36 groups of 3 dc + 36 ch-1 sps)
Tier 1, Round 6 (Scallop Edge): Ch 1, sc in first st, (ch 3, sk 2 dc, sc in ch-1 sp, ch 3, sk 2 dc, sc in next dc, ch 3, sc in ch-1 sp) around, adjusting as needed to end at join, join to first sc. Fasten off.
Tier 1 height: approximately 2.5 inches (6.4 cm).
Section 8: Skirt Tier 2 (Color B, F-5 hook)
Attach Color B to the bottom scallop edge of Tier 1.
Tier 2, Round 1 (Pickup and Increase): Ch 1, sc evenly into the scallop points of Tier 1, increasing to 144 sts total. Work (sc, sc, 2sc) around. (144 sc)
Tier 2, Rounds 2 through 6: Repeat the Pineapple Fan Stitch rounds as for Tier 1 but working over 144 sts (12 fan repeats).
Round 2: (sc, ch 5, sk 5, sc, ch 5, sk 5) around. (24 ch-5 arches, 24 sc)
Round 3: (7 dc into ch-5 arch, sc into next ch-5 arch) around. (12 fans of 7 dc + 12 sc anchor)
Round 4: Sc/ch-3 mesh over each fan as in Tier 1 Round 4. (48 ch-3 sps)
Round 5: (3 dc in ch-3 sp, ch 1) around. (48 groups of 3 dc = 144 dc + 48 ch-1 sps)
Round 6 (Scallop Edge): Sc/ch-3 scallop edge as in Tier 1 Round 6. Fasten off.
Tier 2 height: approximately 2.5 inches (6.4 cm).
Section 9: Skirt Tier 3 (Color B, F-5 hook)
Attach Color B to bottom scallop edge of Tier 2.
Tier 3, Round 1 (Pickup and Increase): Sc into scallop points increasing to 180 sts total. Work (sc in each of 3 sts, 2 sc in next st) around. (180 sc)
Tier 3, Rounds 2 through 6: Repeat the Pineapple Fan Stitch rounds working over 180 sts (15 fan repeats).
Round 2: (sc, ch 5, sk 5, sc, ch 5, sk 5) around for 15 pair-repeats. (30 ch-5 arches, 30 sc)
Round 3: (7 dc into ch-5 arch, sc into next ch-5 arch) around. (15 fans of 7 dc + 15 sc)
Round 4: Sc/ch-3 mesh over each fan. (60 ch-3 sps)
Round 5: (3 dc in ch-3 sp, ch 1) around. (60 groups of 3 dc = 180 dc + 60 ch-1 sps)
Round 6 (Scallop Edge): Sc/ch-3 scallop edge. Fasten off.
Tier 3 height: approximately 2.5 inches (6.4 cm).
Total skirt length (Tiers 1 + 2 + 3): approximately 7.5 inches (19 cm).
Checkpoint: After all three tiers, total dress length from shoulder should be approximately 13.5 to 14 inches (34 to 35.5 cm).
Section 10: Headband (Color B, E-4 hook)
Foundation: With Color B and E-4 hook, ch 67. Join to first ch to form a ring, being careful not to twist.
Round 1: Ch 1, sc in each ch around, join. (66 sc)
Continue with additional rounds of sc to desired width, then add a shell edging if desired. Attach the smaller daisy applique to one side.
Finishing Your Baby Dress
Weave in all ends securely. Block the skirt tiers gently to open up the lace pattern. Thread the satin ribbon through the waist channel and tie in a bow at center front. Sew the daisy applique over the ribbon bow. Sew buttons to correspond with the button loops on the back opening.
Give everything a gentle steam or wet block to help the lace tiers drape beautifully.
Tips for Success
Take your time with the yoke. The raglan shaping is straightforward once you get the rhythm, but those first few rows require careful attention to marker placement.
Use lifelines. Before starting each skirt tier, thread a piece of contrasting yarn through your stitches. If you need to rip back, you won’t lose your work.
Block your gauge swatch. Cotton yarn can behave differently after washing, so wash and block your swatch before measuring.
Count often. Especially on the skirt tiers, verify your stitch counts at the end of each round.
I really hope you love making this sweet baby dress as much as I loved designing it. It makes the most beautiful gift for baby showers, christenings, or just because. Save this pattern to your Pinterest boards so you can find it when you’re ready to start, and please leave a comment below if you make one. I would absolutely love to see your finished dresses!
You Might Also Like
- Mint Chocolate Chameleon Amigurumi Free Crochet Pattern
- Sage Green Daisy Square Mini Dress Free Crochet Pattern
- Cherry Blossom Butterfly Garden Charm Free Crochet Pattern
- Succulent Garden Crochet Bowl Free Crochet Pattern
