
When I sat down to design this dress, I had a clear vision. I wanted something feminine and fitted that would actually work across multiple sizes. I wanted those classic granny square vibes but with a modern, wearable silhouette. And I absolutely had to include daisies because, well, who doesn’t love a good floral moment?
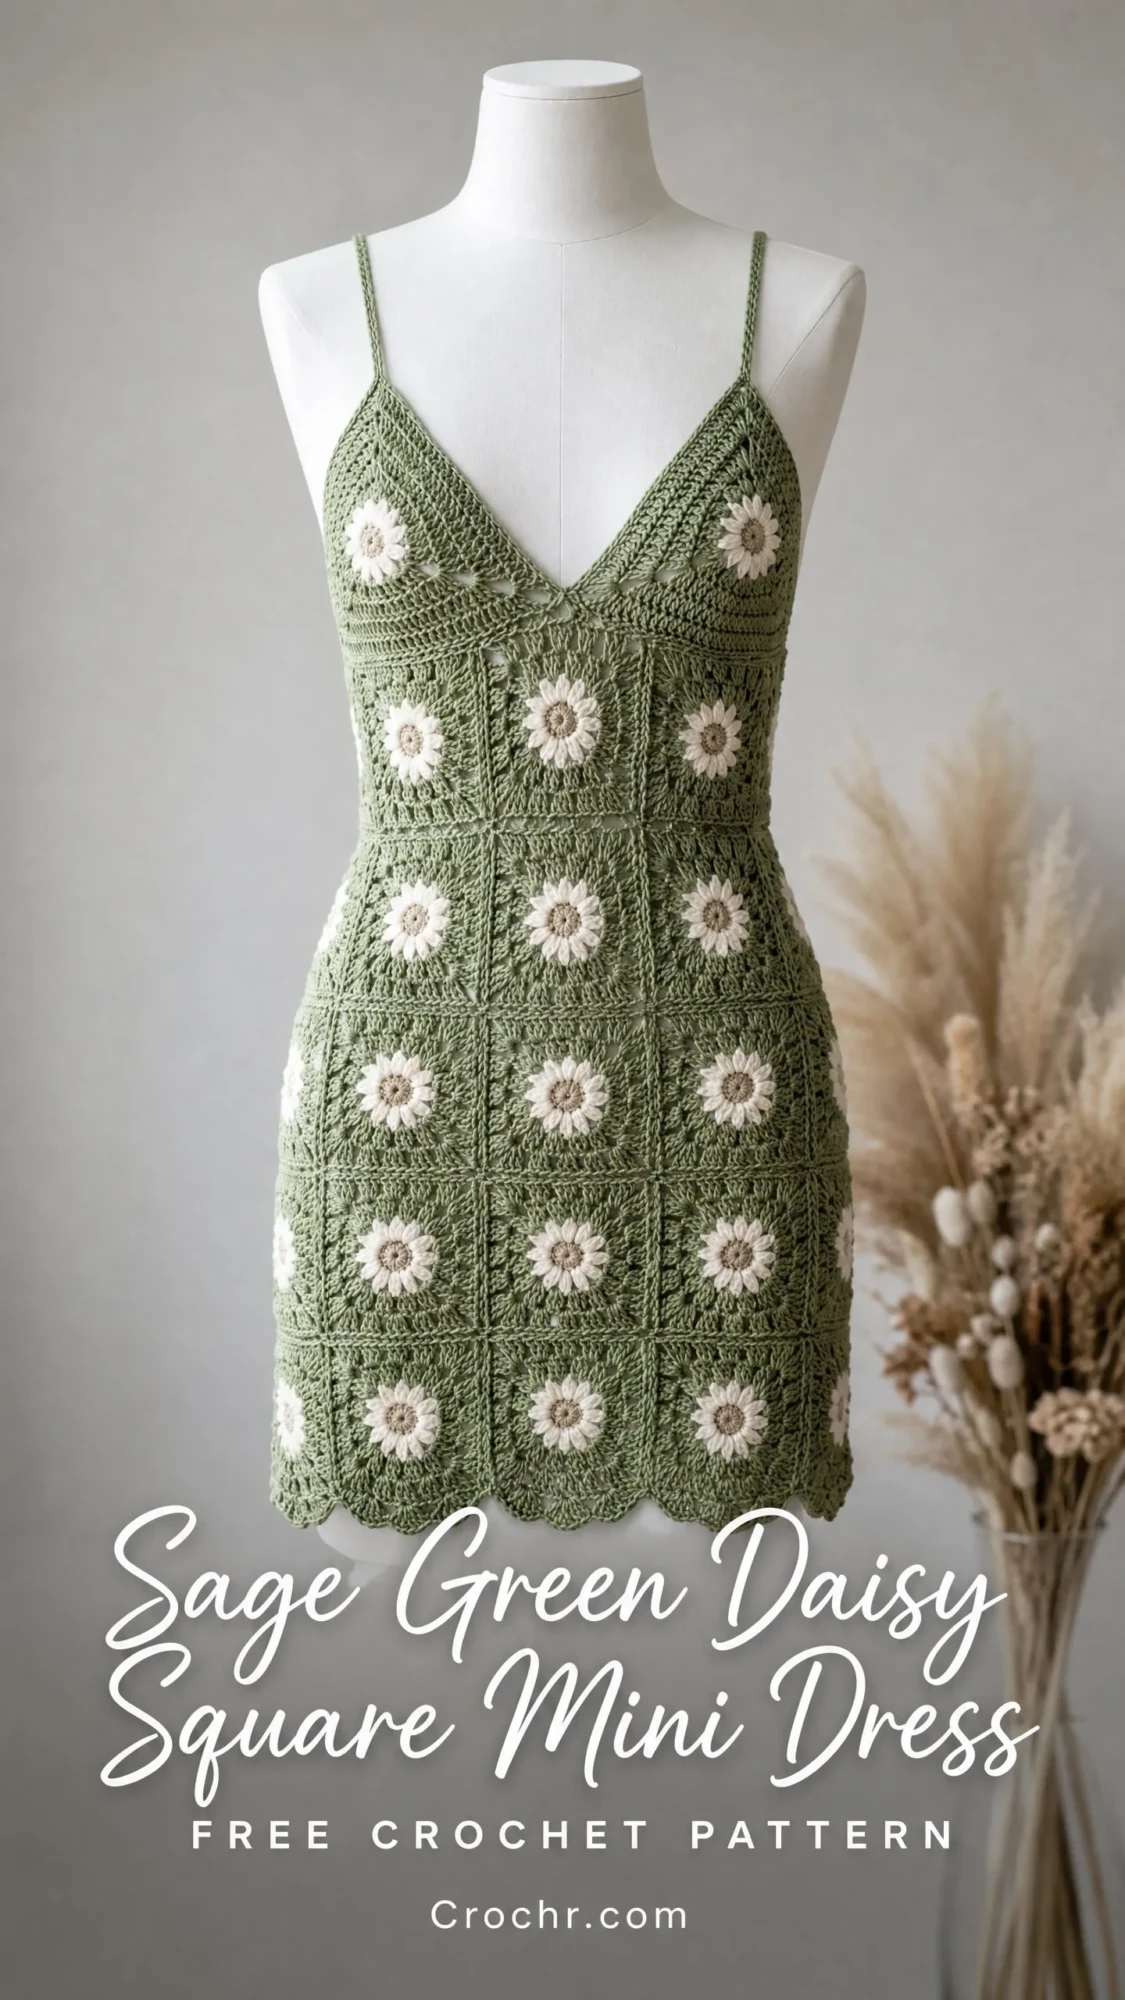
The construction method here is what really excites me. Instead of complicated shaping rows, we’re using strategic square placement and joining techniques to create that flattering fitted look. The V-neckline forms naturally from half-square triangles. The scalloped hem adds that perfect finishing touch.
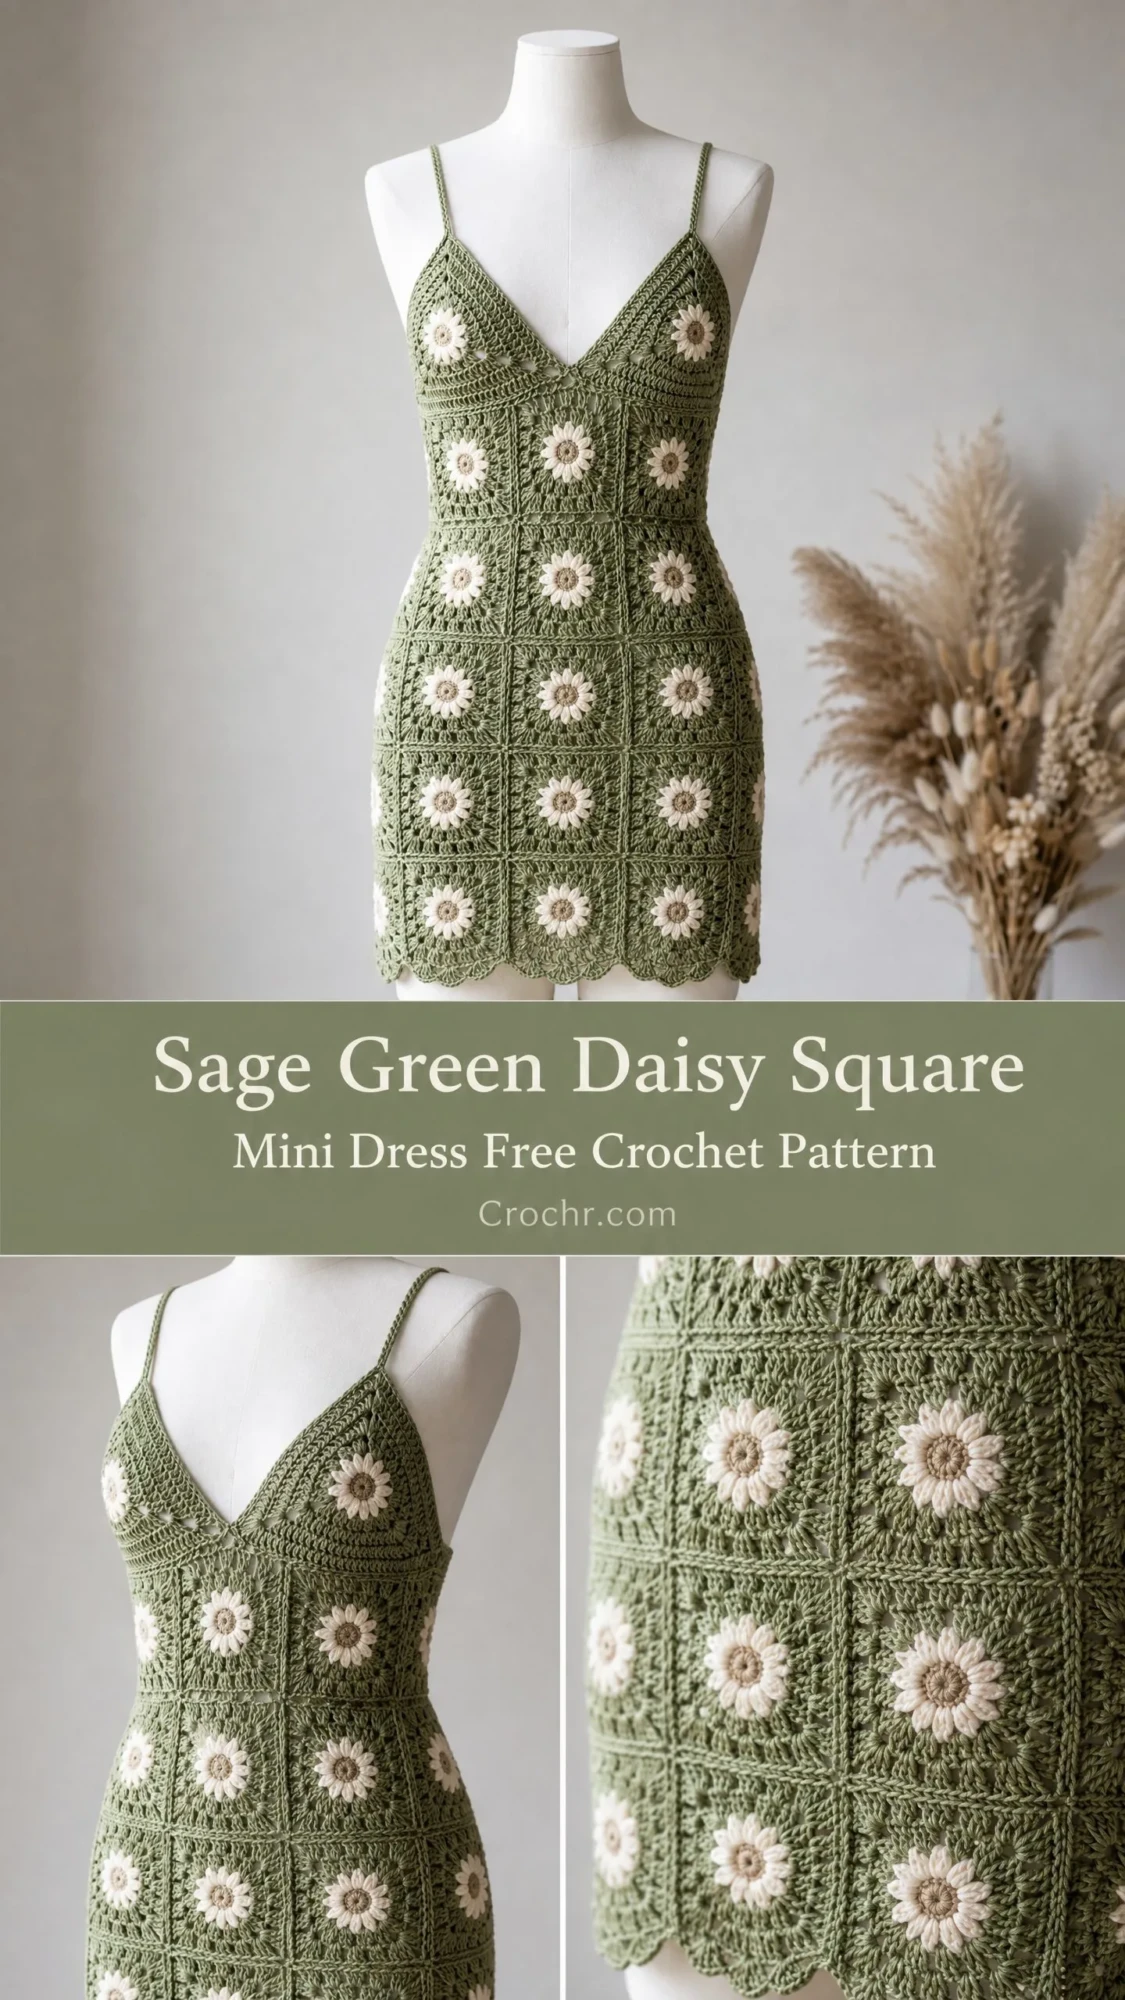
I am SO pleased with how this turned out. The sage green with cream daisies and warm taupe centers gives it such a fresh, springtime feel. Whether you wear it to a garden party, a beach day, or a summer date night, this little dress is going to turn heads.
About This Crochet Pattern
This mini dress is constructed entirely from joined granny squares, each featuring a beautiful raised daisy motif at the center. The construction is straightforward once you understand the process. You’ll make all your squares individually, block them, join them into flat panels for the front and back, seam the sides together, add straps, and finish with that gorgeous scalloped hem.
The dress sits approximately mid-thigh, hitting roughly 16 to 18 inches from underarm to hem depending on your chosen size. Each finished square measures exactly 3 inches by 3 inches after blocking. The bodice uses three rows of squares, and the skirt uses three additional rows, giving you six horizontal rows total per panel.
Important fit note: This dress is designed with 1 inch of negative ease at the bust and waist. That’s what creates the fitted silhouette you see in the photos. Granny square garments have natural stretch when worked in cotton, so don’t worry about it being too snug.
Skill Level
I’m rating this pattern as Intermediate to Advanced Intermediate.
Here’s why. You’ll need to be comfortable with granny square construction, working a daisy relief stitch into a foundation, joining motifs using flat slip stitch joins, reading stitch counts across multiple motif rows, shaping a V-neckline with half-motifs, and executing a fitted garment without traditional row-by-row shaping.
If you’ve made motif-based garments before, you’ll feel right at home. If this is your first one, just take it slow and trust the process. I’ll walk you through every step.
Time Estimate
Plan for approximately 40 to 55 hours for a size Small/Medium. This includes all squares, joining, straps, and finishing. If you’re working a larger size or have a slower tension, add 8 to 12 more hours.
Don’t let that number scare you. This is a perfect project to work on bit by bit. Make a few squares while watching TV each evening, and before you know it, you’ll have enough to start joining.
Finished Measurements
Size XS/S: Bust 32 to 34 inches, waist 26 to 28 inches, hip 34 to 36 inches, length underarm to hem 16 inches.
Size M/L: Bust 36 to 38 inches, waist 30 to 32 inches, hip 38 to 40 inches, length underarm to hem 17 inches.
Size XL/2XL: Bust 40 to 42 inches, waist 34 to 36 inches, hip 42 to 44 inches, length underarm to hem 18 inches.
Throughout the pattern, sizes appear in brackets like this: [XS/S, M/L, XL/2XL]. Always follow the numbers for your size.
Materials Needed
Yarn Color A (Sage Green): Worsted weight, 100 percent cotton or cotton-acrylic blend.
Yarn Color B (Cream/Off-White): Worsted weight, same fiber content as Color A.
Yarn Color C (Warm Taupe): Worsted weight, same fiber content as Color A.
Hooks:
Additional materials:
Yarn Suggestions
Lion Brand 24/7 Cotton in Sage (Color A), White (Color B), and Linen (Color C). This 100 percent mercerized cotton drapes beautifully and gives excellent stitch definition for the daisy relief work. It’s machine washable and widely available.
We Are Knitters The Cotton in Sage Green (Color A), Ecru (Color B), and Sand (Color C). This cotton-linen blend gives a slightly more textured, artisanal look. Swatch carefully since this yarn may require dropping to a US F-5 hook to achieve gauge.
Paintbox Yarns Simply DK in Grass Green (Color A), Champagne White (Color B), and Champagne (Color C). This 100 percent cotton DK-weight yarn knits up at a similar gauge to light worsted when worked at a tighter tension.
Substitution note: Choose a smooth, plied cotton or cotton-blend in a true worsted weight for best stitch definition. Avoid fuzzy or halo yarns since they will obscure the daisy petal detail. Always check gauge before beginning.
Gauge
One finished daisy granny square, blocked, equals 3 inches by 3 inches.
To check gauge, complete one full square through all rounds as written. Weave in your ends, wet block, and pin to 3 inches by 3 inches. If your square is larger, go down one hook size. If smaller, go up one hook size. Correct gauge is essential for the garment to fit as intended.
For reference, approximately 16 single crochet stitches by 18 rows equals 4 inches with the US G-6 hook.
Abbreviations
beg = beginning
BLO = back loop only
BPdc = back post double crochet (inserting your hook from back to front around the post of a stitch from the previous row)
ch = chain
ch-sp = chain space (the gap created by chain stitches)
dc = double crochet (yarn over, insert hook, pull up loop, yarn over and pull through 2 loops twice)
FPdc = front post double crochet
hdc = half double crochet
MC = main color (Color A, Sage Green)
CC1 = contrast color 1 (Color B, Cream)
CC2 = contrast color 2 (Color C, Warm Taupe)
pm = place marker
rem = remaining
rep = repeat
rnd = round
RS = right side
sc = single crochet (insert hook, pull up loop, yarn over and pull through both loops)
sl st = slip stitch
sk = skip
sp = space
st(s) = stitch(es)
t-ch = turning chain
tog = together
WS = wrong side
yo = yarn over
Brackets [ ] mean repeat the instructions inside the number of times indicated. Parentheses ( ) show the stitch count at the end of a row or round.
Special Stitches
Daisy Center Bobble (DCB)
This creates the raised center of each daisy. Here’s how to work it:
Insert hook into designated stitch or ring, yarn over, pull up a loop. You now have 2 loops on hook. Without completing the stitch, insert hook again into the same place, yarn over, pull up a loop. You now have 3 loops. Repeat this three more times until you have 7 loops on hook. Yarn over and draw through all 7 loops. Chain 1 to close and secure. This chain 1 does not count as a stitch.
The bobble will pop outward toward you on the right side.
Daisy Petal (DP)
This forms the petals around your daisy center:
Insert hook from front to back around the post of the designated stitch in the previous round (like a BPdc entry). Yarn over, pull up a loop to the height of a tall double crochet. Yarn over twice, insert hook around the same post again, yarn over, pull up a loop. Yarn over and draw through 2 loops twice. You now have 3 loops on hook. Yarn over and draw through all 3 loops.
The result is a raised elongated petal that lies over the surface of the square.
Puff Stitch (PS)
Used in corner construction:
Yarn over, insert hook into designated chain space. Yarn over, pull up a loop to the height of a standard dc. Repeat twice more into the same chain space. You now have 7 loops on hook. Yarn over and draw through all 7 loops. Chain 1 to close.
Flat Join (FJ)
Used to join squares without creating a ridge:
Hold two squares with wrong sides together, right sides facing outward. Insert hook through both corresponding corner chain spaces or edge stitches simultaneously. Slip stitch through both layers. Work along the entire edge, slip stitching through both layers stitch by stitch.
Scallop Edging (SE)
Used along the hem:
Skip 2 stitches, work 5 dc into next stitch, skip 2 stitches, slip stitch into next stitch. Repeat across, adjusting as needed at joins between squares so scallops center naturally over each square.
Square Count Overview
Before you begin, here’s how many motifs you’ll need:
Front panel: [XS/S: 10, M/L: 12, XL/2XL: 14] columns x 6 rows equals [60, 72, 84] full squares plus [XS/S: 8, M/L: 10, XL/2XL: 12] half-squares for the V-neckline.
Back panel: Same column count x 6 rows equals [60, 72, 84] full squares. No half-squares needed since the back has a straight neckline.
Total full squares: [XS/S: 120, M/L: 144, XL/2XL: 168]
Total half-squares: [XS/S: 8, M/L: 10, XL/2XL: 12]
Grand total motifs: [XS/S: 128, M/L: 154, XL/2XL: 180]
Yes, that’s a lot of squares. But each one is quick to make, and the repetitive nature becomes meditative. Put on a good podcast and enjoy the process.
Full Daisy Granny Square Instructions
Make the required number of full squares following this color sequence.
Round 1 (Center)
Using CC2 and US G-6 hook, make a magic ring.
Ch 2 (does not count as dc), work 1 DCB into ring, ch 2, [1 DCB into ring, ch 2] 7 times. Join with sl st to top of first DCB. (8 DCB, 8 ch-2 sps)
Fasten off CC2. Join CC1 in any ch-2 sp.
Round 2 (Petals)
Working into the ch-2 sps of Round 1.
Ch 1 (does not count as sc), 1 sc into same ch-2 sp. Work 1 DP around the post of the next DCB. [1 sc into next ch-2 sp, 1 DP around post of next DCB] 7 times. Join with sl st to first sc. (8 sc, 8 DP)
Round 3 (Petal Tips and Transition)
Continue with CC1.
Ch 1, sc in same st (sc on top of first sc from Rnd 2). Ch 1, sk the DP, sc in next sc. [Ch 1, sk DP, sc in next sc] 7 times. Ch 1, join with sl st to first sc. (8 sc, 8 ch-1 sps)
You now have a daisy with 8 petals surrounded by a ring of sc and ch-1 sps. Fasten off CC1. Join MC in any ch-1 sp.
Round 4 (First Granny Round)
With MC.
Ch 3 (counts as first dc), 2 dc in same ch-1 sp, ch 1. [3 dc in next ch-1 sp, ch 1] 7 times. Join with sl st to top of beg ch-3. (8 groups of 3 dc, 8 ch-1 sps)
Round 5 (Corner Formation)
Continue with MC.
Sl st across first 2 dc of Round 4 into the ch-1 sp. Ch 3 (counts as first dc), 2 dc in same ch-1 sp, ch 2 (corner made). [3 dc in next ch-1 sp (side), ch 1, 3 dc in next ch-1 sp, ch 2 (corner)] 3 times. 3 dc in next ch-1 sp, ch 1. Join with sl st to top of beg ch-3.
(4 corners each with ch-2 sp, 4 sides each with one 3-dc cluster and one ch-1 sp between corner clusters. Total: 8 groups of 3 dc, 4 ch-2 corner sps, 4 ch-1 sps, 24 dc total)
Round 6 (Final Border)
Continue with MC.
Sl st into corner ch-2 sp. Ch 3 (counts as first dc), [2 dc, ch 2, 3 dc] in same corner ch-2 sp. Corner complete. Ch 1, 3 dc in next ch-1 sp (side cluster), ch 1. [3 dc, ch 2, 3 dc] in next corner ch-2 sp (corner), ch 1, 3 dc in next ch-1 sp, ch 1. Rep from corner to corner around all 4 sides. Join with sl st to top of beg ch-3. Fasten off MC.
(4 corners: each has [3 dc, ch-2, 3 dc]; 4 sides: each has one 3-dc cluster flanked by ch-1; total 12 groups of 3 dc, 4 ch-2 corner sps, 8 ch-1 sps. Final count: 36 dc, 4 ch-2 sps, 8 ch-1 sps per square)
Each finished square after blocking measures 3 inches by 3 inches.
CHECKPOINT: After completing and blocking 10 squares, lay them edge to edge in a horizontal row. The row should measure exactly 30 inches for XS/S. If not, reblock or adjust your hook size.
Half-Square (V-Neckline Triangle) Instructions
Make [XS/S: 8, M/L: 10, XL/2XL: 12] half-squares. These fill in the diagonal edges of the V-neckline on the front panel only. They’re worked as triangles in MC only with no daisy motif.
Foundation: Ch 5 with MC and G-6 hook. Turn.
Row 1 (RS): Dc in 4th ch from hook, dc in last ch. Turn. (2 dc, not counting t-ch)
Row 2: Ch 3 (counts as dc), dc in first st, 2 dc in next dc, 2 dc in top of t-ch. Turn. (5 dc)
Row 3: Ch 3 (counts as dc), dc in first st, dc in next 3 dc, 2 dc in top of t-ch. Turn. (7 dc)
Row 4: Ch 3 (counts as dc), dc in first st, dc in next 5 dc, 2 dc in top of t-ch. Turn. (9 dc)
Row 5: Ch 3 (counts as dc), dc in first st, dc in next 7 dc, 2 dc in top of t-ch. Turn. (11 dc)
Row 6: Ch 3 (counts as dc), dc in each dc across, 2 dc in top of t-ch. (13 dc)
Do not fasten off. Work a single round of sc border around all edges of the triangle to create join-ready edges. Place 3 sc in each corner point, 1 sc per dc along the top and bottom, 1 sc per row end along the diagonal edge.
Fasten off. Block to match the triangular half of a 3 inch by 3 inch square.
Panel Construction
Front Panel Layout (viewed from RS)
Row 1 (top/neckline): Two half-squares at far left, then [XS/S: 6, M/L: 8, XL/2XL: 10] full squares, then two half-squares at far right. The half-squares create the diagonal V-neckline slope. The center of Row 1 is open (the V opening itself).
For XS/S specifically: [Half-sq, Half-sq, 3 full squares] on the left side of the V and [3 full squares, Half-sq, Half-sq] on the right side. For M/L: [Half-sq, Half-sq, 4 full squares] each side. For XL/2XL: [Half-sq, Half-sq, 5 full squares] each side.
Rows 2 through 6: [XS/S: 10, M/L: 12, XL/2XL: 14] full squares across, all joined edge to edge.
Back Panel Layout
Rows 1 through 6: [XS/S: 10, M/L: 12, XL/2XL: 14] full squares across, all joined edge to edge. Straight top edge, no V.
Joining Squares Into Panels
Use the Flat Join method and a US F-5 hook.
Step 1: Arrange all squares for one panel on a blocking mat in the correct grid layout, RS facing up.
Step 2: Join squares in horizontal rows first. Hold two adjacent squares with WS together, RS out. Beginning at a corner ch-2 sp, sl st through both corner sps simultaneously. Work sl st through both layers along the entire shared edge, stitch by stitch, ending at the opposite corner ch-2 sp. Fasten off. Repeat for all horizontal joins within each row.
Step 3: Join rows to each other in the same manner, working along the full horizontal seam between Row 1 and Row 2, then Row 2 and Row 3, and so on through Row 6.
Step 4: At all four-corner intersections where four squares meet, pass the yarn through the center junction point with a single sl st to anchor. This prevents gaps at intersections.
CHECKPOINT: After completing the front panel, measure its total width. XS/S should be 30 inches wide. M/L should be 36 inches. XL/2XL should be 42 inches. Total height should be 18 inches (6 rows x 3 inches).
Joining Front and Back Panels
Step 1: Hold front and back panels with RS together, WS facing out.
Step 2: Using MC and US F-5 hook, sl st the left side seam from underarm edge (top of Row 1 side edge) to the hem edge (bottom of Row 6 side edge). Work through both layers stitch by stitch.
Step 3: Repeat for the right side seam.
Step 4: Turn RS out. The dress is now a tube.
CHECKPOINT: Try the dress on a dress form or your body before adding straps. The underarm circumference should measure: XS/S 30 inches, M/L 36 inches, XL/2XL 42 inches.
Neckline Edge Finishing
Front V-neckline: Using MC and US F-5 hook, join yarn at right shoulder top edge. Work 1 round of sc evenly around the entire front V-neckline opening, including across the top of the right-side squares, down the right diagonal V-edge, around the point of the V, up the left diagonal edge, and across the top of the left-side squares. Work 1 sc per stitch or row end around, placing 3 sc at any corner turn points and sc2tog at the inner V point to keep the V shape crisp. Join with sl st. Fasten off.
Back neckline: Using MC and US F-5 hook, join yarn at right back corner. Work 1 row of sc across the top back edge. Work 1 sc in each st across. Fasten off. (XS/S: approximately 60 sc; M/L: approximately 72 sc; XL/2XL: approximately 84 sc)
Straps
Make 2 identical straps.
Using MC doubled over a US F-5 hook, or using a single strand on a US D-3 hook for a firmer cord:
Ch 4. Sl st into first ch to form a small ring.
Round 1 and all following rounds: Ch 1, work 4 sc into ring/center of tube. Do not join. Work in continuous spiral. Place marker in first sc to track beginning of round.
Continue working 4 sc per round in continuous spiral until strap measures [XS/S: 12 inches, M/L: 12.5 inches, XL/2XL: 13 inches], or custom-fit desired length by trying on.
Make 2 straps. Do not fasten off until after fitting.
Strap attachment front: Pin each strap to the V-point of the front neckline, approximately 0.5 inch in from the innermost V join. Try on for strap length comfort. Adjust length, then fasten off and sew strap ends securely using tapestry needle and MC. Weave through at least 8 stitches in multiple directions for security.
Strap attachment back: Each strap attaches to the back top edge, positioned approximately [XS/S: 3 inches, M/L: 4 inches, XL/2XL: 5 inches] in from the side seam.
Hem Edging
Using MC and US G-6 hook, join yarn to the bottom edge at any side seam.
Round 1: Ch 1, sc evenly around the entire hem circumference, working 1 sc per stitch or chain space, and placing 1 sc at each square corner junction. Join with sl st to first sc. Count: [XS/S: 120 sc, M/L: 144 sc, XL/2XL: 168 sc]. Adjust by adding or removing 1 sc as needed to make total divisible by 6.
Round 2 (Scallop Edging): [Skip 2 sc, 5 dc in next sc, skip 2 sc, sl st in next sc] around. Repeat to end.
Number of scallops: [XS/S: 20, M/L: 24, XL/2XL: 28]. Join with sl st to first sl st of round. Fasten off.
Size Customization Tips
To lengthen the dress: Add one or more additional rows of full squares above or below the waist. Each additional row adds 3 inches to the length.
To widen for a larger hip: Add one or more columns of squares to each panel. Each additional column adds 3 inches of circumference. Add the same column count to both front and back for symmetry.
To add more waist definition: After joining front and back at side seams, thread a length of narrow elastic through the join seam channel at the Row 3 to Row 4 junction on the inside of the dress. Overlap elastic ends by 1 inch and sew together.
To raise or lower the V-neckline: Use more half-squares along the V diagonal for a deeper V, or fewer for a shallower V.
Finishing and Blocking
Step 1: Weave in all ends on the WS using a tapestry needle. Weave each end through at least 1 inch in two directions and trim.
Step 2: Wet block the completed dress. Fill a basin with cool water and submerge fully. Gently squeeze water through without wringing. Remove and roll in a dry towel to extract excess moisture.
Step 3: Lay flat on blocking mats. Pin hem scallops to shape, pinning each scallop arc at its peak and each sl st valley point. Pin the V-neckline to the correct angle.
Step 4: Allow to dry completely flat. Do not wear until fully dry, as cotton stretches when wet.
Care Instructions
Machine wash cold on gentle cycle or hand wash in cool water with mild detergent. Do not tumble dry. Lay flat to dry. Do not iron directly on daisy motifs since the raised texture will flatten. Store folded flat, not on a hanger, to prevent stretching.
You Did It!
Thank you so much for choosing this pattern for your next project. I truly hope you love making this dress as much as I loved designing it. Those little daisies bring me so much joy, and I know they’ll do the same for you.
If you make one, I would absolutely love to see it! Tag me on Instagram or share a photo in our Facebook group. There’s nothing better than seeing these patterns come to life in your hands.
Save this pattern to your Pinterest boards so you can find it easily when you’re ready to start. And please drop a comment below if you make this dress or have any questions along the way. I’m always here to help, and I genuinely love hearing from you. Happy crocheting!
You Might Also Like
- Mustard Yellow Backpack Free Crochet Pattern
- Dusty Rose Bobble Purse Free Crochet Pattern
- Soft Lavender Purple Crochet Backpack Free Pattern
- Sage Green Cable Knit Crop Sweater Free Crochet Pattern
