
A heart cutout in crochet? That sounds terrifying, right? I promise you, it is not nearly as complicated as it looks. The shaping is methodical, the stitches are basic, and I am going to walk you through every single row so you never feel lost.
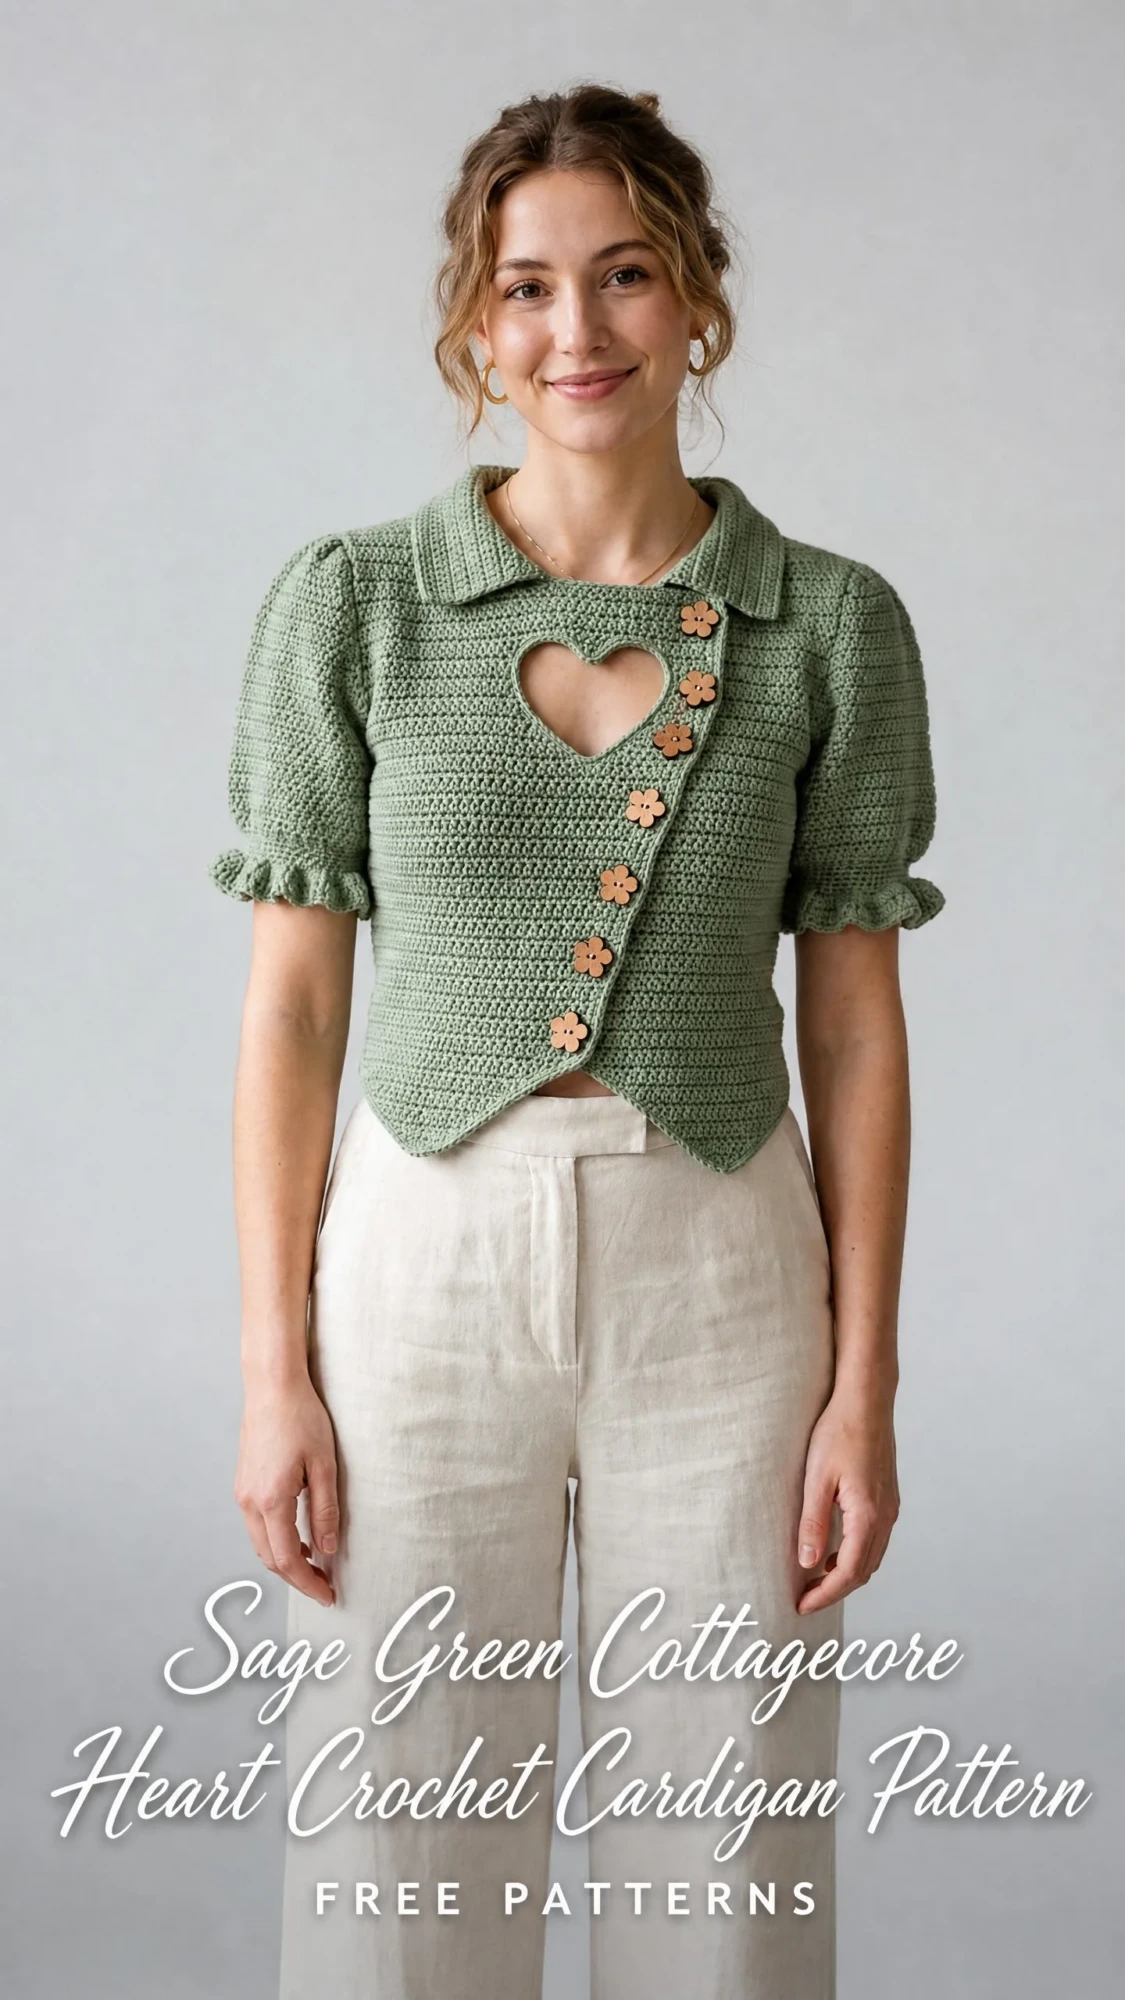
This sage green cottagecore cardigan looks like something straight out of a fairytale wardrobe. Puff sleeves, ruffled cuffs, a Peter Pan collar, adorable flower buttons, and that sweet heart cutout at the chest. It seems like a project reserved for advanced crocheters with years of garment construction under their belts.
Here is the truth. If you can work a single crochet and follow a row count, you can make this cardigan. The entire body uses just one stitch worked through the back loop only. The "complicated" parts are really just careful counting and a bit of patience. Let me show you how it all comes together.
What Makes This Cottagecore Cardigan So Special
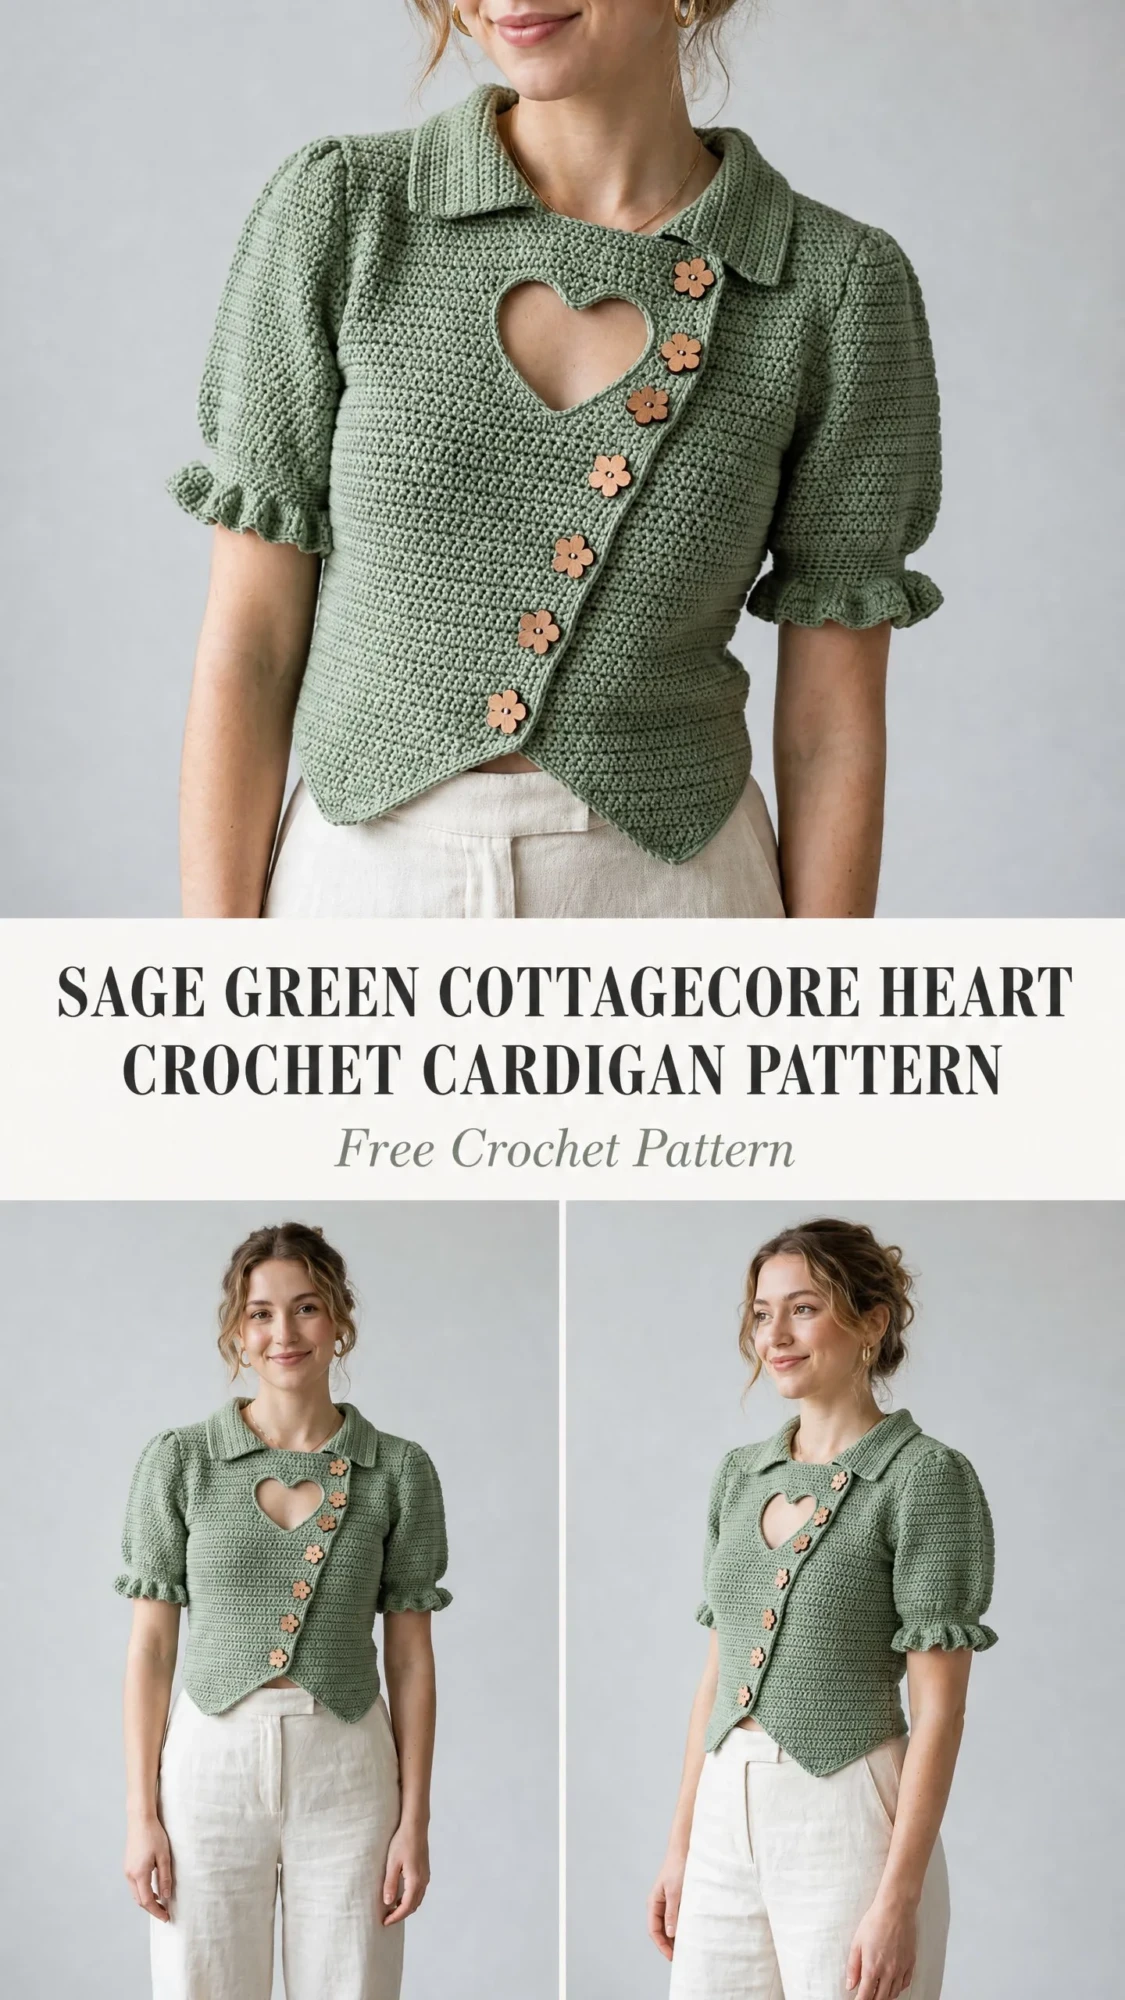
This fitted cropped cardigan captures everything beautiful about the cottagecore aesthetic. The design features puff sleeves with ruffle cuffs, a flat Peter Pan collar, a decorative heart-shaped cutout at the center chest, an asymmetric front hem that dips to a point, and a diagonal button band closed with six flower-shaped wooden buttons.
The body is worked entirely in single crochet through the back loop only (blo sc), which creates a subtle ribbed texture that looks far more intricate than it actually is. The garment is constructed in pieces: back panel, left front, right front, two sleeves, and collar. Then everything gets seamed together.
The button band and heart cutout are integrated into the right front panel, so there is no fussy finishing work at the end. What you see in the finished piece is exactly what you build as you go.
Skill Level and Time Commitment
I would call this an intermediate level crochet pattern. You need to be comfortable with:
No specialty stitches are extremely difficult here. The coordination of multiple panels and precise shaping is what moves this beyond beginner territory. If you have made a simple sweater or cardigan before, you are absolutely ready for this project.
Time estimate: Approximately 20 to 28 hours for an experienced intermediate crocheter, including seaming and finishing. This is not a weekend project, but it is absolutely worth the investment.
Finished Measurements
This pattern is written for size Small/Medium (US size 4-6/8-10).
All measurements given are after wet blocking.
Materials You Will Need
Yarn
Worsted weight, 100% cotton or cotton-blend, approximately 900 to 1050 yards (820 to 960 m) total in sage green.
Here are my top yarn recommendations:
1. Lion Brand 24/7 Cotton in Sage – 100% mercerized cotton, 186 yards (170 m) per 3.5 oz (100 g) skein. You will need 5 to 6 skeins. This yarn produces excellent stitch definition and a clean drape ideal for the structured bodice.
2. Paintbox Yarns Simply DK Cotton in Pistachio Green – Note that this is a DK that works at a slightly tight worsted gauge with a G hook, so swatch carefully. 100% cotton, 137 yards (125 m) per 1.75 oz (50 g) ball. You will need 7 to 8 balls.
3. Drops Paris in color 36 (Pistachio) – 100% cotton, 82 yards (75 m) per 1.75 oz (50 g) ball. You will need 12 to 13 balls.
Substitution tip: Choose a smooth, plied cotton or cotton-blend worsted weight yarn with good stitch definition. Avoid hairy or fuzzy fibers, which will obscure the back-loop-only texture and the heart cutout shaping. The yarn should have minimal stretch so the garment holds its structure.
Hooks
Notions
Gauge (This Is Mandatory)
With larger hook (US G/6 / 4.0 mm) and working single crochet through the back loop only:
18 stitches x 22 rows = 4 inches x 4 inches (10 cm x 10 cm)
Gauge is mandatory for a fitted garment. Adjust hook size up or down as needed to match gauge before cutting yarn. I cannot stress this enough. A cardigan that does not fit is heartbreaking after 25 hours of work.
Abbreviations and Stitch Definitions
Let me define every abbreviation you will encounter:
Special Stitches Explained
BLO Single Crochet (Primary Texture Stitch)
Insert hook into the back loop only of the indicated stitch. Yarn over, pull up a loop. Yarn over, pull through both loops on hook. This creates the subtle horizontal ribbing throughout the cardigan.
Sc2tog (Single Crochet Two Together)
Insert hook into next stitch, yarn over, pull up a loop. Without completing the stitch, insert hook into the following stitch, yarn over, pull up a loop. Yarn over, pull through all 3 loops on hook. This counts as 1 stitch and decreases by 1 stitch.
Ruffle Stitch
Working into the front loop of the indicated edge row, work 2 dc in every stitch across or around. This creates the ruffled, flared effect at the cuffs and hem points.
Heart Cutout Construction
This sounds intimidating, but here is the breakdown. At the designated row, you divide your work. You work one side of the heart (the left lobe), fasten off, rejoin yarn, and work the other side (the right lobe). Then you bridge across the top of the heart with a chain and continue working full rows. The curved heart shape comes from decreasing stitches at the inner upper corners. Full row-by-row instructions are included in the right front panel section.
Important Pattern Notes Before You Begin
1. The cardigan is worked flat in pieces: back, right front, left front, two sleeves. All pieces are seamed using mattress stitch or whip stitch.
2. All body and sleeve rows are worked in single crochet through the back loop only (blo sc) unless a specific instruction says otherwise.
3. Turning chains: All pieces are worked with a turning chain of 1 at the start of each row. The turning chain of 1 does NOT count as a stitch. Always work the first stitch into the very first stitch at the base of the turning chain.
4. Identifying the right side: The RS is the side facing you on odd-numbered rows (Row 1, 3, 5, etc.). Place a stitch marker on the RS at Row 1 so you always know which side faces out.
5. The button band is integrated into the right front panel edge, not picked up separately. Six buttonholes are evenly spaced along this band.
6. The left front panel mirrors the right front but has no buttonholes and no heart cutout.
7. The collar is worked flat, then seamed and attached to the neckline.
8. Stitch counts are given in parentheses at the end of each row.
9. The asymmetric front hem is achieved with decrease rows at the bottom of each front panel, creating those beautiful pointed tabs.
Crochet Pattern Instructions
Back Panel
Foundation chain: Chain 80.
Row 1 (RS): Sc in 2nd ch from hook and in each ch across. Turn. (79 sc)
Row 2: Ch 1. Sc blo in each st across. Turn. (79 sc)
Rows 3 through 6: Rep Row 2. Turn. (79 sc)
Row 7 (waist shaping, decrease row): Ch 1. Sc blo in first 17 sts. Sc2tog over next 2 sts. Sc blo in next 39 sts. Sc2tog over next 2 sts. Sc blo in last 17 sts. Turn. (77 sc)
Rows 8 through 10: Work even in blo sc. Turn. (77 sc)
Row 11 (waist shaping, decrease row): Ch 1. Sc blo in first 16 sts. Sc2tog over next 2 sts. Sc blo in next 37 sts. Sc2tog over next 2 sts. Sc blo in last 16 sts. Turn. (75 sc)
Rows 12 through 14: Work even in blo sc. Turn. (75 sc)
Row 15 (waist shaping, decrease row): Ch 1. Sc blo in first 15 sts. Sc2tog over next 2 sts. Sc blo in next 35 sts. Sc2tog over next 2 sts. Sc blo in last 15 sts. Turn. (73 sc)
Row 16: Work even in blo sc. Turn. (73 sc)
Row 17 (hip/bust expansion, increase row): Ch 1. Sc blo in first 15 sts. 2 sc blo in next st. Sc blo in next 35 sts. 2 sc blo in next st. Sc blo in last 15 sts. Turn. (75 sc)
Row 18: Work even in blo sc. Turn. (75 sc)
Row 19 (increase row): Ch 1. Sc blo in first 16 sts. 2 sc blo in next st. Sc blo in next 35 sts. 2 sc blo in next st. Sc blo in last 16 sts. Turn. (77 sc)
Rows 20 through 22: Work even in blo sc. Turn. (77 sc)
Row 23 (increase row): Ch 1. Sc blo in first 17 sts. 2 sc blo in next st. Sc blo in next 37 sts. 2 sc blo in next st. Sc blo in last 17 sts. Turn. (79 sc)
Rows 24 through 26: Work even in blo sc. Turn. (79 sc)
CHECKPOINT: After Row 26, the back panel should measure approximately 4.75 inches (12 cm) from foundation row. This is the lower back body. You are about to begin armhole shaping.
Armhole Shaping for Back
Row 27 (armhole decrease, RS): Ch 1. Sk first 5 sts. Sc blo in next st and in each st to the last 5 sts. Leave last 5 sts unworked. Turn. (69 sc)
Row 28: Ch 1. Sc2tog over first 2 sts. Sc blo in each st to last 2 sts. Sc2tog over last 2 sts. Turn. (67 sc)
Row 29: Ch 1. Sc2tog over first 2 sts. Sc blo in each st to last 2 sts. Sc2tog over last 2 sts. Turn. (65 sc)
Row 30: Ch 1. Sc2tog over first 2 sts. Sc blo in each st to last 2 sts. Sc2tog over last 2 sts. Turn. (63 sc)
Row 31: Ch 1. Sc2tog over first 2 sts. Sc blo in each st to last 2 sts. Sc2tog over last 2 sts. Turn. (61 sc)
Rows 32 through 52: Work even in blo sc. Turn. (61 sc each row)
CHECKPOINT: After Row 52, the back armhole depth is approximately 4.75 inches (12 cm). You are now at the shoulder and neckline shaping.
Back Neckline and Shoulder Shaping
Row 53 (shoulder/neck divide): Ch 1. Sc blo in first 18 sts. Leave remaining sts unworked. Turn. This forms the right shoulder.
Row 54: Ch 1. Sc2tog over first 2 sts (neck edge). Sc blo to end. Turn. (17 sc)
Row 55: Ch 1. Sc blo to last 2 sts. Sc2tog. Turn. (16 sc)
Row 56: Ch 1. Sc2tog over first 2 sts. Sc blo to end. Turn. (15 sc)
Row 57: Work even in blo sc. Turn. (15 sc)
Fasten off. This is the right back shoulder.
Return to Row 53. Count 25 sts from where you stopped working (these 25 sts are the center back neck opening). Join yarn in the 44th st from the right edge. Work across remaining 18 sts.
Row 54 (left shoulder): Ch 1. Sc blo to last 2 sts. Sc2tog. Turn. (17 sc)
Row 55: Ch 1. Sc2tog over first 2 sts. Sc blo to end. Turn. (16 sc)
Row 56: Ch 1. Sc blo to last 2 sts. Sc2tog. Turn. (15 sc)
Row 57: Work even. Turn. (15 sc)
Fasten off. This is the left back shoulder.
Back panel total dimensions: approximately 8.5 inches (21.5 cm) wide at bust, 15.5 inches (39 cm) tall from foundation to shoulder.
Right Front Panel
The right front panel is approximately half the back width plus a small overlap for the button band. It includes the heart cutout, the diagonal button band, and the asymmetric pointed hem.
Foundation chain: Chain 44.
Row 1 (RS): Sc in 2nd ch from hook and in each ch across. Turn. (43 sc)
Row 2: Ch 1. Sc blo in each st across. Turn. (43 sc)
Rows 3 through 6: Work even in blo sc. Turn. (43 sc)
Row 7 (waist shaping, decrease): Ch 1. Sc blo in first 10 sts. Sc2tog over next 2 sts. Sc blo in each st to end. Turn. (42 sc)
Rows 8 through 10: Work even. Turn. (42 sc)
Row 11 (waist shaping): Ch 1. Sc blo in first 9 sts. Sc2tog over next 2 sts. Sc blo in each st to end. Turn. (41 sc)
Rows 12 through 14: Work even. Turn. (41 sc)
Row 15 (waist shaping): Ch 1. Sc blo in first 9 sts. Sc2tog over next 2 sts. Sc blo in each st to end. Turn. (40 sc)
Row 16: Work even. Turn. (40 sc)
Row 17 (increase): Ch 1. Sc blo in first 9 sts. 2 sc blo in next st. Sc blo to end. Turn. (41 sc)
Row 18: Work even. Turn. (41 sc)
Row 19 (increase): Ch 1. Sc blo in first 10 sts. 2 sc blo in next st. Sc blo to end. Turn. (42 sc)
Rows 20 through 22: Work even. Turn. (42 sc)
Row 23 (increase): Ch 1. Sc blo in first 10 sts. 2 sc blo in next st. Sc blo to end. Turn. (43 sc)
Rows 24 through 26: Work even. Turn. (43 sc)
CHECKPOINT: Right front panel should measure approximately 4.75 inches (12 cm) tall and 9.5 inches (24 cm) wide at this point.
Heart Cutout Section (Rows 27 through 35)
The heart cutout is positioned at the upper chest of the right front. It is centered between the side edge and the button band edge, beginning at Row 27 and spanning 9 rows in height. The heart is 10 stitches wide and 9 rows tall.
Before beginning heart shaping, place a stitch marker at stitch 20 and stitch 29 from the side edge.
Row 27 (begin heart cutout, RS): Ch 1. Sc blo in first 19 sts.
Left Half of Heart (worked first)
Row 27a continues: Sc blo in sts 20 through 24 (5 sts). Turn. (5 sc for left lobe)
Row 28a: Ch 1. Sc2tog over first 2 sts. Sc blo in next 2 sts. Sc blo in last st. Turn. (4 sc)
Row 29a: Ch 1. Sc blo in first 2 sts. Sc2tog over last 2 sts. Turn. (3 sc)
Row 30a: Ch 1. Sc2tog over first 2 sts. Sc blo in last st. Turn. (2 sc)
Row 31a: Ch 1. Sc2tog. Turn. (1 sc)
Row 32a: Ch 1. Sc in that 1 st. Fasten off. This is the point at the bottom of the left lobe.
Right Half of Heart
Return to Row 27. Rejoin yarn at st 25.
Row 27b: Ch 1. Sc blo in sts 25 through 29 (5 sts). Turn. (5 sc)
Row 28b: Ch 1. Sc blo in first st. Sc blo in next 2 sts. Sc2tog over last 2 sts. Turn. (4 sc)
Row 29b: Ch 1. Sc2tog over first 2 sts. Sc blo in last 2 sts. Turn. (3 sc)
Row 30b: Ch 1. Sc blo in first st. Sc2tog over last 2 sts. Turn. (2 sc)
Row 31b: Ch 1. Sc2tog. Turn. (1 sc)
Row 32b: Ch 1. Sc in that 1 st. Fasten off. This is the point at the bottom of the right lobe.
Rejoin Full Row After Heart Cutout
Row 33 (rejoin full row): With RS facing, join yarn at st 1. Work as follows: Ch 1. Sc blo in first 19 sts. Ch 10 (this chain bridges over the heart cutout and creates the upper arch). Sk the heart cutout region (sts 20 through 29). Sc blo in sts 30 through 43. Turn. (43 sts)
Row 34: Ch 1. Sc blo in each st across (including working into each of the 10 chain bridge stitches). Turn. (43 sc)
Rows 35 through 36: Work even. Turn. (43 sc)
CHECKPOINT: After Row 36, the right front panel should measure approximately 6.5 inches (16.5 cm) tall. The heart cutout should measure approximately 2.2 inches (5.6 cm) wide and 2 inches (5 cm) tall.
Armhole Shaping for Right Front
Row 37 (armhole): Ch 1. Sk first 5 sts (side seam edge). Sc blo in next st and in each st to end. Turn. (38 sc)
Row 38: Ch 1. Sc blo to last 2 sts. Sc2tog. Turn. (37 sc)
Row 39: Ch 1. Sc2tog. Sc blo to end. Turn. (36 sc)
Row 40: Ch 1. Sc blo to last 2 sts. Sc2tog. Turn. (35 sc)
Row 41: Ch 1. Sc2tog. Sc blo to end. Turn. (34 sc)
Rows 42 through 52: Work even. Turn. (34 sc)
Button Band and Buttonholes
The button band runs along the center front edge. The last 4 stitches of every row form the button band section. Buttonholes are placed on rows 23, 27, 33, 39, 45, and 51.
Buttonhole rows: Work blo sc to last 4 sts. Sc blo in next st. Ch 2. Sk next 2 sts. Sc blo in last st. Turn. On the following row, work 2 sc into the ch-2 sp.
Right Front Neckline and Shoulder
Row 53 (neck shaping begins): Ch 1. Sc blo in first 15 sts (shoulder sts). Leave remaining 19 sts unworked. Turn. (15 sc)
Rows 54 through 57: Work even in blo sc. Turn. (15 sc)
Fasten off.
Right Front Asymmetric Hem Point
After the main right front is complete, return to the lower right corner (center front edge). Join yarn.
Hem Extension Row 1 (RS): Ch 1. Sc blo in first 8 sts along the lower foundation edge. Turn. (8 sc)
Hem Extension Row 2: Ch 1. Sc blo in first 6 sts. Sc2tog. Turn. (7 sc)
Hem Extension Row 3: Ch 1. Sc2tog. Sc blo in next 3 sts. Sc2tog. Turn. (5 sc)
Hem Extension Row 4: Ch 1. Sc2tog. Sc blo in next 1 st. Sc2tog. Turn. (3 sc)
Hem Extension Row 5: Ch 1. Sl st in first st. Sc blo in next st. Sl st in last st. Turn. (3 sts, forms tip)
Fasten off.
Left Front Panel
The left front mirrors the right front structurally but has no heart cutout and no buttonholes.
Foundation chain: Chain 44.
Row 1 (RS): Sc in 2nd ch from hook and in each ch across. Turn. (43 sc)
Rows 2 through 6: Work even in blo sc. Turn. (43 sc)
Row 7: Ch 1. Sc blo to last 12 sts. Sc2tog. Sc blo to end. Turn. (42 sc)
Rows 8 through 10: Work even. Turn. (42 sc)
Row 11: Ch 1. Sc blo to last 12 sts. Sc2tog. Sc blo to end. Turn. (41 sc)
Rows 12 through 14: Work even. Turn. (41 sc)
Row 15: Ch 1. Sc blo to last 11 sts. Sc2tog. Sc blo to end. Turn. (40 sc)
Row 16: Work even. Turn. (40 sc)
Row 17: Ch 1. Sc blo to last 10 sts. 2 sc blo in next st. Sc blo to end. Turn. (41 sc)
Row 18: Work even. Turn. (41 sc)
Row 19: Ch 1. Sc blo to last 11 sts. 2 sc blo in next st. Sc blo to end. Turn. (42 sc)
Rows 20 through 22: Work even. Turn. (42 sc)
Row 23: Ch 1. Sc blo to last 11 sts. 2 sc blo in next st. Sc blo to end. Turn. (43 sc)
Rows 24 through 26: Work even. Turn. (43 sc)
Armhole Shaping for Left Front
Row 27: Ch 1. Sc blo to last 5 sts. Leave last 5 sts unworked. Turn. (38 sc)
Row 28: Ch 1. Sc2tog. Sc blo to end. Turn. (37 sc)
Row 29: Ch 1. Sc blo to last 2 sts. Sc2tog. Turn. (36 sc)
Row 30: Ch 1. Sc2tog. Sc blo to end. Turn. (35 sc)
Row 31: Ch 1. Sc blo to last 2 sts. Sc2tog. Turn. (34 sc)
Rows 32 through 52: Work even. Turn. (34 sc)
Left Front Neckline and Shoulder
Row 53: Ch 1. Leave first 19 sts unworked (front neck). Join yarn at st 20. Sc blo in sts 20 through 34. Turn. (15 sc)
Rows 54 through 57: Work even. Turn. (15 sc)
Fasten off.
Left Front Asymmetric Hem Point
Work the same hem extension as for the right front, joining at the lower left corner of the left front panel. Follow Hem Extension Rows 1 through 5 exactly.
CHECKPOINT: Both front panels should each measure approximately 9.5 inches (24 cm) wide at the bust rows and 15.5 inches (39 cm) tall including the hem extension point.
Sleeves (Make 2)
The sleeves are worked flat and seamed. The puff effect is created by working the sleeve cap with extra ease that is gathered when seamed into the armhole.
Foundation chain: Chain 60.
Row 1 (RS): Sc in 2nd ch from hook and in each ch across. Turn. (59 sc)
Row 2: Ch 1. Sc blo in each st across. Turn. (59 sc)
Rows 3 through 8: Work even. Turn. (59 sc)
CHECKPOINT: After Row 8, sleeve measures approximately 1.5 inches (3.8 cm) from foundation.
Sleeve Taper (decreasing toward cuff)
Row 9: Ch 1. Sc2tog. Sc blo to last 2 sts. Sc2tog. Turn. (57 sc)
Continue following the sleeve shaping in your pattern, working decreases every few rows until you reach the cuff width. Add the ruffle cuff by switching to your smaller hook and working 2 dc in every stitch around the cuff edge.
Assembly and Finishing
1. Block all pieces before seaming. Wet block and pin to measurements.
2. Seam shoulders using mattress stitch or whip stitch.
3. Attach sleeves to armholes, easing in the puff at the sleeve cap.
4. Seam side seams from underarm to hem.
5. Seam sleeve seams from underarm to cuff.
6. Attach collar to neckline, centering at back neck.
7. Add ruffle edging along the asymmetric hem points using the ruffle stitch.
8. Attach buttons to the left front panel opposite the buttonholes using sewing needle and thread.
9. Weave in all ends and give your finished cardigan a final steam or light blocking.
Tips for Success With This Crochet Pattern Tutorial
Final Thoughts
This sage green cottagecore heart crochet cardigan is a labor of love, but every hour you put into it shows in the finished piece. The heart cutout, the puff sleeves, the ruffle details, the pointed hem. It all comes together into something truly special.
Thank you so much for choosing this crochet pattern tutorial. I hope the step by step instructions gave you confidence that you absolutely can make this. You have got this.
If you loved this cottagecore cardigan pattern, go ahead and save it to your Pinterest boards so you can find it when you are ready to start. And please leave a comment below if you make one. I would love to see your color choices and hear how the project went for you!
You Might Also Like
- Buttercream Yellow Dragon Amigurumi Plush Free Crochet Pattern
- Mint Green Dragon Amigurumi Plush Free Crochet Pattern
- Cream Lace Bridal Barrel Bag Free Crochet Pattern
- Ivory White Bridal Tote with Pearl Embellished Tassels Pattern
