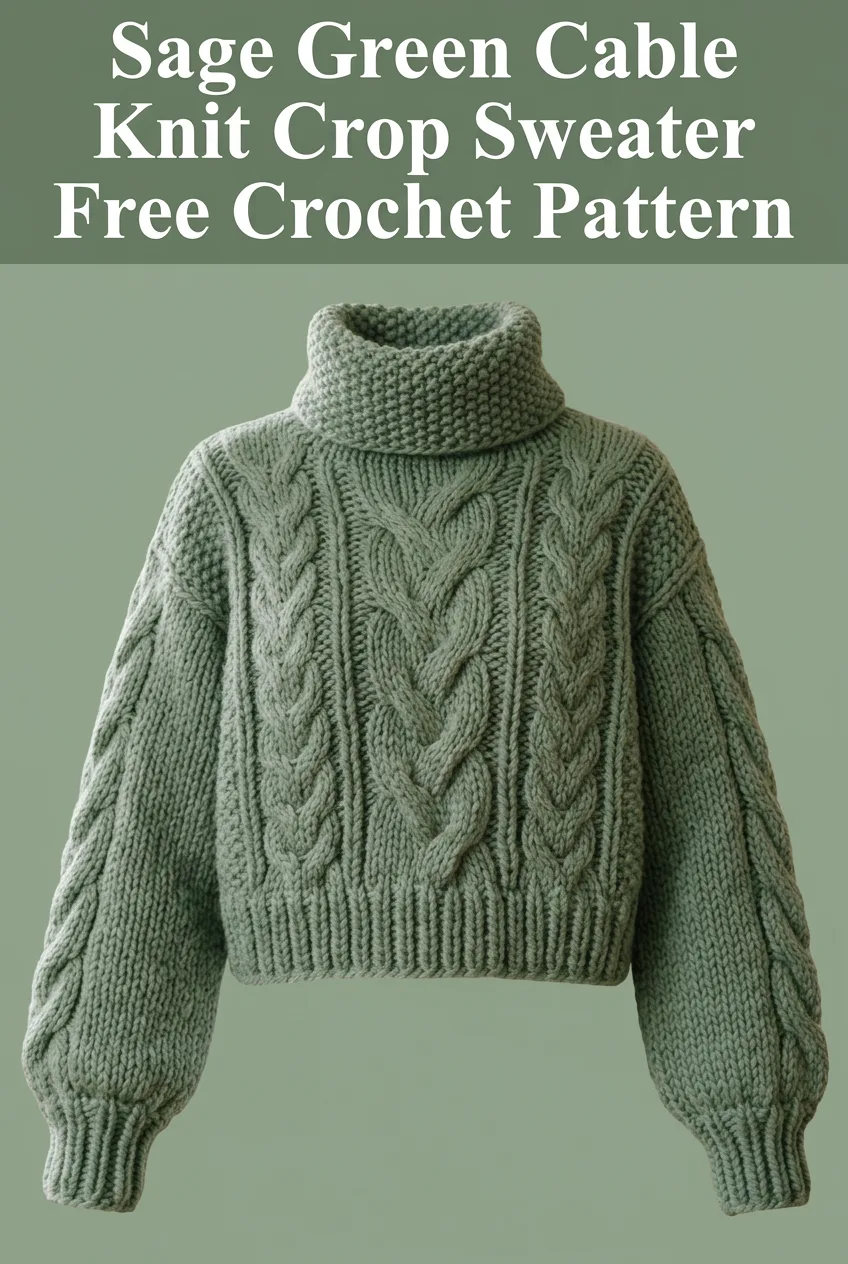
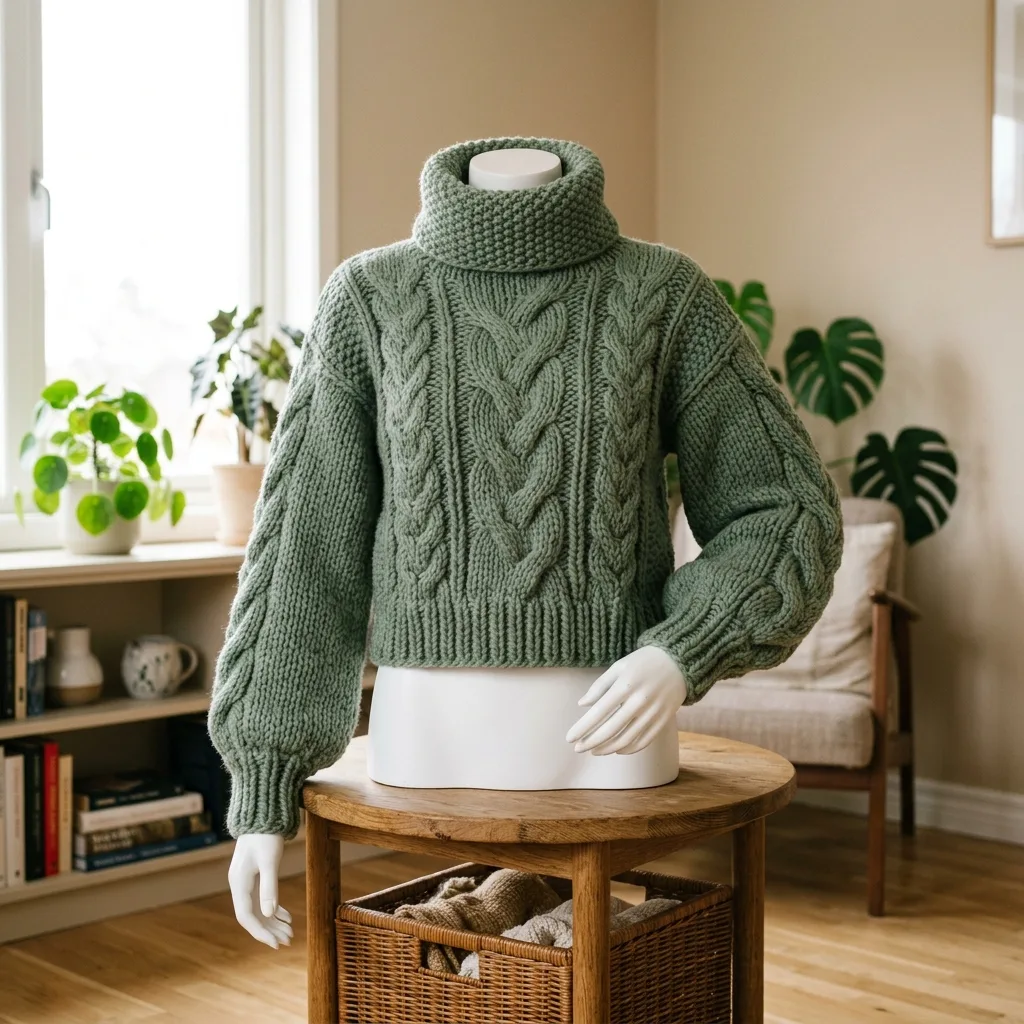
I’ve been looking for the perfect cable sweater pattern for months now, and this sage green crop sweater is my absolute favourite find. The classic cable texture, the cozy turtleneck, the cropped silhouette. This one checks every box for a modern winter wardrobe staple.
Let me walk you through exactly how to recreate this stunning piece. Fair warning: this is an intermediate to advanced project. But don’t let that scare you off. I’ll break down every technique so you can tackle it with confidence, even if cables feel intimidating right now.
Why This Cable Knit Sweater Pattern Works
Before we dive into the stitches, let me tell you what makes this design so satisfying to create.
The cable texture mimics traditional knit cables using crochet post stitches. Yes, you read that right. You can absolutely achieve that beautiful braided look with your crochet hook. The technique is called crochet cables, and it uses front post and back post stitches worked in strategic sequences to create the raised, woven appearance.
The cropped length makes this sweater a quicker project than a full-length pullover. You’re looking at approximately 25 to 30 hours of work depending on your speed. That’s still a commitment, but the result is a garment you’ll reach for constantly during cooler months.
The seed stitch texture on the turtleneck collar and ribbed cuffs adds beautiful contrast to the cable panels. It keeps the eye moving and gives the sweater that handcrafted, heirloom quality.
Materials You Will Need
Gather everything before you start. Nothing worse than running out of yarn halfway through a sleeve.
Yarn:
Hook:
Notions:
Gauge:
16 stitches and 14 rows = 4 inches in cable pattern with larger hook
Check your gauge before starting. This sweater needs accurate sizing, and cables tend to pull fabric inward. If your gauge is off, adjust your hook size accordingly.
Finished Measurements
This pattern is written for size Medium. I’ll include notes for adjusting smaller or larger.
Abbreviations and Stitch Definitions
Let me define every stitch you’ll need. Read through these before starting so nothing catches you off guard.
ch = chain: wrap yarn over hook, pull through loop on hook
sl st = slip stitch: insert hook, yarn over, pull through both loops at once
sc = single crochet: insert hook, yarn over, pull up loop (2 loops on hook), yarn over, pull through both loops
dc = double crochet: yarn over, insert hook, yarn over, pull up loop (3 loops on hook), yarn over, pull through 2 loops, yarn over, pull through remaining 2 loops
FPdc = front post double crochet: yarn over, insert hook from front to back to front around the post of the stitch below, yarn over, pull up loop, complete as regular dc. This creates a raised stitch on the front of your work.
BPdc = back post double crochet: yarn over, insert hook from back to front to back around the post of the stitch below, yarn over, pull up loop, complete as regular dc. This pushes the stitch to the back of your work.
FPtr = front post treble crochet: yarn over twice, insert hook around post from front to back to front, yarn over, pull up loop, (yarn over, pull through 2 loops) 3 times
Cable 4 Front (C4F) = skip next 2 stitches, work FPdc in next 2 stitches, then work FPdc in the 2 skipped stitches (working in front of stitches just made). This creates the cable crossing.
Cable 4 Back (C4B) = skip next 2 stitches, work FPdc in next 2 stitches, then work FPdc in the 2 skipped stitches (working behind stitches just made). This crosses cables in the opposite direction.
Special Techniques
How to Work Crochet Cables
Cables look complicated, but they follow a simple principle: you’re crossing stitches over each other by changing the order you work them.
For a Cable 4 Front, you skip two stitches, work into the next two, then go back and work into the skipped stitches. Your hook passes in front of the stitches you just made. This makes the cable cross from lower right to upper left.
For a Cable 4 Back, same process, but your hook passes behind. This crosses from lower left to upper right.
Practice on a swatch first. Seriously. Make a small rectangle using just the cable panel instructions below until it clicks. You’ll feel so much better tackling the full sweater.
Seed Stitch in Crochet
The seed stitch alternates between single crochet and double crochet stitches, then offsets them on the following row. It creates a lovely bumpy texture perfect for collars and cuffs.
Row 1: *sc, dc* repeat across
Row 2: *dc, sc* repeat across (working dc in the sc spaces and sc in the dc spaces from previous row)
Pattern Instructions
Back Panel
With larger hook, ch 66 (or adjust by multiples of 8 plus 2 for size changes).
Foundation Row: Dc in 4th ch from hook, dc in each ch across. Turn. (64 dc)
Row 1 (Cable Setup): Ch 3 (counts as dc here and throughout), *dc in next 3 sts, FPdc around next 4 sts, dc in next st* repeat across to last st, dc in last st. Turn. (64 sts)
Row 2: Ch 3, *dc in next 3 sts, BPdc around next 4 post sts, dc in next st* repeat across. Turn.
Row 3: Ch 3, *dc in next 3 sts, C4F over next 4 sts, dc in next st* repeat across. Turn.
Rows 4 to 6: Repeat Row 2.
Row 7: Ch 3, *dc in next 3 sts, C4B over next 4 sts, dc in next st* repeat across. Turn.
Rows 8 to 10: Repeat Row 2.
Repeat Rows 3 through 10 for cable pattern.
Continue in established cable pattern until piece measures 11 inches from beginning, ending on an even-numbered row.
Shape Armholes:
Row 1: Sl st in first 4 sts, ch 3, work in pattern across to last 4 sts, leave remaining sts unworked. Turn. (56 sts)
Row 2: Ch 2, skip first st, work in pattern across to last 2 sts, dc2tog over last 2 sts. Turn. (54 sts)
Rows 3 and 4: Repeat Row 2. (50 sts after Row 4)
Continue in pattern without further shaping until armhole measures 7 inches.
Fasten off. Weave in ends.
Front Panel
Work exactly as Back Panel through armhole shaping.
Continue in pattern until armhole measures 5 inches.
Shape Neckline:
Work across first 18 sts in pattern. Turn, leaving center and remaining sts unworked.
Decrease 1 st at neck edge every row for 4 rows. (14 sts)
Continue without shaping until armhole measures 7 inches.
Fasten off.
Skip center 14 sts, rejoin yarn, work remaining 18 sts in pattern.
Shape second shoulder to match first, reversing shaping.
Sleeves (Make 2)
With larger hook, ch 34.
Foundation Row: Dc in 4th ch from hook, dc across. Turn. (32 dc)
Work in cable pattern as established for body.
Increase Row: Ch 3, 2 dc in first st, work in pattern across to last st, 2 dc in last st. Turn. (34 sts)
Repeat increase row every 6th row until you have 48 sts total, incorporating new stitches into pattern as you go.
Continue without shaping until sleeve measures 20 inches from beginning.
Shape Cap:
Sl st in first 4 sts, work across to last 4 sts, leave remaining unworked. Turn. (40 sts)
Decrease 1 st each side every row for 8 rows. (24 sts)
Decrease 2 sts each side every row for 4 rows. (8 sts)
Fasten off, leaving long tail for seaming.
Ribbed Cuffs (Make 2)
With smaller hook, ch 10.
Row 1: Sc in 2nd ch from hook, sc across. Turn. (9 sc)
Row 2: Ch 1, working in back loops only, sc across. Turn.
Repeat Row 2 until ribbing measures approximately 8 inches (or circumference of sleeve bottom).
Sl st short ends together to form cuff.
Attach cuff to sleeve bottom using whip stitch.
Turtleneck Collar
With smaller hook, ch 14.
Row 1: Sc in 2nd ch from hook, *dc in next st, sc in next st* repeat across. Turn. (13 sts)
Row 2: Ch 1, *dc in sc, sc in dc* repeat across. Turn.
Repeat Row 2 until collar measures approximately 22 inches (to fit around neckline with slight stretch).
Join short ends with sl st.
Ribbed Hem
With smaller hook, ch 8.
Row 1: Sc in 2nd ch from hook, sc across. Turn. (7 sc)
Row 2: Ch 1, sc in BLO across. Turn.
Repeat Row 2 until ribbing measures approximately 40 inches (to fit around bottom edge of sweater).
Join ends.
Assembly
1. Block all pieces gently. Lay flat on towels, spritz with water, and allow to dry completely. This relaxes the stitches and makes seaming much easier.
2. Place Front and Back pieces right sides together. Seam shoulders using mattress stitch or whip stitch.
3. Find center of sleeve cap. Match to shoulder seam. Pin in place. Continue pinning sleeve into armhole, easing any fullness.
4. Seam sleeves to body.
5. Seam side seams from hem to underarm in one continuous line.
6. Seam sleeve seams from cuff to underarm.
7. Attach ribbed hem to bottom edge of sweater, stretching slightly to fit.
8. Attach turtleneck collar to neckline, distributing evenly around opening.
9. Weave in all remaining ends. Give finished sweater a final steam or blocking.
Helpful Tips for Success
Take your time with the cables. They’re the star of this sweater. Rushing leads to twisted stitches and uneven tension.
Use stitch markers to mark the beginning of each cable panel. This helps you stay on track, especially during a Netflix marathon.
Don’t skip blocking. Cables need blocking to really pop. Your finished sweater will look so much more polished after a good soak and lay-flat dry.
Yarn choice matters. Fuzzy or highly textured yarns will obscure your beautiful cable work. Stick with smooth, plied yarns with excellent stitch definition.
Final Thoughts on This Sage Green Cable Knit Crop Sweater Crochet Pattern
You did it. Or you’re about to. Either way, I’m so excited for you to make this sweater.
This cable knit crop sweater crochet pattern combines classic techniques with a modern silhouette. It’s the kind of project that teaches you something new while creating a genuinely wearable garment. The cables will become second nature after a few repeats. The turtleneck keeps you cozy. The cropped length keeps it current.
I hope this step by step crochet tutorial gave you everything you need to tackle this project with confidence. Whether you’re an experienced crocheter looking for your next challenge or an ambitious beginner ready to level up, this sweater is worth every stitch.
Thank you so much for spending time with me today. I truly appreciate you choosing this pattern for your next project. If you make this sweater, please tag me on Instagram or share in our Facebook group. I absolutely love seeing your finished pieces and hearing how the pattern worked for you.
Go ahead and save this cable knit sweater crochet pattern to your Pinterest boards so you can find it when you’re ready to cast on. And if you have any questions or just want to share your progress, drop a comment below. I read every single one and I’m always here to help. Happy crocheting, friend.
