This is hands down one of the EASIEST and most IMPRESSIVE sweaters you will ever crochet. I’m serious. If you’ve been putting off making your first garment because sweaters feel intimidating, this is the one to start with. The lace details look incredibly intricate, but they’re created with basic stitches you already know. You can finish this pullover in a weekend if you really get into it, and I promise you’ll want to wear it every single day. This makes an absolutely stunning gift too. The recipient will never believe you made it yourself.

Why You’ll Love This Boho Lace Crochet Pullover Pattern
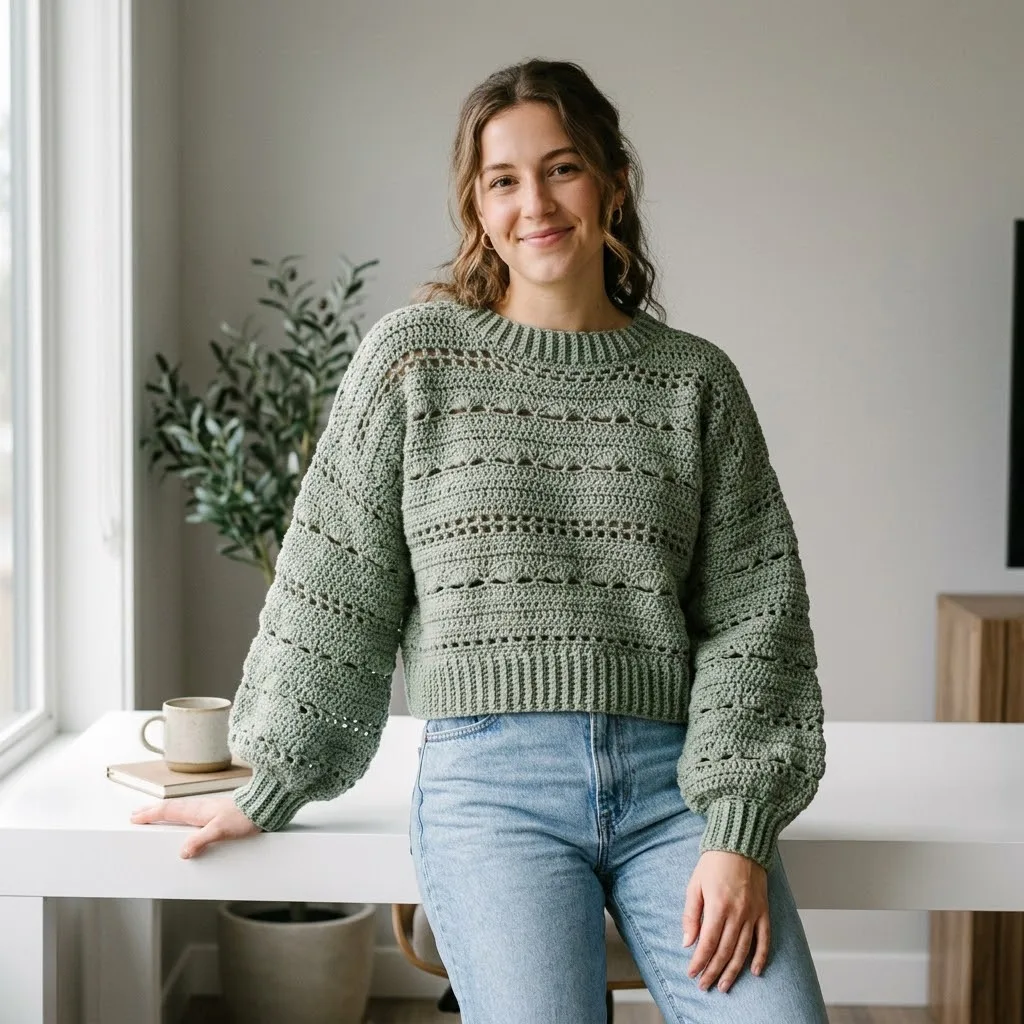
This sage green pullover combines everything I love about modern crochet garments. The relaxed cropped fit looks effortlessly stylish with high-waisted jeans. The balloon sleeves add that perfect touch of drama without being over the top. And those horizontal lace stripes? They create visual interest while actually making the pattern easier to follow because you’re working in repeating sections.
The ribbed neckline, hem, and cuffs give this sweater a polished finish that rivals store-bought pieces. You’ll look like you spent a fortune on a boutique find when really you made it with your own two hands.
Skill Level
Intermediate beginner to intermediate. If you can work basic stitches in rows and you’re comfortable joining pieces together, you can absolutely make this sweater. I’ll walk you through every section.
Materials You’ll Need
Yarn: Approximately 1200 to 1400 yards of worsted weight yarn, depending on your size. I used a soft cotton blend in sage green. Look for a yarn with good stitch definition so your lace details really pop. Acrylic blends, cotton, or bamboo all work beautifully.
Crochet Hook: 5.0mm (H/8) hook for the main body and sleeves. 4.5mm (G/6) hook for the ribbing sections.
Additional Tools:
Gauge
16 stitches and 14 rows = 4 inches in the main stitch pattern using 5.0mm hook. Please check your gauge before starting. Sweater fit depends entirely on matching gauge.
Finished Measurements
This pattern is written for size Medium with a finished bust measurement of approximately 42 inches. The sweater has 4 to 6 inches of positive ease for that relaxed boho fit. Length from shoulder to hem is approximately 19 inches. Sleeve length is approximately 18 inches.
To size up or down, add or subtract 8 stitches to your starting chain for each size.
Abbreviations and Stitch Definitions
Let me break down every stitch you’ll use in this crochet tutorial. Even if you know these, a quick refresher never hurts.
ch = chain. Wrap yarn over hook and pull through the loop on your hook. This creates one chain.
sl st = slip stitch. Insert hook into stitch, yarn over, pull through both the stitch and the loop on your hook in one motion.
sc = single crochet. Insert hook into stitch, yarn over and pull up a loop (2 loops on hook), yarn over and pull through both loops.
hdc = half double crochet. Yarn over, insert hook into stitch, yarn over and pull up a loop (3 loops on hook), yarn over and pull through all 3 loops.
dc = double crochet. Yarn over, insert hook into stitch, yarn over and pull up a loop (3 loops on hook), yarn over and pull through 2 loops (2 loops remain), yarn over and pull through remaining 2 loops.
sk = skip. Miss the indicated number of stitches.
sp = space. The gap created by chains in the previous row.
BLO = back loop only. Work into only the back loop of the stitch instead of both loops.
FLO = front loop only. Work into only the front loop of the stitch.
Special Techniques
Ribbing: The stretchy ribbed sections at the neckline, hem, and cuffs are created by working single crochet into the back loop only. This creates vertical ridges that mimic knit ribbing and provide natural stretch.
Lace Stripe: The decorative openwork rows are made by alternating double crochet stitches with chain spaces. Simpler than it looks, I promise.
Puff Detail: The raised texture running horizontally through the sweater comes from working into the front loop of stitches in a previous row, creating a lifted ridge effect.
The Pattern
Back Panel
Using your 4.5mm hook, ch 12.
Ribbing Section:
Row 1: Sc in 2nd ch from hook and in each ch across. Turn. (11 sc)
Rows 2 through 50: Ch 1, sc BLO in each st across. Turn. (11 sc)
This creates your stretchy bottom ribbing. It should measure approximately 21 inches when gently stretched.
Transition to Body:
Rotate your ribbing 90 degrees. You’ll now work along the long edge, picking up stitches.
Switch to your 5.0mm hook.
Row 1 (RS): Ch 1, work 84 sc evenly across the long edge of your ribbing. Turn. (84 sc)
Row 2: Ch 1, sc in each st across. Turn. (84 sc)
Row 3: Ch 3 (counts as dc), dc in each st across. Turn. (84 dc)
Row 4: Ch 1, sc in each st across. Turn. (84 sc)
Row 5 (Lace Row): Ch 4 (counts as dc plus ch 1), sk 1 st, *dc in next st, ch 1, sk 1 st* repeat across to last st, dc in last st. Turn. (42 dc, 41 ch-1 sp)
Row 6: Ch 1, sc in first dc, *sc in ch-1 sp, sc in next dc* repeat across. Turn. (84 sc)
Row 7: Ch 1, sc in each st across. Turn. (84 sc)
Row 8: Ch 3, dc in each st across. Turn. (84 dc)
Row 9: Ch 1, working in FLO only, sc in each st across. Turn. (84 sc)
This creates that lovely raised ridge detail you see running across the sweater.
Row 10: Ch 1, sc in each st across (working through both loops as normal). Turn. (84 sc)
Rows 11 through 14: Repeat Rows 3 through 6.
Continue repeating this pattern sequence (Rows 7 through 14) until your back panel measures approximately 12 inches from the ribbing, ending after a wrong side row.
Armhole Shaping:
Next Row (RS): Sl st in first 6 sts, ch 1, sc in same st as last sl st, sc in next 71 sts, leave remaining 6 sts unworked. Turn. (72 sc)
Continue in the established stripe pattern for another 6 inches.
Fasten off and weave in ends.
Front Panel
Work exactly as the Back Panel. The neckline shaping happens during assembly with the ribbed neckband.
Sleeves (Make 2)
Using your 4.5mm hook, ch 10.
Cuff Ribbing:
Row 1: Sc in 2nd ch from hook and in each ch across. Turn. (9 sc)
Rows 2 through 28: Ch 1, sc BLO in each st across. Turn. (9 sc)
Your cuff should measure approximately 7 inches when stretched.
Transition to Sleeve Body:
Rotate ribbing and switch to 5.0mm hook.
Row 1: Ch 1, work 36 sc evenly across the long edge of cuff. Turn. (36 sc)
Row 2: Ch 1, sc in each st across. Turn. (36 sc)
Row 3: Ch 3, dc in each st across. Turn. (36 dc)
Row 4: Ch 1, sc in each st across. Turn. (36 sc)
Row 5 (Increase Row): Ch 1, 2 sc in first st, sc across to last st, 2 sc in last st. Turn. (38 sc)
Continue working in the same stripe pattern as the body, incorporating the lace rows and puff detail rows.
Increase every 4th row by working 2 sc in the first and last stitch until you have 56 stitches.
Continue even in pattern until sleeve measures approximately 16 inches from cuff ribbing.
Sleeve Cap:
Next Row: Sl st in first 4 sts, ch 1, work in pattern across to last 4 sts, leave remaining sts unworked. Turn. (48 sts)
Next 2 Rows: Decrease 2 sts at each edge by working sc2tog at beginning and end.
Fasten off, leaving a long tail for seaming.
Neckband
Using 4.5mm hook, ch 8.
Row 1: Sc in 2nd ch from hook and in each ch across. Turn. (7 sc)
Rows 2 through 72: Ch 1, sc BLO in each st across. Turn. (7 sc)
Your neckband should be stretchy and fit comfortably around the neck opening. Adjust rows as needed.
Assembly
Take a deep breath. This part is easier than you think.
1. Join shoulders. Place front and back panels with right sides together. Using your yarn needle and a length of yarn, whip stitch or mattress stitch the shoulder seams, leaving approximately 9 inches open in the center for your head.
2. Attach sleeves. Find the center top of each sleeve cap. Pin it to the shoulder seam. Pin the underarm edges to match. Seam in place using mattress stitch for an invisible join.
3. Seam sides and sleeves. With right sides together, sew from the bottom of the ribbing up the side, continuing down the sleeve to the cuff. Repeat on the other side.
4. Attach neckband. Pin the short ends of your neckband together to form a loop. Seam closed. Pin the neckband evenly around the neck opening with the seam at center back. Whip stitch in place, easing any fullness as you go.
5. Weave in all ends. Take your time here. A well-finished garment lasts longer.
Blocking Your Finished Pullover
Lay your sweater flat on a blocking mat or clean towel. Gently steam or wet block according to your yarn’s care instructions. Smooth the lace sections so the openwork lies flat. Let dry completely before wearing.
Customization Ideas
Want to make this crochet pattern your own? Try these ideas:
Troubleshooting Tips
My ribbing curls. This is normal. Blocking will relax it, and once attached to the body, it lays flat.
My gauge is off. Go up a hook size if your stitches are too tight, down if too loose. Gauge really matters for garments.
The lace rows look uneven. Make sure you’re counting your chains carefully. Each chain 1 space should sit directly above a skipped stitch.
I really hope you love making this Sage Green Boho Lace Crochet Pullover as much as I loved designing it. Thank you for trusting me with your crafting time. It means the world. If you make this sweater, please tag me on Instagram or share a photo in our Facebook group. I would absolutely love to see your version.
If this pattern inspires you, go ahead and save it to your Pinterest boards so you can find it when you’re ready to cast on. And please drop a comment below if you make it. I read every single one and your photos make my whole day.
