Go ahead and dig into that stash of yours. You know the one. That gorgeous skein of chunky gray yarn you’ve been saving for "the right project"? This is it. These cozy slipper boots feature a beautiful ribbed texture that looks way more complicated than it actually is, plus a stunning braided cuff detail that will make you feel like a crochet genius. The construction is surprisingly straightforward once you break it down. You’ll work the main boot in vertical ribbing, seam it together, then add that show-stopping braided cuff with decorative buttons. I won’t lie and say this is a beginner project, but if you’re comfortable with basic stitches and ready for a small challenge, you can absolutely make these.

Why You’ll Love This Slipper Boots Crochet Pattern
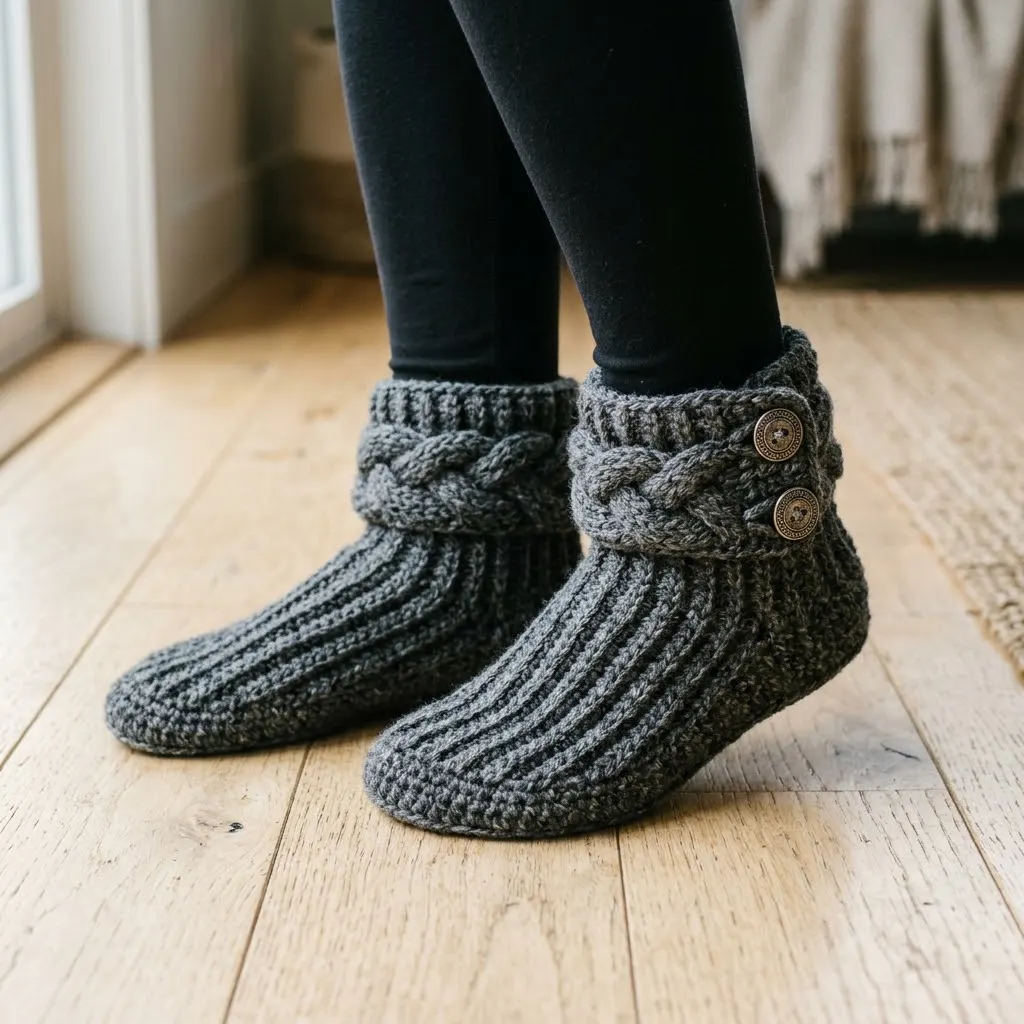
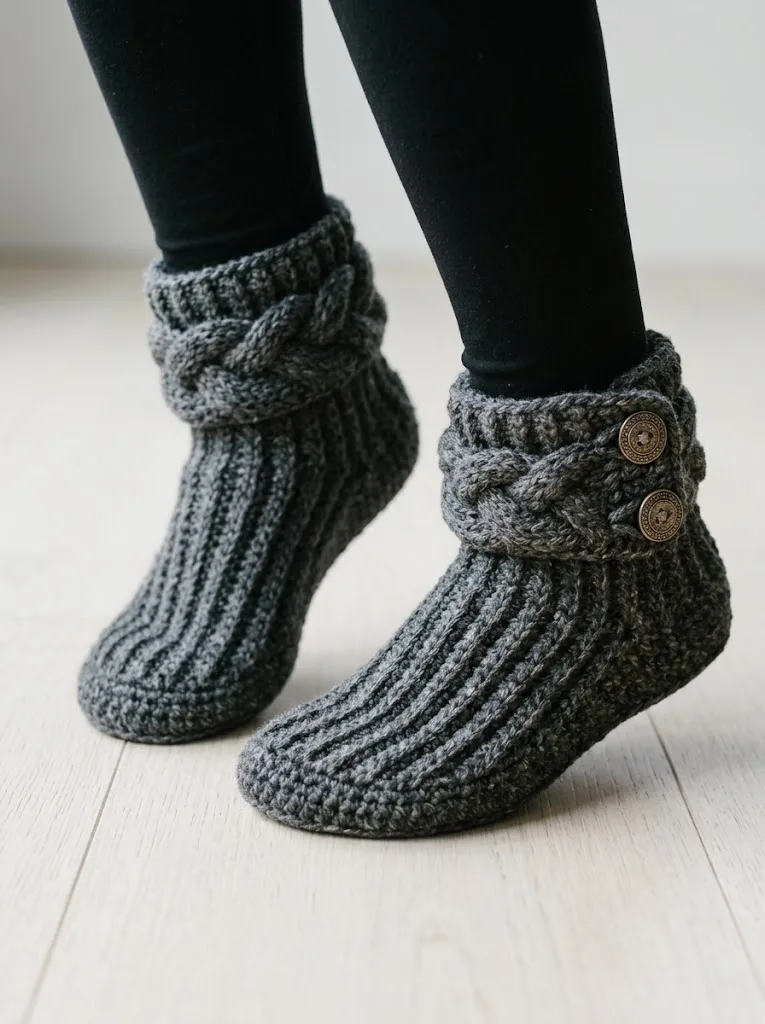
These charcoal gray button cuff slipper boots are the kind of handmade gift that makes people say "wait, you MADE these?" The vertical ribbing creates incredible stretch and a snug fit around your foot and ankle. The braided cuff adds a touch of rustic elegance. And those wooden buttons? Pure cozy cabin vibes.
I designed these with real wearability in mind. The ribbed construction means they hug your feet without feeling tight. They’re warm without being bulky. And unlike some slipper patterns that look adorable but fall apart after a week, these are built to last.
Perfect for:
Skill Level
Intermediate. You should be comfortable with basic crochet stitches and working in rows. The braided cuff technique requires working separate strands and weaving them together, which takes a bit of patience. But I promise, if you can single crochet and double crochet, you can make these boots.
Finished Measurements
These instructions create slipper boots in Women’s Medium (fits US shoe sizes 7 to 8). The finished foot length is approximately 9.5 inches. The boot height from sole to top of cuff is approximately 7 inches.
To adjust sizing: Add or subtract rows to the main boot section in increments of 2 rows for each half size up or down.
Materials Needed
Yarn:
Hook:
Notions:
Gauge
14 stitches and 16 rows = 4 inches in single crochet back loop only ribbing.
Take time to check your gauge. Slipper fit depends on it. If your gauge is too loose, your boots will stretch out and feel sloppy. Too tight, and they won’t fit over your heel.
Abbreviations and Stitch Definitions
Let me break down every stitch you’ll need for this crochet tutorial. Even if you know these by heart, a quick refresher never hurts.
Ch = Chain. Wrap yarn over hook, pull through loop on hook. This creates your foundation.
Sl st = Slip stitch. Insert hook, yarn over, pull through stitch AND loop on hook in one motion. Used for joining and invisible movement.
Sc = Single crochet. Insert hook into stitch, yarn over, pull up a loop (2 loops on hook), yarn over, pull through both loops. The most basic crochet stitch.
Sc BLO = Single crochet in back loop only. Work a regular single crochet, but insert your hook under only the back loop of the stitch instead of both loops. This creates the stretchy ribbing texture.
Dc = Double crochet. Yarn over, insert hook, yarn over, pull up loop (3 loops on hook), yarn over, pull through 2 loops, yarn over, pull through remaining 2 loops. A taller stitch that works up quickly.
Sk = Skip. Pass over the indicated stitch without working into it.
St(s) = Stitch(es).
Rep = Repeat.
Pattern Notes
Read these before you start. They’ll save you headaches later.
1. The main boot is worked flat in rows, then seamed up the back and across the toe. Don’t panic when you see how it comes together. Trust the process.
2. Working in back loop only is what creates that gorgeous stretchy ribbing. Make sure you’re consistently going under just the back loop, not the front loop or both loops.
3. The braided cuff is made separately from three long strips that you braid together, then attach around the top of the boot.
4. Make two of everything. I know it sounds obvious, but I’ve definitely gotten so excited about finishing one slipper that I forgot I needed a second one.
Step by Step Crochet Pattern
Main Boot Section (Make 2)
This is the body of your slipper boot. You’ll work it flat, then seam it into a boot shape.
Foundation: Ch 29.
Row 1: Sc in 2nd ch from hook and in each ch across. Turn. (28 sts)
Row 2: Ch 1, sc BLO in each st across. Turn. (28 sts)
Rows 3 through 48: Rep Row 2. (28 sts)
You should now have a long ribbed rectangle. The ridges should run vertically when you hold it with the short ends at top and bottom.
Fasten off, leaving a long tail for seaming (approximately 24 inches).
Shaping the Boot
Now comes the fun part. You’ll fold and seam this rectangle into an actual boot.
1. Fold the rectangle in half lengthwise, bringing the two short ends together.
2. Seam the back of the boot. Using your yarn needle and the long tail, whip stitch the back seam from the top (cuff edge) down about 5 inches. This creates the back of the ankle and heel area.
3. Create the heel pocket. At the bottom of your back seam, you’ll need to shape the heel. Fold the bottom edge so it creates a flat base, then seam across the heel, joining approximately 2 inches of fabric on each side.
4. Seam the toe. Continue seaming along the bottom and across the toe, closing the front of the boot. Leave the top open for your foot.
5. Weave in the end securely.
Cuff Braid Strips (Make 6 total, 3 per boot)
This is what makes these slipper boots so special. Three strips braided together create that chunky, textured cuff.
Foundation: Ch 51.
Row 1: Dc in 4th ch from hook (skipped chains count as first dc), dc in each ch across. (49 sts including turning chain)
Fasten off, leaving a 6 inch tail.
Rep to make 6 strips total.
Assembling the Braided Cuff
1. Take three strips and lay them side by side.
2. Secure one end. Use a stitch marker or small piece of yarn to loosely tie the three strips together at one end.
3. Braid the strips. Cross the right strip over the middle, then the left strip over the new middle. Continue until you reach the end. Keep the braid snug but not too tight.
4. Secure the other end temporarily with a stitch marker.
5. Wrap the braid around the top of the boot. Position it so it sits about half an inch below the top edge of the boot cuff.
6. Adjust the braid length if needed by undoing a few crosses at the end to make it fit snugly around the boot opening.
7. Whip stitch the braid in place all the way around, securing both the inner and outer edges to the boot.
8. Rep for the second boot.
Adding the Buttons
The buttons are decorative but also help secure the braid overlap.
1. Position two buttons on the outer side of each boot, over the spot where the braid ends meet.
2. Sew buttons through the braid and boot fabric using yarn or coordinating thread.
3. Secure firmly and weave in ends.
Finishing Your Slipper Boots
Almost done. Just a few final touches.
Weave in all remaining ends. Use your yarn needle to weave each tail through several stitches on the wrong side, then trim close.
Block if desired. You can lightly steam block these boots to even out the stitches. Stuff them with towels to hold their shape while they dry.
Add non-slip soles (optional). If you plan to wear these on hard floors, consider adding puffy fabric paint dots to the bottom or sewing on leather sole patches. Safety first.
Tips for Success
If your boots feel too tight around the ankle: Add 2 to 4 more rows to your main boot section before seaming.
If your braid seems too long: It’s easier to undo a few braid crosses than to try to stretch a short braid. Always err on the side of making your strips a little longer.
If you’re struggling with the back loop only technique: Work slowly and look at your stitches from above. You’ll see two loops forming a V shape at the top of each stitch. The back loop is the one farther from you.
For a more feminine look: Try these in cream, blush pink, or soft lavender. Swap the wooden buttons for mother of pearl or crystal buttons.
For extra warmth: Hold a strand of fuzzy yarn or mohair together with your main yarn throughout.
Why This Pattern Works for Gift Giving
Let me tell you something. These slipper boots photograph beautifully. They look high end. They feel luxurious. And the recipient will never guess how straightforward they were to make.
Pair them with a nice candle or some fancy hot cocoa mix, and you’ve got a gift that looks like it cost serious money. The braided cuff detail elevates them from "homemade slippers" to "artisan footwear."
They also work up relatively quickly for something this impressive. Once you’ve made your first pair, the second pair goes even faster because you’ve got the rhythm down.
Customization Ideas
Color variations: Try an ombre effect by using three different shades of gray for your braid strips. Or make the boot one color and the braid a contrasting shade.
Button alternatives: Leather buttons, coconut buttons, or even vintage buttons from your grandmother’s button jar would all look beautiful.
Extended cuff: Want a taller boot? Add more rows to your main boot section and position the braid higher up.
No braid version: Short on time? Skip the braid entirely and just fold down the top edge of the boot for a simple cuffed look.
I really hope you love making these charcoal gray button cuff slipper boots as much as I loved designing them. They’re the kind of project that reminds you why you fell in love with crochet in the first place. Useful, beautiful, and made with your own two hands.
If you make these cozy boots, I would absolutely love to see them. Tag me on Instagram or share a photo in our Facebook group. Nothing makes my day like seeing your finished projects pop up in my feed.
Go ahead and save this crochet pattern to your favorite Pinterest board so you can find it when you’re ready to cast on. And please drop a comment below if you make these or if you have any questions along the way. I read every single one and I’m always here to help. Happy crocheting, friend.
