
I set out to design a baby dress that felt truly special. Something with texture, elegance, and just the right amount of vintage charm. I wanted a structured bodice with eye-catching detail, sleeves that flutter without overwhelming, and a skirt that moves beautifully. The diamond bobble texture, the chevron lace, the contrast waistband with its little flower accent. Every single element came together exactly how I pictured it.
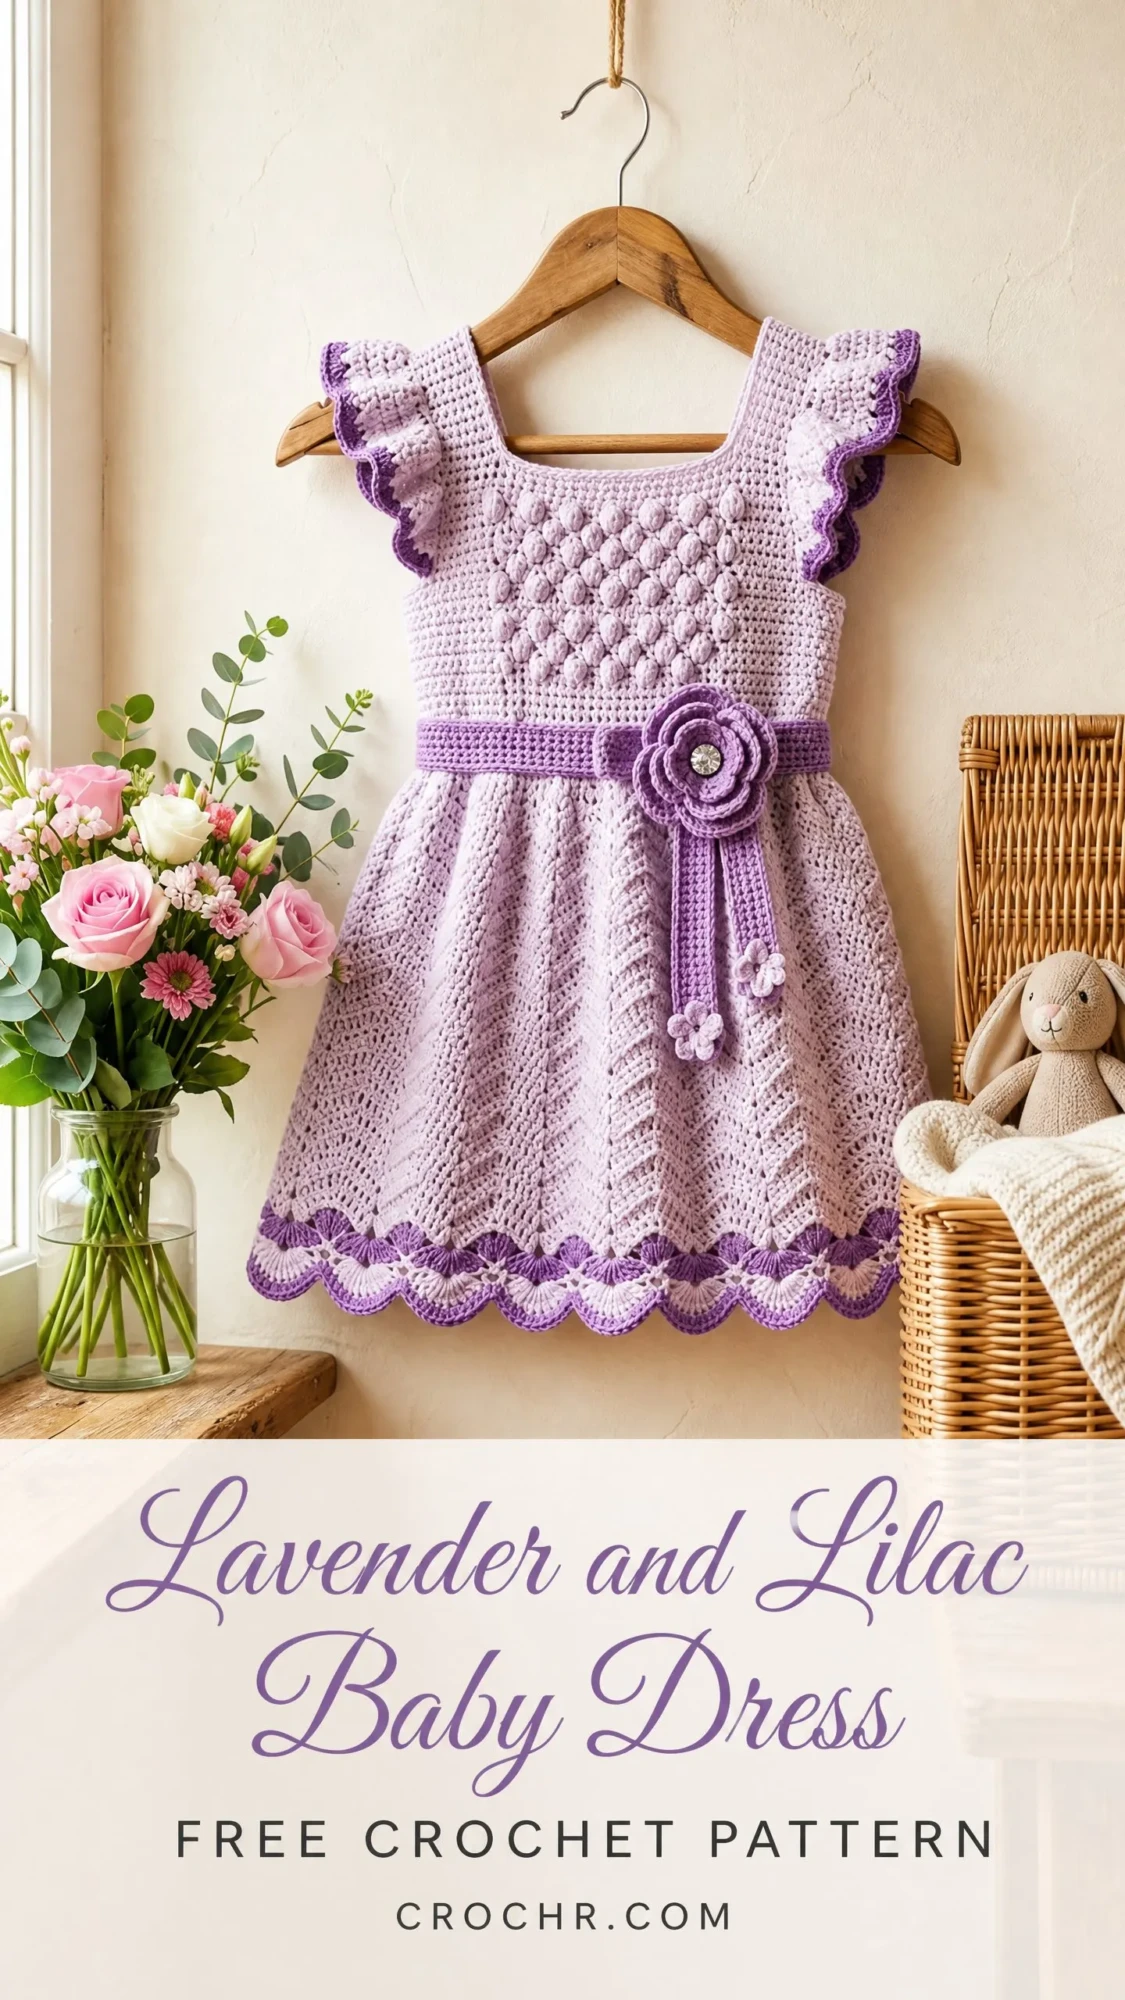
I am SO pleased with how this turned out. This lavender and lilac baby dress has become one of my absolute favorite designs. The soft purple tones work together perfectly, and the construction, while detailed, flows logically from one section to the next.
If you have been wanting to challenge yourself with a garment project that teaches multiple techniques in one beautiful piece, this crochet pattern is exactly what you need. Let me walk you through everything.
About This Crochet Pattern
This baby dress fits size 12 to 18 months, with a finished chest measurement of approximately 19 inches and a total length from shoulder to hem of about 17 inches. The design features several distinct elements that create its charming character.
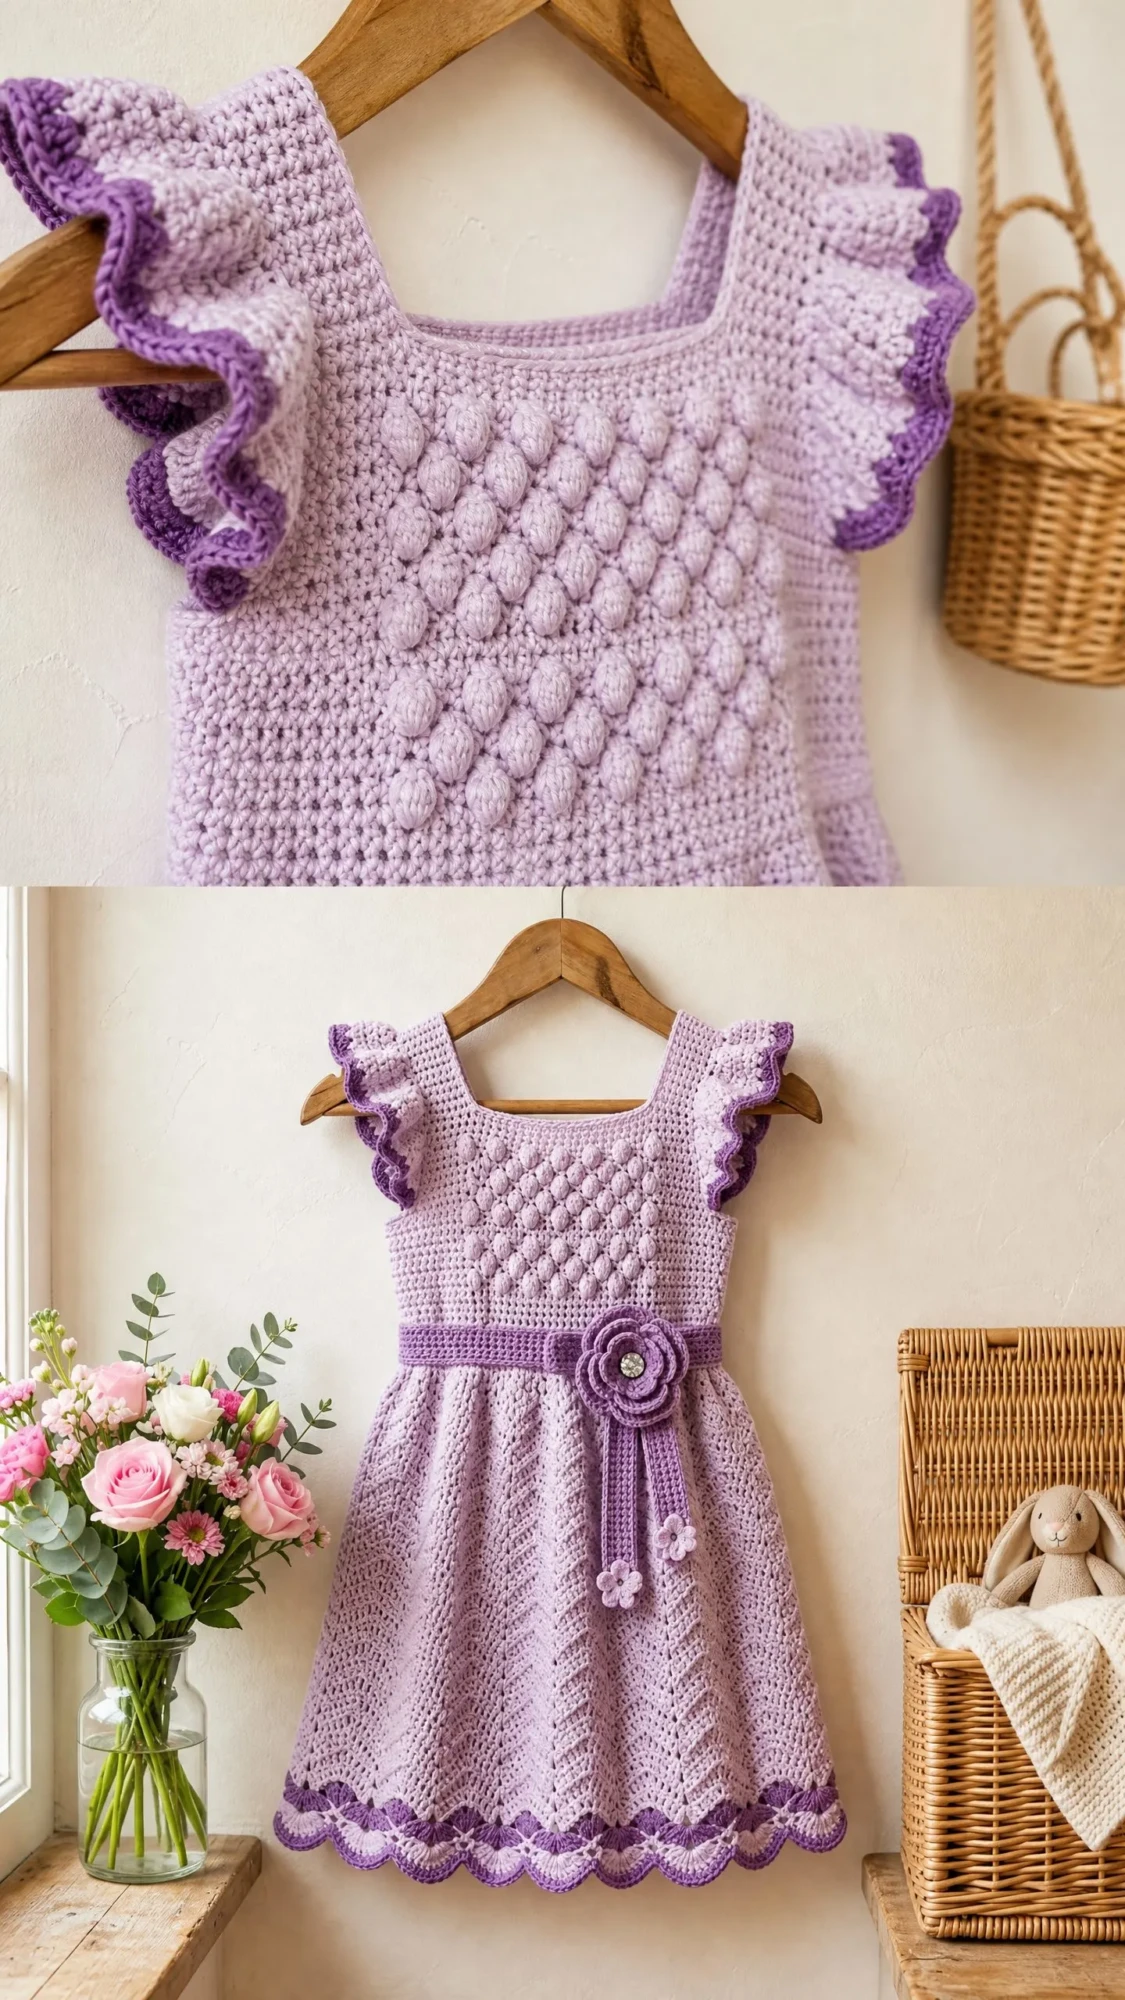
The bodice showcases a diamond bobble grid pattern that creates a quilted, textured look. Bobbles are placed in a staggered checkerboard arrangement across alternating rows, giving that dimensional appearance you see in the reference images.
The waistband sits at an empire waist position in deep purple contrast color, creating a clean visual break between the bodice and skirt. A crocheted flower with a rhinestone center anchors the front, with a decorative tie featuring two tiny flower accents dangling below.
The skirt uses a chevron lace stitch pattern that creates beautiful peaks and valleys throughout. This gives the dress its graceful A-line flare and lovely drape.
The flutter sleeves are picked up directly from the armhole edges and worked in rounds, finishing with scallop edging in the deep purple contrast color. The hem features matching scallop edging to tie everything together.
Skill Level
I would rate this pattern as intermediate to advanced. You should feel comfortable with bobble stitches, working chevron lace repeats, managing two colors, seaming crochet fabric, and constructing dimensional embellishments like the flower accent.
If you have completed at least one garment project and feel confident with stitch pattern repeats, you will succeed with this dress. The techniques are not overly complicated individually, but there are several of them working together.
Time estimate: Plan for 12 to 18 hours of work if you are an experienced intermediate crocheter. Add extra time for the embellishments and finishing details.
Materials You Will Need
Yarn:
Hooks:
Notions:
Yarn Suggestions
Lion Brand Pound of Love works beautifully here. It is a DK/worsted blend in 100% acrylic with excellent stitch definition for bobbles. Look for Pastel Lavender and Purple colorways.
Paintbox Yarns Simply DK offers consistent tension, crisp stitch definition, and a budget-friendly price. Try Dusty Lilac for the main color and Wisteria Purple for the contrast.
Drops Safran adds a slight sheen and lovely drape, with 50% Egyptian cotton and 50% acrylic for breathability. Perfect for a baby dress that needs to be comfortable.
When substituting yarn, choose any DK weight (weight 3) with good stitch definition. Avoid fuzzy or halo yarns as they will obscure the bobble and lace textures.
Gauge
Getting gauge right matters a lot for garments. Here is what you need:
Bobble section (E-4 / 3.5 mm hook): 22 single crochet stitches = 4 inches; 24 rows = 4 inches
Chevron lace section (F-5 / 3.75 mm hook): 18 stitches = 4 inches; 10 rows = 4 inches
Always swatch before starting. If your swatch is too large, go down one hook size. If too small, go up one hook size.
Abbreviations and Definitions
Let me define every abbreviation you will encounter:
Special Stitches
Bobble (bo)
This stitch creates the raised, dimensional texture on the bodice. Here is how to work it:
Yarn over, insert hook into the indicated stitch, yarn over and pull up a loop, yarn over and pull through 2 loops. You have made one incomplete double crochet. Repeat this step 4 more times in the same stitch, giving you 5 incomplete double crochets with 6 loops on your hook. Yarn over and pull through all 6 loops. Chain 1 to close and lock the bobble.
Count the bobble plus its closing chain as one stitch unit.
Diamond Bobble Grid
Bobbles are placed in a staggered checkerboard arrangement. Odd rows place bobbles in odd-numbered stitch positions. Even rows place bobbles in even-numbered stitch positions. Each bobble is separated by 1 single crochet on either side. This creates the quilted diamond texture.
Chevron Lace Repeat (multiple of 12 + 3)
The repeat works as follows: sc2tog over 2 stitches, sc in next 2 stitches, (dc, ch 1, dc) in next stitch (this is your V-stitch peak), sc in next 2 stitches, sc2tog over 2 stitches (valley). Each 12-stitch repeat is worked across the row.
The stitch count stays constant because each sc2tog removes one stitch and each V-stitch peak adds one stitch.
Scallop Edging
Worked in CC. Slip stitch into first stitch, (chain 3, 3 dc) in same stitch, skip 2 stitches, sl st in next stitch, skip 2 stitches, (3 dc, chain 3, sl st) in next stitch. Repeat across. Each scallop consumes 6 stitches.
Crochet Flower
Large flower: With CC and D-3 hook, ch 5, sl st to join ring. (Ch 3, 2 dc, ch 3, sl st) 5 times into ring to create 5 petals. Fasten off, leaving tail for sewing.
Tiny flower (make 2): With CC and D-3 hook, ch 4, sl st to join ring. (Ch 2, dc, ch 2, sl st) 4 times into ring to create 4 petals. Fasten off, leaving tail.
Pattern Notes Before You Begin
1. The bodice front and bodice back are worked flat separately, then seamed at the sides.
2. The skirt is worked as two separate flat panels, then seamed at the sides to match the bodice construction.
3. Sleeves are not separate pieces. The flutter ruffle is picked up and crocheted directly around each armhole opening.
4. The waistband is worked as a separate strip and sewn onto the dress at the empire waist join.
5. Do not count the turning chain as a stitch in single crochet rows. In double crochet rows, the turning chain 3 counts as one dc.
6. All turning chains: sc rows use ch 1; dc rows use ch 3.
7. Join new colors by pulling the new color through the final yarn-over of the last stitch before the join row.
8. Right side of work faces you on odd-numbered rows.
Step by Step Crochet Pattern Instructions
Bodice Front
Foundation chain: With MC and E-4 hook, chain 54.
Row 1 (RS): Sc in 2nd ch from hook and in each ch across. Turn. (53 sc)
Row 2 (WS): Ch 1, sc in each st across. Turn. (53 sc)
Row 3 (RS, begin bobble grid): Ch 1, sc in first 2 sts. Bo in next st, sc in next st; rep from across to last 3 sts, sc in last 3 sts. Turn. (53 sts)
Row 4 (WS): Ch 1, sc in each st across. Turn. (53 sc)
Row 5 (RS, offset bobble row): Ch 1, sc in first 3 sts. Bo in next st, sc in next st; rep from across to last 2 sts, sc in last 2 sts. Turn. (53 sts)
Row 6: Ch 1, sc in each st across. Turn. (53 sc)
Rows 7 through 22: Repeat Rows 3 through 6 four more times, then repeat Rows 3 and 4 once more. (53 sts throughout)
After Row 22, the bodice front measures approximately 3.5 inches from foundation. You have completed the lower bobble section.
Armhole Shaping (Bodice Front)
Row 23 (RS): Ch 1, sl st across first 4 sts (armhole edge), ch 1, sc across next 45 sts, leave last 4 sts unworked (armhole edge). Turn. (45 sc)
Row 24: Ch 1, sc2tog over first 2 sts, sc across to last 2 sts, sc2tog. Turn. (43 sc)
Row 25 (bobble row): Ch 1, sc2tog, sc in next 1 st. Bo in next st, sc in next st; rep from to last 4 sts, sc in next 1 st, sc2tog. Turn. (41 sts)
Row 26: Ch 1, sc2tog, sc across to last 2 sts, sc2tog. Turn. (39 sc)
Row 27 (bobble offset): Ch 1, sc2tog, sc in next 2 sts. Bo in next st, sc in next st; rep from to last 3 sts, sc in 1 st, sc2tog. Turn. (37 sts)
Row 28: Ch 1, sc in each st across. Turn. (37 sc)
Rows 29 through 32: Repeat Rows 27 and 28 twice. (37 sts throughout, no further armhole shaping)
Neckline Shaping (Bodice Front)
Row 33 (RS): Ch 1, sc across first 12 sts, sc2tog. Fasten off, leaving right shoulder section for now. (13 sts right shoulder)
Rejoin MC at center. Leave center 9 sts unworked (neckline). Sc2tog over next 2 sts, sc across remaining 12 sts. Turn. (13 sts left shoulder)
Left Shoulder:
Row 34: Ch 1, sc across to last 2 sts, sc2tog. Turn. (12 sc)
Row 35: Ch 1, sc2tog, sc across. Turn. (11 sc)
Row 36: Ch 1, sc in each st across. Turn. (11 sc)
Row 37: Ch 1, sc2tog, sc across. Turn. (10 sc)
Row 38: Ch 1, sc in each st across. Fasten off. (10 sc)
Right Shoulder:
Rejoin MC at armhole edge of right shoulder section.
Row 34: Ch 1, sc2tog, sc across. Turn. (12 sc)
Row 35: Ch 1, sc across to last 2 sts, sc2tog. Turn. (11 sc)
Row 36: Ch 1, sc in each st across. Turn. (11 sc)
Row 37: Ch 1, sc across to last 2 sts, sc2tog. Turn. (10 sc)
Row 38: Ch 1, sc in each st across. Fasten off. (10 sc)
Checkpoint: Each shoulder strap measures 10 stitches wide. Total bodice front height is approximately 6 inches from foundation chain to shoulder. The neckline opening spans 9 stitches at center.
Bodice Back
Work exactly as Bodice Front through Row 32. (37 sts)
The back has a shallow neck shaping with an optional button closure.
Row 33 (RS): Ch 1, sc across first 10 sts, sc2tog. Fasten off right back shoulder.
Leave center 13 sts unworked for back neck opening.
Rejoin MC. Sc2tog, sc across remaining 10 sts. Turn. (11 sts left back shoulder)
Left Back Shoulder:
Row 34: Ch 1, sc in each st across. Turn. (11 sc)
Row 35: Ch 1, sc2tog, sc across. Turn. (10 sc)
Row 36: Ch 1, sc in each st across. Fasten off. (10 sc)
Right Back Shoulder:
Rejoin MC at armhole edge.
Row 34: Ch 1, sc in each st across. Turn. (11 sc)
Row 35: Ch 1, sc across to last 2 sts, sc2tog. Turn. (10 sc)
Row 36: Ch 1, sc in each st across. Fasten off. (10 sc)
Checkpoint: Both bodice panels are complete. Seam the shoulder straps together (front to back, 10 sts each side). Seam the side seams from underarm down to bottom of bodice, approximately 2 inches on each side. Leave armhole edges open. Do not seam the lower bodice edge yet.
Waistband
With CC and E-4 hook, chain 116.
Row 1: Sc in 2nd ch from hook and each ch across. Turn. (115 sc)
Row 2: Ch 1, BLO sc in each st across. Turn. (115 sc)
Row 3: Ch 1, sc in each st across. Fasten off, leaving long tail for seaming. (115 sc)
The waistband measures approximately 19 inches wide and 0.75 inches tall. Set aside.
Skirt Front Panel
Foundation: With MC and F-5 hook, chain 53.
Row 1 (RS): Sc in 2nd ch from hook and in each ch across. Turn. (52 sc)
Row 2: Ch 1, sc in first 26 sts, sc2tog, sc in remaining 24 sts. Turn. (51 sc)
Chevron Lace Pattern Rows
Row 3 (RS, begin chevron lace): Ch 1, sc in first st (selvage). Sc2tog over next 2 sts, sc in next 2 sts, (dc, ch 1, dc) in next st, sc in next 2 sts, sc2tog over next 2 sts; rep from 3 more times (4 repeats total), sc in last st (selvage). Turn. (51 sts)
Row 4 (WS): Ch 1, sc in each st and in each ch-1 sp across. Turn. (51 sc)
Rows 5 through 26: Repeat Rows 3 and 4 eleven more times. (51 sts throughout)
After Row 26, the skirt front panel measures approximately 9.5 inches. Fasten off.
Skirt Back Panel
Work exactly as Skirt Front Panel. Fasten off.
Skirt Hem Edging
With CC and F-5 hook, join at bottom right corner of skirt front panel.
Row 1 (Picot base): Ch 1, sc evenly across bottom edge, ending with sc2tog at the end to give you 48 sc. Turn. (48 sc)
Scallop Row (RS): (Sl st in first st, ch 3, 3 dc in same st, skip 2 sts, sl st in next st, skip 2 sts, 3 dc in next st, ch 3, sl st in same st); rep 7 more times across. (8 scallops) Fasten off.
Work hem edging on skirt back panel identically.
Assembly
Step 1: Lay bodice front and bodice back with right sides together. Seam shoulders if not already done.
Step 2: With MC and tapestry needle, whip stitch the side seams of the bodice from armhole corner down to lower bodice edge, approximately 1.5 inches on each side.
Step 3: With MC and tapestry needle, seam the skirt front panel to skirt back panel at side seams, right sides together.
Step 4: Attach skirt to bodice with right sides together. Align the top edge of skirt panels with lower edge of bodice. Seam all the way around, easing any extra stitches evenly.
Step 5: Wrap the waistband around the empire waist join. Slip stitch or whip stitch into place. Overlap ends at back and sew closed.
Sleeves / Flutter Ruffle Armhole Finish
With MC and F-5 hook, join at the underarm corner of one armhole opening with a slip stitch.
Rnd 1: Ch 1, sc evenly around the armhole opening. Pick up approximately 24 sc around (12 sts across top, 6 sts down each side). Join with sl st to first sc. (24 sc)
Rnd 2 (ruffle): Ch 3 (counts as dc), dc in same st, 2 dc in each st around. Join with sl st to top of ch-3. (48 dc)
Rnd 3 (scallop edging in CC): Join CC. (Sl st in first st, ch 3, 3 dc in same st, skip 2 sts, sl st in next st, skip 2 sts, 3 dc in next st, ch 3, sl st); rep 7 more times. (8 scallops) Fasten off.
Repeat for second armhole.
Flower Embellishment
Large Flower: With CC and D-3 hook, ch 5, sl st into first ch to form ring.
Rnd 1: (Ch 3, 2 dc into ring, ch 3, sl st into ring) 5 times. (5 petals) Fasten off, leaving a 12-inch tail.
Attach rhinestone to flower center. Position large flower at center front waistband. Sew flower securely.
Flower Tie: Cut CC approximately 24 inches. Fold in half, thread folded end through flower base and loop to secure. Two strands hang down.
Tiny Flowers (make 2): With CC and D-3 hook, ch 4, sl st to join ring. (Ch 2, dc into ring, ch 2, sl st into ring) 4 times. (4 petals) Fasten off. Attach one tiny flower to end of each tie strand.
Neckline and Back Edge Finish
With CC and E-4 hook, join at back right shoulder. Work 1 round of sc evenly around entire neckline and back neck opening, working sc2tog at corners as needed. Join with sl st. Fasten off.
Back Button Loops (optional): With CC and D-3 hook, join at top right corner of back neck opening. Ch 1, sc down right side for approximately 1 inch, then ch 4, sl st into next st for button loop. Continue sc down edge. Add second loop 1.5 inches lower. Fasten off. Sew buttons to left back edge.
Finishing and Blocking
Weave in all yarn ends securely, running ends through at least 1 inch of stitches in two directions.
Wet blocking gives the best results. Soak the completed dress in cool water with gentle wool wash for 15 minutes. Press out excess water in a clean towel. Lay flat on a blocking mat. Pin the chevron hem points to emphasize the scallops. Pin ruffle sleeves flat and open. Allow to dry completely.
For acrylic yarn, steam blocking works as an alternative. Hold a steam iron 1 inch above the fabric without pressing directly onto the crochet.
Care Instructions
Hand wash in cool water with gentle baby-safe detergent. Lay flat to dry. Do not machine wash unless your yarn label confirms it is machine washable on delicate. Do not tumble dry or iron directly on the crochet fabric.
Size Customization Tips
To go up one size (2T, chest 20 to 21 inches): Add 6 stitches to the bodice foundation chain for each panel. Add one additional 12-stitch chevron repeat to the skirt foundation. Add 2 to 4 rows to bodice height before armhole shaping. Adjust waistband chain to 128 stitches.
To go down one size (6 to 9 months, chest 16 to 17 inches): Reduce bodice foundation to chain 46. Use 3 chevron repeats for skirt (39 sts per panel). Reduce total length by 1.5 inches by working 2 fewer chevron repeat rows.
To lengthen the skirt: Each two-row chevron repeat adds approximately 0.8 inches. Add repeat pairs as desired.
Thank you so much for choosing this pattern. I poured my heart into every detail, and I truly hope you enjoy making this sweet little dress as much as I enjoyed designing it. If you make one, please share a photo with me on Instagram or Facebook. I would absolutely love to see your finished baby dress in whatever colors you choose.
Go ahead and save this pattern to your Pinterest boards so you can find it easily when you are ready to start. And if you have any questions or want to share your progress, drop a comment below. I always love hearing from you!
You Might Also Like
- Dusty Rose Bow Handbag Free Crochet Pattern
- Cream Cable Knit Baby Onesie Set Free Crochet Pattern
- Autumn Maple Leaf Crochet Bracelet Free Pattern
- Ocean Blue Lattice Crochet High Tops Free Pattern
