Okay, this bracelet is SERIOUSLY stunning and works up SO much faster than you’d think! I’m talking a few hours from start to finish, and you end up with this gorgeous delicate cherry blossom piece that looks like it belongs in a jewelry boutique. The tiny flowers, the little buds, the adjustable sliding closure. It’s one of those projects that makes people say "wait, you MADE that?" Perfect for gifts, perfect for treating yourself, and absolutely perfect for using up those pretty thread scraps you’ve been saving.
About This Cherry Blossom Crochet Bracelet Pattern
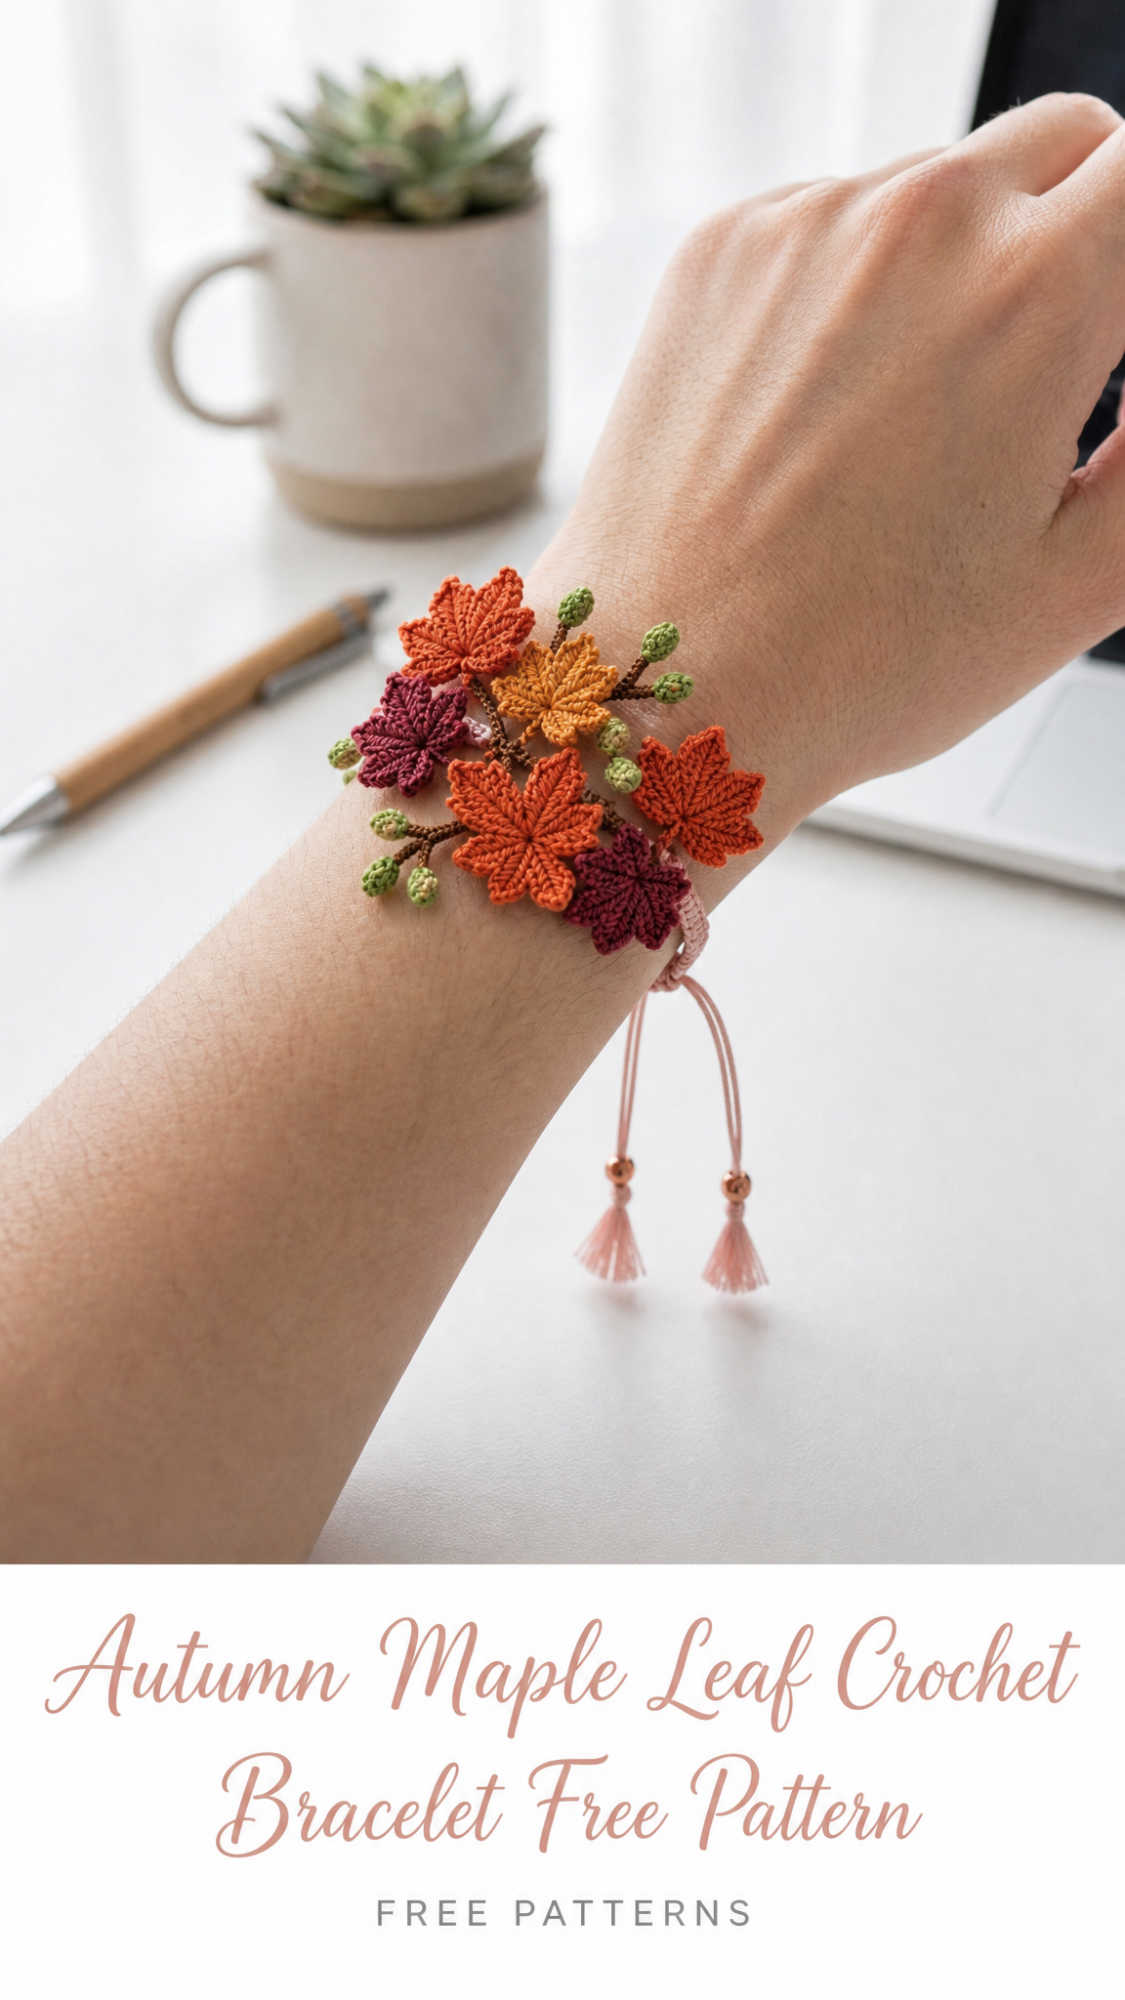
Let me walk you through what makes this crochet bracelet pattern so special. Despite what the title says, I’m seeing the most delicate cherry blossom branch design with multiple five-petal flowers in soft pink and white shades. Each flower features a golden yellow center that mimics real cherry blossom stamens. Brown crocheted branches connect everything together, and tiny green buds add that realistic touch.
The bracelet band itself uses a neat braided or corded technique in dusty rose pink. You’ll notice the adjustable sliding knot closure with sweet little tassels and rose gold beads at the ends. This design sits beautifully on the wrist with the floral motif as a stunning focal point.
Skill level: Intermediate. You should be comfortable working in small rounds and joining tiny pieces. If you’ve made crochet flowers before, you’ve got this!
Materials You Will Need
Gather these supplies before you begin your crochet bracelet tutorial:
Yarn/Thread:
– Light pink (approximately 15 yards)
– White (approximately 10 yards)
– Golden yellow (approximately 5 yards)
– Brown (approximately 20 yards)
– Sage green (approximately 5 yards)
– Dusty rose pink for the band (approximately 25 yards)
Hook:
Notions:
Gauge and Finished Measurements
Gauge isn’t critical for jewelry, but your stitches should be tight and even so the flowers hold their shape.
Finished bracelet: Approximately 7 inches long when fully extended, adjustable down to about 5.5 inches. The floral motif measures roughly 2 inches wide by 1.5 inches tall.
Abbreviations and Stitch Definitions
Let me break down every stitch you’ll need for this step by step crochet pattern:
ch = chain. Wrap yarn over hook and pull through the loop on your hook. This creates the foundation for most crochet work.
sl st = slip stitch. Insert hook, yarn over, pull through both the stitch and the loop on your hook in one motion. Used for joining and moving across stitches invisibly.
sc = single crochet. Insert hook into stitch, yarn over and pull up a loop (2 loops on hook), yarn over and pull through both loops. A short, tight stitch.
hdc = half double crochet. Yarn over, insert hook into stitch, yarn over and pull up a loop (3 loops on hook), yarn over and pull through all 3 loops. Slightly taller than single crochet.
dc = double crochet. Yarn over, insert hook into stitch, yarn over and pull up a loop (3 loops on hook), yarn over and pull through 2 loops, yarn over and pull through remaining 2 loops. Creates a medium height stitch.
magic ring = adjustable starting ring. Creates a tightly closed center for working in the round. If you’re not comfortable with magic rings, you can chain 4 and slip stitch to join instead.
How to Crochet the Cherry Blossom Flowers
You’ll need approximately 7 to 9 flowers total. Make some in light pink and some in white for variety. Don’t worry if they’re not all identical. Real cherry blossoms aren’t either!
Large Flower (make 4 to 5)
Center:
Using golden yellow thread, make a magic ring.
Round 1: Ch 1, work 5 sc into the ring, sl st to first sc to join. Pull ring closed tightly. (5 sts)
Fasten off yellow. Join pink or white thread to any stitch.
Round 2 (Petals):
In the same stitch: ch 3, dc, hdc, sl st.
*In next stitch: sl st, hdc, dc, ch 3, sl st (this creates one petal).*
Repeat from * around until you have 5 petals total. Sl st to base of first petal to join.
Fasten off and weave in ends. Each petal should have a gentle rounded shape.
Small Flower (make 3 to 4)
These are slightly simpler and add dimension to your arrangement.
Center:
Using golden yellow thread, make a magic ring.
Round 1: Ch 1, work 5 sc into the ring, sl st to first sc to join. Pull ring closed. (5 sts)
Fasten off yellow. Join pink or white thread.
Round 2 (Petals):
In each stitch around: sl st, ch 2, hdc, ch 2, sl st.
This creates smaller, more delicate petals. Sl st to join.
Fasten off and weave in ends.
Helpful tip: If your petals curl too much, a light application of fabric stiffener helps them lay flat. Just let them dry completely before assembling.
How to Crochet the Buds
These tiny additions make your bracelet look incredibly realistic. Make 4 to 6 buds.
Pink Bud
Using light pink thread, ch 4.
Row 1: Sc in 2nd ch from hook, hdc in next ch, sc in last ch. (3 sts)
Fasten off, leaving a tail for sewing. The piece will naturally curl into a tiny bud shape.
Green Leaf Bud
Using sage green thread, ch 5.
Row 1: Sl st in 2nd ch from hook, sc in next ch, hdc in next ch, sc in last ch. (4 sts)
Fasten off with a tail. These represent the unopened buds with their green casings.
How to Crochet the Branches
The branches connect all your elements. This is where the design comes together!
Main Branch
Using brown thread, ch 25.
Row 1: Sc in 2nd ch from hook and in each ch across. (24 sts)
Fasten off with a long tail.
Small Branch Offshoots (make 3 to 4)
Using brown thread, ch 8.
Row 1: Sc in 2nd ch from hook and in each ch across. (7 sts)
Fasten off with tails for attaching.
Assembly tip: The branches should look organic and natural. When you attach the smaller branches to the main one, angle them at different points rather than evenly spacing them.
How to Crochet the Bracelet Band
This is the adjustable cord portion that wraps around your wrist.
Making the Cord
Using dusty rose pink thread, ch 6.
Row 1: Sc in 2nd ch from hook and in each ch across. (5 sts)
Rows 2 onwards: Ch 1, turn. Sc in back loop only of each st across. (5 sts)
Continue until your cord measures approximately 14 inches long. This creates a neat ribbed texture.
Alternatively, you can create a simple i-cord or twisted cord if you prefer. The key is making it sturdy enough to hold the sliding closure.
Fasten off and weave in one end.
Creating the Sliding Knot Closure
This beginner friendly closure makes the bracelet adjustable.
1. Fold your cord so the ends overlap by about 2 inches.
2. Using a separate piece of dusty rose thread (about 12 inches), wrap tightly around both cord pieces about 10 to 12 times.
3. Thread the tail through your wraps using a tapestry needle to secure.
4. Repeat on the other side where the cords overlap.
The wrapped sections should slide along the cords to adjust the fit.
Adding the Tassels and Beads
1. Cut 6 strands of dusty rose thread, each about 3 inches long.
2. Thread one cord end through a rose gold bead.
3. Fold 3 strands in half and attach below the bead using a lark’s head knot.
4. Trim tassel ends evenly to about half an inch.
5. Repeat for the other cord end.
Assembling Your Cherry Blossom Bracelet
Now comes the fun part! Lay out all your pieces before you start sewing.
Step 1: Arrange your main branch in a gentle curve.
Step 2: Position the smaller branch offshoots at natural angles along the main branch. Sew in place using brown thread and a tapestry needle.
Step 3: Place your flowers along the branches, mixing pink and white. The largest flowers look best near the center. Sew each flower securely to the branch structure.
Step 4: Tuck the buds between flowers and at branch tips. These fill gaps and add realism.
Step 5: Attach the completed floral motif to the center of your bracelet band. Sew through the back of the branch structure into the cord, making sure your stitches don’t show from the front.
Step 6: Try on the bracelet and adjust the sliding knots for fit.
Care Instructions
Your handmade crochet bracelet deserves gentle care:
Customization Ideas
Once you’ve mastered this cherry blossom crochet pattern, try these variations:
Different flowers: Swap cherry blossoms for forget-me-nots in blue, or tiny roses in red
Autumn version: Use rust, orange, and golden yellow for actual maple leaf shapes
Bridal accessory: Make an all-white version with pearl beads instead of rose gold
Hair accessory: Attach the floral motif to a hair clip or headband instead
Troubleshooting Common Issues
Flowers won’t lay flat: Use fabric stiffener or try blocking them while damp. Pinning them to a foam board while drying helps.
Stitches too loose: Drop down a hook size. Thread work requires tighter tension than regular yarn.
Branches look stiff: Gently roll them between your fingers to soften. They’ll become more flexible with handling.
Assembly looks messy: Take photos of professional floral arrangements for reference. Nature isn’t perfectly symmetrical, so don’t stress about exact placement.
I really hope you love making this cherry blossom crochet bracelet as much as I do. It’s one of those projects that feels like a tiny accomplishment every time you finish a new flower. If you make one, I would absolutely love to see it! Tag me on Instagram or share a photo in our Facebook group.
If this pattern caught your eye, go ahead and save it to your Pinterest boards so you can find it when you’re ready to start. And please drop a comment below if you give it a try. I read every single one and love hearing how your projects turn out!
