
I’ve been looking for the perfect baby romper pattern for months now, and I finally found one that checks every single box. This Sunset Gradient Baby Romper has that heirloom quality I always want in handmade baby clothes, but it’s actually achievable for intermediate crocheters without a ton of garment construction experience.
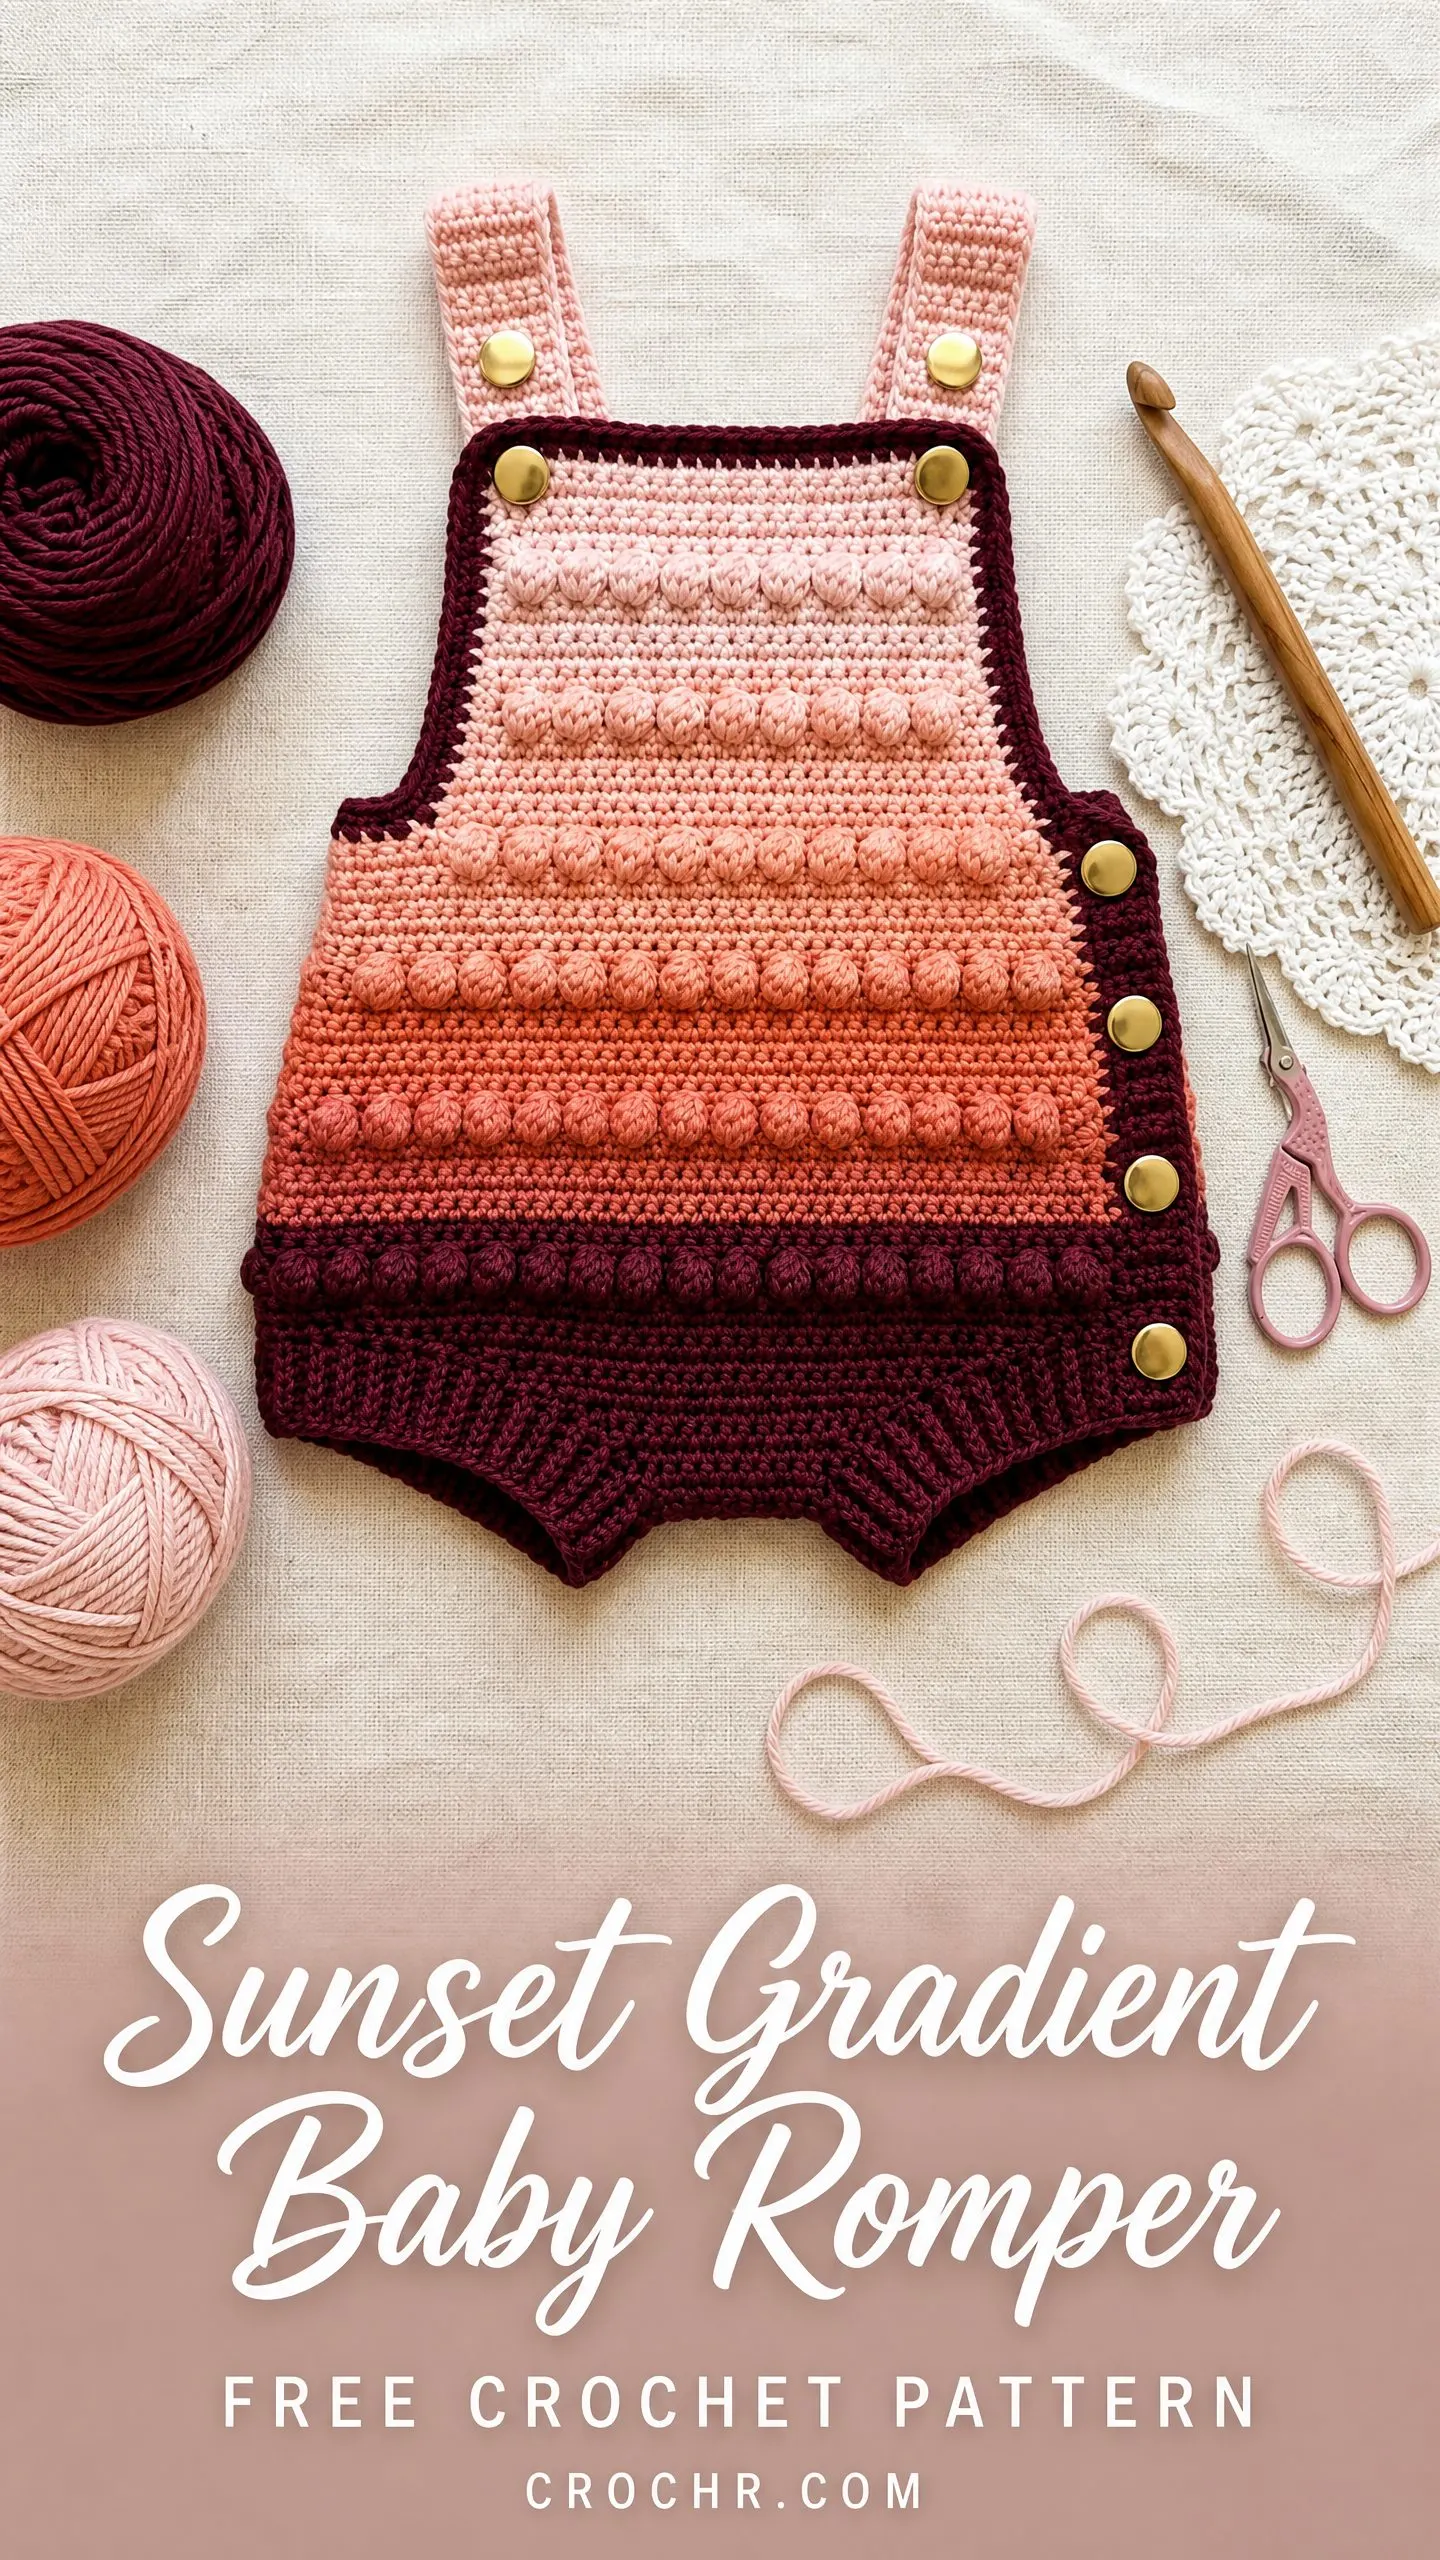
The gradient effect alone had me sold. But then I noticed the bobble texture, the snap button closures for easy diaper changes, and that gorgeous burgundy border framing everything so beautifully. This is one of those patterns that looks far more complicated than it actually is.
If you’ve been searching for a show-stopping baby gift or a keepsake piece for your own little one, this is it. Let me walk you through everything you need to know to make this stunning romper from start to finish.
What Makes This Crochet Baby Romper Special
This romper is constructed as two flat panels, a front and a back, that are joined at the sides with snap closures rather than seaming. That means the entire garment opens up completely for diaper changes. No wrestling a wiggly baby through leg holes. Just unsnap, change, and snap back together.
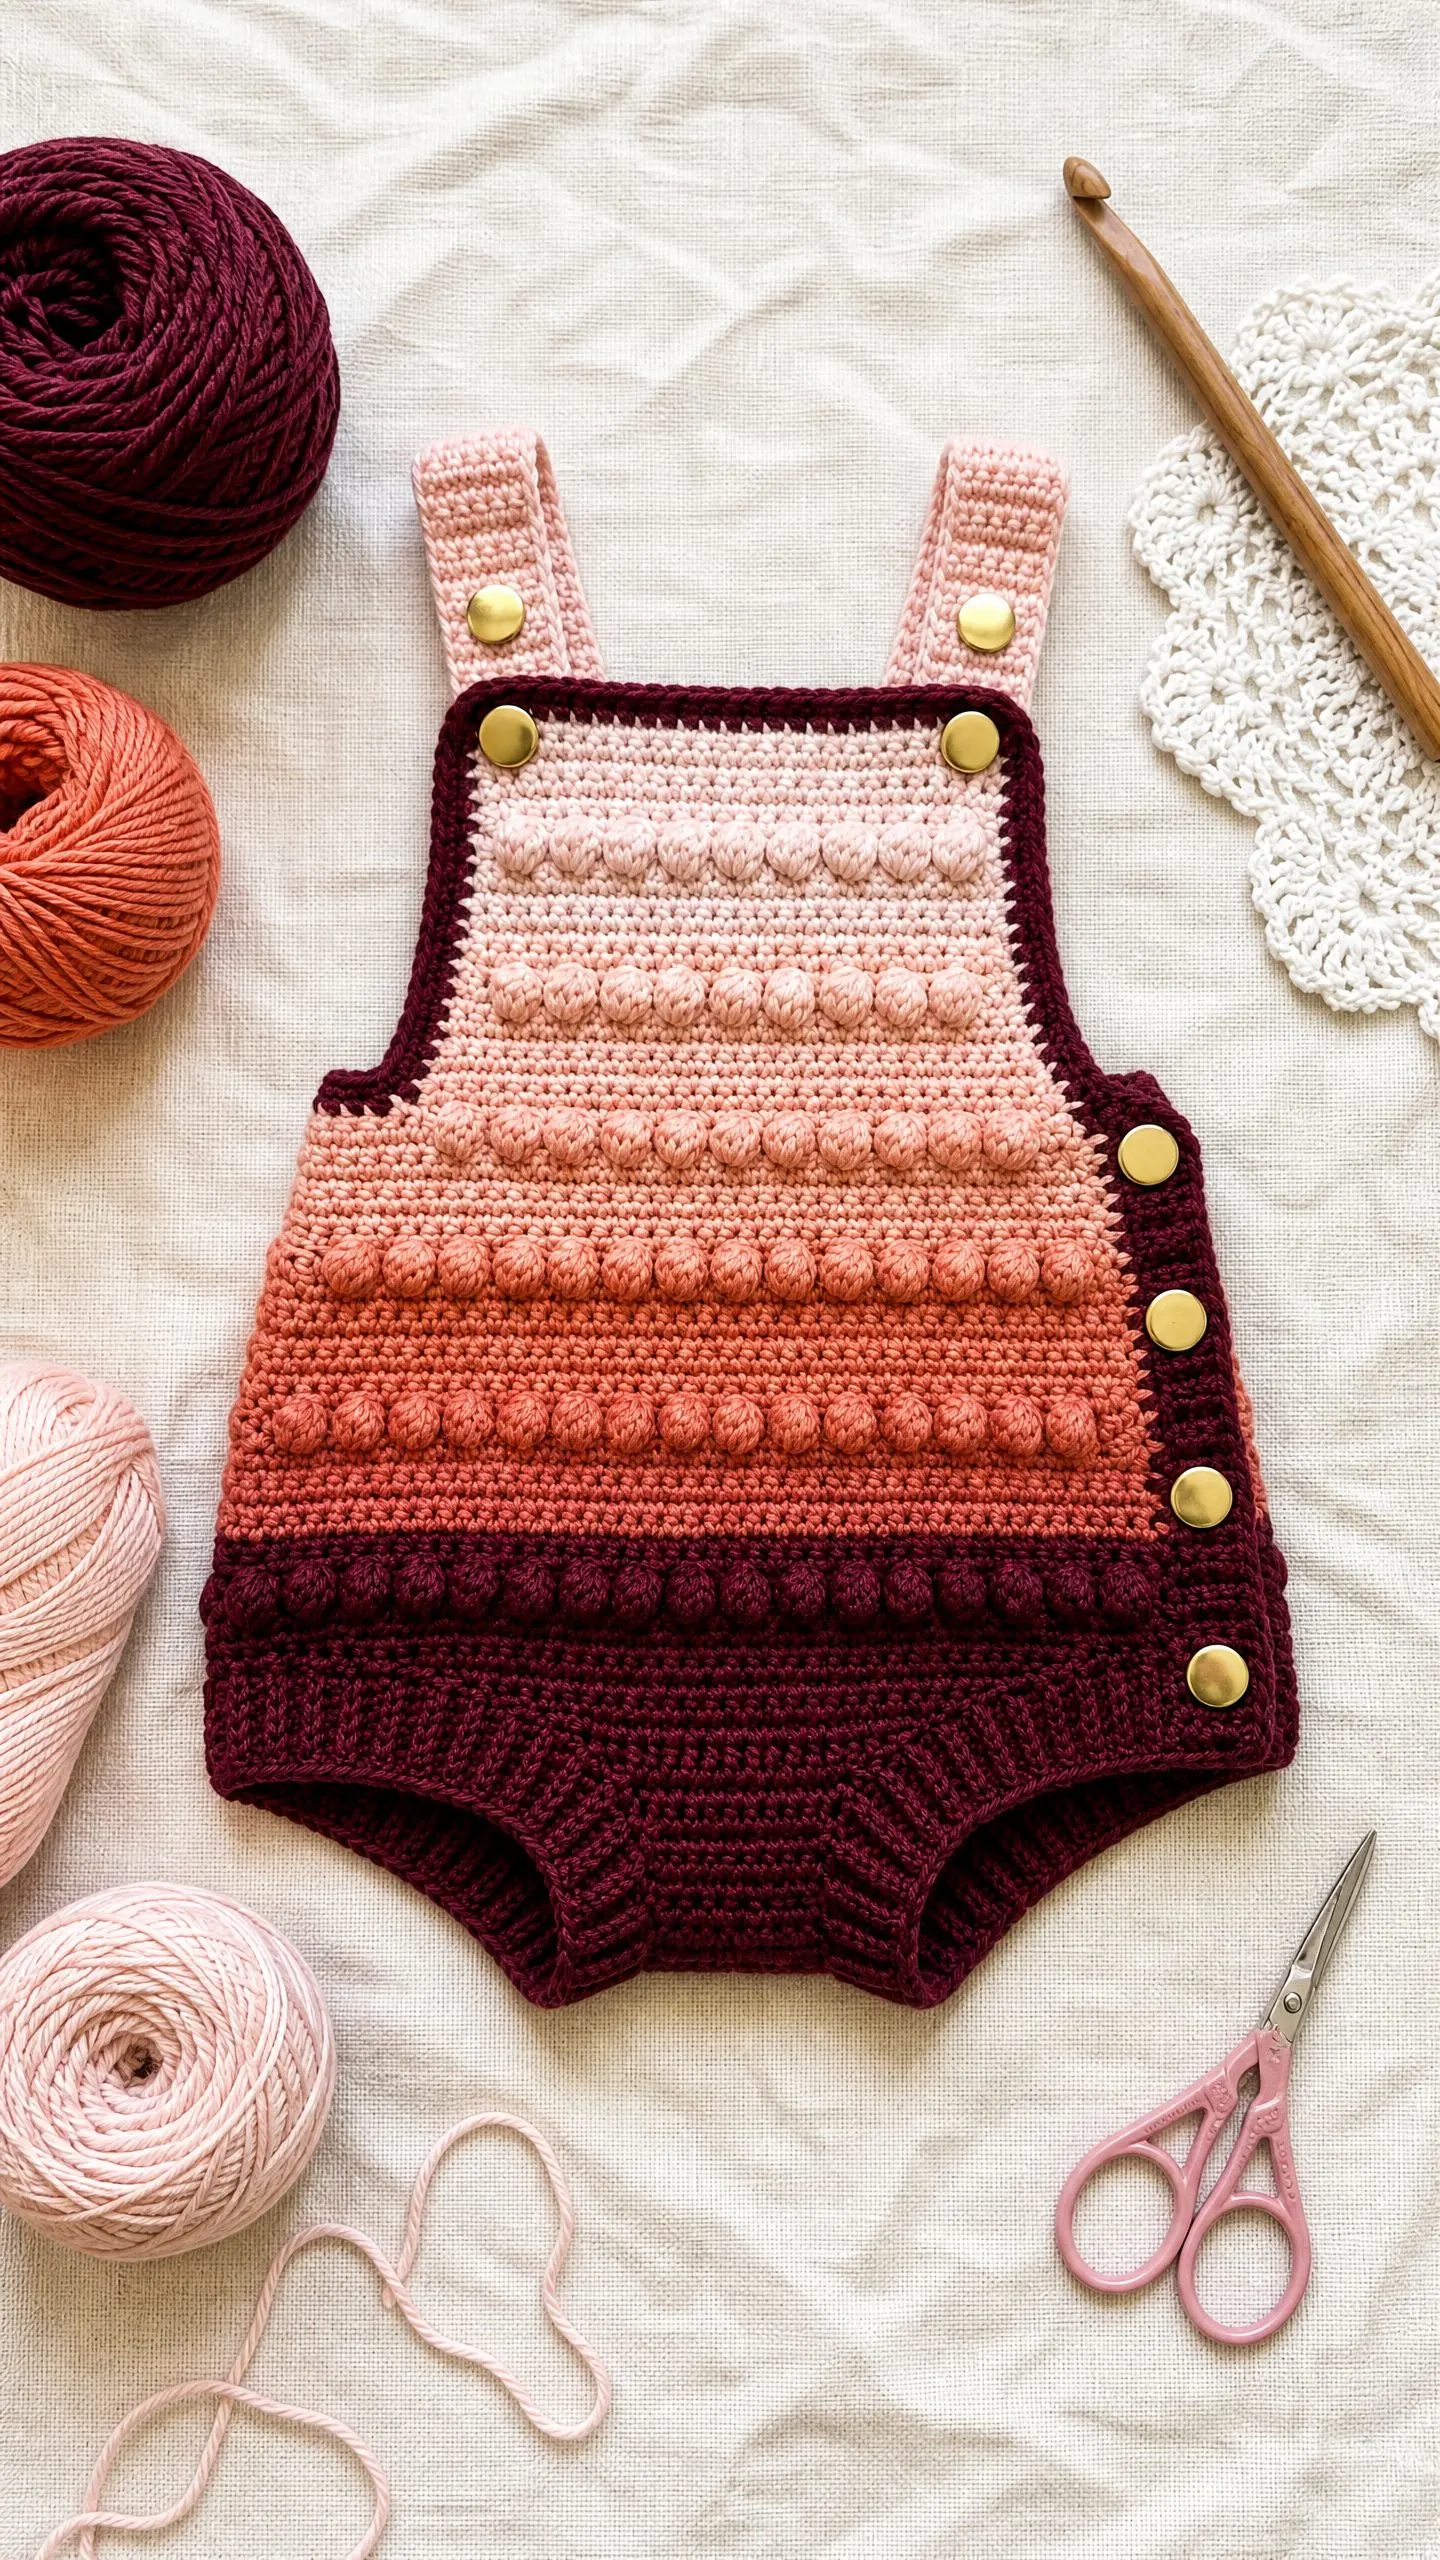
The bodice features alternating rows of half double crochet (hdc) and bobble stitches worked in a warm sunset gradient. The colors transition from soft blush pink at the top through rose, dusty coral, and terracotta, finishing with a deep wine burgundy that frames all the edges. The bobbles create those adorable textured rows you see popping out from the fabric.
The lower portion becomes a bloomer style bottom with a ribbed leg opening that has just the right amount of stretch. Gold snap buttons run down each side seam and attach the shoulder straps, giving the whole piece a polished boutique look.
Skill Level and Time Commitment
I would call this an intermediate level pattern. You should be comfortable working in rows, changing yarn colors mid-project, and making bobble stitches. No prior garment construction experience is necessary because the flat panel construction keeps things straightforward.
Plan for approximately 10 to 15 hours of work time if you’re an experienced intermediate crocheter. If you’re newer to color changes or bobbles, give yourself a bit more time. The multiple color changes do produce quite a few yarn ends to weave in, so factor that into your finishing time as well.
Finished Measurements
This pattern is written for size 3 to 6 months with the following finished dimensions:
The relaxed fit accommodates both cloth and disposable diapers comfortably.
Materials You Will Need
Yarn
You will need DK weight yarn (CYCA 3 Light) in five colors. Here are the approximate yardage requirements:
Total yardage needed: approximately 340 yards or 311 meters
Recommended Yarn Options
Lion Brand Comfy Cotton Blend works beautifully for this project. It’s 60% cotton and 40% nylon with excellent stitch definition for the bobbles. Plus it’s machine washable, which is essential for baby items.
Paintbox Yarns Simply DK is a budget friendly option with very consistent gauge and a wonderful color range in pinks and corals.
Cascade Yarns Ultra Pima is my premium pick if you want something extra special. The 100% cotton has gorgeous drape and feels incredibly soft against baby skin.
Any DK weight yarn that meets gauge will work. For baby garments, prioritize soft, non-scratchy fibers like cotton, cotton blends, or fine acrylic. Avoid novelty yarns or anything with loose plies that could snag little fingers.
Hook and Notions
Gauge
18 stitches and 20 rows = 4 inches or 10 cm in half double crochet using a US G-6 or 4.0 mm hook, after blocking.
18 stitches and 16 rows = 4 inches or 10 cm in the bobble pattern (alternating hdc and bobble rows), after blocking.
Gauge is critical for a fitted garment like this. Please work a swatch of at least 6 by 6 inches, wash and block it, then measure. Adjust your hook size as needed. Going up one hook size typically adds approximately 0.5 inches to every 4 inches worked.
Abbreviations and Stitch Definitions
Let me walk you through all the abbreviations used in this pattern. I’ll define each one so you know exactly what to do.
Special Stitches
Bobble Stitch (bo)
The bobble stitch creates those wonderful textured bumps you see in the finished romper. Here is how to make one:
Step 1: Yarn over, insert hook into the indicated stitch.
Step 2: Yarn over and pull up a loop. You now have 3 loops on your hook.
Step 3: Yarn over, insert hook into the SAME stitch.
Step 4: Yarn over and pull up a loop. You now have 5 loops on your hook.
Step 5: Yarn over, insert hook into the SAME stitch again.
Step 6: Yarn over and pull up a loop. You now have 7 loops on your hook.
Step 7: Yarn over and draw through all 7 loops on your hook.
Step 8: Chain 1 to close and secure the bobble. This chain 1 does NOT count as a stitch.
Important note: Bobbles naturally push to the wrong side of the work as you make them. The front of the fabric shows the bobble popping outward. If your bobbles are pressing toward you as you work, you are on the right side. This pattern is designed so all bobble rows fall on right side rows, making the bobbles face outward correctly on the finished garment.
Half Double Crochet Ribbing (BLO)
For the ribbed leg openings, you will work hdc into the back loop only of each stitch across. This creates a stretchy, ridged texture that gives the leg openings a nice finished look and comfortable fit.
Pattern Notes Before You Begin
Read through these notes before starting. They will save you confusion later.
1. The romper is constructed in two identical flat panels, front and back. Both panels are worked from the strap tops downward to the leg opening.
2. Color changes for the gradient occur at the beginning of specified rows. When changing colors, complete the last yarn over of the final stitch in the current color with the new color. Cut the old color leaving a 6 inch tail.
3. Because each color section is only a few rows, it is most economical to cut and rejoin colors rather than carry them along the side.
4. The border in Color E is worked after both panels are complete, directly onto the edges.
5. Straps are worked separately and then seamed to the top of each panel.
6. Snap buttons are attached after all crocheting and finishing is complete.
7. Both panels are identical through the main body. The only difference is snap placement so they align when worn.
8. All turning chains count as indicated. Chain 2 at the beginning of hdc rows counts as the first hdc. Chain 1 at the beginning of bobble rows does NOT count as a stitch.
9. The pattern is written with the right side facing at the start of odd numbered rows.
Section 1: Straps (Make 4 Identical)
The romper has 4 straps total. Two attach to the front panel and two to the back panel.
Using Color A (Blush Pink):
Foundation: Ch 9.
Row 1 (RS): Hdc in 3rd ch from hook and in each ch across. Turn. (7 hdc)
Rows 2 through 20: Ch 2, hdc in each st across. Turn. (7 hdc)
After Row 20, do not turn. Fasten off.
Each strap measures approximately 7 inches or 18 cm long and 1.5 inches or 4 cm wide.
Make 4 straps total and set aside.
Section 2: Front Panel
The front panel is worked from the yoke (top) downward.
Bodice Section
Using Color A (Blush Pink):
Foundation: Ch 45. (This yields 43 working stitches.)
Row 1 (RS): Hdc in 3rd ch from hook and in each ch across. Turn. (43 hdc)
Row 2 (WS): Ch 2, hdc in each st across. Turn. (43 hdc)
Row 3 (RS, bobble row, Color A): Ch 1 (does not count as st), bo in first st, hdc in next st, [bo in next st, hdc in next st] across to last st, bo in last st. Turn. (43 sts: 22 bobbles, 21 hdc)
Row 4 (WS, Color A): Ch 2, hdc in each st across. Turn. (43 hdc)
Change to Color B (Rose Pink) at end of Row 4.
Row 5 (RS, Color B): Ch 2, hdc in each st across. Turn. (43 hdc)
Row 6 (WS, Color B): Ch 2, hdc in each st across. Turn. (43 hdc)
Row 7 (RS, bobble row, Color B): Ch 1, bo in first st, hdc in next st, [bo in next st, hdc in next st] across to last st, bo in last st. Turn. (43 sts)
Row 8 (WS, Color B): Ch 2, hdc in each st across. Turn. (43 hdc)
Change to Color C (Dusty Coral) at end of Row 8.
Row 9 (RS, Color C): Ch 2, hdc in each st across. Turn. (43 hdc)
Row 10 (WS, Color C): Ch 2, hdc in each st across. Turn. (43 hdc)
Row 11 (RS, bobble row, Color C): Ch 1, bo in first st, hdc in next st, [bo in next st, hdc in next st] across to last st, bo in last st. Turn. (43 sts)
Row 12 (WS, Color C): Ch 2, hdc in each st across. Turn. (43 hdc)
Change to Color D (Terracotta) at end of Row 12.
Row 13 (RS, Color D): Ch 2, hdc in each st across. Turn. (43 hdc)
Row 14 (WS, Color D): Ch 2, hdc in each st across. Turn. (43 hdc)
Row 15 (RS, bobble row, Color D): Ch 1, bo in first st, hdc in next st, [bo in next st, hdc in next st] across to last st, bo in last st. Turn. (43 sts)
Row 16 (WS, Color D): Ch 2, hdc in each st across. Turn. (43 hdc)
Row 17 (RS, Color D): Ch 2, hdc in each st across. Turn. (43 hdc)
Row 18 (WS, Color D): Ch 2, hdc in each st across. Turn. (43 hdc)
Row 19 (RS, bobble row, Color D): Ch 1, bo in first st, hdc in next st, [bo in next st, hdc in next st] across to last st, bo in last st. Turn. (43 sts)
Row 20 (WS, Color D): Ch 2, hdc in each st across. Turn. (43 hdc)
Change to Color E (Burgundy) at end of Row 20.
Checkpoint: After Row 20, your front bodice panel should measure approximately 4 inches or 10 cm tall from the foundation row. The gradient should show four color bands.
Lower Body Section (Color E)
The lower body adds width to create the bloomer shape by increasing at each end of select rows.
Row 21 (RS, Color E): Ch 2, 2 hdc in first st (inc made), hdc in each st across to last st, 2 hdc in last st (inc made). Turn. (45 hdc)
Row 22 (WS, Color E): Ch 2, hdc in each st across. Turn. (45 hdc)
Row 23 (RS, bobble row, Color E): Ch 1, bo in first st, hdc in next st, [bo in next st, hdc in next st] across to last st, bo in last st. Turn. (45 sts: 23 bobbles, 22 hdc)
Row 24 (WS, Color E): Ch 2, hdc in each st across. Turn. (45 hdc)
Row 25 (RS, Color E): Ch 2, 2 hdc in first st (inc), hdc in each st across to last st, 2 hdc in last st (inc). Turn. (47 hdc)
Row 26 (WS, Color E): Ch 2, hdc in each st across. Turn. (47 hdc)
Row 27 (RS, bobble row, Color E): Ch 1, bo in first st, hdc in next st, [bo in next st, hdc in next st] across to last st, bo in last st. Turn. (47 sts: 24 bobbles, 23 hdc)
Row 28 (WS, Color E): Ch 2, hdc in each st across. Turn. (47 hdc)
Row 29 (RS, Color E): Ch 2, hdc in each st across. Turn. (47 hdc)
Row 30 (WS, Color E): Ch 2, hdc in each st across. Turn. (47 hdc)
Row 31 (RS, Color E): Ch 2, hdc in each st across. Turn. (47 hdc)
Row 32 (WS, Color E): Ch 2, hdc in each st across. Turn. (47 hdc)
Leg Opening Ribbing (Color E)
The ribbed leg hem creates stretch at the leg openings. The lower edge is divided into two sections with a gap in the center for the crotch.
Right Leg Opening Ribbing:
With RS facing, join Color E at the bottom right corner of Row 32.
Row 1 (ribbing): Ch 2, working in BLO, hdc in first 21 sts. Turn. (21 hdc)
Rows 2 through 5: Ch 2, hdc in BLO of each st across. Turn. (21 hdc)
Fasten off after Row 5.
Skip the center 5 sts of Row 32 (this forms the crotch).
Left Leg Opening Ribbing:
Join Color E in the next stitch after the 5 skipped center stitches.
Row 1 (ribbing): Ch 2, working in BLO, hdc in each of the remaining 21 sts. Turn. (21 hdc)
Rows 2 through 5: Ch 2, hdc in BLO of each st across. Turn. (21 hdc)
Fasten off after Row 5.
Checkpoint: After completing the ribbing, the panel should measure approximately 10 to 10.5 inches from top of Row 1 to bottom of ribbing.
Front Panel Edging
With Color E and RS facing, work a surface slip stitch border along the following edges in order: up the right side edge from bottom right to top right corner, across the top edge from right to left, down the left side edge from top left to bottom left corner. Do not work along the leg openings.
For side edges, work approximately 1 slip stitch per row end.
For the top edge, work 1 slip stitch per stitch (43 slip stitches across).
After the surface slip stitch, work 1 round of sc along the same edges: join Color E with a sl st at bottom right, ch 1, sc evenly along right edge, 3 sc in top right corner, sc across top edge (43 sc), 3 sc in top left corner, sc evenly along left edge. Fasten off.
Fasten off and weave in all ends on front panel.
Section 3: Back Panel
Work the back panel identically to the front panel, following all instructions from Foundation through Front Panel Edging. The back panel is a complete mirror image.
Make 1 back panel total.
Section 4: Attach Straps
Position one strap at each of the four top shoulder corners (two on front panel, two on back panel). Each strap aligns with the outer 7 stitches of the top edge.
Using Color E, whip stitch or slip stitch each strap end firmly to the corresponding top corner of the appropriate panel, with RS of strap facing out. The front left strap will snap to the back left strap, and the front right strap will snap to the back right strap.
After attaching straps, work a single row of sc in Color E along the top edge of each strap if needed to clean the edge.
Section 5: Snap Button Placement
You will attach 12 snap buttons total:
Side seam snap placement: Mark snaps evenly along each side border. With 4 snaps per side over approximately 10 inches of side edge, place the first snap approximately 0.75 inches from the underarm corner. Space remaining snaps approximately 2 to 2.5 inches apart.
Strap snap placement: On each strap end, attach one snap button pair at approximately 0.5 inches from the free end of the strap. Attach the corresponding receiving half of the snap to the front panel top edge at the corresponding position.
Attach snaps with pliers following manufacturer instructions for pronged snap buttons, or sew with a needle and thread using a bar tack stitch for sewn snaps.
Section 6: Leg Opening Border
With Color E and RS facing, work 1 round of sc evenly around each leg opening including along the ribbing edges and across the center crotch stitches. Join with sl st to first sc. Fasten off and weave in ends.
Approximate sc count per leg opening: 48 to 52 sc, adjusted to keep the circle flat.
Finishing and Blocking
1. Weave in all yarn ends securely, burying tails at least 1.5 inches in the wrong side of the work.
2. Wet block: Soak the finished romper in cool water for 15 to 20 minutes. Gently press out excess water in a clean towel (do not wring). Lay flat on a blocking mat and pin to the finished measurements. Allow to dry completely.
3. After blocking, the bobble stitch texture will be more pronounced and the overall fabric will be softer.
4. For acrylic yarn: Use steam blocking instead. Hover a clothes iron set to steam approximately 1 inch above the surface (do not touch iron to yarn) and allow steam to relax the fibers.
Size Customization Tips
To size up to 6-12 months:
To size up to 12-18 months:
To size down to 0-3 months:
Important: Foundation chain must remain an odd number of working stitches to maintain the bobble pattern repeat.
Care Instructions
Machine wash cold on gentle cycle. Lay flat to dry. Do not tumble dry, iron directly, or dry clean. Remove all snap buttons before washing if they are not rustproof.
Store folded flat, not on a hanger, to maintain the shape of the straps and prevent stretching.
You Did It!
Thank you so much for choosing this pattern for your next baby project. I truly hope you love making this romper as much as I loved designing it. The finished piece makes an absolutely stunning baby shower gift or a treasured keepsake for your own little one.
If you make this Sunset Gradient Baby Romper, I would absolutely love to see it! Tag me on Instagram or share your finished photos in my Facebook group. Seeing your creations honestly makes my entire day.
Go ahead and save this crochet pattern to your Pinterest boards so you can find it easily when you’re ready to cast on. And if you have any questions or want to share your finished romper, drop a comment below. I read every single one and I’m always here to help!
You Might Also Like
- Mint Green Lacy Baby Dress Free Crochet Pattern
- Sunset Peach Coral Ombre Sweater Free Crochet Pattern
- Sunset Coral Ruffle Dress Free Crochet Pattern
- Blue Morpho Butterfly Cape Free Crochet Pattern
