
I have been dreaming about this design for months. My goal was to create a wearable art piece that captures the stunning iridescent beauty of Blue Morpho butterfly wings while remaining practical enough to actually wear. I wanted the gradient to flow naturally from bright cyan at the center outward to deep navy at the wing tips, with that distinctive wing shape that makes Morphos so recognizable.
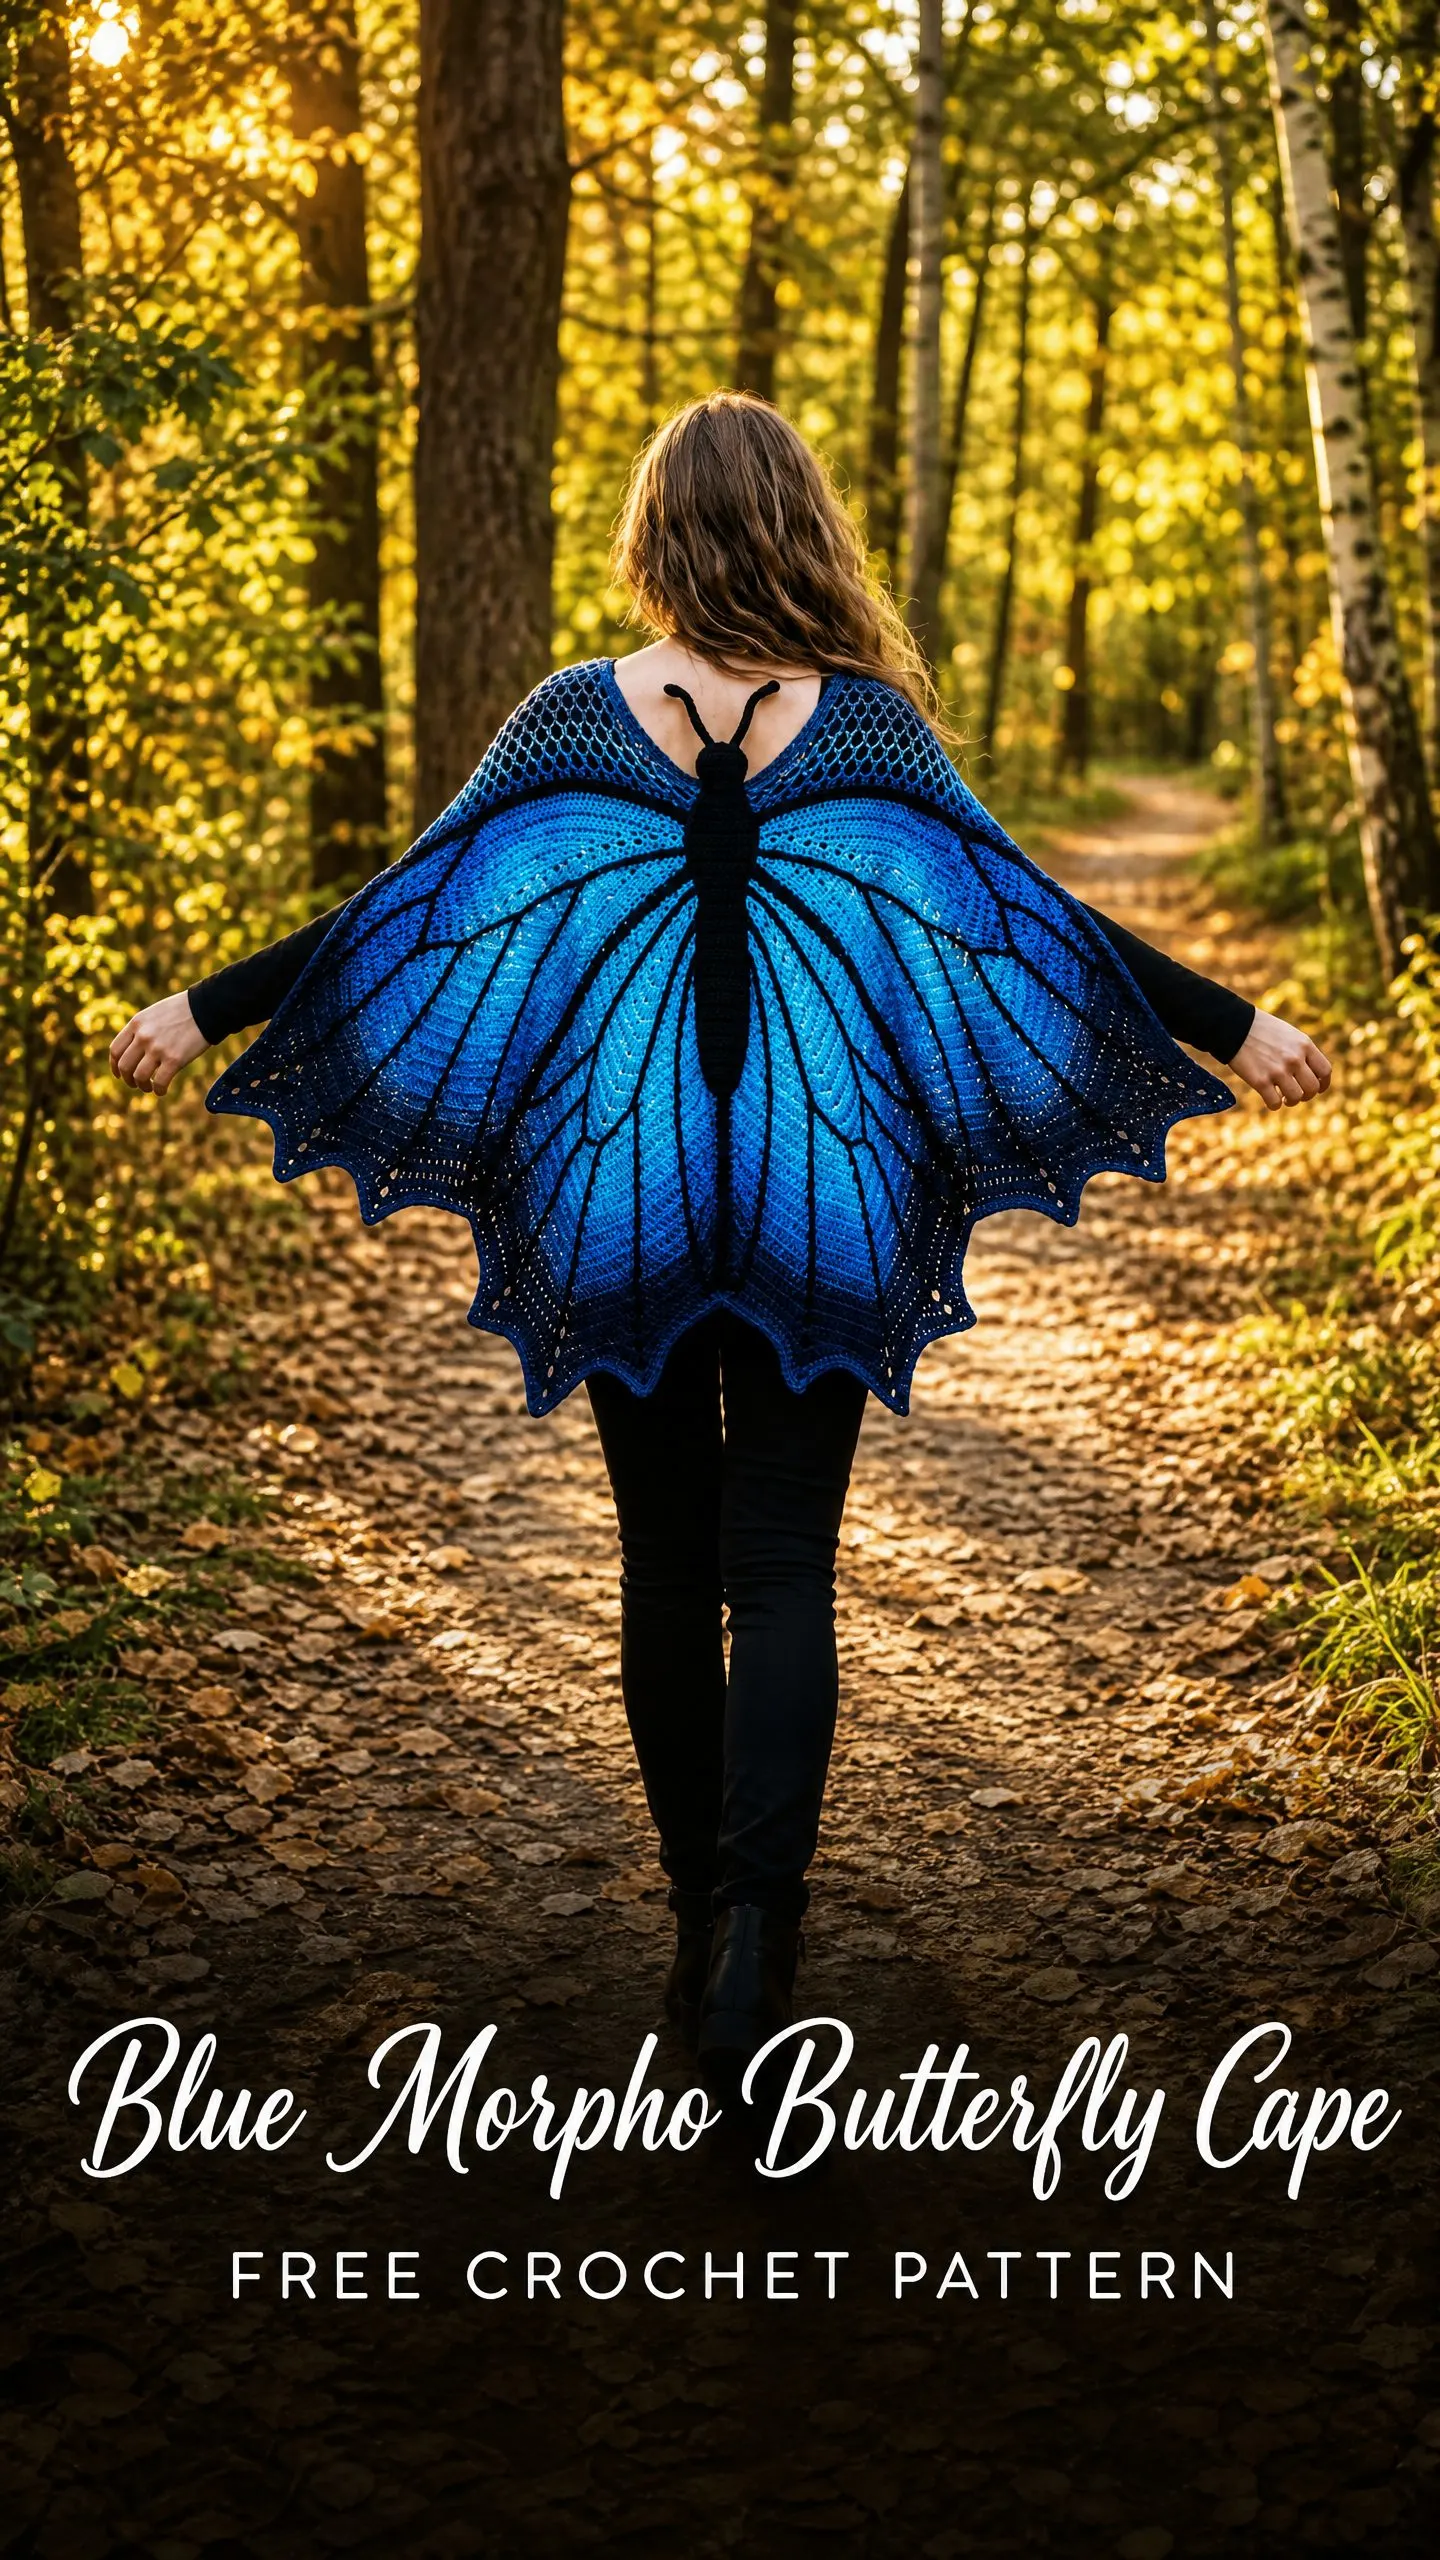
The construction needed to be logical. One piece worked flat from the center back, strategic shaping to create those upper and lower wing lobes, and a three-dimensional butterfly body running down the spine. I spent hours studying real Morpho wings to get the venation pattern right.
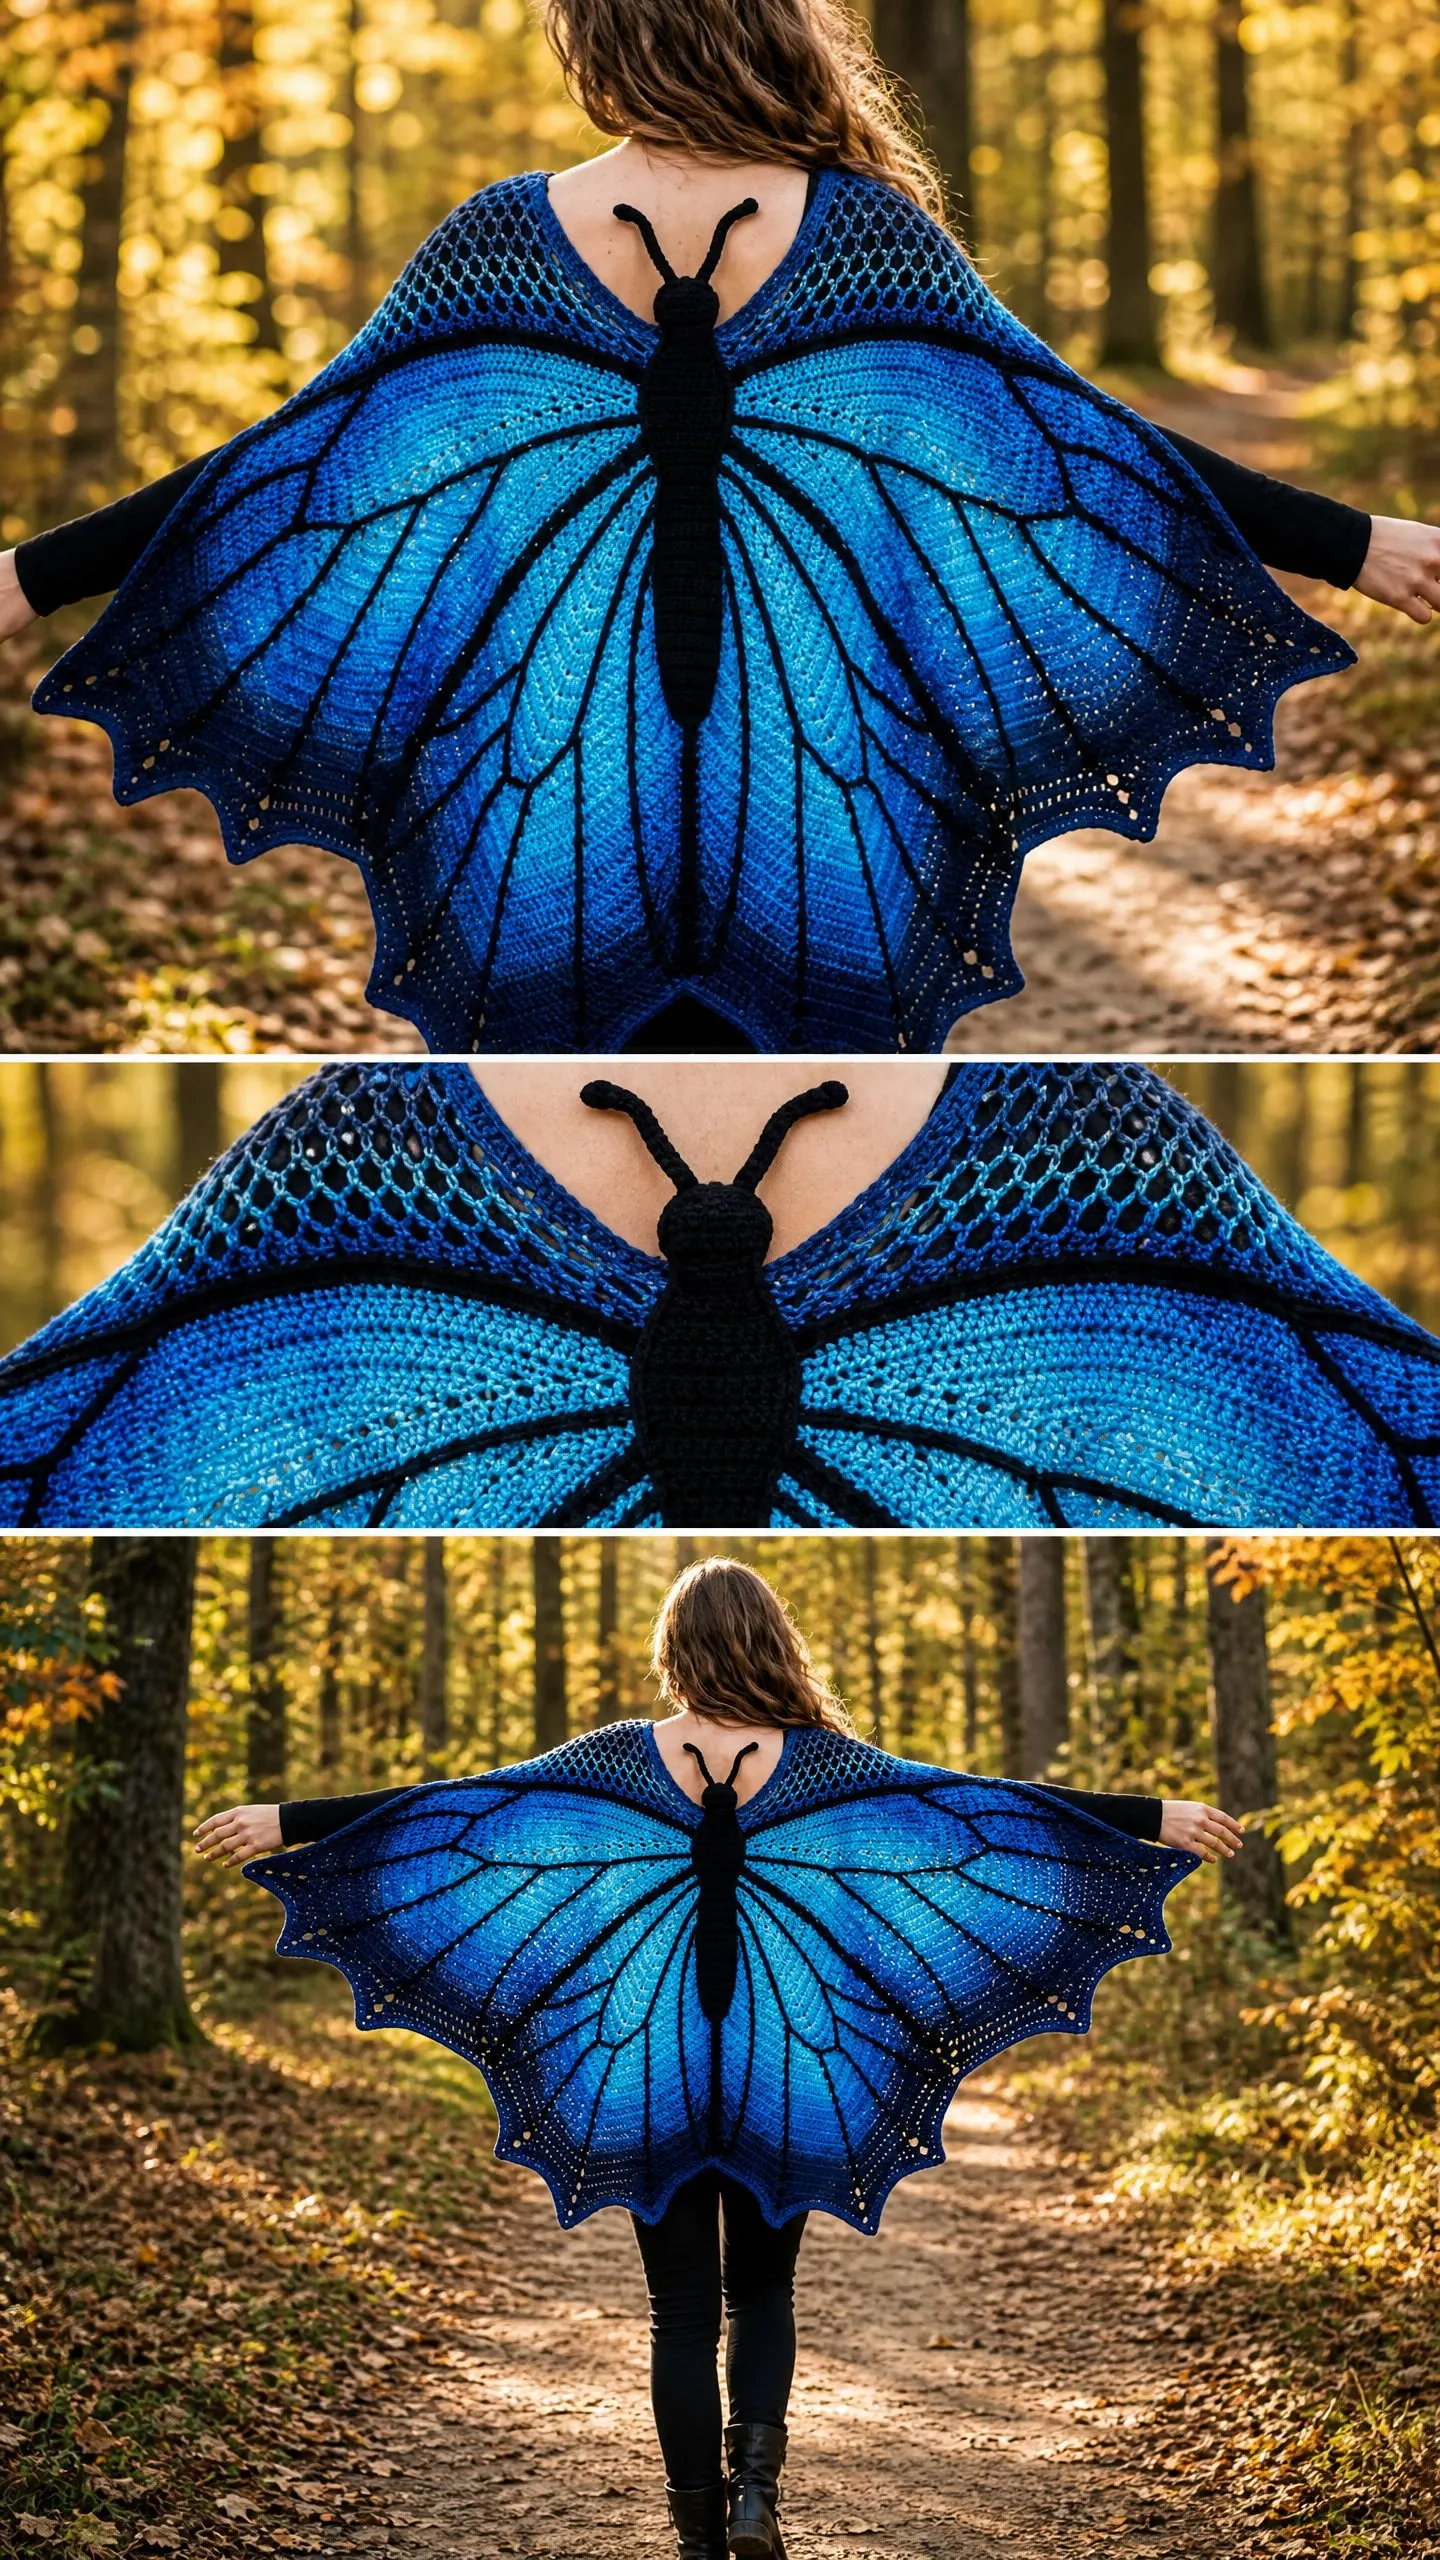
I am SO pleased with how this turned out. The honeycomb mesh at the shoulders creates beautiful drape. The surface slip stitch veins pop against the gradient. And when you spread your arms, you genuinely look like a butterfly taking flight.
About This Blue Morpho Butterfly Cape Pattern
This poncho-style cape is constructed as a single flat piece worked from the center back neck outward. The butterfly body sits along the center spine as a separate stuffed element. You will use strategic increases and short rows to create the asymmetrical upper and lower wing lobes characteristic of the Morpho species.
The finished cape drapes over your shoulders with a V-neck opening at center front. It falls to approximately hip length at the longest point of the lower wing tips. When you hold your arms out, the full wingspan measures 54 inches tip to tip.
Skill level: Advanced Intermediate. You should be comfortable with flat piece construction, managing multiple color sections, short row shaping, surface slip stitching, and three-dimensional applique construction. If you have completed at least two shaped garments like a shawl with increase shaping and a color change project, you will find this manageable.
Time estimate: Approximately 80 to 110 hours for an experienced crocheter. The cape body takes roughly 65 to 80 hours. The butterfly body and antennae take 4 to 6 hours. Surface venation takes 8 to 12 hours. Finishing and assembly take 4 to 6 hours.
This is a commitment project, but the results are absolutely worth it.
Finished Measurements
This cape fits most adult sizes XS through XL due to its open drape construction.
Materials Needed for Your Butterfly Cape
Yarn
You will need DK weight yarn (CYCA 3 Light) in the following amounts:
Total yardage: approximately 2000 yards / 1829 meters across all colors plus 150 yards black
Recommended Yarn Options
Paintbox Yarns Simply DK (100% acrylic, 276 yards per 100g skein) is budget-friendly and widely available in all required shades. Its smooth construction shows stitch definition clearly, which matters for the visible venation lines. You need approximately 3 skeins Color A, 2 skeins Color B, 2 skeins Color C, 1 to 2 skeins Color D, and 1 skein black.
Malabrigo Rios (100% superwash merino wool, 210 yards per 100g skein) produces beautiful soft drape with a slight halo that adds depth to the gradient colors. Choose Azul Profundo for Color A, Marine for Color B, Matisse Blue for Color C, and Cerulean for Color D.
Cascade 220 Superwash (100% superwash wool, 220 yards per 100g skein) offers excellent stitch clarity and easy care. The superwash treatment allows machine washing on cold, which is practical for a wearable this size.
Substitution note: Any smooth DK weight yarn matching gauge works. Avoid brushed or fluffy yarns since the surface venation lines will not read clearly against a textured background.
Hooks
Additional Materials
Gauge
With E-4 (3.5 mm) hook and DK weight yarn:
Gauge swatch: Chain 26. Work single crochet (sc) in the 2nd chain from hook and each chain across. (25 sc) Turn each row with chain 1 (does not count as stitch). Work 28 rows. Block swatch before measuring. Measure the center 20 stitches and center 24 rows only.
Mesh section gauge:
Gauge is critical to achieve the stated finished dimensions and ensure the cape drapes correctly over the shoulders. Please take time to check this before starting.
Abbreviations and Stitch Definitions
Let me walk you through every abbreviation you will encounter. I am defining these in plain language so nothing feels mysterious.
Special Stitches for This Crochet Pattern
These special techniques create the distinctive details of your butterfly cape.
Picot-3
Single crochet in indicated stitch, chain 3, slip stitch in the first chain of the chain-3 just made, single crochet in the same stitch as the first single crochet. This creates a small decorative knot used along wing border edges.
Picot-5
Single crochet in indicated stitch, chain 5, slip stitch in the first chain of the chain-5 just made, single crochet in the same stitch as the first single crochet. This creates a larger decorative knot used at the pointed wing tip projections.
Surface Slip Stitch Vein
With the right side facing you, insert hook through the fabric from front to back at the starting point of the vein line. Draw up a loop of black yarn from behind the fabric. Without turning the work, insert hook through the fabric at the next point along the vein line approximately 1 to 2 stitches away. Draw up a new loop and pull it through the loop already on the hook. Continue along the entire vein path. Fasten off and weave ends to the wrong side. The resulting line sits raised on the right side surface.
Honeycomb Mesh Stitch (worked flat)
Row 1 (RS): Chain 1, sc in first st, (ch 2, sk 2 sts, sc in next st) across. Turn.
Row 2 (WS): Chain 1, sc in first sc, (ch 2, sc in next sc) across. Turn.
Repeat Rows 1 and 2 for pattern. The total stitch count in the foundation row must be divisible by 3 plus 1 additional sc at the end.
Wing Tip Spike
At the designated wing tip point, work: sc in tip st, ch 7, sc in 2nd ch from hook, sc in each of next 5 ch, sl st in same tip st. This creates a small free-standing spike forming the jagged lower wing tip characteristic of the Morpho wing shape.
Important Pattern Notes Before You Begin
Please read these notes carefully. They will save you confusion later.
1. The cape is worked flat as a single large piece starting from the center back neck edge. The work expands outward in all directions using increases placed at four key shaping points per row.
2. Mark the right side at the beginning with a locking stitch marker. The right side faces outward when worn.
3. Color changes follow a gradient from Color D (Bright Cyan) at the center through Color C, Color B, and finally Color A (Deep Navy) at the outer edges. Carry unused colors loosely along the edge or cut and rejoin. If carrying colors, do not carry more than 6 rows before trapping the float.
4. The shoulder yoke section uses honeycomb mesh to create the open lattice texture visible across the top of the cape.
5. The butterfly body is crocheted separately in black yarn, stuffed lightly, then sewn to the center spine.
6. The wing venation is surface slip stitched after blocking. Do not attempt venation before blocking as the fabric will shift.
7. All turning chains of chain 1 do not count as a stitch unless specifically stated.
8. Place stitch markers at each of the 4 shaping increase points at the beginning. Label them: Left Outer Wing (LOW), Left Inner Wing (LIW), Right Inner Wing (RIW), Right Outer Wing (ROW).
Step by Step Instructions
Section 1: Foundation and Center Back Neck Yoke
The cape begins at the center back neck with a foundation chain. The yoke is worked in honeycomb mesh for the first 12 rows.
Using Color D and E-4 hook, chain 52.
Row 1 (Foundation Row, RS): Sc in 2nd ch from hook, (ch 2, sk 2 ch, sc in next ch) across, ending with sc in last ch. Turn. (18 sc, 16 ch-2 spaces)
Row 2 (WS): Chain 3, sc in first ch-2 sp, (ch 2, sc in next ch-2 sp) across, ch 2, sc in last sc. Turn. (18 sc, 17 ch-2 spaces)
Row 3 (RS): Chain 3, sc in first ch-2 sp, (ch 2, sc in next ch-2 sp) across, ch 2, sc in last sc. Turn. (19 sc, 18 ch-2 spaces)
Row 4 (WS): Chain 3, sc in first ch-2 sp, (ch 2, sc in next ch-2 sp) across, ch 2, sc in last sc. Turn. (20 sc, 19 ch-2 spaces)
Row 5 (RS): Chain 3, sc in first ch-2 sp, (ch 2, sc in next ch-2 sp) across, ch 2, sc in last sc. Turn. (21 sc, 20 ch-2 spaces)
Row 6 (WS): Chain 3, sc in first ch-2 sp, (ch 2, sc in next ch-2 sp) across, ch 2, sc in last sc. Turn. (22 sc, 21 ch-2 spaces)
Row 7 (RS): Chain 3, sc in first ch-2 sp, (ch 2, sc in next ch-2 sp) across, ch 2, sc in last sc. Turn. (23 sc, 22 ch-2 spaces)
Row 8 (WS): Chain 3, sc in first ch-2 sp, (ch 2, sc in next ch-2 sp) across, ch 2, sc in last sc. Turn. (24 sc, 23 ch-2 spaces)
Row 9 (RS): Chain 3, sc in first ch-2 sp, (ch 2, sc in next ch-2 sp) across, ch 2, sc in last sc. Turn. (25 sc, 24 ch-2 spaces)
Row 10 (WS): Chain 3, sc in first ch-2 sp, (ch 2, sc in next ch-2 sp) across, ch 2, sc in last sc. Turn. (26 sc, 25 ch-2 spaces)
Row 11 (RS): Chain 3, sc in first ch-2 sp, (ch 2, sc in next ch-2 sp) across, ch 2, sc in last sc. Turn. (27 sc, 26 ch-2 spaces)
Row 12 (WS): Chain 3, sc in first ch-2 sp, (ch 2, sc in next ch-2 sp) across, ch 2, sc in last sc. Turn. (28 sc, 27 ch-2 spaces)
Checkpoint 1: After Row 12 the yoke should measure approximately 10 inches / 25.5 cm wide across the center back and approximately 5 inches / 12.5 cm tall. The mesh should be open and lacy.
Section 2: Transition Row to Solid Fabric
Row 13 (RS, Transition): Chain 1, sc in first sc, (2 sc in ch-2 sp, sc in next sc) across. Turn. (82 sc)
Place stitch markers as follows:
The center 2 stitches (41 and 42) represent the center spine of the butterfly.
Section 3: Upper Wing Shaping (Rows 14 Through 55)
In this section the cape grows outward to form the upper wing lobes. Four increases are worked every RS row at the inner markers.
Color sequence:
Row 14 (WS): Chain 1, sc in each sc across. Turn. (82 sc)
Row 15 (RS, increase row): Chain 1, sc in each sc to 1 st before LIW marker, 2 sc in next st (inc before LIW), sm, 2 sc in next st (inc after LIW), sc across to 1 st before RIW marker, 2 sc in next st (inc before RIW), sm, 2 sc in next st (inc after RIW), sc across to end. Turn. (86 sc)
Row 16 (WS): Chain 1, sc in each sc across. Turn. (86 sc)
Row 17 (RS, increase row): Repeat Row 15 shaping. Turn. (90 sc)
Continue in this established pattern, working WS rows even (no increases) and RS rows with 4 increases at the inner markers.
Row 18 (WS): 90 sc
Row 19 (RS): 94 sc
Row 20 (WS): 94 sc
Row 21 (RS): 98 sc
Row 22 (WS): 98 sc
Change to Color C.
Rows 23-34: Continue pattern. After Row 34: (122 sc)
Change to Color B.
Rows 35-46: Continue pattern. After Row 46: (146 sc)
Change to Color A.
Rows 47-55: Continue pattern. After Row 55: (166 sc)
Checkpoint 2: The cape body should measure approximately 21 inches wide and 14.5 inches tall from the foundation chain.
Section 4: Upper Wing Tip Shaping (Rows 56 Through 70)
The outer edges are now tapered while center increases continue.
Row 56 (WS): Chain 1, sc in each sc across. Turn. (166 sc)
Row 57 (RS): Chain 1, sc2tog over first 2 sc, sc across to 1 st before LIW, inc, sm, inc, sc across to 1 st before RIW, inc, sm, inc, sc across to last 2 sc, sc2tog. Turn. (168 sc)
Row 58 (WS): Chain 1, sc in each sc across. Turn. (168 sc)
Continue this pattern through Row 66: (176 sc)
Row 67 (RS): Chain 1, sc2tog twice, sc across to 1 st before LIW, inc, sm, inc, sc across to 1 st before RIW, inc, sm, inc, sc across to last 4 sc, sc2tog twice. Turn. (176 sc)
Rows 68-70: Continue with double decreases at edges and 4 center increases, maintaining (176 sc)
Section 5: Lower Wing Lobe Shaping (Rows 71 Through 110)
The lower wing lobes extend below the upper wings using short rows. Divide the work at the center 2 stitches (held on a stitch marker as the spine).
Color sequence:
Work the left wing half (stitches 1 through 87) first, increasing at the lower outer edge on every RS row as specified in the detailed pattern. Then work the right wing half to match.
The lower wing sections build the characteristic scalloped shape with pointed projections. Follow the row-by-row instructions for each half, changing colors at the specified rows.
Finishing Your Butterfly Cape
Blocking
Wet block your cape before adding the venation. Soak in lukewarm water with a small amount of wool wash for 20 minutes. Gently squeeze out excess water without wringing. Lay flat on blocking mats and pin to the finished dimensions, stretching the wing tips gently outward. Allow to dry completely before removing pins.
Surface Slip Stitch Venation
Using black yarn and the E-4 hook, work surface slip stitch veins radiating from the center spine outward toward the wing tips. Study photographs of Blue Morpho butterflies for authentic vein placement. Each wing should have approximately 8 to 10 main vein lines with smaller branching veins.
Butterfly Body Construction
Using black yarn and the D-3 hook, create a stuffed tubular body approximately 12 inches long. Work single crochet in the round, stuffing lightly with fiberfill as you go. Create a slightly larger head section at one end. Sew the body along the center spine of the cape from the back neck to below the front V opening.
Antennae
Chain 20 with black yarn. Sc in 2nd ch from hook and each ch across. At the tip, work 5 sc in one stitch to create a small ball. Fasten off. Make two. Attach at the center back neck on either side of the body.
Picot Edging
Work picot-3 edging along the entire outer edge of the wings, using picot-5 at the pointed wing tip projections for extra emphasis.
Tips for Success
This is a big project. Take your time and enjoy the process. I recommend working on it in sections and taking breaks between major shaping changes.
Keep your tension consistent, especially when changing colors. Uneven tension will show in the finished gradient.
The surface slip stitch venation is easier than it looks. Practice on your gauge swatch first if you are nervous. Go slowly and the lines will look crisp and professional.
Block generously. This fabric transforms with blocking. The honeycomb mesh opens up beautifully and the wings take on their proper shape.
Wear Your Butterfly Wings with Pride
You did it. You created wearable art. This Blue Morpho Butterfly Cape is the kind of project that stops people in their tracks. The gradient, the venation, the dimensional butterfly body, and those dramatic wing tips all come together to create something truly special.
Throw it over your shoulders at a festival, wear it to a costume event, or simply drape it around yourself when you need to feel magical. This cape is a statement piece, and you made it with your own hands.
Thank you so much for choosing to make this butterfly cape crochet pattern. I really hope you love the finished piece as much as I loved designing it. If you make one, please tag me on Instagram or share in my Facebook group. I would absolutely love to see your color choices and finished wings.
Save this pattern to your Pinterest boards so you can find it when you are ready to start. And please leave a comment below if you make it or have any questions along the way. I am always happy to help, and I genuinely love hearing from you.
You Might Also Like
- Lavender Lace Summer Two-Piece Free Crochet Pattern
- Ocean Wave Butterfly Crochet Dress Free Pattern
- Emerald Green Holiday Baby Romper Free Crochet Pattern
- Sage Green Boho Granny Square Dress Free Crochet Pattern
