
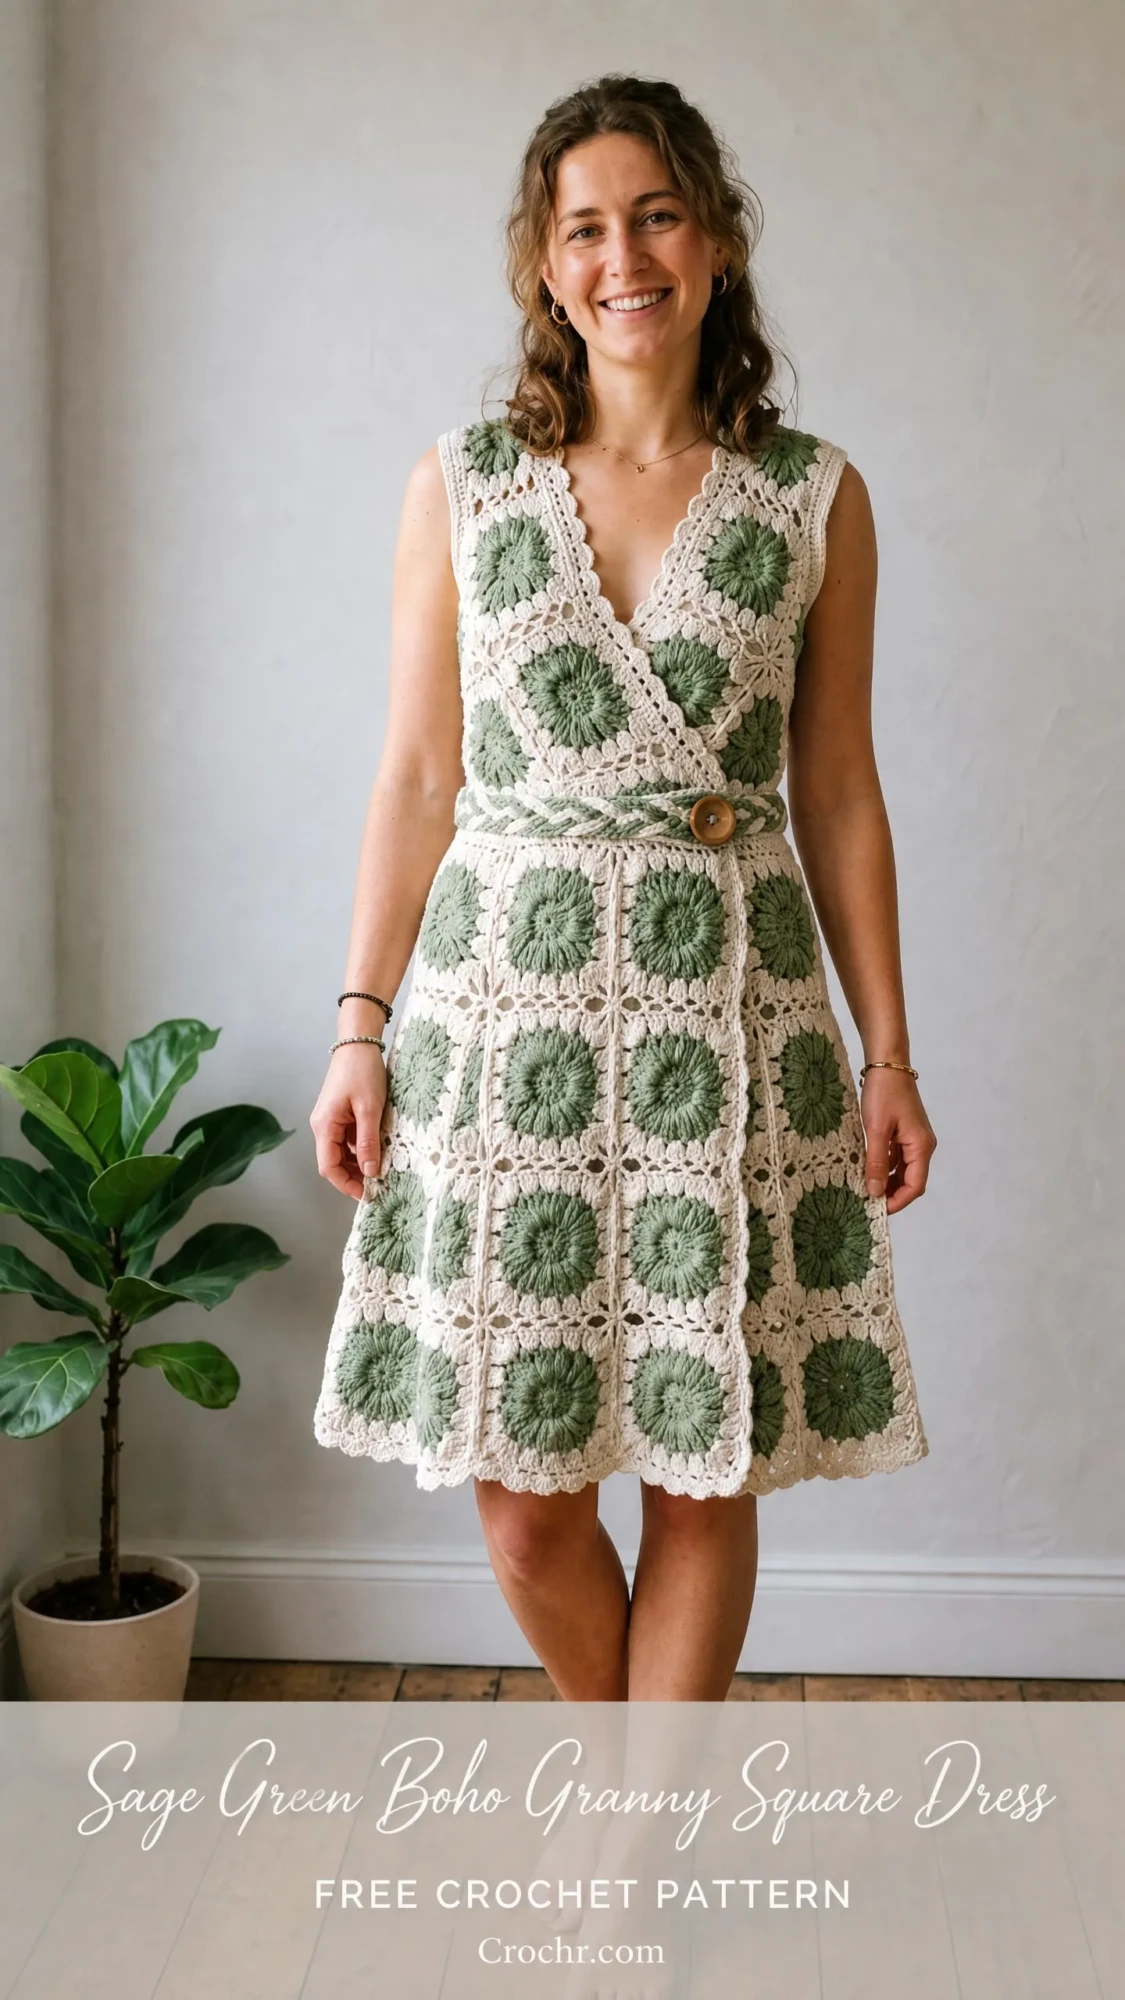
I’ve been looking for the perfect summer dress pattern for ages. Something that feels handmade and special without looking costume-y. This sage green boho granny square dress is my absolute favourite find. The raised sunflower centers pop beautifully against the cream borders, and that wrap bodice detail? Chef’s kiss.
This is definitely a project for someone ready to level up their skills. But don’t let the "advanced intermediate" label scare you off. If you’ve made granny squares before and completed at least one garment, you can absolutely do this.
Let me walk you through everything you need to know to create this stunning knee-length dress from start to finish.
Why This Granny Square Dress Pattern Works
The magic of this design comes from the construction method. Each motif features a raised sunflower center worked in sage green, surrounded by cream lace-style square borders. When you join them together using the join-as-you-go technique, you get seamless connections without any sewing.
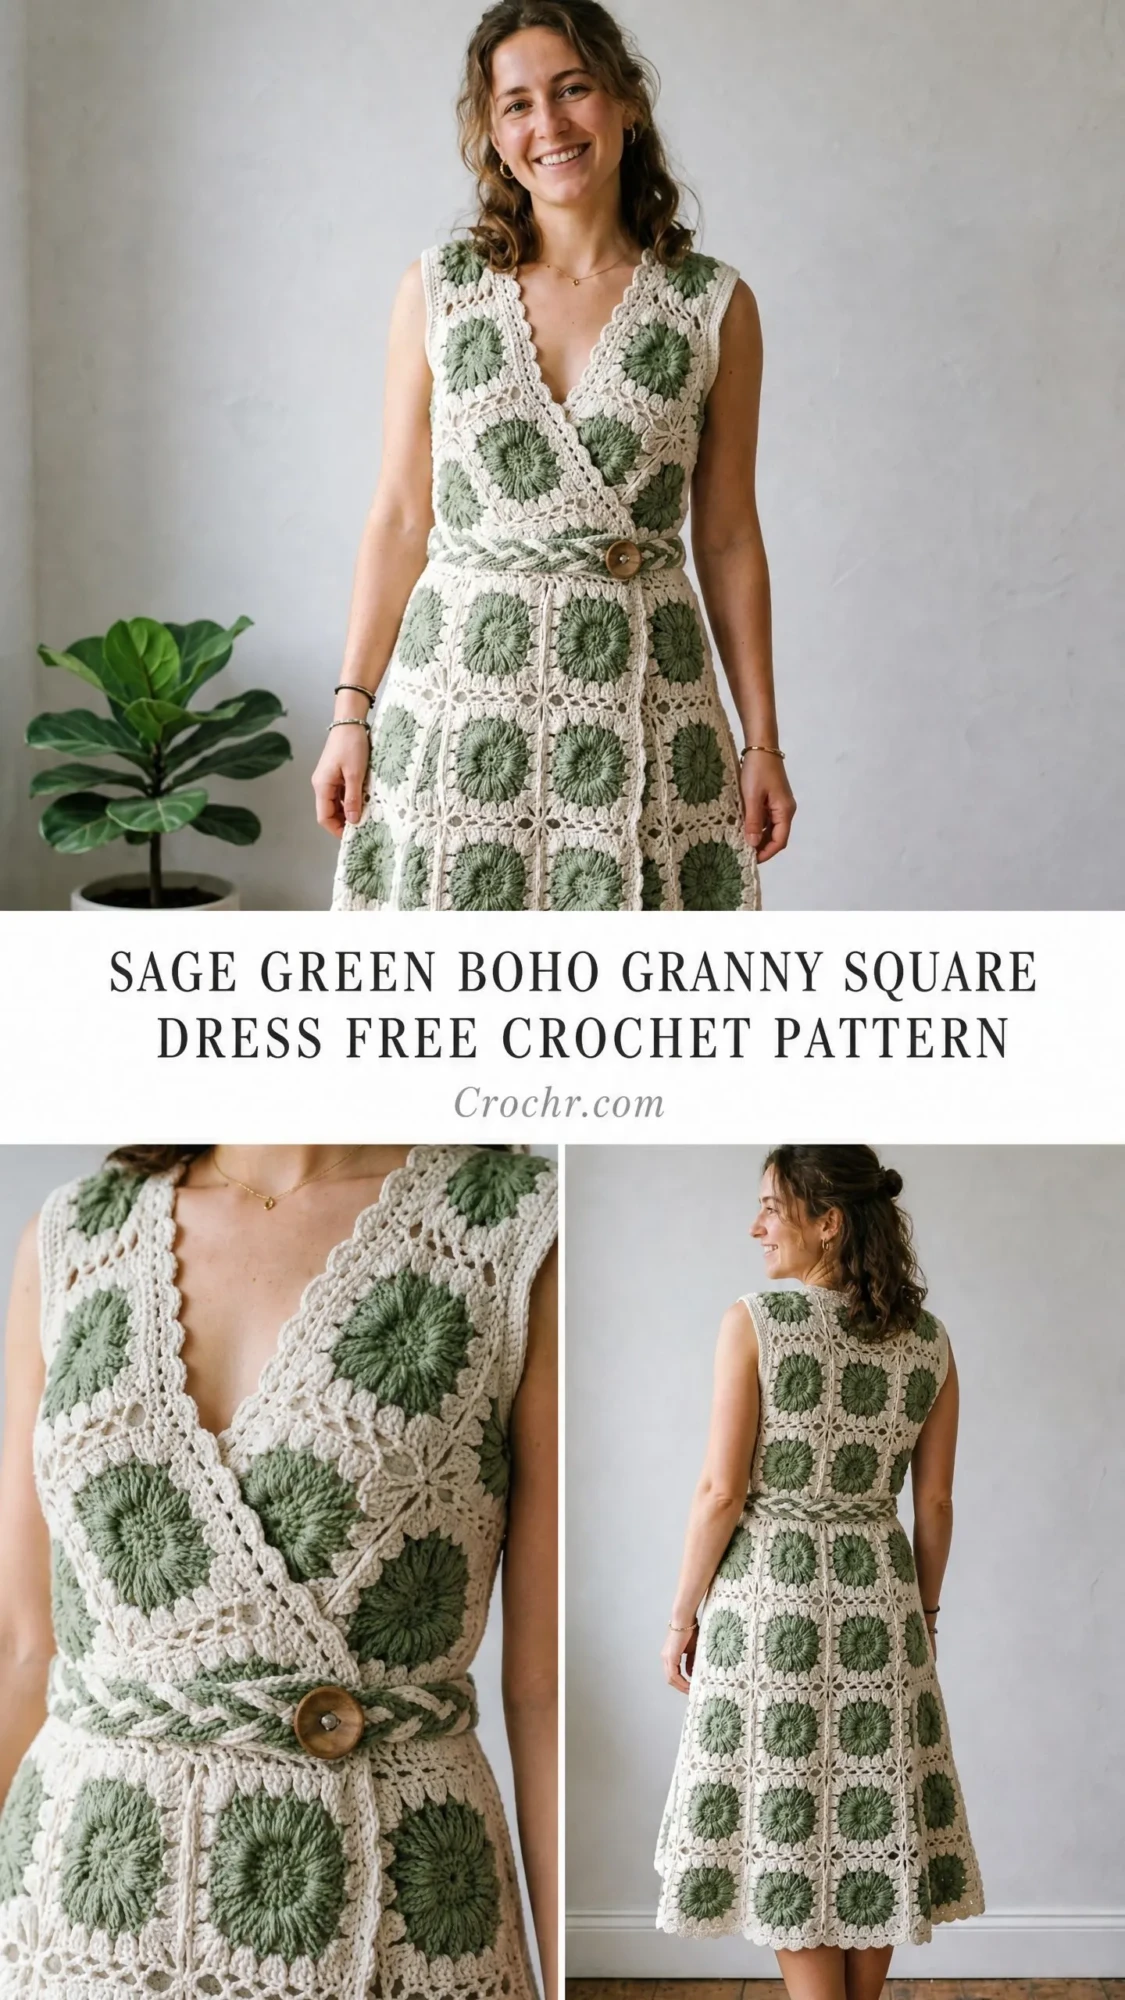
The wrap-style bodice creates a flattering deep V-neckline, and the skirt flares gently from the hip in an A-line silhouette. A braided belt with a wooden button closure cinches everything at the waist. The scalloped edging on the neckline, armholes, and hem adds that perfect finishing touch.
This crochet pattern is written for a women’s size Medium (US 8-10 / EU 38-40), but I’ve included size customization guidance at the end so you can adjust up or down.
Finished Measurements
Before you start, here’s what you’re working toward:
Materials You’ll Need
Yarn A (Sage Green): Approximately 1000 yds / 914 m of DK weight cotton yarn
Yarn B (Cream): Approximately 1550 yds / 1417 m of DK weight cotton yarn
Hook: US size E-4 / 3.5 mm
Notions:
Yarn Suggestions
Option 1: Lion Brand 24/7 Cotton in Sage (Yarn A) and Ecru (Yarn B). 186 yds / 170 m per 3.5 oz / 100 g skein. You will need 6 skeins Sage and 9 skeins Ecru.
Option 2: Paintbox Yarns Simply DK in Grass Green (Yarn A) and Vanilla Cream (Yarn B). 137 yds / 125 m per 1.75 oz / 50 g skein. You will need 8 skeins Green and 12 skeins Cream.
Option 3: Drops Safran in Sage Green (Yarn A) and Off-White (Yarn B). 175 yds / 160 m per 1.75 oz / 50 g skein. You will need 7 skeins Green and 10 skeins Cream.
Substitution Note: Choose a smooth, tightly plied DK weight cotton or cotton-blend yarn. Avoid fuzzy or textured yarns, which will obscure the raised petal stitch detail. Linen-cotton blends work beautifully and give excellent stitch definition with lovely drape. Always make a gauge swatch before beginning.
Gauge
1 blocked motif = 4 in x 4 in / 10 cm x 10 cm using E-4 / 3.5 mm hook
20 sc x 24 rows = 4 in / 10 cm in single crochet (used as reference for edgings)
Gauge is critical for garment fit. Adjust hook size as needed to achieve the correct motif size. If your motif is larger, go down one hook size. If smaller, go up one hook size.
Abbreviations (US Terms)
Let me break down every stitch abbreviation you’ll encounter:
Special Stitches Explained
Front Post Treble Crochet (FPtr)
This is the stitch that creates those beautiful raised petals. Here’s how to work it:
1. Yarn over twice
2. Insert hook from front to back to front around the post of the designated stitch
3. Yarn over and pull up a loop (4 loops on hook)
4. Yarn over, pull through 2 loops three times
The petals pop forward toward you, creating that gorgeous sunflower texture.
Picot
Chain 3, then slip stitch into the first chain made. This creates a tiny decorative bump.
Join-As-You-Go (JAYG)
When working the final round of a new motif, at each corner and side joining point, replace the ch-2 corner space or ch-1 side space with: ch 1, sl st into the corresponding space of the adjacent completed motif, ch 1. This creates a flat, seamless join without sewing.
Standing Double Crochet
Begin with a slip knot on hook. Yarn over, insert hook into designated stitch or space, yarn over and pull up a loop, yarn over and pull through 2 loops twice. This creates a dc without a starting chain and is used to rejoin yarn invisibly.
Time Estimate
Plan for 60 to 80 hours for a size Medium. That’s approximately 40 to 50 minutes per motif, plus additional time for joining, edging, belt, and blocking.
This is a marathon project, not a sprint. I recommend working on it over several weeks or months, making motifs during TV time or while traveling.
Pattern Notes Before You Begin
Read these carefully. They’ll save you confusion later.
Basic Granny Sunflower Motif Instructions
Make 96 total.
Using Yarn A (sage green), make a magic ring (MR).
Round 1: Ch 3 (counts as first dc), work 11 dc into MR, pull ring closed. Sl st to top of beginning ch-3 to join. (12 dc)
Round 2: Ch 1, FPtr around the next dc, ch 1; rep from around. Sl st to first FPtr to join. (12 FPtr, 12 ch-1 sps)
Round 3: FPtr around the next FPtr from Round 2 (inserting hook below the ch-1 of Round 2 to reach the post), ch 1; rep from around. Sl st to first FPtr. (12 FPtr, 12 ch-1 sps)
The petals from Rounds 2 and 3 stack and fan, creating the raised sunflower texture. This is where the magic happens.
Fasten off Yarn A. Join Yarn B with standing dc in any ch-1 sp.
Round 4: Ch 2, dc in same ch-1 sp (half corner started), dc in next ch-1 sp, dc in next ch-1 sp, (2 dc, ch 2, 2 dc) in next ch-1 sp (corner made); rep from 2 more times, dc in next ch-1 sp, dc in next ch-1 sp, 2 dc in beg ch-1 sp, ch 2, sl st to top of first dc to join. (28 dc, 4 ch-2 corner sps)
Round 5: Sl st into ch-2 corner sp, ch 3 (counts as dc), (dc, ch 2, 2 dc) in same corner sp (corner), ch 1, sk 2 dc, dc in next dc, ch 1, sk 2 dc, dc in next dc, ch 1, sk 2 dc, (2 dc, ch 2, 2 dc) in corner ch-2 sp (corner); rep from 2 more times, ch 1, sk 2 dc, dc in next dc, ch 1, sk 2 dc, dc in next dc, ch 1, sk 2 dc, sl st to top of beginning ch-3. (8 corner dc pairs, 8 single dc, 12 ch-1 sps, 4 ch-2 corner sps)
Round 6 (Border/Joining Round): Sl st into corner ch-2 sp, ch 3 (counts as dc), (dc, ch 2, 2 dc) in same sp, ch 1, (2 dc, ch 1) in next ch-1 sp, dc in next single dc, ch 1, (2 dc, ch 1) in next ch-1 sp, (2 dc, ch 2, 2 dc) in next corner ch-2 sp; rep from 2 more times, ch 1, (2 dc, ch 1) in next ch-1 sp, dc in next single dc, ch 1, (2 dc, ch 1) in next ch-1 sp, sl st to top of beginning ch-3. Fasten off.
Blocked motif measurement checkpoint: Each finished motif should measure exactly 4 in x 4 in / 10 cm x 10 cm after blocking.
Dress Construction Overview
Build the dress in this order:
1. Back panel (upper and lower)
2. Right front bodice panel
3. Left front bodice panel (with wrap overlap)
4. Shoulder joining and armhole finishing
5. Hip and skirt extension
6. Neckline edging
7. Armhole edging
8. Hem edging
9. Belt loops
10. Braided belt
Section 1: Back Panel
The back panel is a rectangle of motifs, 5 motifs wide and 9 rows tall, with a 1-motif-wide center split at the top 3 rows to create the open back detail.
Total motifs for back: 42
Back Panel Rows 4-9 (Full Width, Worked First)
Make 30 motifs and join in a 5-wide x 6-tall grid using JAYG on Round 6.
Joining order: Work bottom row (Row 9, closest to hem) first from left to right. Join each new motif to the left neighbor. Then work Row 8, joining each motif to the motif below it and to the left neighbor. Continue upward through Row 4.
For JAYG corner joins: At each shared corner point where 4 motifs meet, work the ch-2 corner of the new motif as follows: ch 1, sl st into the ch-2 sp of the adjacent already-joined motif, ch 1.
For JAYG side joins: At each ch-1 sp along a shared edge, replace ch 1 with: sl st into the corresponding ch-1 sp of the adjacent motif.
Checkpoint: The lower back panel rectangle should measure 20 in / 51 cm across and 24 in / 61 cm tall.
Back Panel Rows 1-3 (Split Upper Back)
Left back upper section: Make 6 motifs. Join in a 2-wide x 3-tall grid. Join the bottom edge of this section to the left 2 motifs of Row 4 of the lower back panel.
Right back upper section: Make 6 motifs. Join in a 2-wide x 3-tall grid. Join the bottom edge to the right 2 motifs of Row 4 of the lower back panel.
The center column remains open, forming the open back detail.
Section 2: Right Front Bodice Panel
The right front bodice covers the right chest and wraps to center front. It is 3 motifs wide x 5 motifs tall.
Make 15 motifs. Join in a 3-wide x 5-tall grid.
Join the outer right edge of the right front panel to the right upper back panel: the top 2 rows of the right front join to the 2 motifs of the right upper back section at the shoulder. This creates the right shoulder seam (2 motifs wide = 8 in / 20 cm shoulder).
Section 3: Left Front Bodice Panel
The left front bodice is also 3 motifs wide x 5 motifs tall (15 motifs), but it overlaps the right front at center front by approximately half a motif width. The left panel sits on top of the right panel at the wrap point.
Join left front motifs in a 3-wide x 5-tall grid.
Join the outer left edge of the left front panel to the left upper back at the shoulder.
The wrap overlap extends past center front by 2 in / 5 cm. This overlap is secured invisibly with a few stitches at the waist level when the belt is applied.
Section 4: Skirt and Hip Extension
Front skirt extension: 24 motifs total, arranged as follows:
Side joining: Join the outer edges of the front skirt to the outer edges of the back lower panel at the side seams using sl st through both outer edge ch-1 sps on wrong side.
Section 5: Neckline Edging
With RS facing, join Yarn B at center back top of back panel.
Round 1: Ch 1, sc evenly around entire neckline, working 1 sc per dc along motif edges, 1 sc per ch-1 sp, and 3 sc into each outer corner of a motif. Sl st to first sc to join.
Adjust to a multiple of 3 by working sc2tog or 2 sc into one space as needed.
Round 2: Sk 1 sc, 5 dc in next sc (shell made), sk 1 sc, sl st in next sc; rep from around. Sl st to first st to join. Fasten off.
Section 6: Armhole Edging
Work on both armhole openings.
With RS facing, join Yarn B at underarm point.
Round 1: Ch 1, sc evenly around armhole opening. Adjust to a multiple of 3. Sl st to first sc.
Round 2: Sk 1 sc, 5 dc in next sc, sk 1 sc, sl st in next sc; rep from around. Sl st to join. Fasten off.
Section 7: Hem Edging
With RS facing, join Yarn B at one side seam at the hem.
Round 1: Ch 1, sc evenly along the entire hem. Adjust to a multiple of 3. Sl st to first sc.
Round 2: Sk 1 sc, 5 dc in next sc, sk 1 sc, sl st in next sc; rep from around. Sl st to join. Fasten off.
Section 8: Open Back Edging
With RS facing, join Yarn B at bottom of the open back gap.
Row 1: Ch 1, sc evenly up the right inner edge of the open back, across the top, and down the left inner edge. Turn.
Row 2: Ch 1, sc in each sc across. Fasten off.
Section 9: Belt Loops
Make 2 belt loops.
With Yarn B, join yarn at the side seam join at waist level.
Ch 8, sl st into the same join point to form a small ring. Fasten off and weave in end.
Repeat on opposite side seam.
Section 10: Braided Belt
With Yarn B, make 3 chains, each 90 ch long. Fasten off each.
Hold all 3 together, knot at one end, and braid the full length. Knot at the other end. Trim ends neatly. The finished braid should measure approximately 50 in / 127 cm.
Sew 1 wooden button at the center of the braid, or position it so the button rests at the wrap overlap point on the left front when the belt is tied.
Size Customization Tips
To go up one dress size (size L / US 12-14): Add 1 additional motif column to the front panel on each side (front becomes 4 motifs wide per panel instead of 3).
To go down one size (size S / US 4-6): Reduce front panel to 2 motifs wide per panel.
For length adjustments: Each additional row of motifs adds 4 in / 10 cm to the length. Add or remove rows from the skirt sections only.
Blocking and Finishing
Wet blocking is essential for cotton yarns. Do not skip this step.
Before joining: Block each individual motif by soaking in cool water for 10-15 minutes, gently squeezing out excess water (do not wring), pinning to blocking mat to exact 4 in x 4 in dimensions, and allowing to dry completely.
After assembly: Mist the entire assembled dress with cool water from a spray bottle. Gently smooth and shape on a flat surface. Pin scalloped edges into neat arcs. Allow to dry fully before wearing.
Weave in all yarn ends on the wrong side, securing each end with a double knot before trimming.
Care Instructions
Hand wash in cool water with gentle soap. Do not use hot water. Gently press out excess water without wringing. Lay flat to dry on a clean towel or blocking mat. Do not hang dry, as the weight will stretch the joins. Store folded, not on a hanger.
Thank you so much for choosing this pattern for your next big project. I truly hope you love making it as much as I loved designing it. If you create this beautiful boho dress, I’d be thrilled to see your finished piece. Tag me on Instagram or share in my Facebook group.
If this sage green boho granny square dress crochet pattern is calling your name but you’re not quite ready to start, go ahead and save it to your Pinterest boards so you can find it when the time is right. And please drop a comment below if you make one. I absolutely love seeing your creations come to life.
You Might Also Like
- Ocean Blue Pineapple Crochet Crop Top Free Pattern
- Mermaid Tail Sparkle Baby Blanket Free Crochet Pattern
- Cherry Blossom Spring Charm Bracelet Free Crochet Pattern
- Sunset Pink Coral Crochet Platform Wedge Sandals Pattern
