
A Showstopping Halter That Pushes Your Skills to Beautiful New Heights
I set out to design a crop top that would challenge experienced crocheters while delivering that jaw-dropping finished piece you can’t stop admiring. The goals were specific: a seamless construction from neck to hem, traditional pineapple lace that actually flatters the body, and built-in shaping that creates a fitted waist without any seaming headaches.
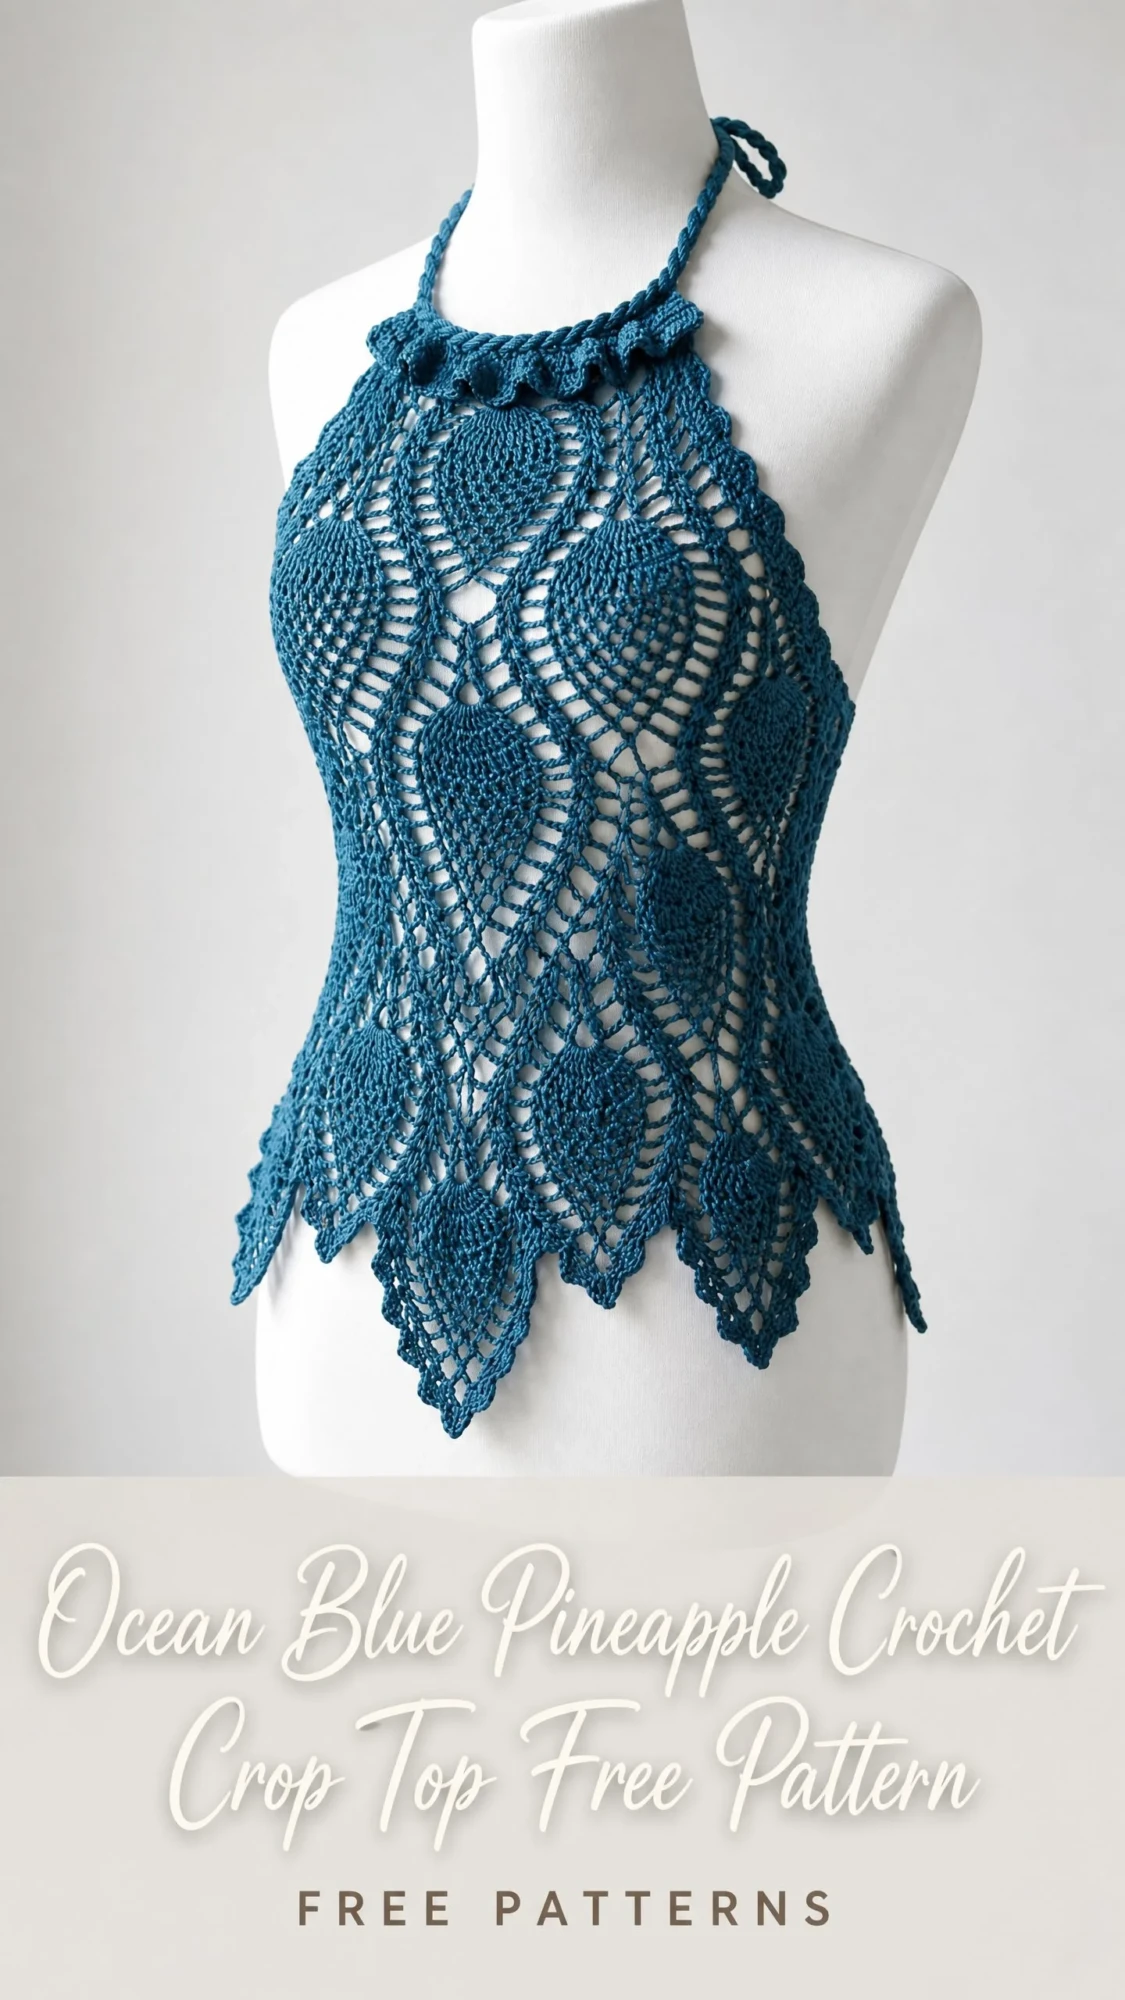
The decisions came one after another. I chose to work from the top down so you could try it on as you go. I incorporated multiple generations of pineapple motifs that overlap and interlock, creating that dense, richly textured look you see in heirloom pieces. And that pointed hem? It happens naturally when you let each pineapple column close at its own pace.
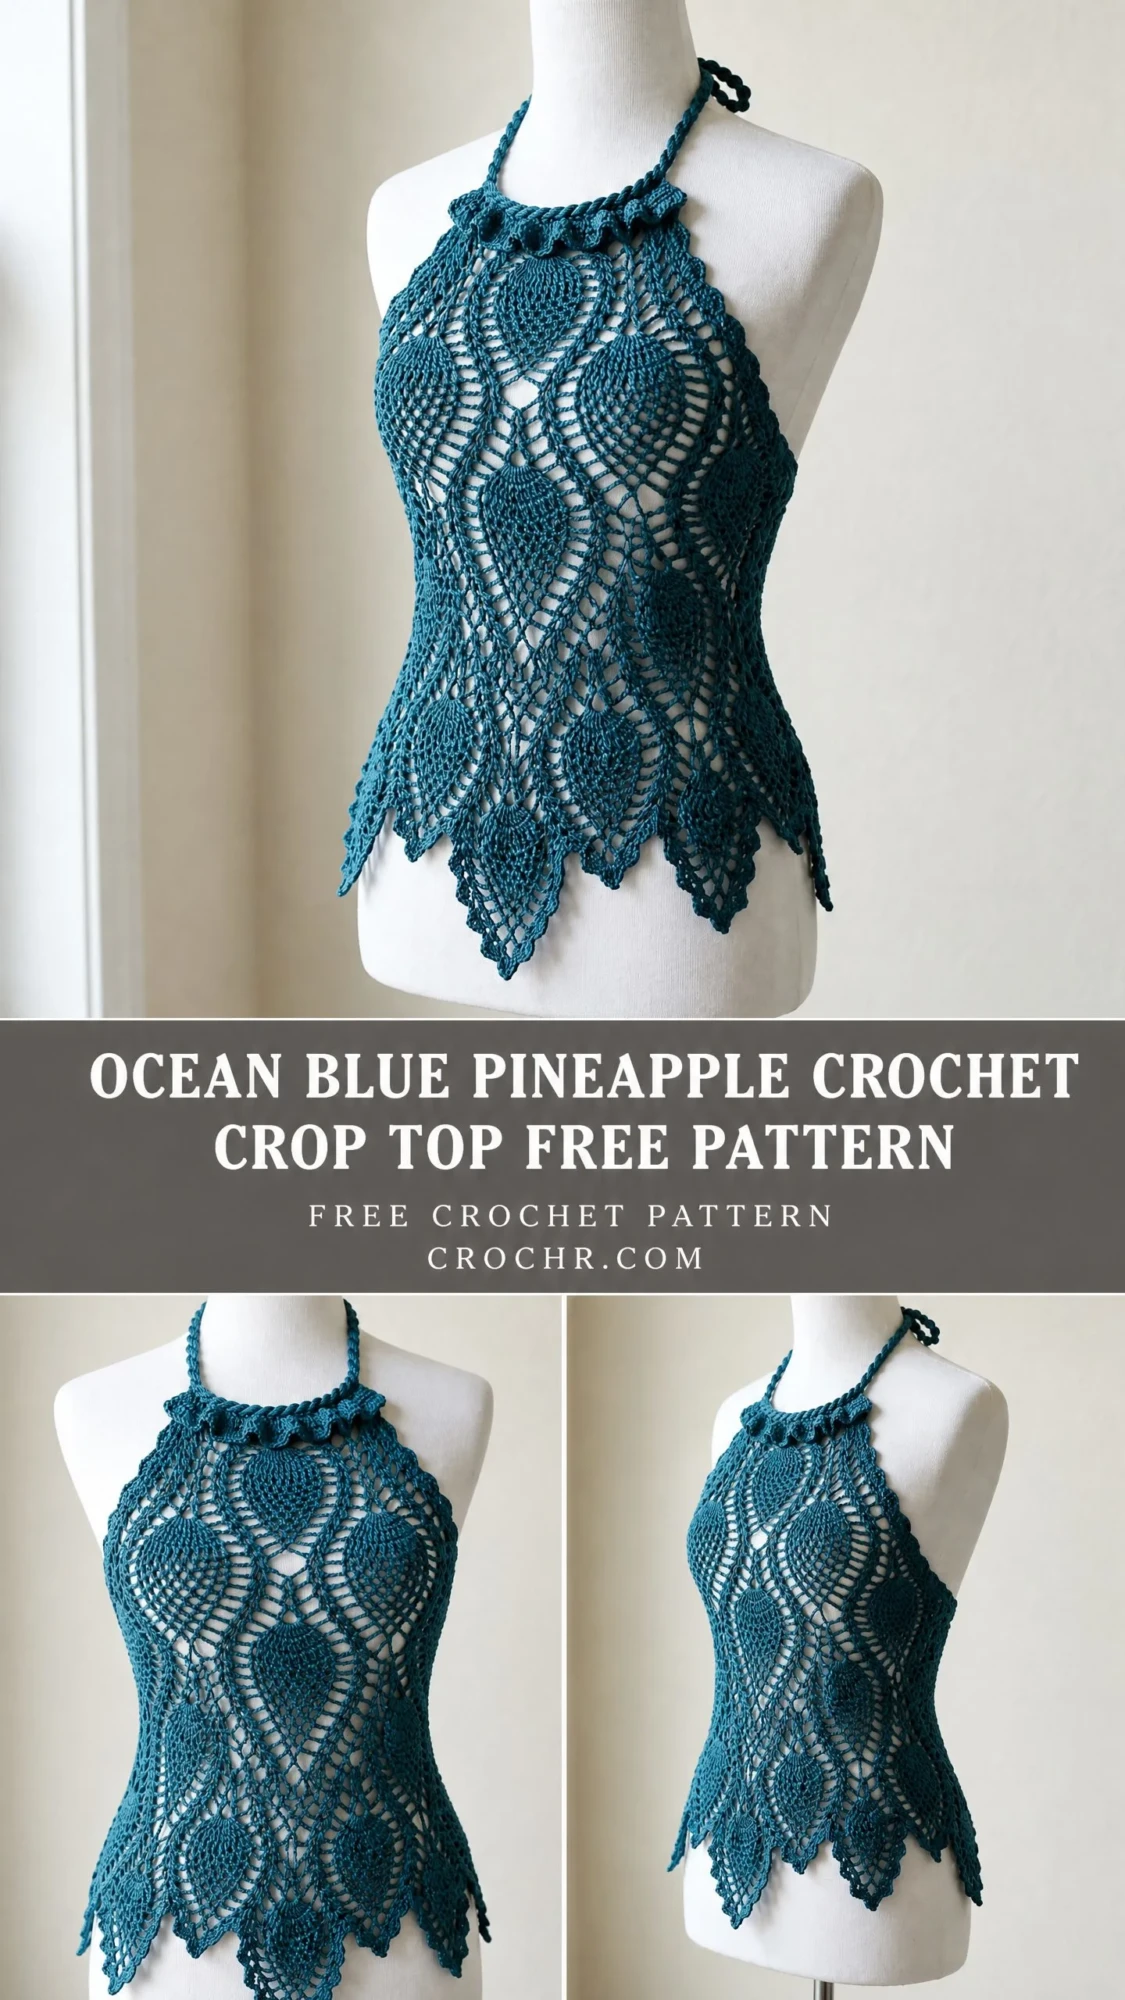
I am SO pleased with how this turned out. The ocean teal color catches the light beautifully through all those open lacework sections, and the silhouette is genuinely flattering. If you’ve been waiting for a project that will truly test your lace crochet abilities, this is the one.
Before You Begin: What to Know About This Pattern
This pineapple crochet crop top is rated advanced, and I mean it warmly but honestly. You’ll need comfortable familiarity with pineapple lace construction, switching between working in the round and in rows, and managing multiple live sections at once. If you’ve completed at least two pineapple dishcloths or doilies, you’re ready. If not, I’d recommend practicing those first. There’s no shame in building skills before tackling a garment.
The construction flows from the neckline down. You’ll start with a foundation chain joined into a ring, work the front and back panels together in the round through the bust and waist, then separate to create the open-back halter silhouette. The hem falls into natural pineapple points, giving you that gorgeous scalloped edge without any additional shaping.
Plan for approximately 30 to 45 hours of work depending on your experience level. This is a slow, meditative project. Put on your favorite podcast series and settle in.
Materials You’ll Need
Yarn: Size 3 light/DK-weight cotton or cotton-blend yarn, approximately 900 to 1100 yards total in one color. The sample uses a deep ocean teal.
Recommended Yarn Options:
1. Lion Brand 24/7 Cotton in "Teal" (100% mercerized cotton, 186 yards per 3.5 oz skein). Purchase 5 to 6 skeins. This yarn has excellent stitch definition and drapes beautifully in lace patterns without splitting.
2. Paintbox Yarns Cotton DK in "Kingfisher Blue" (100% cotton, 137 yards per 1.75 oz skein). Purchase 7 to 8 skeins. The smooth twist and consistent ply produce crisp pineapple points.
3. WeCrochet Dishie in "Tidepool" (100% cotton, 190 yards per 3.5 oz skein). Purchase 5 to 6 skeins. This one has a slightly rustic texture that gives the lace a handcrafted quality.
Substitution Note: Choose a smooth, tightly plied cotton or cotton-blend in DK weight (approximately 200 yards per 100 g). Avoid fuzzy, textured, or loosely spun yarns because they will obscure the pineapple lace detail. Crochet a test swatch and hold it to the light. You want an open, drapey fabric rather than a stiff one.
Hook: US Size E-4 / 3.5 mm crochet hook. Adjust as needed to meet gauge.
Notions:
Gauge
With E-4 / 3.5 mm hook, after blocking:
One pineapple repeat (from center of mesh column to center of next mesh column) = 2.5 inches / 6.35 cm wide
One pineapple repeat (base chain-space to tip of top shell) = 4 inches / 10 cm tall
Alternatively: 20 dc and 10 rows in standard dc mesh = 4 inches square, blocked.
Gauge is critical for fit. Work a swatch of at least 4 pineapple repeats wide and 2 pineapple repeats tall before beginning. Block your swatch before measuring. Yes, this takes extra time. Yes, it’s worth it.
Finished Measurements
Shown in size Small/Medium.
See Size Customization Tips at the end for adjusting up or down.
Abbreviations and Stitch Definitions
Let me walk you through each abbreviation before we begin. Knowing these cold will make the pattern much easier to follow.
Special Stitches for This Crochet Pattern
Pineapple Shell (Psh)
Work 9 dc all into the same chain-space or stitch. This forms the full pineapple body. Over successive rows, you’ll decrease one dc each row until a single dc or sc remains at the tip.
V-Stitch (V-st)
Work (dc, ch 2, dc) all into the same stitch or space. This creates a V-shaped cluster with a chain space in the center.
Picot
Ch 3, sl st in the first ch of that ch-3. This creates a small decorative loop.
Ruffled Neck Edging (RNE)
Chain Picot Selvedge (CPS)
Work (sl st, ch 3, sl st) in the same stitch. This creates small picot loops for threading the cord.
Twisted Cord
Cut 6 strands of yarn each 3 yards long. Fold in half, anchor the fold, and twist clockwise until the strands begin to kink back on themselves. Fold the twisted length in half, hold both ends together, and allow the cord to twist around itself. Knot both ends to secure. Trim to desired length, leaving tails. The finished cord should measure approximately 30 inches.
Pattern Notes Before Starting
1. The top is worked from the neck down. The neckline foundation chain is joined into a ring and worked in the round.
2. Pineapple motifs are oriented vertically, with the narrow tip pointing upward toward the neckline and the wide base fanning downward toward the hem.
3. Place stitch markers at the beginning of each round and at each pineapple column base to track position.
4. All rounds are worked with RS facing unless otherwise noted.
5. Turning chain counts: For rows worked flat, ch 3 counts as first dc. Ch 1 at beginning of sc rows does not count as a stitch.
Step-by-Step Instructions
Section 1: Neckline Foundation
Foundation Chain:
Ch 120. Sl st in the first ch to form a ring, being careful not to twist. (120 ch)
Note: This 120-chain foundation establishes 6 pineapple column anchors across the front panel (spaced every 10 chains) and 6 across the back panel, with mesh chains between them.
Round 1 (RS): Ch 3 (counts as dc), dc in next ch, (ch 3, sk 3 ch, sc in next ch, ch 3, sk 3 ch, dc in next ch, ch 2, dc in next ch) 11 times, ch 3, sk 3 ch, sc in next ch, ch 3, sk 3 ch, sl st in top of beg ch-3 to join. (12 V-st columns established with sc mesh between; 12 pineapple anchor positions)
Round 2: Sl st into ch-2 sp of first V-st, ch 3, dc in same sp, ch 5, (V-st in ch-2 sp of next V-st, ch 5) 11 times, sl st in top of beg ch-3. (12 V-st, 12 ch-5 arches)
Round 3: Sl st into ch-2 sp, ch 3, dc in same sp, ch 3, sc in ch-5 arch, ch 3, (V-st in ch-2 sp of next V-st, ch 3, sc in ch-5 arch, ch 3) 11 times, sl st in top of beg ch-3. (12 V-st, 24 ch-3 sps, 12 sc)
Round 4: Sl st into ch-2 sp, ch 3, 8 more dc in same sp (Psh = 9 dc), ch 3, sk ch-3 sp, sc in sc, ch 3, (Psh in ch-2 sp of next V-st, ch 3, sk ch-3 sp, sc in sc, ch 3) 11 times, sl st in top of beg ch-3. (12 Psh started; each Psh = 9 dc; 24 ch-3 sps; 12 sc)
Round 5 (Pineapple Row 2 of 9): Sl st across top of first Psh to 5th dc (center dc), ch 1, sc in that dc, ch 5, sc in sc in mesh, ch 5, (sc in center dc of next Psh, ch 5, sc in sc in mesh, ch 5) 11 times, sl st in first sc. (24 ch-5 arches; 24 sc)
Round 6: Sl st into ch-5 arch, ch 3, 8 dc in same arch (9 dc total in arch), ch 2, sc in sc, ch 2, sc in next ch-5 arch, ch 2, sc in sc, ch 2, (9 dc in next ch-5 arch, ch 2, sc in sc, ch 2, sc in next ch-5 arch, ch 2, sc in sc, ch 2) 11 times, sl st in top of beg ch-3. (12 second-tier Psh = 9 dc each; 48 ch-2 sps; 36 sc)
Round 7: Sl st to 2nd dc of first Psh, sc in 2nd dc, (ch 3, sk 1 dc, sc in next dc) 3 times across Psh (creating 3 ch-3 loops across 7 active dc of psh), ch 4, sc in sc, ch 4, sc in sc, ch 4, rep from ( to ) 11 times, sl st in first sc. (12 sets of 3 ch-3 loops; 36 ch-4 sps; 36 sc)
Checkpoint: After Round 7, your piece should measure approximately 2.5 inches from cast-on edge. The pineapple fans should be clearly visible with open mesh between them.
Section 2: Upper Bodice and Bust Expansion
Round 8: Work into each psh group: sc in first ch-3 lp, (ch 3, sc) in each of next 2 ch-3 lps, ch 5, in ch-4 sp work (dc, ch 2, dc) = V-st, ch 5, rep around. Sl st to join. (12 V-st between pineapples established; 12 psh continuation arches; 24 ch-5 sps)
Round 9: Work pineapple continuation on existing columns: sc in ch-3 lp, ch 3, sc in next ch-3 lp. Work new Psh (9 dc) in ch-2 sp of each new V-st. Ch 3, sc in ch-5 arch, ch 3 on each side of new psh. Sl st to join. (12 original psh continuing with 2 ch-3 lps remaining; 12 new Psh = 9 dc each)
Round 10: Continue pineapple reduction on original columns: sc in ch-3 lp, ch 3, sc in next ch-3 lp (1 ch-3 loop remaining per original column). Work Row 2 reduction on new psh: sl st to center dc, sc in center dc, ch 5, sc in sc, ch 5, cont. Sl st to join.
Round 11: Close original psh tips: sc in sole remaining ch-3 lp. Work mesh: ch 4, sc in ch-5 arch, ch 4, sc in sc, ch 4, sc in ch-5 arch, ch 4. New psh at Round 3 of growth: work 9 dc in ch-5 arch. Sl st to join. (12 original psh closed; 12 new psh = 9 dc)
Round 12: In each mesh section between second-generation psh: work V-st in center ch-4 sp. Across second-generation psh: sl st to 2nd dc, (sc in dc, ch 3) across to create 4 ch-3 loops per psh. Sl st to join. (12 V-st in mesh sections; 48 ch-3 arches total)
Round 13: Third-generation psh begin: work 9 dc in ch-2 sp of each V-st. Psh reduction continues on second-gen psh: sc in first ch-3 lp, (ch 3, sc) in next 2 lps, (sc, ch 3) in last lp. Sl st to join. (12 third-gen Psh = 9 dc each; 12 second-gen psh with 3 ch-3 lps active)
Checkpoint: After Round 13, your piece should measure approximately 5 inches from neck edge. The three generations of pineapples should be producing a dense, richly textured lace fabric with motifs visually staggered in an offset arrangement.
Section 3: Waist Shaping
The waist is shaped by tightening the mesh chain-spaces from ch-5 arches to ch-3 arches, then expanding back for the hip.
Round 14: Cont psh on all active columns. Mesh: replace ch-5 arches with ch-4 arches throughout. Sl st to join.
Round 15: Cont psh. Mesh: ch-3 arches throughout (waist tightening begins). Sl st to join.
Round 16: Cont psh. Mesh: ch-3 arches throughout. Sl st to join.
Round 17: Cont psh. Mesh: ch-3 arches throughout. Sl st to join. (Narrowest waist point)
Round 18: Cont psh. Mesh: ch-4 arches throughout (waist beginning to relax). Sl st to join.
Round 19: Cont psh. Mesh: ch-5 arches throughout. Sl st to join.
Checkpoint: After Round 19, your piece should measure approximately 9 inches from the neck edge. The fabric should visibly narrow at the waist (Rounds 15 to 17) and begin opening again.
Section 4: Hip Expansion and Hem Pineapple Generation
Round 20: Cont psh on all active third-gen columns (most should be at mid-reduction, approximately 5 dc active). Work V-st in center of each ch-5 mesh arch. Mesh: ch-5 arches on outer sides of each V-st. Sl st to join.
Round 21: Work 9 dc in ch-2 sp of each new V-st (fourth-gen psh begin). Cont psh on third-gen columns. Mesh: ch-5 arches. Sl st to join.
Round 22: Cont all active psh. Fourth-gen psh Row 2: sc in center dc of each fourth-gen psh, ch-5 arch to mesh sc, ch-5 arch. Third-gen psh continue reduction toward tip. Sl st to join.
Round 23: Fourth-gen psh Row 3: 9 dc in ch-5 arch. Third-gen psh cont toward tip or close tips as needed. Sl st to join.
Round 24: Fourth-gen psh Row 4: sl st to center dc, sc in center dc, ch-5 arch both sides. Third-gen psh continue closing. Sl st to join.
Round 25: Fourth-gen psh Row 5: 9 dc in ch-5 arch (psh now at widest point). Any remaining third-gen psh should be at final tip or closed. Sl st to join.
Round 26: Fourth-gen psh Row 6: (sc in dc, ch 3) across all 9 dc of each fourth-gen psh = 4 ch-3 arches per psh. Mesh: ch-5 between psh groups. Sl st to join.
Round 27: Fourth-gen psh Row 7: sc in first ch-3 lp, (ch 3, sc) in each of next 3 lps = 3 ch-3 arches active. Ch 5 mesh between groups. Sl st to join.
Round 28: Fourth-gen psh Row 8: sc in first ch-3 lp, (ch 3, sc) in each of next 2 lps = 2 ch-3 arches active. Ch 5 mesh. Sl st to join.
Round 29: Fourth-gen psh Row 9: sc in ch-3 lp, ch 3, sc in next ch-3 lp = 1 ch-3 arch active. Ch 5 mesh. Sl st to join.
Round 30 (Final Pineapple Tip Row): Sc in sole ch-3 lp of each psh (tip point created). Work (ch 5, sc) in each ch-5 mesh arch between psh groups. Sl st in first sc. Do NOT fasten off.
Checkpoint: After Round 30, your piece should measure approximately 15 to 16 inches from the neck edge at the deepest pineapple points.
Section 5: Hem Edging
Round 31 (Scallop Fill Round): In each ch-5 arch between psh tips, work (sc, hdc, 5 dc, hdc, sc) = 1 scallop shell per arch. At each psh tip sc: work (sc, picot, sc). Sl st to join. Do NOT fasten off.
Round 32 (Picot Finish Round): Sl st into top of each dc of each scallop shell, working (sl st, ch 3, sl st) = 1 picot at top of each of the 5 dc of every scallop. Sl st into each sc and hdc. Sl st in each psh-tip sc. Sl st to join. Fasten off.
Section 6: Separation for Open Back and Back Panel
Return to Round 13 with a new length of yarn attached at the back center. Working only across the back half (approximately 60 working stitches), work rows 14 through 30 as flat rows, turning at each row end. Turn with ch 3 at the beginning of each dc row and ch 1 at the beginning of each sc row.
Side Selvedge Decrease (for back panel only): On Rows 14 to 18, work the outermost pineapple column on each side one reduction row ahead of the interior columns. This produces a slight inward taper at the sides.
Work Rounds 31 and 32 (hem edging) across the back panel hem identically to the front.
Section 7: Side Panels and Joining
Hold front and back panels with RS together at the left side. With a new length of yarn, sl st through corresponding mesh arches along the side edge, spacing joins approximately every 0.5 inch. Fasten off. Repeat for the right side. The side join extends from approximately 4 inches below the armhole to the hem.
Section 8: Neckline Ruffle and Cord Casing
Round 1 of RNE: Join yarn at center back of neck opening. Work 1 sc in each chain of the foundation ring around the entire neck opening. Sl st to join. (120 sc)
Round 2 of RNE: Ch 1, work 3 sc in every sc around. Sl st to join. (360 sc)
Round 3 of RNE: Sl st loosely in each sc around. Sl st to join. Fasten off.
Cord Casing Row: With RS facing, working into the back loops only of Round 1 RNE stitches, join yarn at right side of neck front center. Work (sl st, ch 3, sl st) = CPS in back loop of each sc around the front neckline arc (approximately 60 sts). Fasten off.
Section 9: Twisted Cord Tie
Make 1 Twisted Cord as described in Special Stitches. Thread through the CPS picot loops along the inner front neckline. Bring both cord ends out at the back neck corners, cross them behind the neck, and tie.
Size Customization Tips
To go up one size (38 to 40 inch bust): Add 20 chains to the foundation ring (140 chains total). Add 1 extra pineapple column per panel.
To go up two sizes (42 to 44 inch bust): Add 40 chains (160 chains total).
To go down one size (28 to 30 inch bust): Subtract 20 chains (100 chains total).
To lengthen: Add 1 to 2 additional rounds of mesh between Rounds 19 and 20.
To shorten: Begin the fourth pineapple generation two rounds earlier.
Blocking and Finishing
Weave in all ends securely, threading each tail through at least 4 to 6 stitches on the WS in alternating directions.
Wet blocking (recommended): Soak the finished top in cool water for 20 minutes. Gently squeeze out water without wringing. Roll in a clean towel and press to remove excess moisture. Lay flat on blocking mats and pin to finished measurements. Pin every hem point downward. Allow to dry completely (12 to 24 hours) before unpinning.
Blocking is essential. Without it, your pineapple motifs will not show to their full advantage.
Final Thoughts on This Pineapple Crochet Crop Top Pattern
This project is a labor of love. The hours you invest will show in every single pineapple point, every open lacework section, every graceful curve at the waist. Wear it over a solid tank or bralette for everyday elegance, or style it as a statement piece for summer evenings.
Thank you for trusting me with your time and yarn. I hope this crochet tutorial brings you as much satisfaction as it brought me to design. If you make this top, I would absolutely love to see it! Share your finished photos on Instagram or Facebook and tag me so I can celebrate your work.
If this pattern caught your eye, go ahead and save it to your Pinterest boards so you can find it when you’re ready to cast on. And please drop a comment below if you make it. I love hearing how your projects turn out and seeing your color choices!
You Might Also Like
- Mint Green Floral Crochet Backpack Free Pattern
- Manta Ray Crochet Beach Carryall Free Pattern
- Mint Green Bohemian Ruffle Dress Free Crochet Pattern
- Autumn Burnt Orange Monstera Crochet Plant Free Pattern
