
I call this one the "Midsummer Evening Dress," and honestly, it has been living in my design notebook for almost three years now. The original sketch was scribbled on a napkin during a friend’s outdoor wedding reception. I watched the bride’s guests floating around in these gorgeous flowing dresses, and I thought, "I could crochet that." The pineapple stitch kept calling to me because nothing else captures that vintage bohemian elegance quite like it.
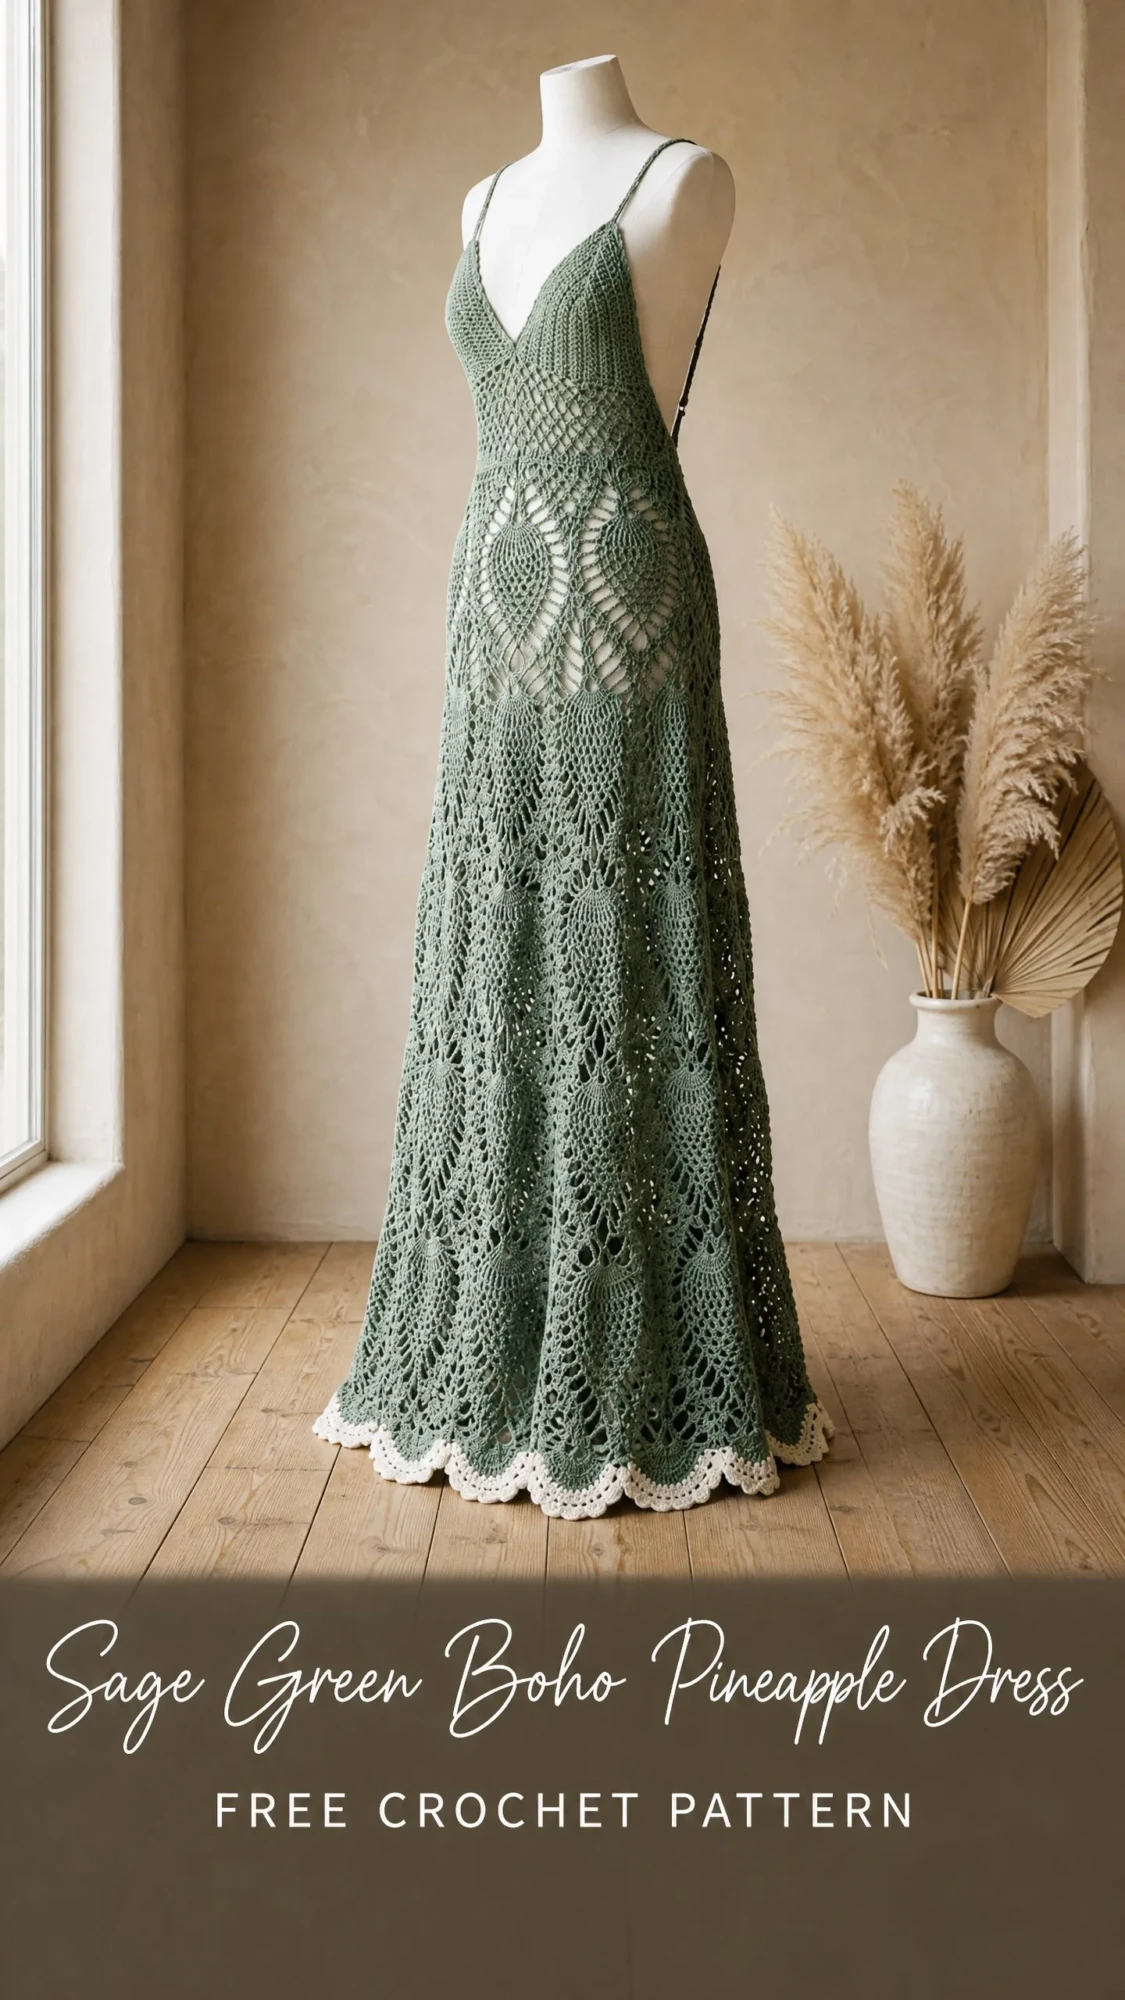
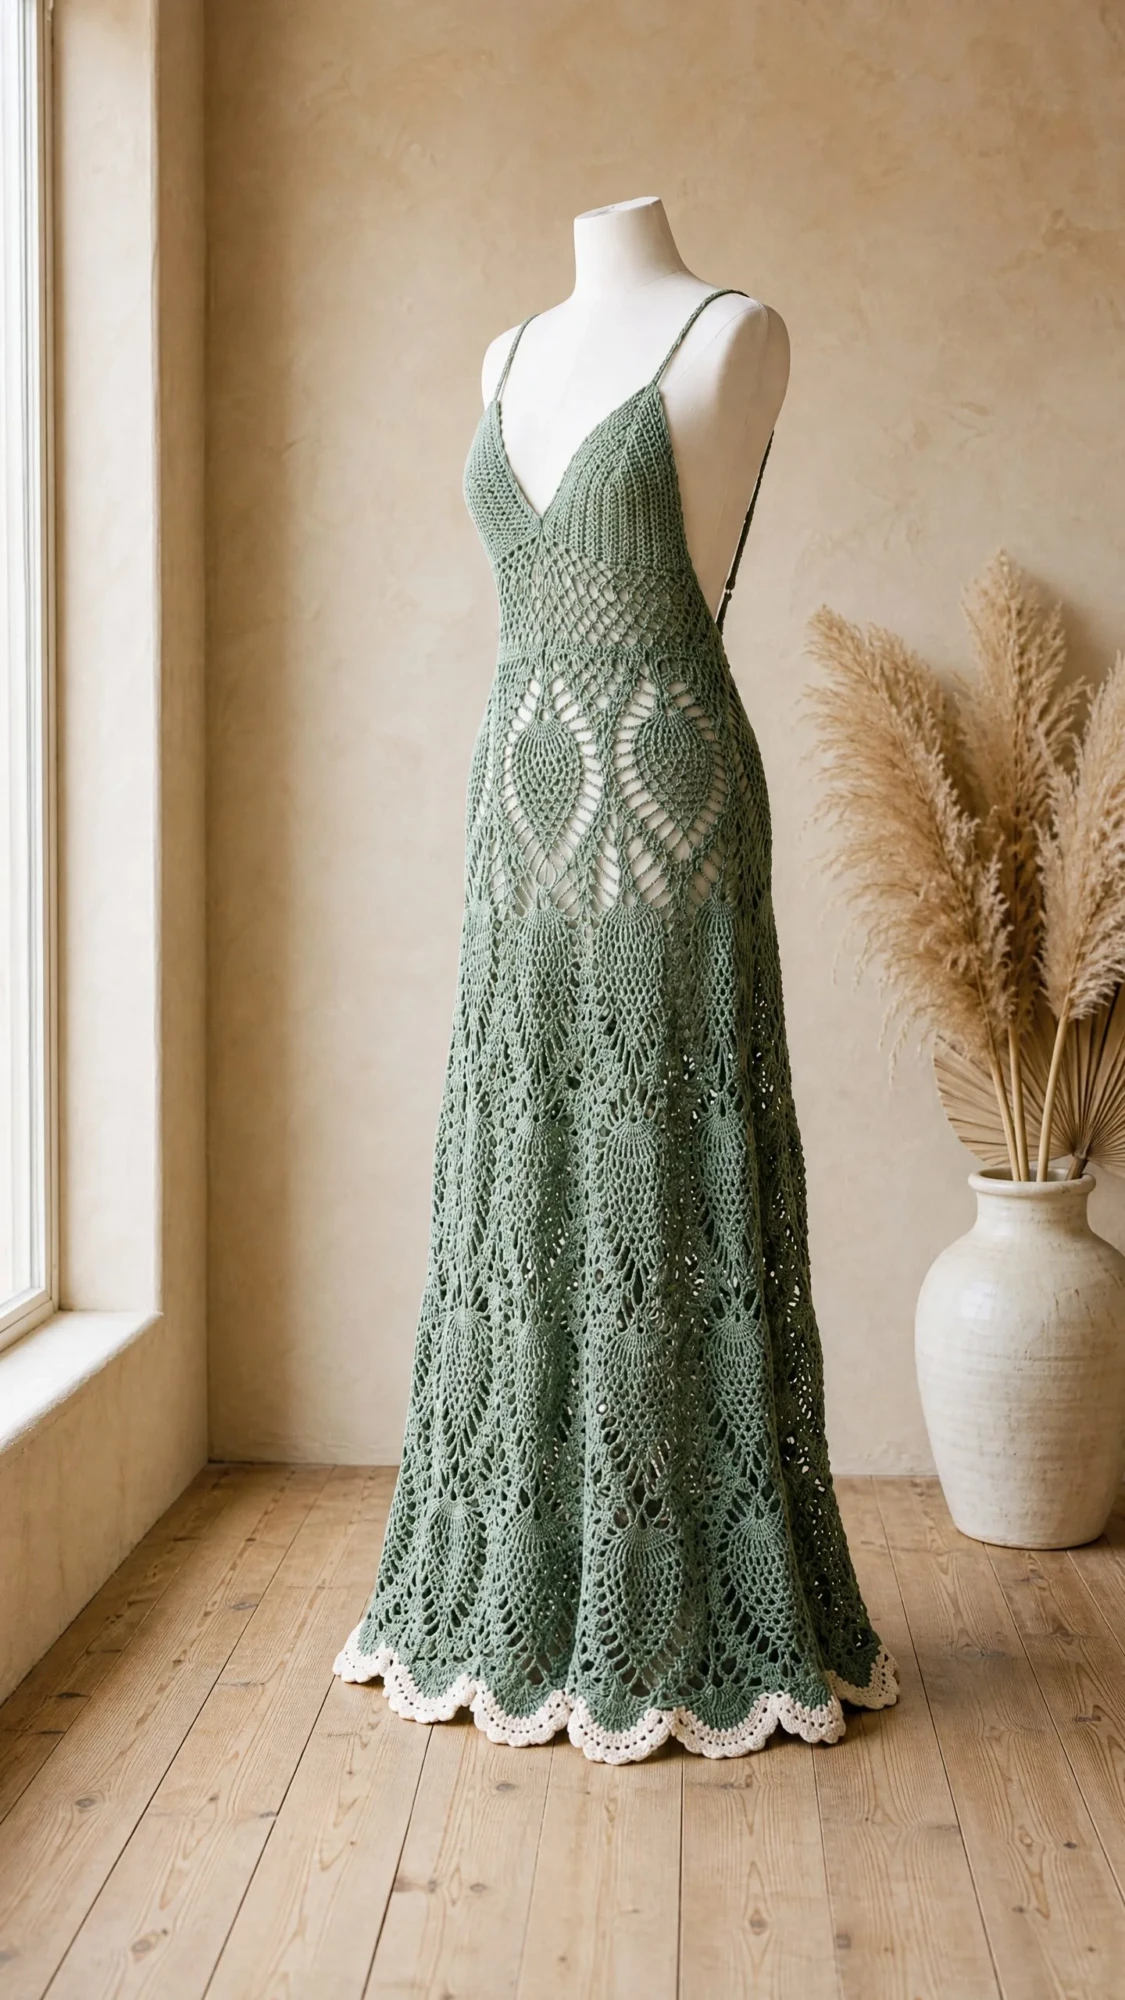
This pattern finally came together after countless swatches, two complete do-overs, and one very patient dress form that has been wearing sage green yarn for months. The result is everything I hoped for. A fitted bodice with delicate spaghetti straps, a dramatically open back, and a skirt that flows like water thanks to those stacked pineapple motifs.
If you have been dreaming of creating a show-stopping garment that proves crochet belongs on the runway, this is your project. Fair warning though. This is an advanced pattern requiring 80 to 120 hours of dedicated work. But every single hour is worth it when you slip this dress over your head and watch it move.
About This Crochet Pattern
This floor-length maxi dress features three distinct construction zones that work together beautifully. The bodice uses a solid mesh stitch worked flat in rows. The hip area transitions through a band of double crochet (dc) mesh and small shells. Then the skirt cascades downward in full pineapple motif glory, worked entirely in the round.
The pineapple stitch is a classic crochet technique that creates an inverted fan shape resembling, you guessed it, a pineapple. Each motif naturally widens at its base, which gives this dress its gorgeous A-line silhouette without complicated increase calculations. The pattern stacks three full tiers of pineapples plus an abbreviated fourth tier that leads into the scalloped hem.
One important note before you start. This dress needs a lining slip underneath. The lace-weight crochet fabric is intentionally open and sheer, which is part of its beauty. Plan to wear a nude or matching slip dress for coverage.
Skill Level
This is an advanced crochet pattern. You should feel confident with pineapple stitch construction, switching between working flat and in the round, shaping a fitted bodice, managing large stitch counts, and executing seamless joins. Experience with blocking lace is essential because cotton lace will not drape or show proper pineapple detail without thorough wet blocking.
Do not let this intimidate you if you are a solid intermediate crocheter ready for a challenge. Just take your time, count your stitches religiously, and trust the process.
Finished Measurements
Size XS/S: Bust 32 to 34 in (81 to 86 cm), Waist 26 to 28 in (66 to 71 cm), Hip 36 to 38 in (91 to 97 cm), Length from shoulder to hem approximately 58 in (147 cm)
Size M/L: Bust 36 to 38 in (91 to 97 cm), Waist 30 to 32 in (76 to 81 cm), Hip 40 to 42 in (102 to 107 cm), Length from shoulder to hem approximately 59 in (150 cm)
Instructions are written for size XS/S with size M/L adjustments in parentheses where they differ.
Materials Needed
Yarn: Size 2 fine weight cotton yarn (also sold as sport weight or light DK cotton)
Recommended Yarns:
1. Paintbox Yarns Cotton DK in Grass Green (100% cotton, 137 yards / 125 m per 50g ball). Excellent stitch definition for lace work and blocks beautifully. You will need approximately 14 (16) balls MC and 1 ball CC. Note: This yarn is a true DK. Work it on the smaller hook for a tighter gauge that reads as fine lace.
2. Lion Brand 24/7 Cotton in Sage (100% mercerized cotton, 186 yards / 170 m per 3.5 oz / 100g ball). Mercerized cotton gives a slight sheen that enhances pineapple definition. You will need approximately 10 (12) balls MC and 1 ball CC.
3. Drops Safran (70% cotton, 30% viscose, 175 yards / 160 m per 50g ball) in a sage or moss colorway. The viscose blend adds drape and a subtle sheen that suits the boho aesthetic. You will need approximately 11 (13) balls MC and 1 ball CC.
Substitution note: Choose any smooth, tightly twisted 100% cotton or cotton-blend yarn that achieves the listed gauge. Avoid fluffy, hairy, or loosely spun yarns as they obscure the pineapple motif detail. Always swatch and wash your swatch before starting.
Hooks:
Notions:
Gauge
With US B-1 / 2.25 mm hook: 28 sc = 4 in / 10 cm; 32 rows of sc = 4 in / 10 cm
With US C-2 / 2.75 mm hook in pineapple pattern: 1 complete pineapple motif repeat (16 stitches wide) = 2.25 in / 5.7 cm; 4 rows of pineapple pattern = 1.5 in / 3.8 cm
Gauge is critical for a wearable fit. Adjust hook size as needed to match gauge. Block your swatch before measuring.
Abbreviations
Special Stitches
Pineapple Cluster (PC): Yarn over, insert hook into designated stitch or space, yarn over and pull up a loop, yarn over and draw through 2 loops (1 half-completed dc on hook). Repeat this action 4 more times into the same stitch or space so you have 6 loops on hook. Yarn over and draw through all 6 loops. One pineapple cluster made.
Shell: Work 5 dc into the same stitch or space.
V-Stitch (V-st): Work (1 dc, ch 2, 1 dc) into the same stitch or space.
Picot: Ch 3, slip stitch into the first of the 3 chains just made.
Beginning Pineapple (Beg PC): Ch 3 (counts as first dc), then work 4 more dc into the same stitch or space, yarn over and draw through all 5 loops on hook. This is used when the pineapple cluster begins a row or round to substitute for the first stitch.
Foundation Single Crochet (FSC): Make a slip knot on hook. Ch 2. Insert hook into second chain from hook, yarn over and pull up a loop (2 loops on hook), yarn over and draw through 1 loop (chain made), yarn over and draw through 2 loops (sc made). For each subsequent stitch: insert hook under the 2 loops of the chain edge of the previous stitch, yarn over and pull up a loop, yarn over and draw through 1 loop, yarn over and draw through 2 loops.
Pattern Notes
1. The dress is constructed in three stages: Front Bodice Panel (worked flat in rows), Back Bodice Panel (worked flat in rows), Side Seams (joined), and Skirt (worked in the round downward from the joined waist edge).
2. Straps are crocheted as chains attached at the bodice and adjusted to length before being fastened to the back.
3. The V-neck shaping is achieved by working two separate halves of the front bodice and joining them at the center.
4. The back is open from just below the shoulder blades to the waist, with two simple tie straps at the center back upper edge.
5. Count stitches at the end of every row. Pineapple patterns are unforgiving of stitch count errors.
6. The pineapple skirt gains width organically. Each pineapple motif naturally fans wider at its base than its top.
7. Turn at the end of every flat row unless stated otherwise.
8. Block aggressively. Cotton lace will not drape or show pineapple detail without thorough wet blocking.
Step-by-Step Instructions
Front Bodice
The front bodice is worked in two halves from the shoulder downward. Each half begins at a strap point and widens to the center front waist.
Right Front Half:
Foundation: Ch 9. (This forms the right shoulder strap attachment point and the top edge of the right bodice half.)
Row 1 (RS): Sc in 2nd ch from hook and in each ch across. Turn. (8 sc)
Row 2: Ch 1, sc in each st across. Turn. (8 sc)
Rows 3 to 6: Ch 1, sc in each st across. Turn. (8 sc)
Row 7: Ch 1, 2 sc in first st (increase at side edge), sc in each st to last st, sc in last st. Turn. (9 sc)
Row 8: Ch 1, sc in each st to last st, 2 sc in last st (increase at side edge). Turn. (10 sc)
Row 9: Ch 1, 2 sc in first st, sc in each st across. Turn. (11 sc)
Row 10: Ch 1, sc in each st to last st, 2 sc in last st. Turn. (12 sc)
Row 11: Ch 1, 2 sc in first st, sc in each st across. Turn. (13 sc)
Row 12: Ch 1, sc in each st to last st, 2 sc in last st. Turn. (14 sc)
Row 13: Ch 1, 2 sc in first st, sc in each st across. Turn. (15 sc)
Row 14: Ch 1, sc in each st to last st, 2 sc in last st. Turn. (16 sc)
Row 15: Ch 1, 2 sc in first st, sc in each st across. Turn. (17 sc)
Row 16: Ch 1, sc in each st to last st, 2 sc in last st. Turn. (18 sc)
Row 17: Ch 1, 2 sc in first st, sc in each st across. Turn. (19 sc)
Row 18: Ch 1, sc in each st to last st, 2 sc in last st. Turn. (20 sc)
Row 19: Ch 1, 2 sc in first st, sc in each st across. Turn. (21 sc)
Row 20: Ch 1, sc in each st to last st, 2 sc in last st. Turn. (22 sc)
Fasten off. Set Right Front Half aside.
Left Front Half:
Work exactly as Right Front Half through Row 20. Do not fasten off at Row 20. You will join the two halves in the next step.
Join Halves to Form Full Front Bodice:
With Left Front Half on hook at end of Row 20, ch 2 (this forms the V at center front), then sc across all 22 sts of Right Front Half. Turn. (46 sc plus 2 ch at center)
Row 21: Ch 1, sc in each of 22 sc, sc in each of 2 ch-sp sts, sc in each of 22 sc. Turn. (46 sc)
Rows 22 to 32: Ch 1, sc in each st across. Turn. (46 sc)
Checkpoint: After completing the front bodice, the panel should be approximately 5.5 to 6 in / 14 to 15 cm tall and approximately 6.5 in / 16.5 cm wide at the bottom edge.
Back Bodice
Right Back Half:
Foundation: Use FSC method to make 23 sts. (23 FSC)
Row 1 (RS): Ch 1, sc in each st across. Turn. (23 sc)
Rows 2 to 8: Ch 1, sc in each st across. Turn. (23 sc)
Row 9: Ch 1, sc in each st to last 2 sts, dc2tog over last 2 sts. Turn. (22 sts)
Row 10: Ch 1, sc in each st across. Turn. (22 sc)
Row 11: Ch 1, sc in each st to last 2 sts, dc2tog over last 2 sts. Turn. (21 sts)
Row 12: Ch 1, sc in each st across. Turn. (21 sc)
Row 13: Ch 1, sc in each st to last 2 sts, dc2tog over last 2 sts. Turn. (20 sts)
Row 14: Ch 1, sc in each st across. Turn. (20 sc)
Row 15: Ch 1, sc in each st to last 2 sts, dc2tog. Turn. (19 sts)
Row 16: Ch 1, sc in each st across. Turn. (19 sc)
Row 17: Ch 1, sc in each st to last 2 sts, dc2tog. Turn. (18 sts)
Row 18: Ch 1, sc in each st across. Turn. (18 sc)
Row 19: Ch 1, sc in each st to last 2 sts, dc2tog. Turn. (17 sts)
Row 20: Ch 1, sc in each st across. Turn. (17 sc)
Row 21: Ch 1, sc in each st to last 2 sts, dc2tog. Turn. (16 sts)
Row 22: Ch 1, sc in each st across. Turn. (16 sc)
Fasten off leaving a long tail for the strap.
Left Back Half:
Work as Right Back Half but mirror the shaping: on decrease rows, work dc2tog over the first 2 sts instead of the last 2 sts. Fasten off at 16 sts.
Side Seam Join
Place Front Bodice panel (RS facing) and Back Bodice left half (RS facing) together. Using MC and a yarn needle, whipstitch or slip-stitch the side edge of the front left bodice to the side edge of the back left half, from waist to underarm (approximately 20 rows). Repeat for the right side. The bodice is now a tube open at top and bottom with a low open back.
Straps
With MC and B-1 / 2.25 mm hook, attach yarn at the right front shoulder point. Ch 90 (or adjust length as needed for fit). Sl st back down the chain to form a cord. Fasten off. Take this strap over the shoulder and attach the end to the back right shoulder at the 16-st edge with a slip stitch seam or sew it down firmly. Repeat for left strap.
For the back tie: At the center back waist, attach MC. Ch 40, fasten off. Attach a second tie on the opposite side.
Waist Preparation
With RS facing and B-1 / 2.25 mm hook, join MC at the back right side seam at the bottom waist edge. Work 1 rnd of sc evenly around the entire waist opening: sc across all sts of front bodice base (46 sc), sc across all sts of left back half base (23 sc), sc across all sts of right back half base (23 sc), and 2 sc into each of the two side seam join points. Join with sl st to first sc. (96 sc) (For M/L: work to achieve 112 sc total at waist.)
Hip Transition Band
Switch to US C-2 / 2.75 mm hook for all skirt work from this point forward.
Rnd 1: Ch 3 (counts as dc), dc in each sc around. Join with sl st to top of ch-3. (96 dc) (M/L: 112 dc)
Rnd 2: Ch 3, dc in same st, sk 1 st, 2 dc in next st; rep from around, sk 1 st. Join. (96 dc) (M/L: 112 dc)
Rnd 3 (increase round): Ch 3, dc in same st, dc in next dc, 2 dc in next dc, dc in next dc; rep from around. Join. (144 dc) (M/L: 168 dc)
Rnd 4: Ch 3, dc in each dc around. Join. (144 dc) (M/L: 168 dc)
Rnd 5 (fine-tune to pineapple multiple): For XS/S: Ch 3, dc in next 8 dc, 2 dc in next dc; rep from around, ending dc in last 8 sts, 2 dc in last st. Join. (160 dc)
For M/L: Ch 3, dc in next 7 dc, 2 dc in next dc; rep from around, distributing 8 increases evenly. Join. (176 dc)
Rnd 6: Ch 1, sc in each dc around. Join with sl st to first sc. (160 sc) (M/L: 176 sc)
Pineapple Skirt Tier 1
Rnd 1 (Set-up): Ch 5 (counts as dc + ch 2), sk 2 sc, shell in next sc, ch 2, sk 3 sc, dc in next sc, ch 2, sk 3 sc; rep from around, ending shell in next sc, ch 2, sk 3 sc. Join with sl st to 3rd ch of beg ch-5. (10 shells, 20 ch-2 sps, 10 dc separators) (M/L: 11 shells, 22 ch-2 sps, 11 dc separators)
Rnd 2: Sl st to center of ch-2 sp, ch 3 (counts as dc), (dc, ch 2, 2 dc) in same ch-2 sp, ch 1, (tr, ch 1) 5 times in center dc of shell from previous rnd, ch 1, (2 dc, ch 2, 2 dc) in next ch-2 sp; rep from to last sp, ch 1, (tr, ch 1) 5 times in last shell center, ch 1. Join to top of ch-3.
Rnd 3: Sl st to ch-2 sp of V-shell, ch 3, (dc, ch 2, 2 dc) in same sp, ch 1, sk ch-1 sp, [sc in next ch-1 sp, ch 3] 4 times, sc in next ch-1 sp, ch 1, (2 dc, ch 2, 2 dc) in ch-2 sp of next V-shell; rep from around. Join.
Rnd 4: Sl st to ch-2 sp, ch 3, (dc, ch 2, 2 dc) in same sp, ch 1, sk to first ch-3 sp, [sc in ch-3 sp, ch 3] 3 times, sc in next ch-3 sp, ch 1, (2 dc, ch 2, 2 dc) in ch-2 sp of next V-shell; rep from around. Join.
Rnd 5: Sl st to ch-2 sp, ch 3, (dc, ch 2, 2 dc) in same sp, ch 1, sk to first ch-3 sp, [sc in ch-3 sp, ch 3] 2 times, sc in next ch-3 sp, ch 1, (2 dc, ch 2, 2 dc) in ch-2 sp of next V-shell; rep from around. Join.
Rnd 6: Sl st to ch-2 sp, ch 3, (dc, ch 2, 2 dc) in same sp, ch 2, sk to ch-3 sp, sc in ch-3 sp, ch 3, sc in next ch-3 sp, ch 2, (2 dc, ch 2, 2 dc) in ch-2 sp of next V-shell; rep from around. Join.
Rnd 7 (pineapple close and new tier set-up): Sl st to ch-2 sp of V-shell, ch 3, dc in same sp, ch 3, PC into the ch-3 sp, ch 3, shell in ch-2 sp of next V-shell; rep from around, ending ch 3, PC into last ch-3 sp, ch 3. Join with sl st to top of ch-3.
Rnd 8 (expansion increase for Tier 2): Ch 5 (counts as dc + ch 2), shell in top of PC, ch 2, dc in center dc of shell, ch 2; rep from around, ending shell in last PC. Join to 3rd ch of beg ch-5.
Pineapple Skirt Tier 2
Work Rnds 9 through 15 identical in structure to Rnds 2 through 8 above.
Pineapple Skirt Tier 3
Work Rnds 16 through 22 identical in structure to Tier 1 Rnds 2 through 8.
For Tier 3, adjust chain spacers: change all ch-2 spaces flanking the shells to ch-3 spaces for additional width.
Tier 4 Short Lower Border
Rnd 23 (set-up): Ch 5, shell in top of PC from Tier 3 close, ch 3, dc in center dc of shell, ch 3; rep from around. Join.
Rnd 24: Sl st to ch-2 sp, ch 3, (dc, ch 2, 2 dc) in same sp, ch 1, (tr, ch 1) 5 times in dc V-spacer, ch 1, (2 dc, ch 2, 2 dc) in ch-2 sp of next V-shell; rep from around. Join.
Rnd 25: Sl st to ch-2 sp, ch 3, (dc, ch 2, 2 dc) in same sp, ch 1, sk, [sc in ch-1 sp, ch 3] 4 times, sc in last ch-1 sp, ch 1, (2 dc, ch 2, 2 dc) in ch-2 sp of next V-shell; rep from around. Join.
Rnd 26: Sl st to ch-2 sp, ch 3, (dc, ch 2, 2 dc) in same sp, ch 1, sk, [sc in ch-3 sp, ch 3] 3 times, sc in last ch-3 sp, ch 1, (2 dc, ch 2, 2 dc) in ch-2 sp of next V-shell; rep from around. Join.
Rnd 27 (final close): Sl st to ch-2 sp, sc in ch-2 sp, ch 4, sc in first ch-3 sp of pineapple fan, (ch 4, sc) in each ch-3 sp across pineapple, ch 4; rep from around. Join with sl st to first sc.
Cream Hem Edging
Join CC (cream) to any ch-4 space along the hem edge. Work a picot scallop border by working (sc, hdc, dc, hdc, sc) into each ch-4 space around the entire hem. Join with sl st to first sc. Fasten off and weave in ends.
Finishing
Wet block your dress thoroughly. Soak it in lukewarm water for at least 20 minutes, gently squeeze out excess water (do not wring), and pin it to blocking mats. Stretch the pineapple motifs open to reveal their full beauty. Allow to dry completely before removing pins.
Weave in all remaining ends. Try on over your slip dress and adjust strap length if needed.
Tips for Success
Take breaks. This is a marathon project, not a sprint. Working on it in focused sessions will help you maintain consistent tension throughout.
Use stitch markers generously. Mark the beginning of each round, each pineapple repeat, and any spots that tend to confuse you.
Count your stitches after every row and round. Pineapple patterns compound errors quickly, and catching mistakes early saves hours of frogging later.
Block a practice swatch before starting. This helps you understand how dramatically cotton lace opens up when wet blocked.
I hope you love making this Sage Green Boho Pineapple Dress as much as I loved designing it. Thank you for trusting me with your precious crafting time. If you make this dress, I would absolutely love to see it! Tag me on Instagram or share a photo in my Facebook group.
This pattern is definitely one to save for when you are ready to tackle something truly special. Pin it to your crochet boards on Pinterest so you can find it when the time is right. And please drop a comment below if you make it or have any questions along the way. I read every single one and love hearing from you!
You Might Also Like
- Berry Pink Granny Square Purse Free Crochet Pattern
- Desert Rose Geometric Tote Free Crochet Pattern
- Dusty Rose Boho Romper Free Crochet Pattern
- Lemon Sorbet Candy Bolster Pillow Free Crochet Pattern
