
I named this design "Little Sailor" the moment I sketched it in my notebook three years ago. It was meant for my best friend’s first baby, a summer arrival who deserved something special for those newborn photos. I wanted stripes that looked crisp and classic, buttons that told a story, and a matching set that would make any new parent gasp with joy. The notebook sat in my craft room for a while, but I finally pulled it out, refined every detail, and turned those scribbly notes into the pattern you see here.
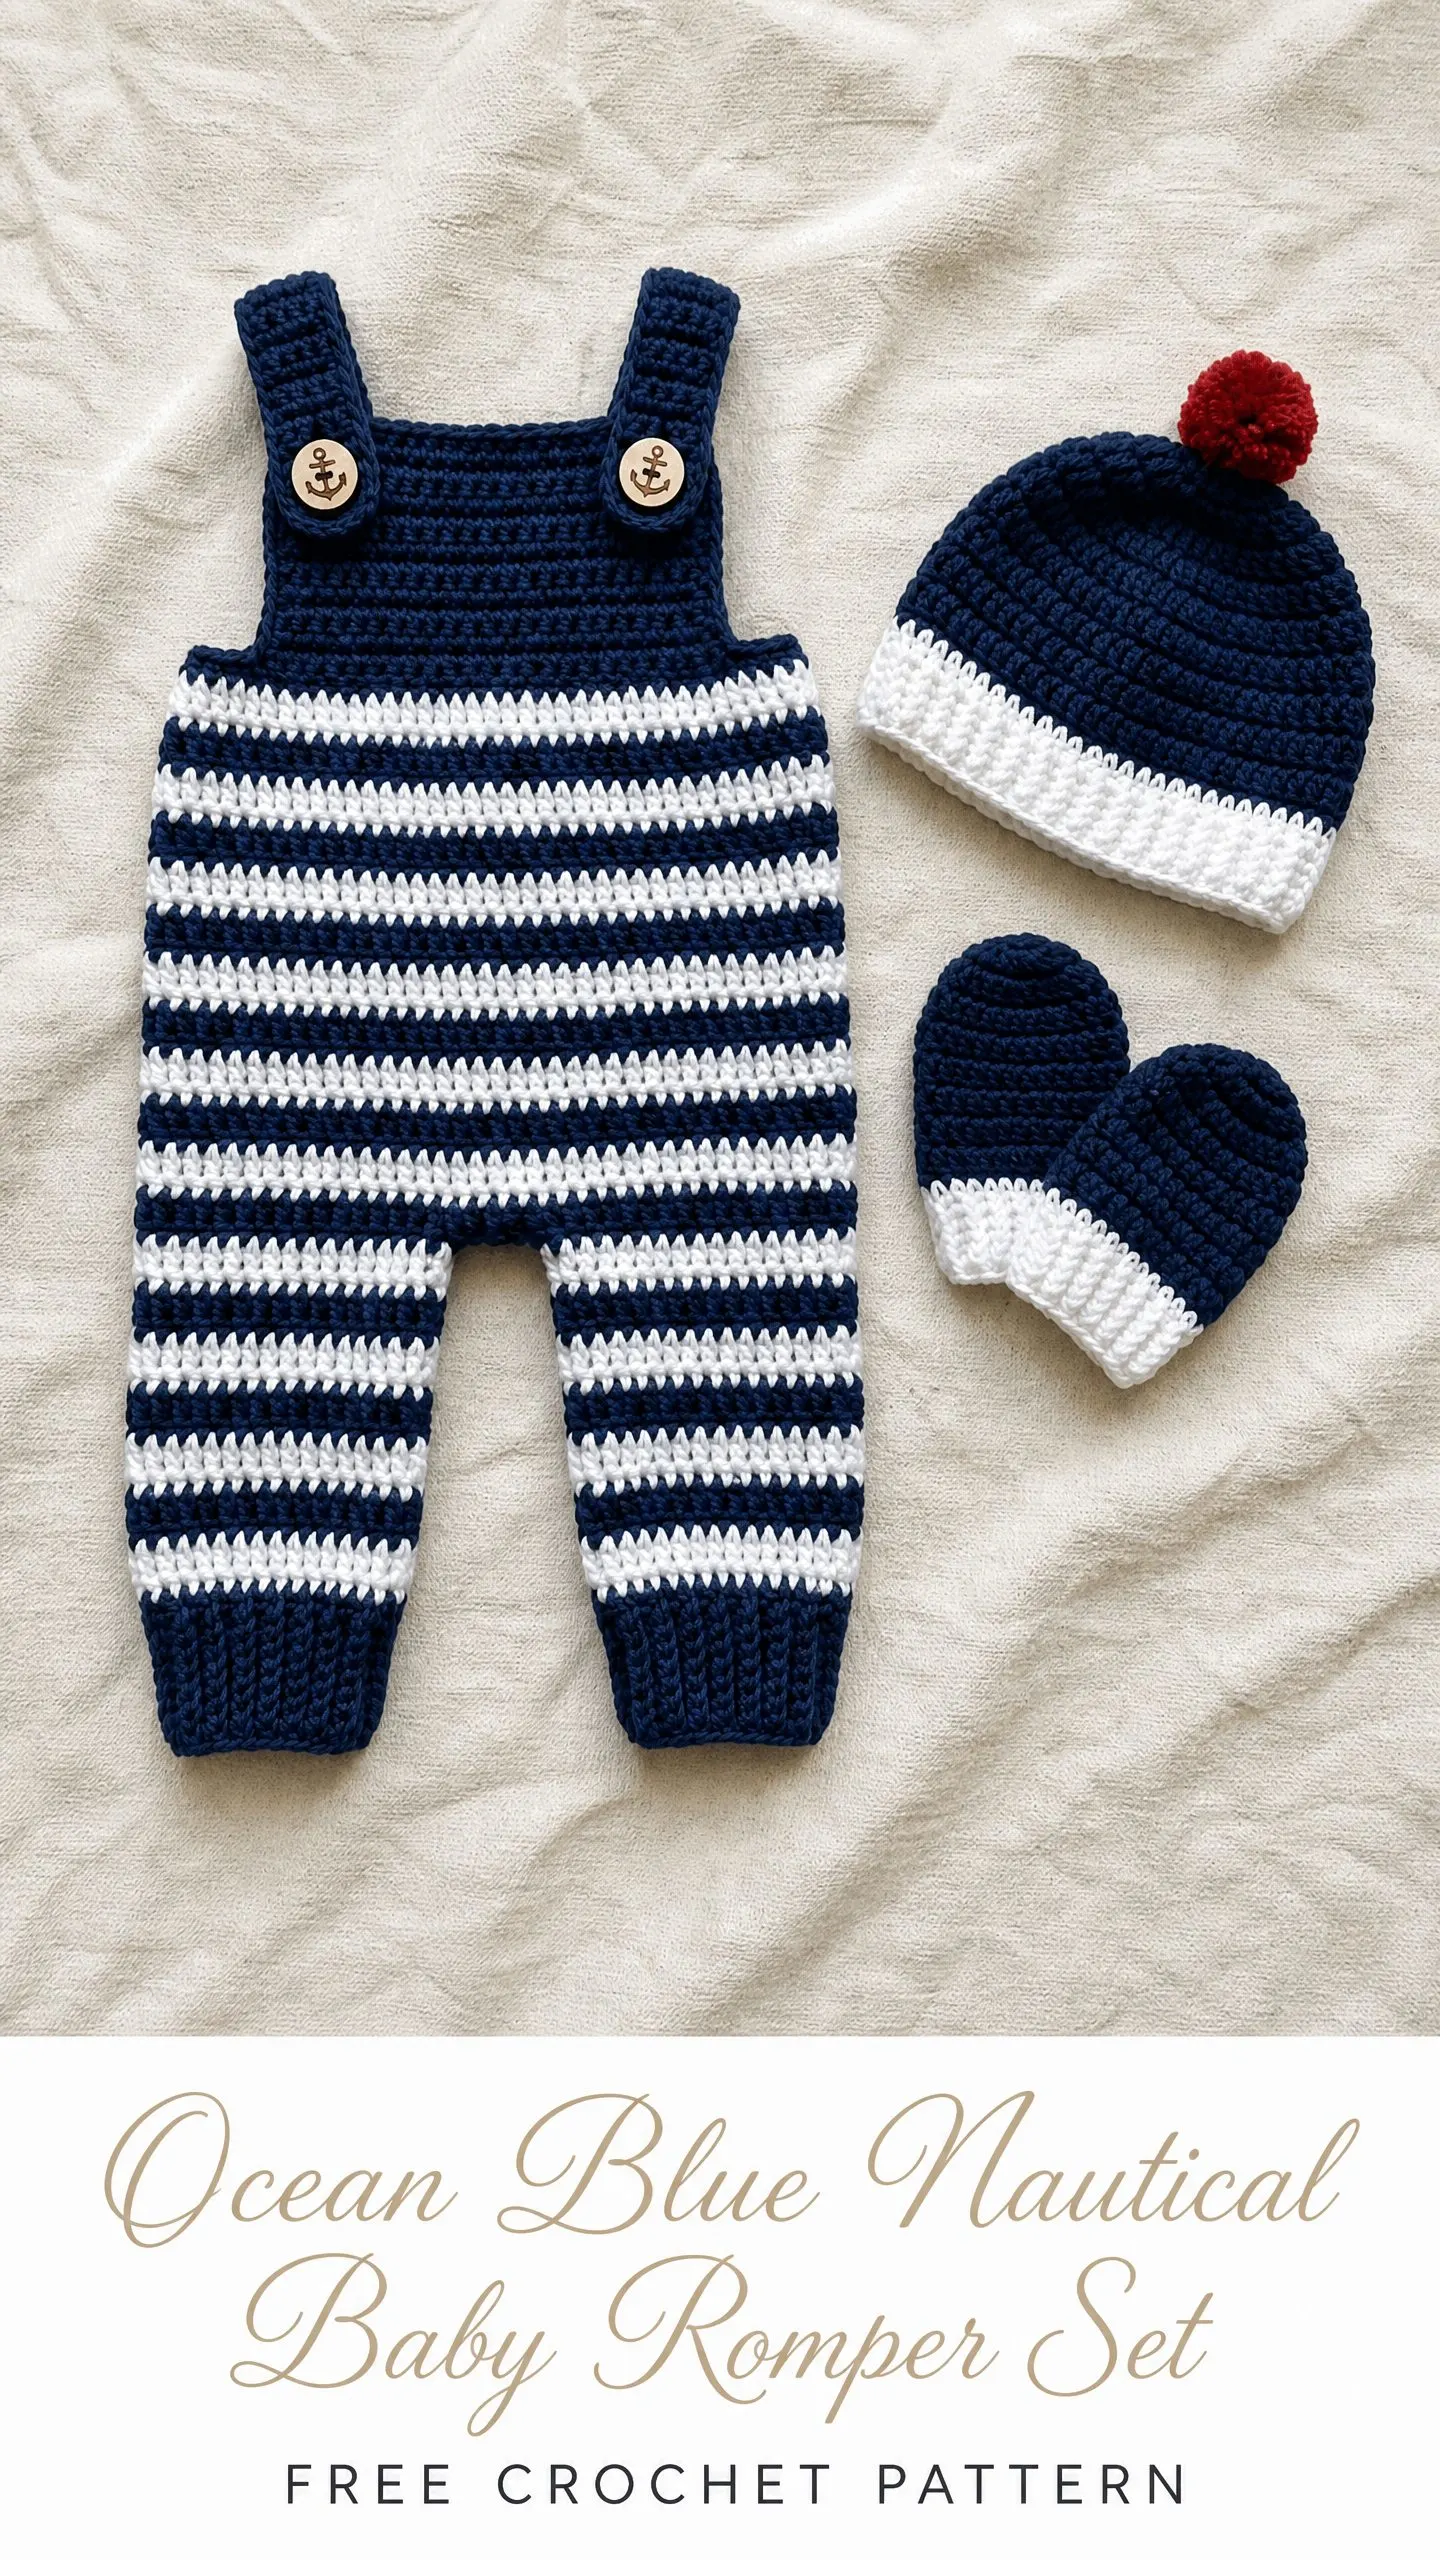
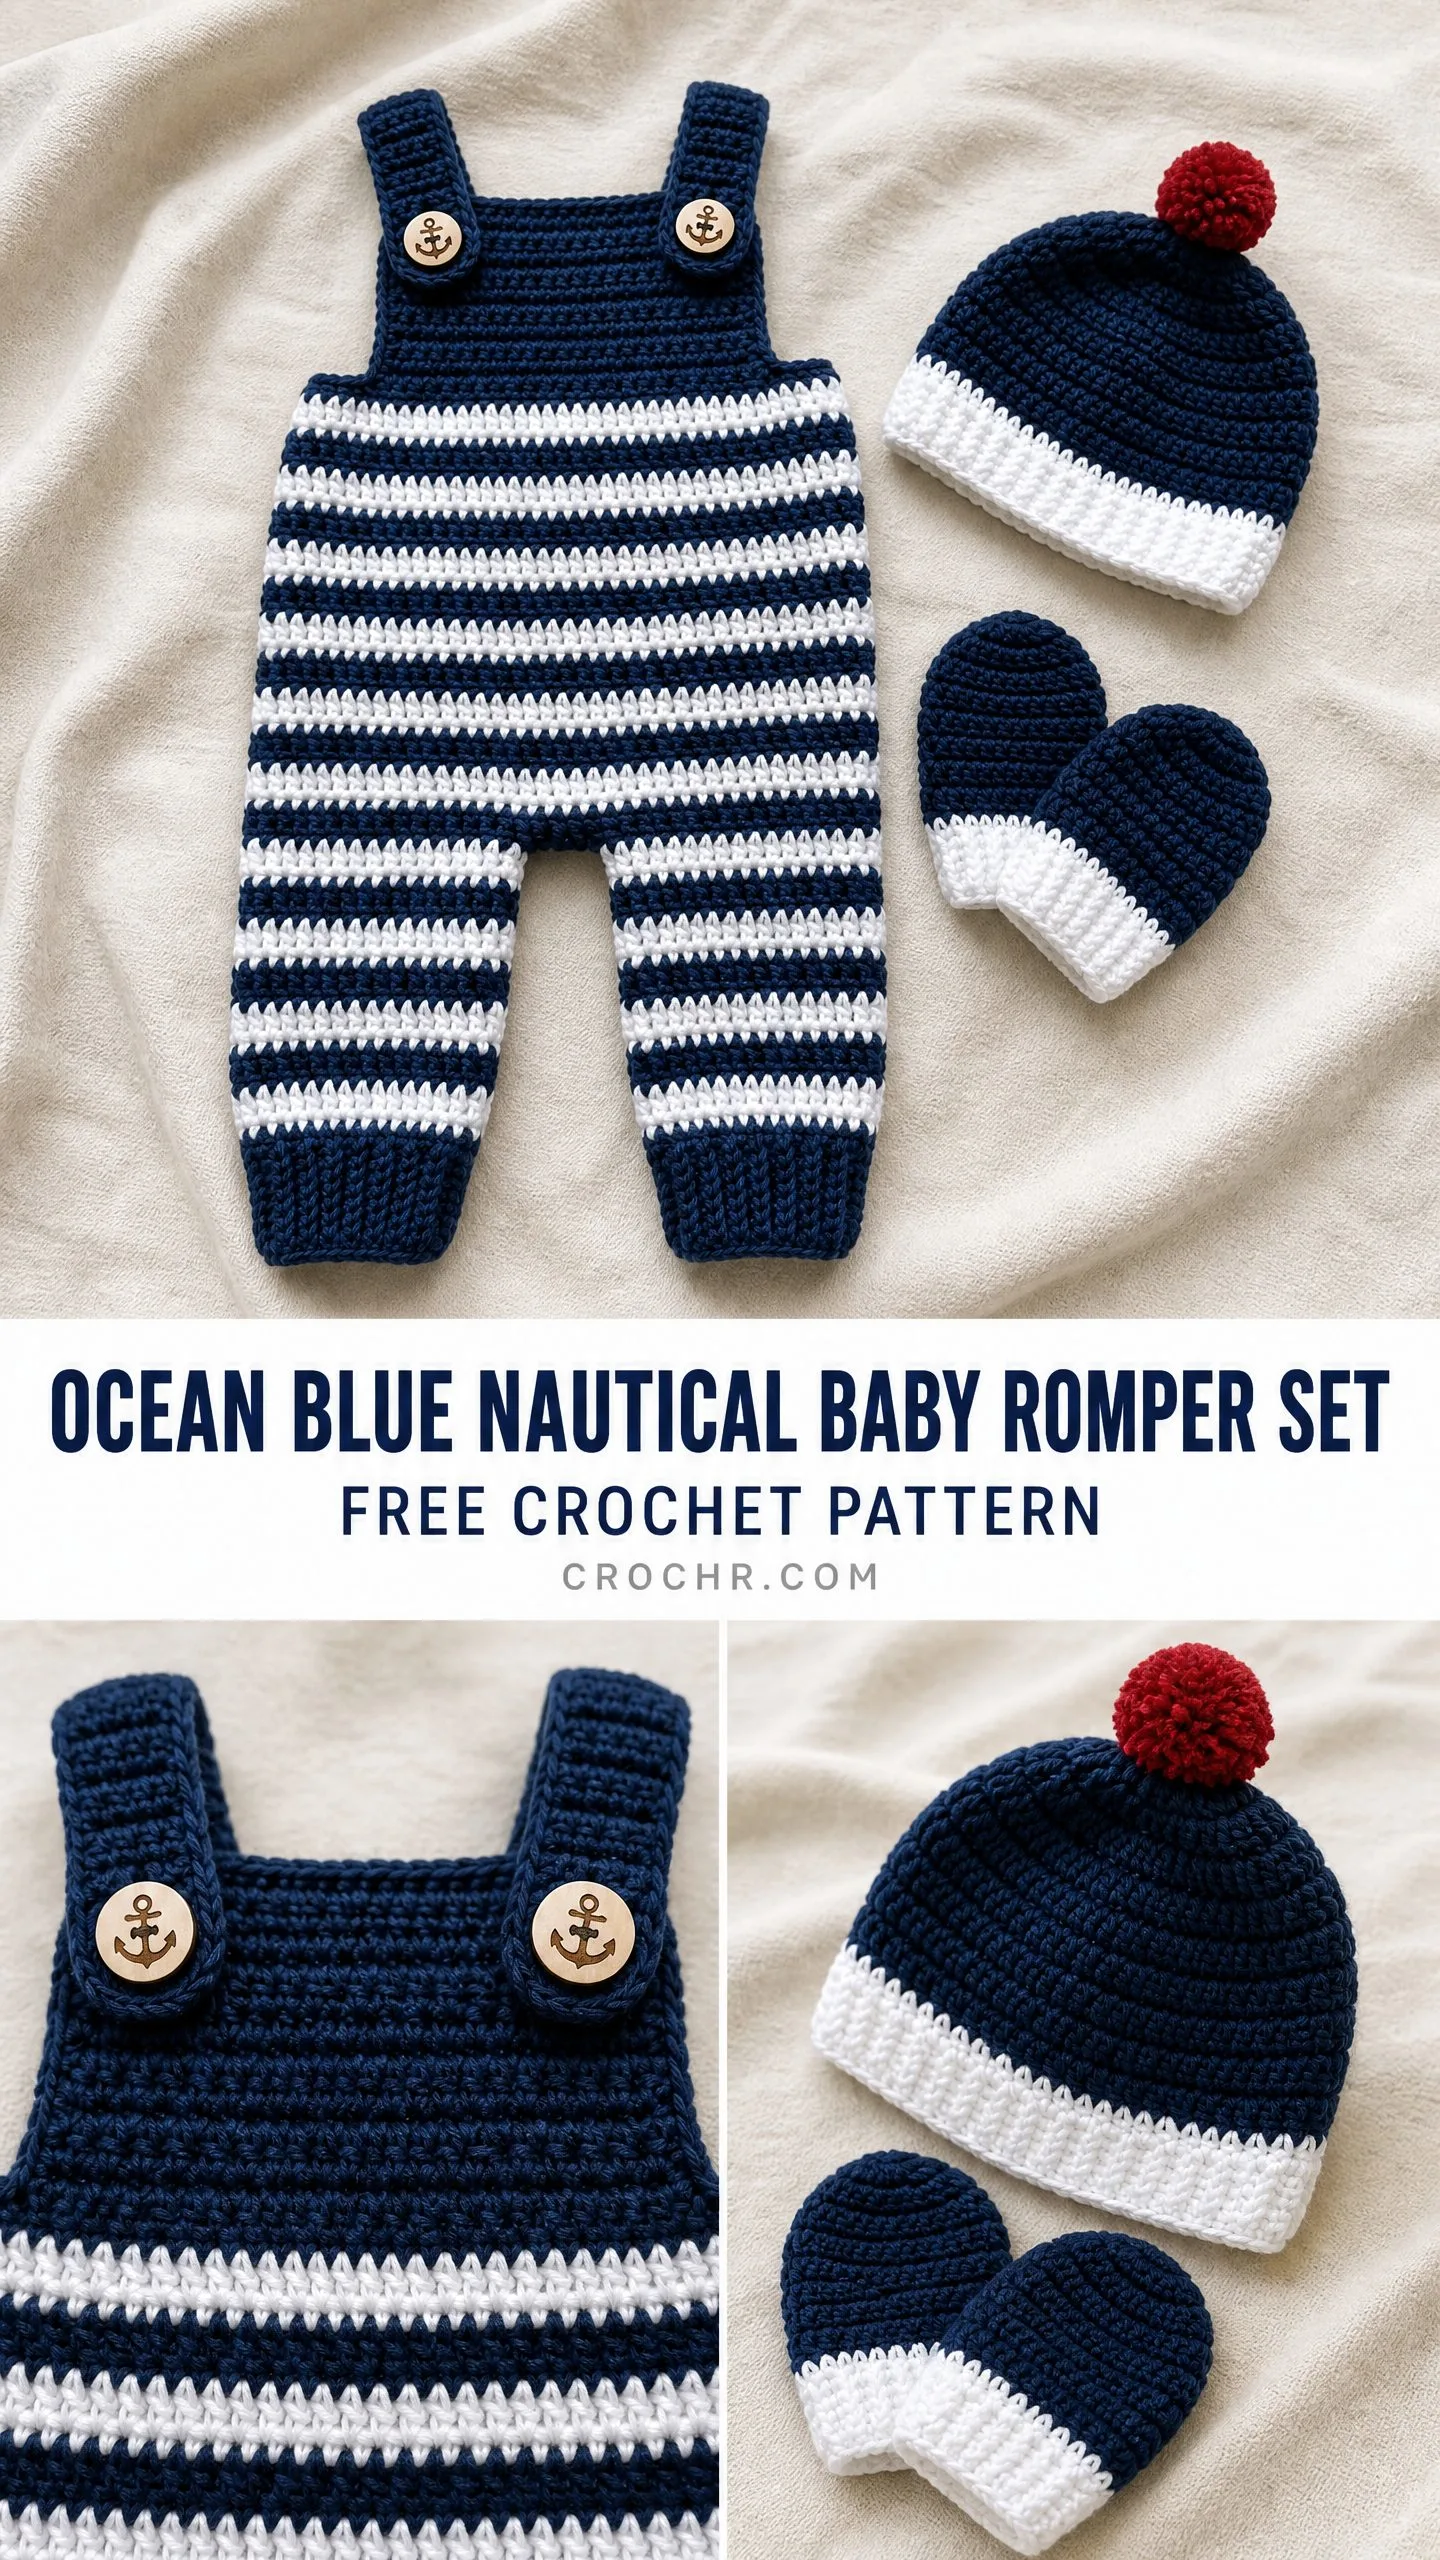
This nautical baby romper set includes three pieces: striped overalls with anchor buttons, a cozy beanie topped with a cheerful red pom-pom, and a pair of matching mittens. The whole set works up in worsted weight yarn using basic single crochet, so the construction feels approachable even if you have never made baby clothes before.
If you have been eyeing that navy yarn in your stash, this is your sign. Let me walk you through every stitch.
Why You Will Love This Crochet Pattern
This crochet pattern hits that sweet spot between impressive and achievable. The overalls look complex with their stripe colorwork and button details, but the entire set uses just one main stitch. You will work single crochet throughout, switching between navy and white to create those classic sailor stripes.
The construction teaches you valuable skills without overwhelming you. You will learn to work in the round, join separate pieces, switch colors cleanly, and shape garments through simple decreases. These techniques transfer to countless other projects.
Gift potential is enormous here. Baby shower season never really ends, and handmade baby items always steal the show. The coordinated three-piece set arrives looking like something from a boutique, but with the irreplaceable warmth of something made by hand.
Skill Level and Time Estimate
I rate this pattern as intermediate, but a motivated beginner with a few projects under their belt can absolutely tackle it. If you can chain, single crochet, and count stitches, you have the foundation. The rest is just following along.
Time breakdown:
Spread across a week of evening sessions, this set comes together beautifully. I find the legs meditative once you get into the stripe rhythm.
Finished Measurements
This crochet tutorial produces a set sized for newborn to 3 months.
Want to size up to 3 to 6 months? Add 2 additional stripe repeats on the legs before joining, work 2 extra rounds on the body after joining, and increase each leg’s starting chain by 4 stitches. For the hat, add 6 stitches to your foundation and work one extra plain round before decreasing. For mittens, add 2 rounds to both the cuff and body sections.
Materials Needed
Yarn:
Hook:
Notions:
Yarn Suggestions
Lion Brand Pound of Love works wonderfully here. It is 100% acrylic, machine washable, and incredibly soft against newborn skin. Grab Oxford Navy and White.
Cascade 220 Superwash gives excellent stitch definition if you prefer wool. It is machine washable on gentle, which parents will appreciate.
Paintbox Yarns Simply DK used doubled can substitute, though you will need to swatch carefully.
Whatever you choose, stick with smooth yarns labeled machine washable. Fuzzy or textured yarns blur those crisp stripe lines.
Gauge (Do Not Skip This)
14 single crochet stitches x 16 rows = 4 in / 10 cm, worked flat in single crochet with a US G-6 / 4.0 mm hook.
I know gauge swatches feel tedious for small projects, but they matter enormously here. A difference of just 1 stitch per inch can make the overalls 2 inches too wide or too narrow. Work a swatch at least 5 in / 12.5 cm square, block it according to your yarn’s care instructions, and measure in the center.
Abbreviations and Stitch Definitions
Let me break down every abbreviation you will encounter. If you are newer to crochet patterns, bookmark this section.
Special Techniques
Stripe Pattern (Worked in the Round)
This creates those beautiful alternating navy and white stripes.
Round 1: Work all single crochet with Color A (navy). At the end of the round, drop Color A to the wrong side. Do not cut.
Round 2: Pick up Color B (white). Work all single crochet with Color B. At the end of the round, drop Color B to the wrong side. Do not cut.
Repeat these two rounds, carrying the unused color loosely up the inside of your work.
Clean Color Changes
When changing colors, complete the last yarn over of your last stitch with the new color. This produces crisp color lines instead of blurry transitions.
Adjustable Ring
Make a loop with your yarn, leaving a tail. Insert your hook into the loop, draw up a working loop, chain as instructed, then work your stitches into the ring. Pull the tail to close the ring tightly.
Step by Step Instructions
Now for the fun part. Follow along carefully, and check your stitch counts at the end of each row or round.
Overalls: Left Leg
With Color A and your G-6 / 4.0 mm hook, chain 29. Being careful not to twist, slip stitch to the first chain to form a ring.
Rnd 1: Ch 1, sc in each ch around, sl st to first sc. (28 sc)
Now work in Stripe Pattern:
Rnd 2: Ch 1, sc in each st around, sl st to first sc. Change to Color B at end of rnd. (28 sc)
Rnd 3: Ch 1, sc in each st around, sl st to first sc. Change to Color A. (28 sc)
Rnd 4: Ch 1, sc in each st around, sl st to first sc. Change to Color B. (28 sc)
Rnd 5: Ch 1, sc in each st around, sl st to first sc. Change to Color A. (28 sc)
Rnd 6: Ch 1, sc in each st around, sl st to first sc. Change to Color B. (28 sc)
Rnd 7: Ch 1, sc in each st around, sl st to first sc. Change to Color A. (28 sc)
Rnd 8: Ch 1, sc in each st around, sl st to first sc. Change to Color B. (28 sc)
Rnd 9: Ch 1, sc in each st around, sl st to first sc. Change to Color A. (28 sc)
Rnd 10: Ch 1, sc in each st around, sl st to first sc. Change to Color B. (28 sc)
Rnd 11: Ch 1, sc in each st around, sl st to first sc. Change to Color A. (28 sc)
Rnd 12: Ch 1, sc in each st around, sl st to first sc. Change to Color B. (28 sc)
Rnd 13: Ch 1, sc in each st around, sl st to first sc. Change to Color A. (28 sc)
Rnd 14: Ch 1, sc in each st around, sl st to first sc. Change to Color B. (28 sc)
Rnd 15: Ch 1, sc in each st around, sl st to first sc. Change to Color A. (28 sc)
Rnd 16: Ch 1, sc in each st around, sl st to first sc. Change to Color B. (28 sc)
Rnd 17: Ch 1, sc in each st around, sl st to first sc. Change to Color A. (28 sc)
Rnd 18: Ch 1, sc in each st around, sl st to first sc. (28 sc)
Fasten off Color B. Continue with Color A only.
Rnds 19 to 21: Ch 1, sc in each st around, sl st to first sc. (28 sc each round)
These 3 rounds form the solid navy ankle cuff. Place a stitch marker in the first and last stitch of the round to mark the crotch seam position. Set Left Leg aside.
Checkpoint: Your left leg tube should measure approximately 5.5 in / 14 cm from foundation chain to top of ankle cuff.
Overalls: Right Leg
Work exactly as Left Leg through Rnd 21. Do not fasten off. Place stitch markers at the first and last stitch of the final round.
Joining Legs to Form Body
Here is where the magic happens. You will connect both legs into one body tube.
With Color A still attached to Right Leg:
Joining Rnd: Ch 4 (this creates the crotch bridge). Insert hook into the marked first stitch of Left Leg, sl st to join. Ch 1, sc in each st around Left Leg (28 sc), sc in each of the 4 ch of the bridge (4 sc), sc in each st around Right Leg (28 sc), sc in the 4 ch on the opposite side of the bridge (4 sc), sl st to first sc. (64 sc)
The two legs of 28 stitches each plus 8 bridge stitches equals 64 total stitches. Mark the beginning of the round and move it up each round.
Begin Stripe Pattern again:
Rnd 1 (body): Change to Color B. Ch 1, sc in each st around, sl st to first sc. (64 sc)
Rnd 2 (body): Change to Color A. Ch 1, sc in each st around, sl st to first sc. (64 sc)
Rnd 3 (body): Change to Color B. Ch 1, sc in each st around, sl st to first sc. (64 sc)
Rnd 4 (body): Change to Color A. Ch 1, sc in each st around, sl st to first sc. (64 sc)
Rnd 5 (body): Change to Color B. Ch 1, sc in each st around, sl st to first sc. (64 sc)
Rnd 6 (body): Change to Color A. Ch 1, sc in each st around, sl st to first sc. (64 sc)
Rnd 7 (body): Change to Color B. Ch 1, sc in each st around, sl st to first sc. (64 sc)
Rnd 8 (body): Change to Color A. Ch 1, sc in each st around, sl st to first sc. (64 sc)
Rnd 9 (body): Change to Color B. Ch 1, sc in each st around, sl st to first sc. (64 sc)
Rnd 10 (body): Change to Color A. Ch 1, sc in each st around, sl st to first sc. (64 sc)
Rnd 11 (body): Change to Color B. Ch 1, sc in each st around, sl st to first sc. (64 sc)
Rnd 12 (body): Change to Color A. Ch 1, sc in each st around, sl st to first sc. (64 sc)
Fasten off Color B. Continue with Color A only.
Rnd 13 (body): Ch 1, sc in each st around, sl st to first sc. (64 sc)
Checkpoint: The body from crotch join to top should measure approximately 4 in / 10 cm. Total length from ankle to top should be approximately 9.5 in / 24 cm.
Overalls: Bib
The bib is worked flat on the front 28 stitches only. Count 18 stitches back from the round marker. Place a marker in stitch 1 and stitch 28 of your bib section. The remaining 36 stitches form the back panel and stay unworked.
With Color A, join yarn to stitch 1 of bib section.
Row 1 (WS): Ch 1, sc in each of next 28 sts, turn. (28 sc)
Rows 2 through 8: Ch 1, sc in each st across, turn. (28 sc)
Do not fasten off.
Checkpoint: The bib should measure approximately 4 in / 10 cm wide and 2 in / 5 cm tall.
Overalls: Straps (Make 2)
With Color A, chain 31.
Row 1: Sc in 2nd ch from hook and in each ch across, turn. (30 sc)
Row 2: Ch 1, sc in each st across, turn. (30 sc)
Row 3: Ch 1, sc in each st across. Fasten off, leaving a 12 in / 30.5 cm tail for sewing. (30 sc)
Each strap measures approximately 8.5 in / 21.5 cm long.
Attaching Straps and Buttons
Fold the end of each strap under approximately 0.5 in / 1.25 cm. Whipstitch the strap end to the front bib top corners, leaving a small button loop by creating a 0.5 in / 1.25 cm gap. Thread a button through this loop and sew it firmly through both the strap fold and bib fabric.
Sew the opposite ends of each strap to the back top corners of the body tube, approximately 4 stitches in from each outer edge. The straps should cross lightly in the center back when worn.
Hat
The hat is worked in the round from the brim upward. The lower section features stripes, and the crown is solid navy.
With Color A, chain 46. Being careful not to twist, sl st to first ch to form a ring.
Rnd 1: Ch 1, sc in each ch around, sl st to first sc. (45 sc)
Begin Stripe Pattern:
Rnd 2: Change to Color B. Ch 1, sc in each st around, sl st to first sc. (45 sc)
Rnd 3: Change to Color A. Ch 1, sc in each st around, sl st to first sc. (45 sc)
Rnd 4: Change to Color B. Ch 1, sc in each st around, sl st to first sc. (45 sc)
Rnd 5: Change to Color A. Ch 1, sc in each st around, sl st to first sc. (45 sc)
Rnd 6: Change to Color B. Ch 1, sc in each st around, sl st to first sc. (45 sc)
Fasten off Color B. Continue with Color A only.
Rnds 7 through 12: Ch 1, sc in each st around, sl st to first sc. (45 sc each round)
Checkpoint: After Rnd 12, the hat should measure approximately 3.5 in / 9 cm from the brim.
Crown Decreases
Rnd 13: Ch 1, (sc in next 7 sts, sc2tog) 5 times, sl st to first sc. (40 sc)
Rnd 14: Ch 1, (sc in next 6 sts, sc2tog) 5 times, sl st to first sc. (35 sc)
Rnd 15: Ch 1, (sc in next 5 sts, sc2tog) 5 times, sl st to first sc. (30 sc)
Rnd 16: Ch 1, (sc in next 4 sts, sc2tog) 5 times, sl st to first sc. (25 sc)
Rnd 17: Ch 1, (sc in next 3 sts, sc2tog) 5 times, sl st to first sc. (20 sc)
Rnd 18: Ch 1, (sc in next 2 sts, sc2tog) 5 times, sl st to first sc. (15 sc)
Rnd 19: Ch 1, (sc in next st, sc2tog) 5 times, sl st to first sc. (10 sc)
Rnd 20: Ch 1, sc2tog 5 times, sl st to first sc. (5 sc)
Fasten off, leaving a 6 in tail. Thread tail through remaining 5 stitches, pull snug to close. Weave in end.
Pom-Pom
Using Color C (red) and a pom-pom maker with approximately 1.5 in / 3.8 cm diameter, wrap yarn densely 80 to 100 times. Cut along the outer edge, tie a securing strand tightly around the center, and trim into a rounded ball. Attach securely to the hat crown tip.
Mittens (Make 2)
With Color A, chain 21. Being careful not to twist, sl st to first ch to form a ring.
Rnd 1: Ch 1, sc in each ch around, sl st to first sc. (20 sc)
Begin Stripe Pattern:
Rnd 2: Change to Color B. Ch 1, sc in each st around, sl st to first sc. (20 sc)
Rnd 3: Change to Color A. Ch 1, sc in each st around, sl st to first sc. (20 sc)
Rnd 4: Change to Color B. Ch 1, sc in each st around, sl st to first sc. (20 sc)
Fasten off Color B. Continue with Color A only.
Rnds 5 through 10: Ch 1, sc in each st around, sl st to first sc. (20 sc each round)
Checkpoint: After Rnd 10, the mitten body should measure approximately 2.5 in / 6.4 cm.
Tip Decreases
Rnd 11: Ch 1, (sc in next 2 sts, sc2tog) 5 times, sl st to first sc. (15 sc)
Rnd 12: Ch 1, (sc in next st, sc2tog) 5 times, sl st to first sc. (10 sc)
Rnd 13: Ch 1, sc2tog 5 times, sl st to first sc. (5 sc)
Fasten off, leaving a 6 in tail. Thread tail through remaining 5 stitches, pull snug to close. Weave in end.
Finishing and Care
Weave in all remaining ends, working them back through at least 1 inch of fabric in two directions to prevent unraveling.
Blocking the overalls: Hand wash in cool water with gentle baby-safe detergent. Press out excess water in a towel without wringing. Lay flat, shape to measurements, and dry completely.
Blocking the hat: Dampen with a spray bottle, place over a rounded object like a bowl, and dry in shape.
Blocking mittens: Lay flat and allow to dry.
Care instructions for the recipient: Hand wash in cool water. Do not wring or twist. Lay flat to dry. If yarn is machine washable, a delicate cycle in a mesh bag works. Store folded flat away from direct sunlight.
Troubleshooting Tips for Beginners
Stripes looking uneven? Make sure you are completing the last yarn over of each final stitch with the new color. This takes practice but makes a huge difference.
Legs twisting? Take extra care when joining your foundation chain into a ring. Lay the chain flat and check that it is not twisted before slip stitching.
Bib too wide or narrow? Check your gauge. Even a half-stitch difference per inch compounds across 28 stitches.
Straps too long or short? Adjust the starting chain by a few stitches. Each stitch adds roughly 0.25 inch to the length.
Thank you so much for choosing this pattern for your next project. I hope it brings joy to you and the lucky little one who gets to wear it. If you make the Little Sailor set, I would absolutely love to see it. Tag me on Instagram or share a photo in my Facebook group. Your makes inspire me every single day.
If you want to find this pattern easily later, go ahead and pin it to your favorite Pinterest board. And please drop a comment below once you finish your set. I read every single one and love hearing about your color choices, your gift recipients, and any tweaks you made along the way. Happy crocheting!
You Might Also Like
- Berry Pink Bell Sleeve Crochet Dress Free Pattern
- Dusty Rose Granny Square Tote Free Crochet Pattern
- Mint Green Lace Ruffle Dress Free Crochet Pattern
- Sunset Peach Coral Ombre Sweater Free Crochet Pattern
