Last summer, I found myself standing in the checkout line at the farmers market, juggling a bag of peaches, two containers of honey, and a bunch of sunflowers that kept trying to escape my arms. The flimsy plastic bag I had grabbed was already threatening to give out. Right then, I promised myself I would make a proper tote that could handle my weekend hauls and actually look beautiful doing it.
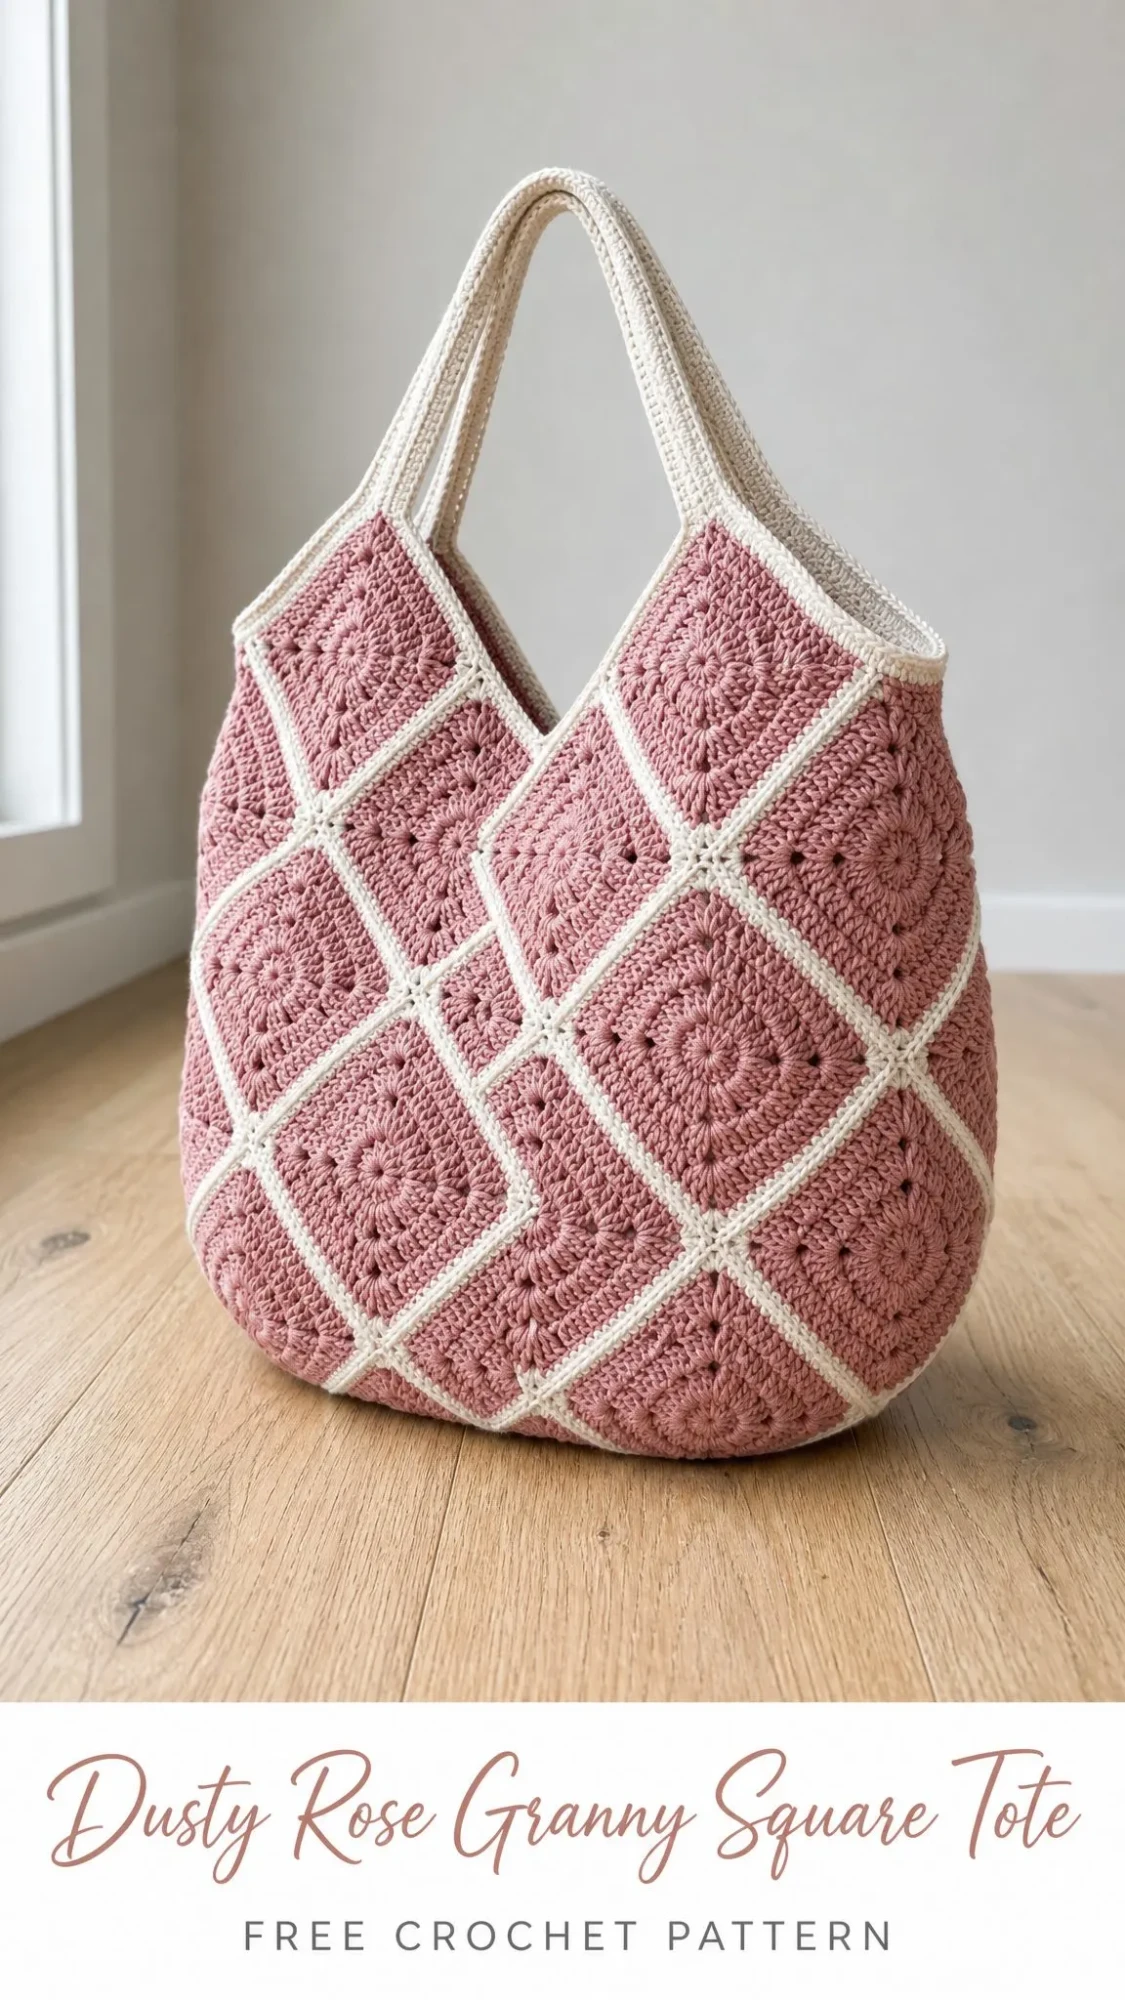
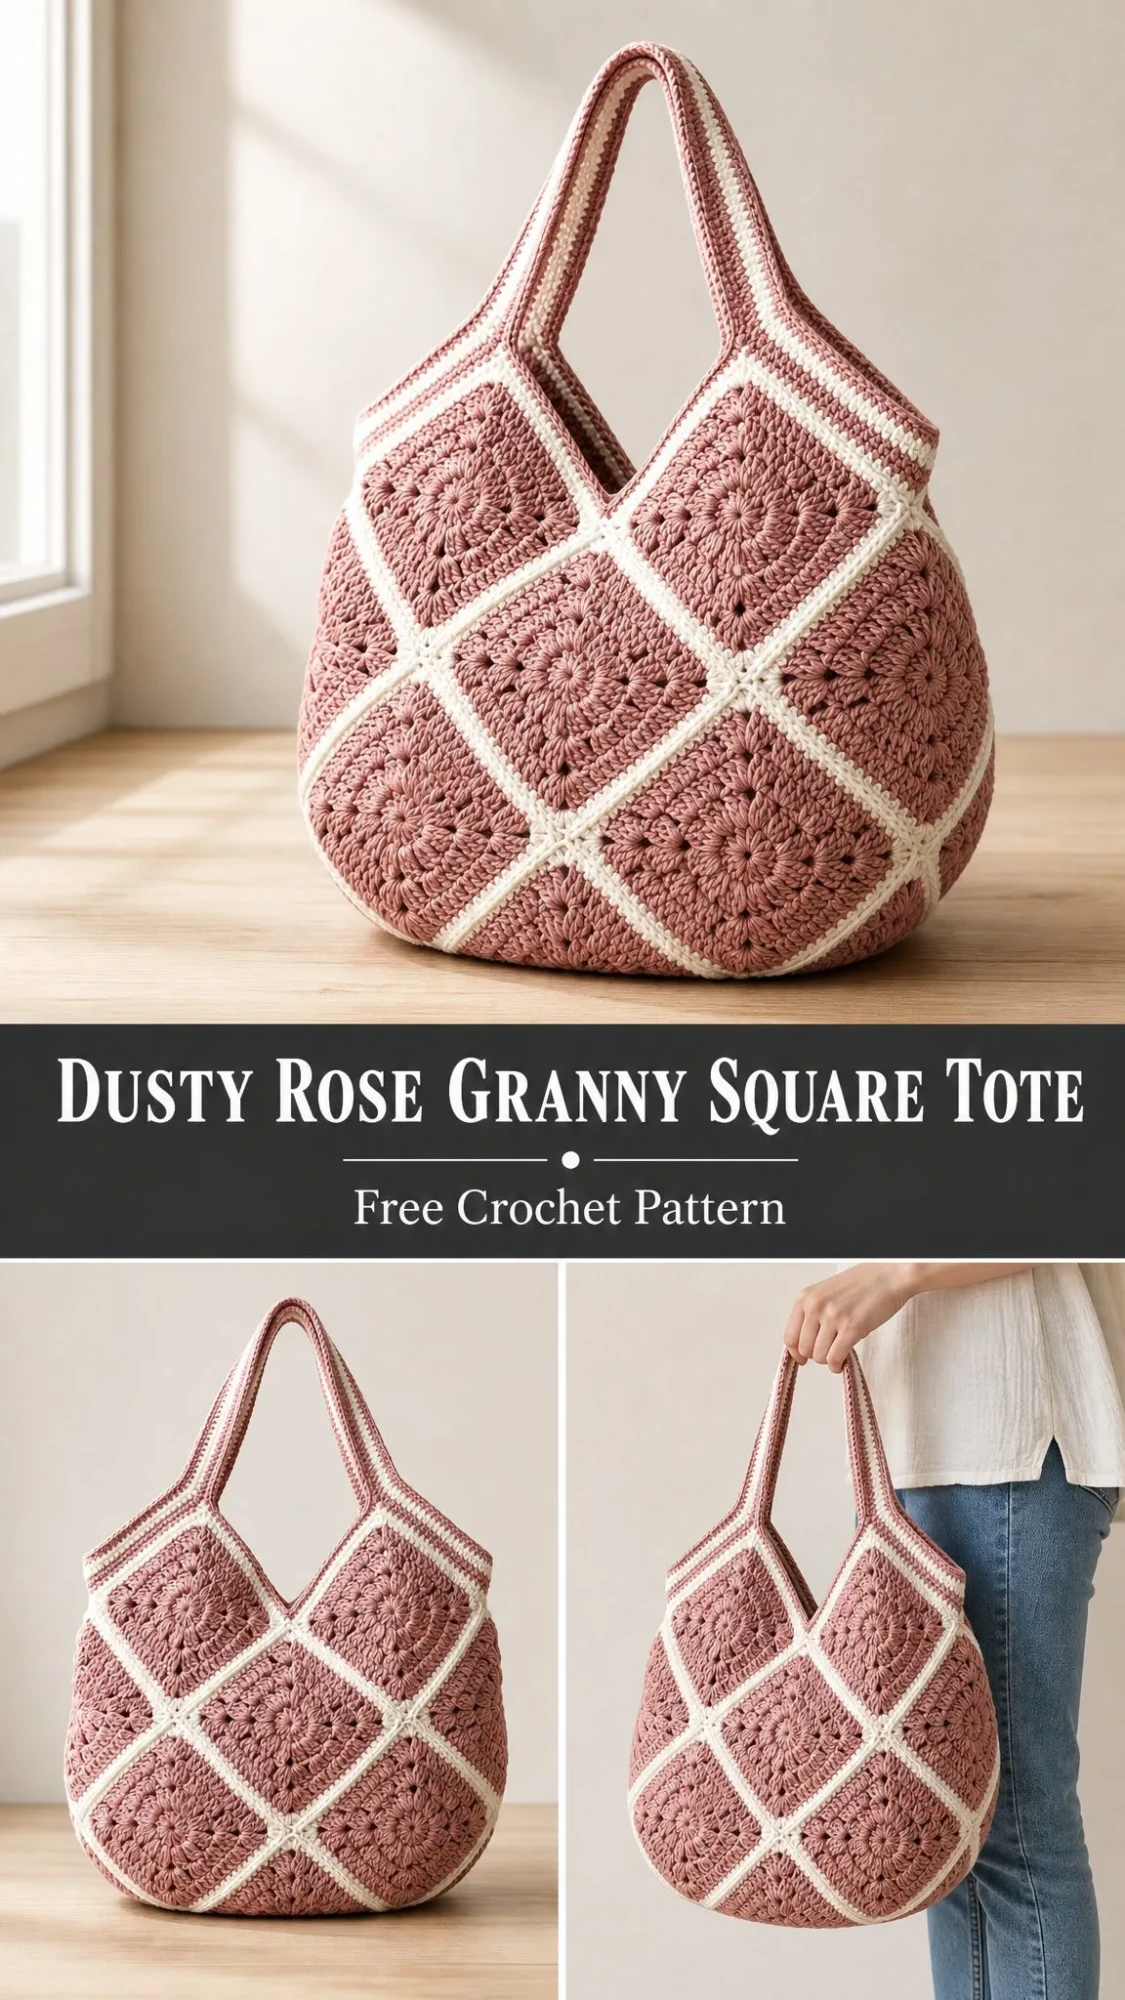
This Dusty Rose Granny Square Tote is exactly what came from that slightly chaotic moment. Eighteen sunburst granny squares in the softest dusty rose, joined with cream borders that create this gorgeous lattice effect. The whole thing has a romantic, slouchy shape that holds more than you would expect while looking like something you would see in a boutique window.
The construction is surprisingly straightforward once you get into the rhythm. You will make a bunch of identical squares, join them into two panels, seam them together, and add striped handles. If you can work a double crochet and follow a simple repeat, you can absolutely make this bag.
Why You Will Love This Granny Square Tote
This tote hits that sweet spot between classic and modern. The sunburst center of each square radiates outward in a way that catches the light beautifully, and the cream borders frame each motif like little windows. When you join the squares on point, that diamond arrangement gives the whole bag movement and visual interest.
The finished size is generous at approximately 13.5 × 14 inches (34 × 35.5 cm) with a strap drop of about 9 inches (23 cm). That is roomy enough for a trip to the market, a day at the beach, or carrying your current work in progress to a friend’s house.
The pattern is rated intermediate but honestly leans toward confident beginner territory. If you have made a granny square before, you already know the core skills. The repetition of making eighteen identical squares actually helps you build muscle memory, and by square number five, you will be working almost on autopilot.
Expect to spend about 10 to 14 hours on this project. It is perfect for a dedicated weekend or spread across several evenings of cozy stitching.
Materials You Will Need
Gathering your supplies before you start makes the whole process smoother. Here is everything the pattern calls for:
Yarn:
You want a smooth worsted weight (aran / #4) cotton or cotton blend yarn. The cotton gives the squares crisp stitch definition and helps the bag hold a gentle structured slouch rather than stretching out over time.
Recommended Yarns:
Hook:
Notions:
Gauge
Getting gauge right keeps your finished bag true to size. Work a test square before diving in.
16 dc × 8 rows = 4 inches (10 cm)
One finished square should measure about 4.5 inches (11.5 cm) square after light blocking.
The gauge is fairly forgiving with this pattern. If you are slightly off, your bag will just be a bit larger or smaller. But if you want to match the finished dimensions exactly, take the time to adjust your hook size until your square hits that 4.5 inch measurement.
Abbreviations and Special Stitches
This pattern uses US crochet terms. If you usually work with UK terms, remember that US single crochet equals UK double crochet, and US double crochet equals UK treble.
Special Stitches:
Magic Ring (MR): This creates an adjustable starting loop that closes completely, leaving no hole in your center. If you are not comfortable with magic rings, you can substitute a ch 4 joined into a ring with a slip stitch.
Corner Cluster: Work (2 dc, ch 2, 2 dc) all into one stitch or space. This creates a crisp 90 degree corner.
Pattern Notes Before You Begin
A few things to keep in mind as you work:
The Sunburst Square Pattern
This is the heart of your bag. Make 18 squares total.
Rounds 1 through 3 use Color A (Dusty Rose). The final border round in Color B (Cream) creates that beautiful cream lattice when the squares are joined.
Round 1 – Color A:
Into a magic ring: ch 3, work 15 dc into the ring. Pull the ring closed tightly. Sl st to the top of the beginning ch 3 to join. (16 dc)
Pull that center ring snug for a neat sunburst eye with no gap.
Round 2 – Color A:
Ch 3, dc in the same st, then work 2 dc in each st around. Sl st to the top of the beginning ch 3 to join. (32 dc)
Round 3 – Color A:
Ch 3, dc in the next 3 sts. Work (2 dc, ch 2, 2 dc) in the next st for the corner, dc in the next 7 sts. Repeat from * around, ending the final side with dc in the last 3 sts. Sl st to join.
You will have four corners with 11 dc along each side. (44 dc, 4 corner spaces)
Round 4 – Color B:
Join Color B in any corner ch 2 space. Ch 3, then work (dc, ch 2, 2 dc) in the same space. Dc in each dc across to the next corner, work (2 dc, ch 2, 2 dc) in the corner space. Repeat from * around. Sl st to join.
Fasten off, leaving a long tail for seaming later. (60 dc total, 15 dc per side)
Blocking Tip: Block all 18 squares to the same 4.5 inch (11.5 cm) measurement before joining. Uniform squares make those lattice lines run perfectly straight and give your finished bag a polished look.
Joining the Squares
Arrange your completed squares into two panels of nine squares each. Each panel forms a 3 × 3 grid. One panel becomes the front of your tote, the other becomes the back.
Keep every square facing the same direction so the sunburst centers line up consistently.
Join Method:
Using Color B and your tapestry needle, hold two squares with right sides together. Whip stitch through the back loops only, matching stitch for stitch along one edge. (15 sts joined per edge)
Work in this order:
1. Join squares into three rows of three.
2. Then join the three rows together to complete each panel.
Alternative Join: If you prefer a more decorative look, you can slip stitch or single crochet the squares together with Color B. This creates a raised lattice ridge on the right side of your work.
Once both panels are complete, press the seams flat from the wrong side.
Each finished panel measures roughly 13.5 inches (34 cm) square.
Assembling the Bag Body
Now you will turn those two flat panels into an actual tote.
Step 1 – Seam the Panels:
Place the two panels with wrong sides together. Using Color B, whip stitch up one side, across the bottom, and up the other side. Leave the top open.
The soft cotton naturally rounds into a gentle curved base as you work. (3 edges seamed)
Step 2 – Work the Top Edge:
Join Color B at one of the side seams. Work 1 sc in each dc around the entire top opening, working evenly across both panel tops. Sl st to join. (96 sc)
Step 3 – Reinforce the Rim:
Work 1 more round of sc around the opening. This creates a firm, tidy rim that supports the handles and helps the bag keep its shape. Sl st to join.
Do not fasten off if you are attaching handles next. (96 sc)
Optional: For extra structure, sew a fabric lining inside the bag before attaching the handles. This keeps your contents tidy and prevents small items from poking through the openwork squares. A magnetic snap at the center of the rim adds security if you like a closed top.
The Striped Handles
Make 2 handles. Each handle is worked lengthwise so the dusty rose and cream stripes run the full length of the strap.
Foundation – Color A:
With Color A, ch 91.
Row 1: Sc in the 2nd ch from hook and in each ch across. Turn. (90 sc)
Rows 2 through 10 – Stripes:
Ch 1, sc in each st across. Turn.
Change color every 2 rows in this order: Color A, Color B, Color A, Color B, Color A.
After 10 rows, your band will be approximately 1.5 inches (4 cm) wide. (90 sc each row)
Shaping the Strap:
Fasten off, leaving a long tail. Fold the band in half lengthwise and whip stitch the long edge closed to form a rounded, sturdy strap. (2 straps total)
Attaching the Handles:
Center one strap across the front rim and one across the back. Position the ends about 4 inches (10 cm) apart.
Stitch each end securely to the inside of the rim. Reinforce with several passes since the handles carry all the weight.
For a longer crossbody drop: Add chains to the foundation. Every 4 chains adds approximately 1 inch (2.5 cm) of length.
Finishing and Blocking Your Tote
You made it! Your Dusty Rose Blossom Tote is nearly ready to use.
A little blocking goes a long way here. It relaxes the stitches and lets the lattice and sunbursts settle into a clean, even finish.
Finishing Steps:
1. Weave in all remaining ends on the wrong side. Split the tails through stitches of the same color so they disappear completely.
2. Block the body by lightly steaming or wet blocking. Gently shape the base round and square up the panels.
3. Check the rim sits level and that the handles mirror each other from front to back.
4. Add a snap or magnetic closure at the rim center if you prefer a secure top.
Care Instructions
Cotton totes wear beautifully with gentle care. Follow these tips to keep your bag looking fresh:
Always check the care instructions on your specific yarn’s ball band, as fiber blends can vary.
Customizing Your Tote Size
The square panel construction makes resizing incredibly simple. Just change how many squares you make or adjust the scale of each one.
Quick math: Each square adds about 4.5 inches (11.5 cm) to a panel’s width or height. Plan your grid and multiply.
For a bigger tote: Work panels of 3 × 4 or 4 × 4 squares for a roomy beach bag or project tote.
For a mini bag: Drop to 2 × 2 panels with a single short strap for a sweet little pouch.
To scale the square: Use a larger hook (5.5 mm) or add an extra dc round to grow every square. Remember this uses more yarn.
For a deeper bag: Add a row of squares as a gusset along the base and sides for a boxier shape.
Strap variations: Lengthen the foundation chain for a shoulder or crossbody drop. Or make four narrow straps for a knotted top handle look.
Color play: Swap the cream border for a contrast shade, or work each sunburst center in a different color for a scrappy rainbow effect.
Tips for Success
Keep your tension consistent across all eighteen squares. If you crochet tighter when you are tired, take a break. Mismatched squares are harder to join neatly.
Use stitch markers to mark corners when joining. This helps you line everything up perfectly.
Try your squares on point before joining to make sure you like the diamond arrangement. Some crafters prefer a straight grid layout instead.
Reinforce those handles. They carry weight, so do not skimp on the stitching where they attach to the rim.
This pattern is genuinely satisfying to work. The repetition of making squares is meditative, and watching the panels come together feels like magic. Plus, you end up with a bag that looks far more complicated than it actually is to make.
I hope you love making this tote as much as I loved designing it. If you give it a try, I would absolutely love to see how yours turns out! Tag me on Instagram or share a photo in our Facebook group. Seeing your versions is honestly the best part of sharing patterns.
If this pattern is calling to you, save it to your Pinterest boards so you can find it when you are ready to start. And please drop a comment below if you make one. I read every single comment and love hearing about your projects!
