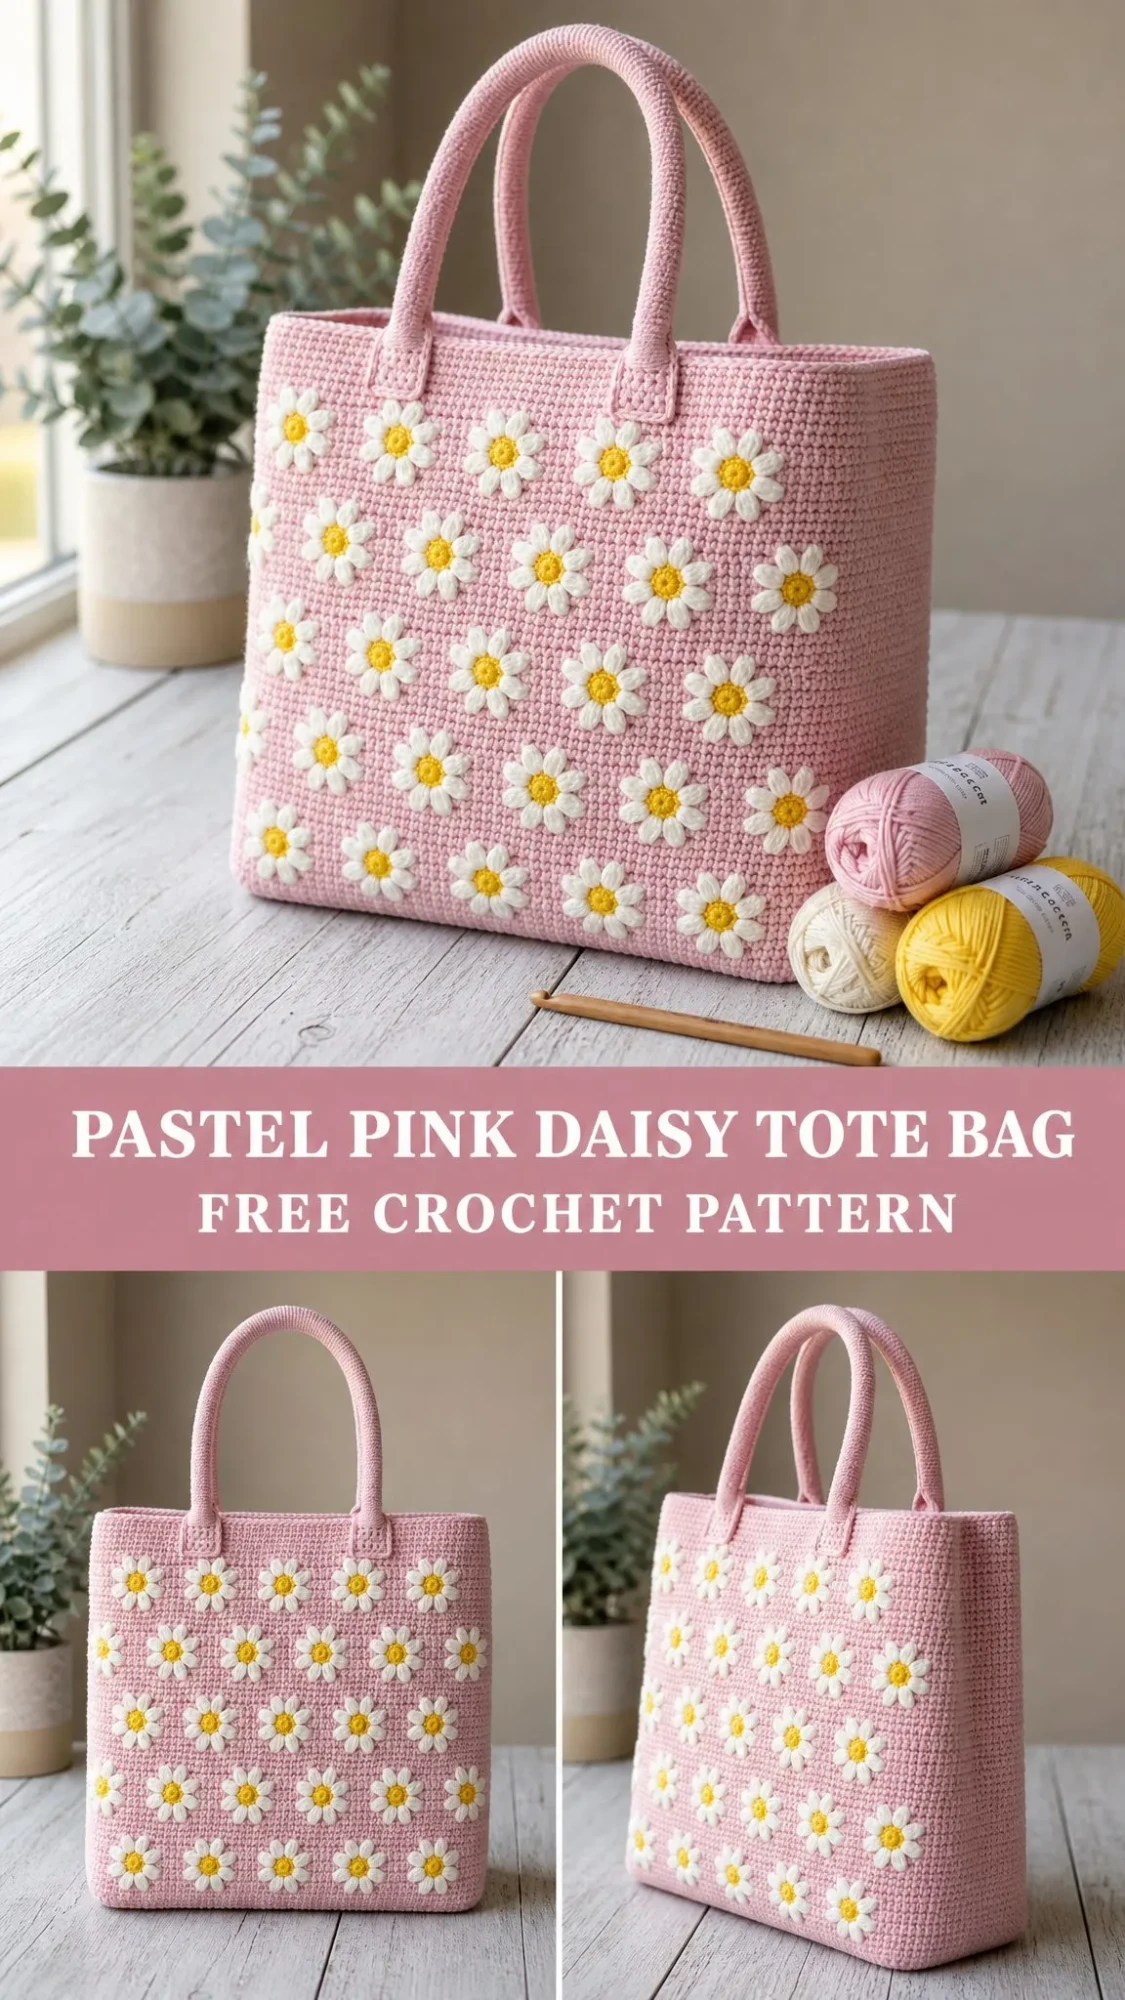
I’ve been on the hunt for the perfect everyday tote pattern for ages, and this one checks every single box. A structured shape that actually stands up on its own, cheerful appliqué daisies that look way more impressive than they are to make, and a construction method that keeps things interesting without getting complicated.
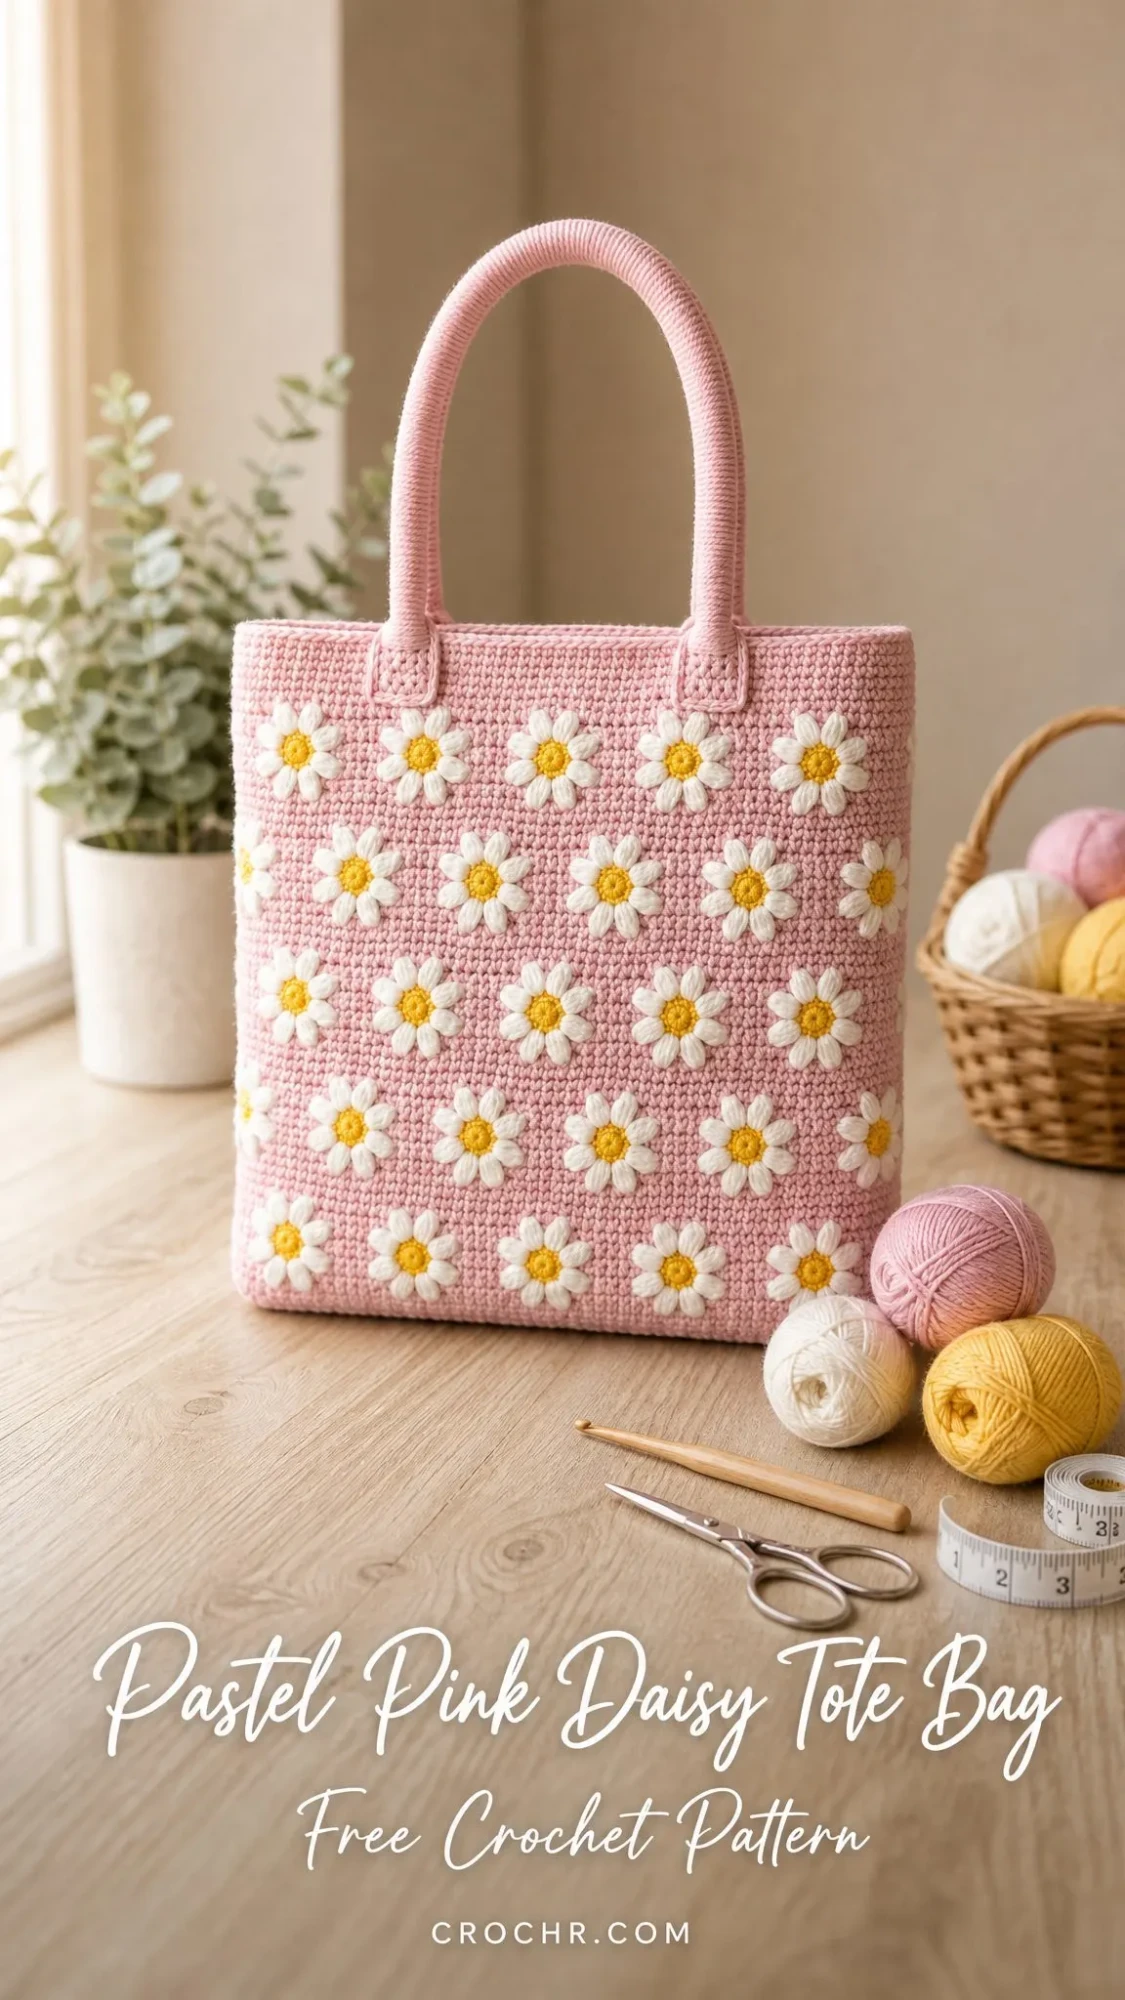
This Pastel Pink Daisy Tote has become my go-to recommendation for anyone ready to move beyond basic projects. The whole thing comes together with single crochet (single crochet, or sc, means inserting your hook, pulling up a loop, then yarning over and pulling through both loops), so if you can do that stitch confidently, you can absolutely make this bag.
The daisies are worked separately and sewn on at the end, which means zero fiddly colorwork while you’re building the body. Just crochet the whole thing in pink, whip up a bunch of little flowers, and stitch them on like a field of tiny blooms. It’s the kind of project that looks like it took forever but actually moves along pretty quickly once you get into a rhythm.
Why This Daisy Tote Bag Pattern Works So Well
What I love most about this crochet pattern is how practical it is without sacrificing style. The firm single crochet fabric creates a bag that holds its shape beautifully. You can set it down and it stays upright, which is honestly such an underrated feature in a handmade tote.
The finished size comes out to approximately 11 × 12 × 3 inches (28 × 30 × 7.5 cm) with a handle drop of about 8.5 inches (21 cm). That’s roomy enough to carry everything you need for a day out but not so huge that it becomes unwieldy. The shoulder-friendly strap length means you can wear it comfortably without it sliding off.
This is rated as an easy or adventurous beginner project. If you’re brand new to crochet, I’d suggest practicing your single crochet until it feels automatic before diving in. But if you’ve made a few dishcloths or simple scarves, you’re ready for this.
The total project time runs about 10 to 14 hours spread over a few sittings. The body works up fairly quickly since it’s all one stitch, and those daisies are actually quite fast once you get into assembly-line mode.
Materials You’ll Need
Gathering your supplies before starting makes everything smoother. Here’s what the pattern calls for:
Yarn:
You’ll want worsted weight or aran weight cotton yarn for this project. Cotton holds its shape much better than acrylic for bags, and it gives you that crisp stitch definition you can see in the finished tote.
Recommended yarn options:
Tools:
Gauge Information
Getting gauge right matters here because it affects whether your bag stands up properly or flops over.
Gauge: 18 single crochet stitches and 19 rows = 4 inches (10 cm) in single crochet with the 4.0 mm hook.
A firm gauge is the secret to a bag that holds its shape. If your test swatch feels floppy or loose, drop down a hook size. You want that fabric to feel sturdy, not drapey.
Abbreviations and Stitches Used
Before we dive into the step-by-step instructions, let’s go over all the abbreviations. This pattern uses US crochet terminology.
UK crocheters: The most important swap is that every "sc" in this pattern is your double crochet (dc).
Special stitch used:
Petal = (sl st, ch 2, 2 dc, ch 2, sl st) all worked into the same stitch. Each petal sits on one center stitch of the daisy.
Pattern Notes Before You Begin
A few things to keep in mind as you work through this crochet tutorial:
The body is worked in continuous spiral rounds, which means you do not join or turn at the end of each round unless the pattern specifically tells you to. Place a stitch marker in the first stitch of each round and move it up as you go. This helps you keep track of where each round begins.
Stitch counts appear at the end of every step in parentheses. Always double-check your count before moving on.
The base is worked flat in joined rows, then the body grows straight up from its edge. The daisies are made separately and sewn on after the bag is complete, so you crochet the whole body in pink only. No carrying colors or complicated colorwork.
Keep your tension firm and even. Cotton yarn shows every single stitch, so consistency matters for a polished finish.
How This Tote Comes Together
The construction order is:
1. Base: a firm 50 × 14 stitch rectangle worked flat
2. Body: 128 stitches picked up around the base, worked straight up for 56 rounds
3. Daisies: 60 or more little appliqué flowers
4. Handles: two rolled straps seamed and attached
5. Assembly: pin, stitch, weave in, done
Step-by-Step Crochet Pattern Instructions
The Base
The base is worked flat in joined rows with pink yarn. This firm rectangle becomes the bottom of the bag.
Foundation: With pink, chain 51.
Row 1: Single crochet in the 2nd chain from hook and in each chain across, turn. (50 sc)
Rows 2 through 14: Chain 1 (this does not count as a stitch), single crochet in each stitch across, turn. (50 sc)
After Row 14, do not turn. The base should measure about 11 × 3 inches (28 × 7.5 cm).
Helpful tip: Count your rows as you go. An even, well-shaped base is the secret to a bag that stands up straight. If your base curls, block it flat under a heavy book before continuing.
Setting Up the Round
You’ll now work around the entire outer edge of the base. Work across the 50 stitches of the last row, down the 14 row-ends of the short side, across the 50 starting-chain stitches, and up the other 14 row-ends. Place 1 single crochet in each stitch or row-end.
This gives you 128 stitches total for the body.
The Body
Round 1 (set-up): Working around the base edge, single crochet in each of 50 stitches along the top edge, 14 stitches down the side, 50 stitches along the bottom edge, 14 stitches up the side. Place marker in the first stitch. Work in continuous spirals from here. (128 sc)
Rounds 2 through 56: Single crochet in each stitch around. (128 sc)
The body should now measure about 12 inches (30 cm) tall. The four corners will form naturally where the base edges meet.
Top Edge
Round 57: Single crochet in each stitch around. (128 sc)
Round 58: Slip stitch loosely in each stitch around to firm the rim. Join with slip stitch to first stitch. Fasten off and weave in the end. (128 sl st)
Want a roomier bag? Add rounds in multiples that keep your daisy spacing even. Check the customizing section before you start so the flower grid still lands nicely.
Daisy Placement Map
Both the front and back carry a tidy grid of daisies. Mark your spots with pins before sewing. A little planning gives that even, scattered-meadow look.
Front panel: 5 columns × 6 rows = 30 daisies (back is the same)
Across: 5 columns, one daisy every 10 stitches. Centers should land near stitches 5, 15, 25, 35, and 45 of each face.
Up: 6 rows, roughly every 9 rounds. Place daisies around rounds 8, 17, 26, 35, 44, and 53.
Total: 30 daisies per face equals 60 for front and back combined. Add 2 to 3 more on each side panel if you like the full-coverage look.
The Daisy Motif
Make 60 daisies (more if you’re covering the sides). Each one is quick to work up. You’ll create a yellow center ringed by eight white petals.
Center (Yellow)
Round 1: Work 8 single crochet in a magic ring. Join with slip stitch to first single crochet. Fasten off, leaving a short tail. (8 sc)
Petals (White)
Round 2: Join white with slip stitch in any center stitch. Work one Petal: (slip stitch, chain 2, 2 double crochet, chain 2, slip stitch) all in the next stitch. Repeat from in each of the 8 stitches around. Join to first slip stitch. (8 petals)
Fasten off, leaving a long tail of about 12 inches (30 cm) for sewing. Weave in only the yellow tail. Keep the white tail for attaching the daisy to the bag.
Speed tip: Chain-batch the centers first. Whip up all your yellow rings, then add petals assembly-line style. It goes fast in front of a movie or podcast.
The Handles
Make 2 firm rolled straps with pink yarn.
Foundation: Chain 6.
Row 1: Single crochet in the 2nd chain from hook and in each chain across, turn. (5 sc)
Rows 2 through 105: Chain 1, single crochet in each stitch across, turn. (5 sc)
The strip should measure about 22 inches (56 cm). Fasten off, leaving a long tail.
Rolling the Strap
1. Fold the strip in half lengthwise so the long edges meet.
2. Whipstitch the edges together along the full length to form a smooth rounded cord.
3. For extra body, tuck a length of cotton cord or twisted yarn inside before seaming.
Handle drop note: A 22-inch strap gives a shoulder-friendly 8.5-inch drop once attached. For a shorter hand-carry style, work to 18 inches instead.
Assembly and Finishing
Step 1: Pin the daisies. Lay the bag flat and pin all flowers to the front and back grids. Step back and adjust until the spacing looks even.
Step 2: Sew them on. Using the long white tail and a tapestry needle, stitch each petal tip and the center down to the bag. Weave the tail inside and trim.
Step 3: Place the handles. Pin each handle end about 4 inches (10 cm) apart and 1.5 inches (4 cm) below the top edge, centered on the front and back panels.
Step 4: Attach firmly. Whipstitch each handle end down through several stitches, going around twice for strength. Weave in all ends.
Step 5: Shape it. Drop in a cut-to-size plastic canvas or cardboard base, and give the bag a gentle steam-block so it stands square.
Care Instructions
Your finished daisy tote will last beautifully with proper care.
How to Customize the Size
Wider or narrower: Change the foundation chain in multiples of 10 stitches so the 5-column daisy grid still divides evenly. For example, chain 61 for 60 stitches gives you 6 columns.
Taller: Add body rounds in groups of about 9 to fit another row of daisies.
Deeper: Add rows to the base in pairs and pick up the matching extra row-ends.
Mini version: Chain 31 (30 stitches wide, 3 columns) and work 36 rounds for a sweet little pouch.
Color play: Swap the pink for sky blue, sage, or butter yellow. The white-and-yellow daisies pop against almost anything.
Troubleshooting Common Issues
Bag is floppy: Your gauge is too loose. Try going down a hook size and working more tightly.
Base is curling: Block it flat before picking up stitches for the body. Lay it under a heavy book or give it a light steam.
Daisies look uneven: Pin all of them before sewing any down. Step back and look at the overall pattern, then adjust as needed.
Handles feel flimsy: Add a length of cotton cord inside before seaming for extra structure.
Final Thoughts on This Daisy Tote Crochet Pattern
This Pastel Pink Daisy Tote Bag pattern hits that sweet spot between a satisfying make and a genuinely useful finished item. The single crochet body is meditative to work, the daisies add just enough interest to keep things fun, and the end result is something you’ll actually want to carry around.
I hope you enjoy making this as much as I enjoyed putting together this tutorial. Thank you for being here and for trusting me with your crafting time.
If you make this tote, I would absolutely love to see it! Tag me on Instagram or share a photo in our Facebook group. Seeing your finished projects is honestly the best part of sharing patterns.
And if you want to come back to this later, go ahead and save this post to your Pinterest boards so it’s easy to find when you’re ready to start. Drop a comment below and let me know if you have any questions or when you finish yours!
